在surging 微服务引擎下如何搭建webservice和身份验证
一、前言
现实生产中,有一些比较老的系统对外提供的接口都是WebService,尤其是比较老的系统都是围绕ESB进行搭建,而对外提供就需要WebService ,为了更好完善其解决方案,故集成了webservice 协议组件和身份验证,现把它上传至github, 而这篇文章就是讲述如何构建WebService,创建的接口IWebServiceService代码如下:
using Surging.Core.CPlatform.Ioc;

using Surging.Core.CPlatform.Runtime.Server.Implementation.ServiceDiscovery.Attributes;

using Surging.IModuleServices.Common.Models;

using System.ServiceModel;

using System.Threading.Tasks;

namespace Surging.IModuleServices.Common

{

    [ServiceBundle("api/{Service}/{Method}")]

    [ServiceContract]

    public  interface IWebServiceService : IServiceKey

    {

        [OperationContract]

        Task<string> SayHello(string name);

        [OperationContract]

        Task<string> Authentication(AuthenticationRequestData requestData);

    }

}
AuthenticationRequestData 代码如下:
using ProtoBuf;

using System;

using System.Collections.Generic;

using System.Runtime.Serialization;

using System.Text;

namespace Surging.IModuleServices.Common.Models

{

    [ProtoContract]

    [DataContract]

    public class AuthenticationRequestData

    {

        [ProtoMember(1)]

        [DataMember]

        public string UserName { get; set; }

        [ProtoMember(2)]

        [DataMember]

        public string Password { get; set; }

    }

}
从以上代码来看,除了需要符合引擎代码规则外,还需要添加[ServiceContract]和[OperationContract] 特性, 如果参数是实体的话,需要添加在实体模型上加[DataContract]和 属性上加[DataMember]
那么创建的业务服务WebServiceService代码如下:
using Surging.Core.ApiGateWay.OAuth;

using Surging.Core.Protocol.WebService.Runtime;

using Surging.IModuleServices.Common;

using Surging.IModuleServices.Common.Models;

using System;

using System.Collections.Generic;

using System.Linq;

using System.Text;

using System.Threading.Tasks;

namespace Surging.Modules.Common.Domain

{

    public class WebServiceService : WebServiceBehavior, IWebServiceService

    {

        private readonly IAuthorizationServerProvider _authorizationServerProvider;

        public WebServiceService(IAuthorizationServerProvider authorizationServerProvider)

        {

            _authorizationServerProvider = authorizationServerProvider;

        }

        public async Task<string> SayHello(string name)

        {

            var token = this.HeaderValue.Token;

            if (await _authorizationServerProvider.ValidateClientAuthentication(token))

                return $"Hello,{name}";

            else

                return " Please leave, stranger";

        }

         public   async Task<string> Authentication(AuthenticationRequestData requestData)

        {

            var param = new Dictionary<string, object>();

            param.Add("requestData", requestData);

            var result=  await _authorizationServerProvider.GenerateTokenCredential(param);

            return result;

        }

    }

}
通过以上代码,首先需要继承IWebServiceService和WebServiceBehavior,然后通过IAuthorizationServerProvider 去生成Token 和验证Token, 或者也可以脱离引擎的身份鉴权,通过传递的this.HeaderValue.Token 进行验证。
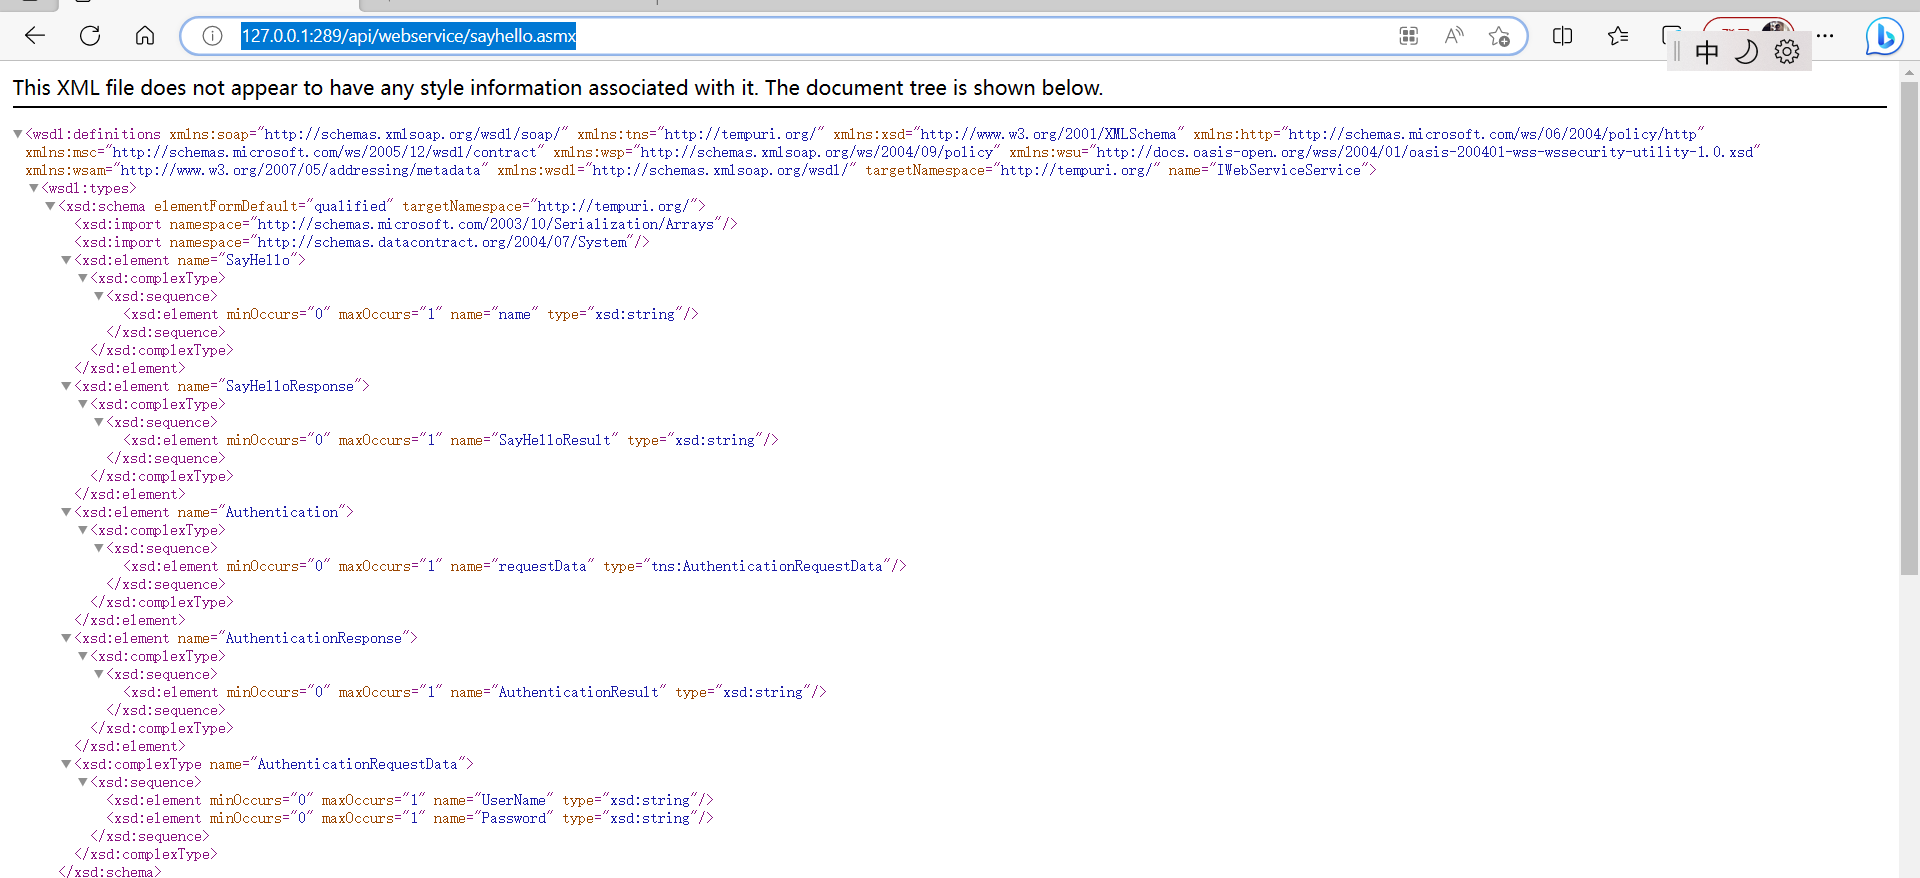
通过访问127.0.0.1:289/api/webservice/sayhello.asmx,显示以下界面,说明基于webservice 的服务就已经添加成功。
二、引用WebService
首先我们在创建好的控制台项目里面添加WebService的引用。
1、在依赖项上面右键,选择“添加服务引用”,选择wcf web service如图所示:
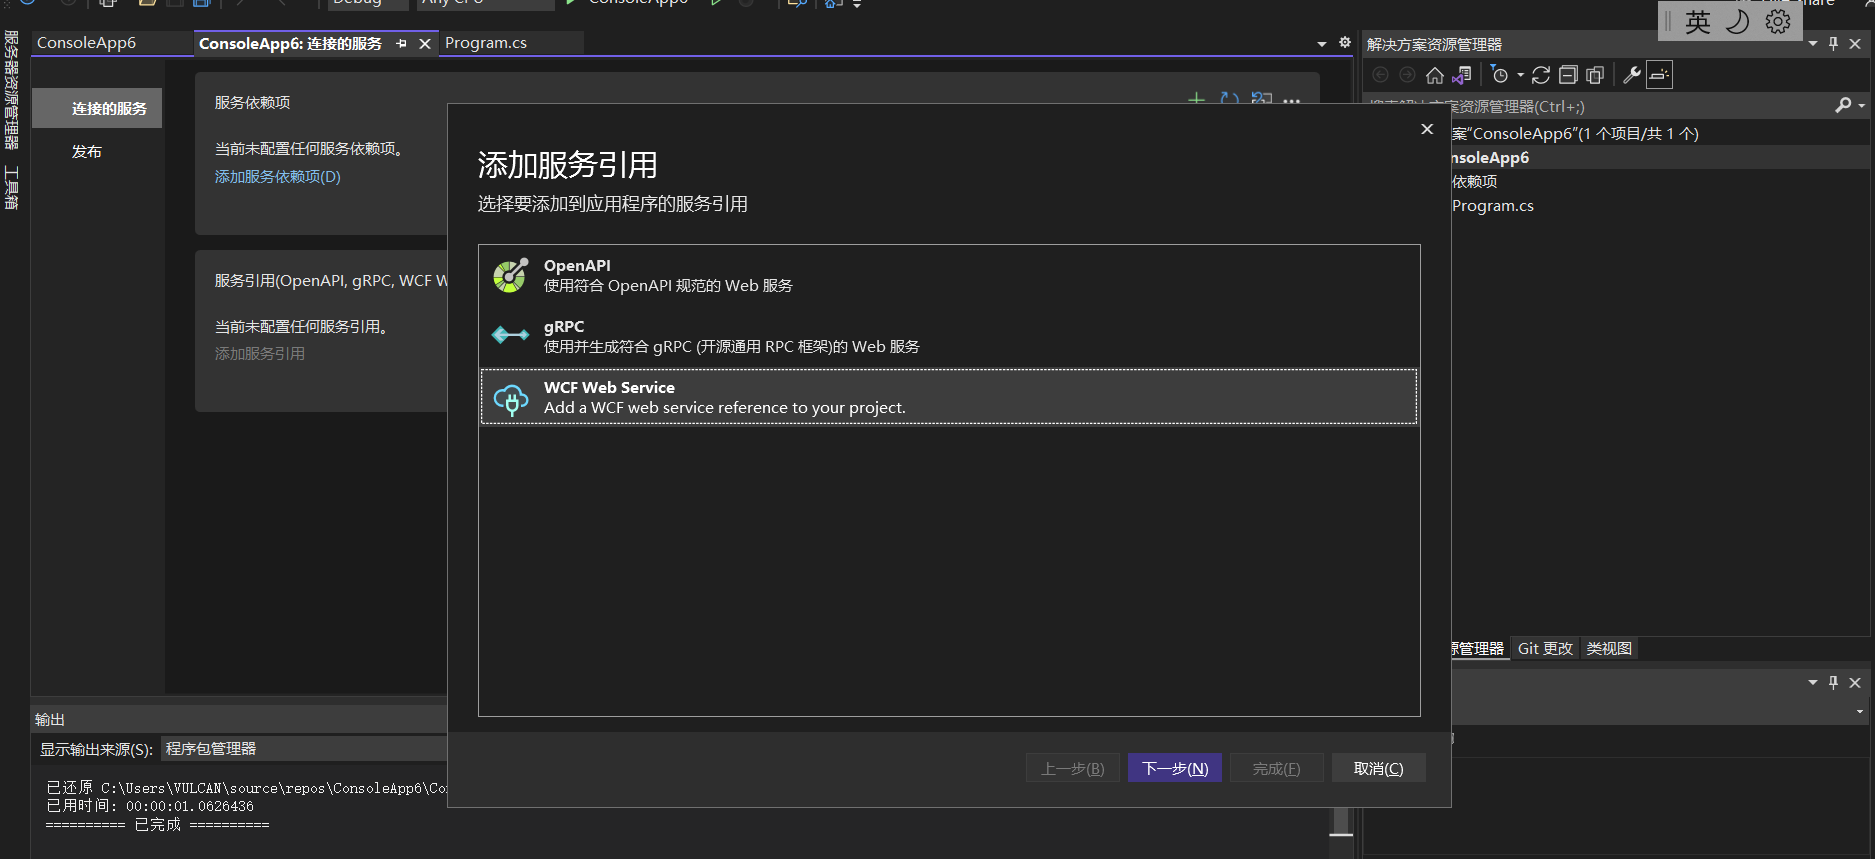
添加服务引用。如图所示: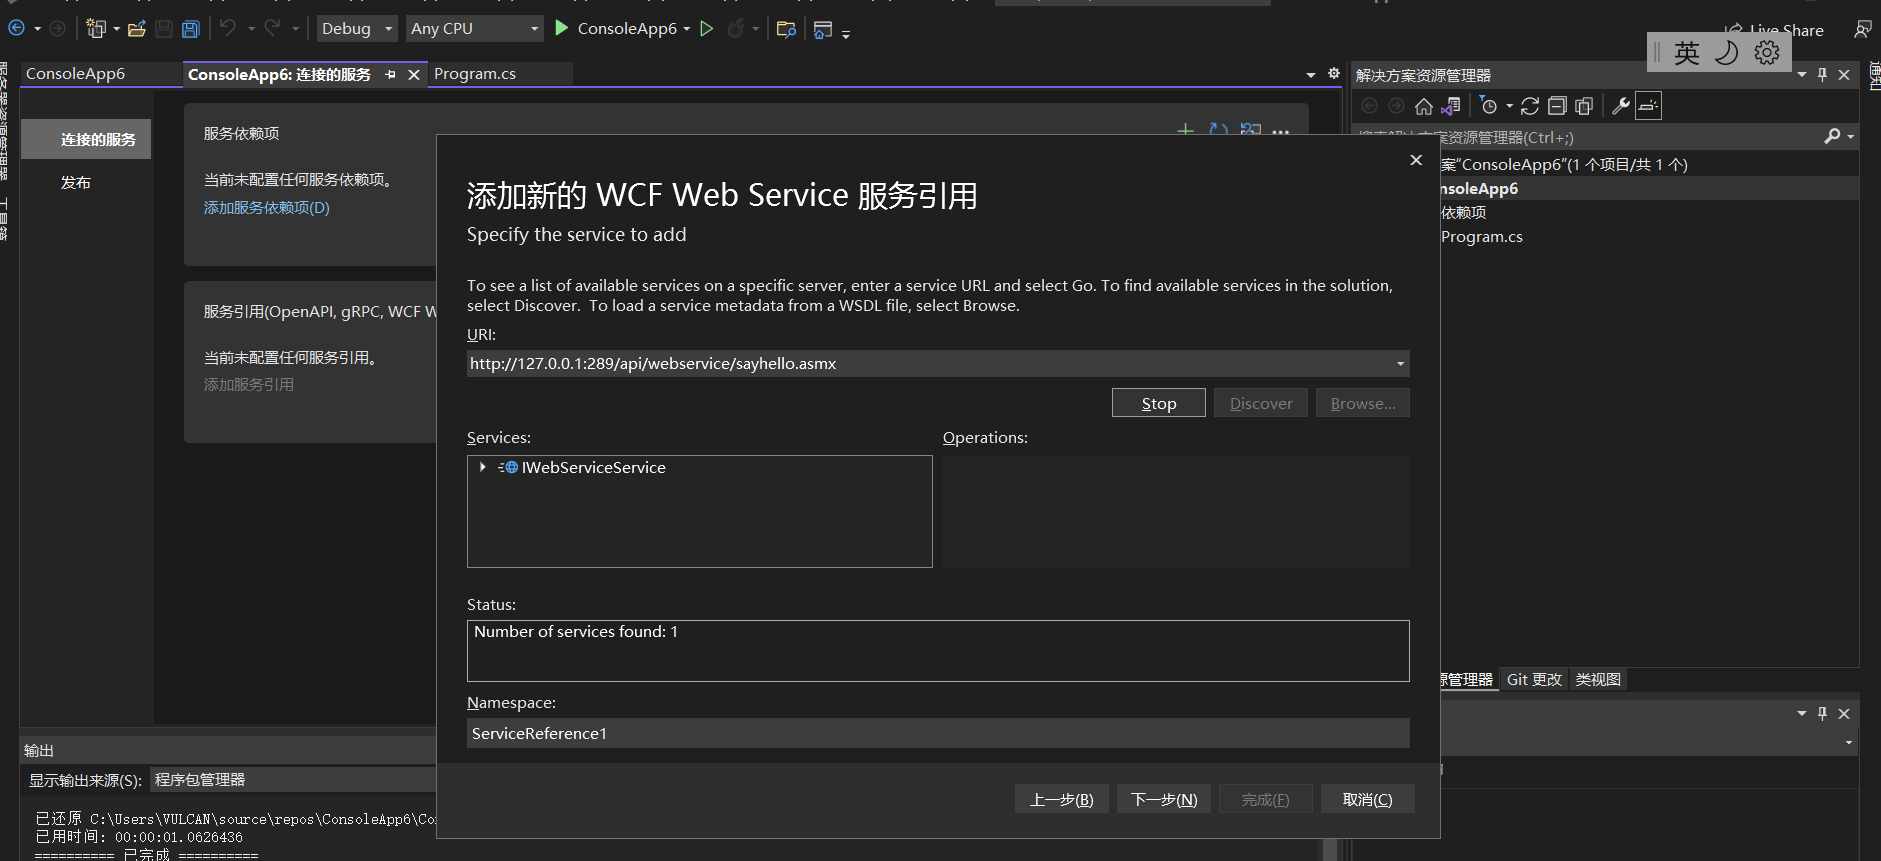
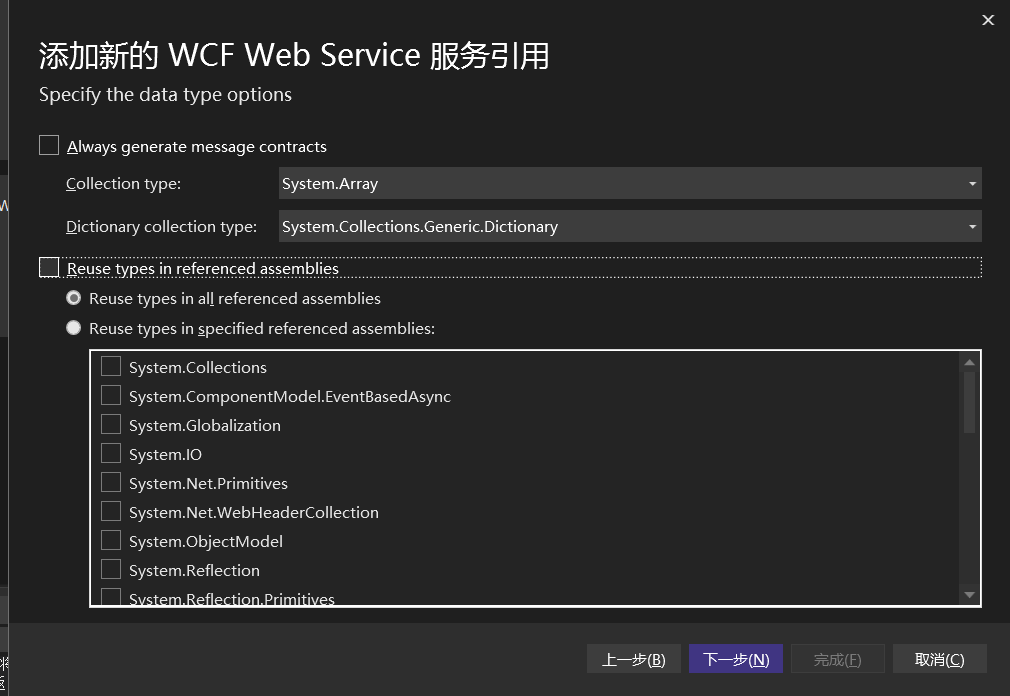
配置完以后,点击“下一步”,去掉重新使用引用的程序集中的类型签名的复选框。
直接点击“完成”按钮即可。慢慢等待配置完成: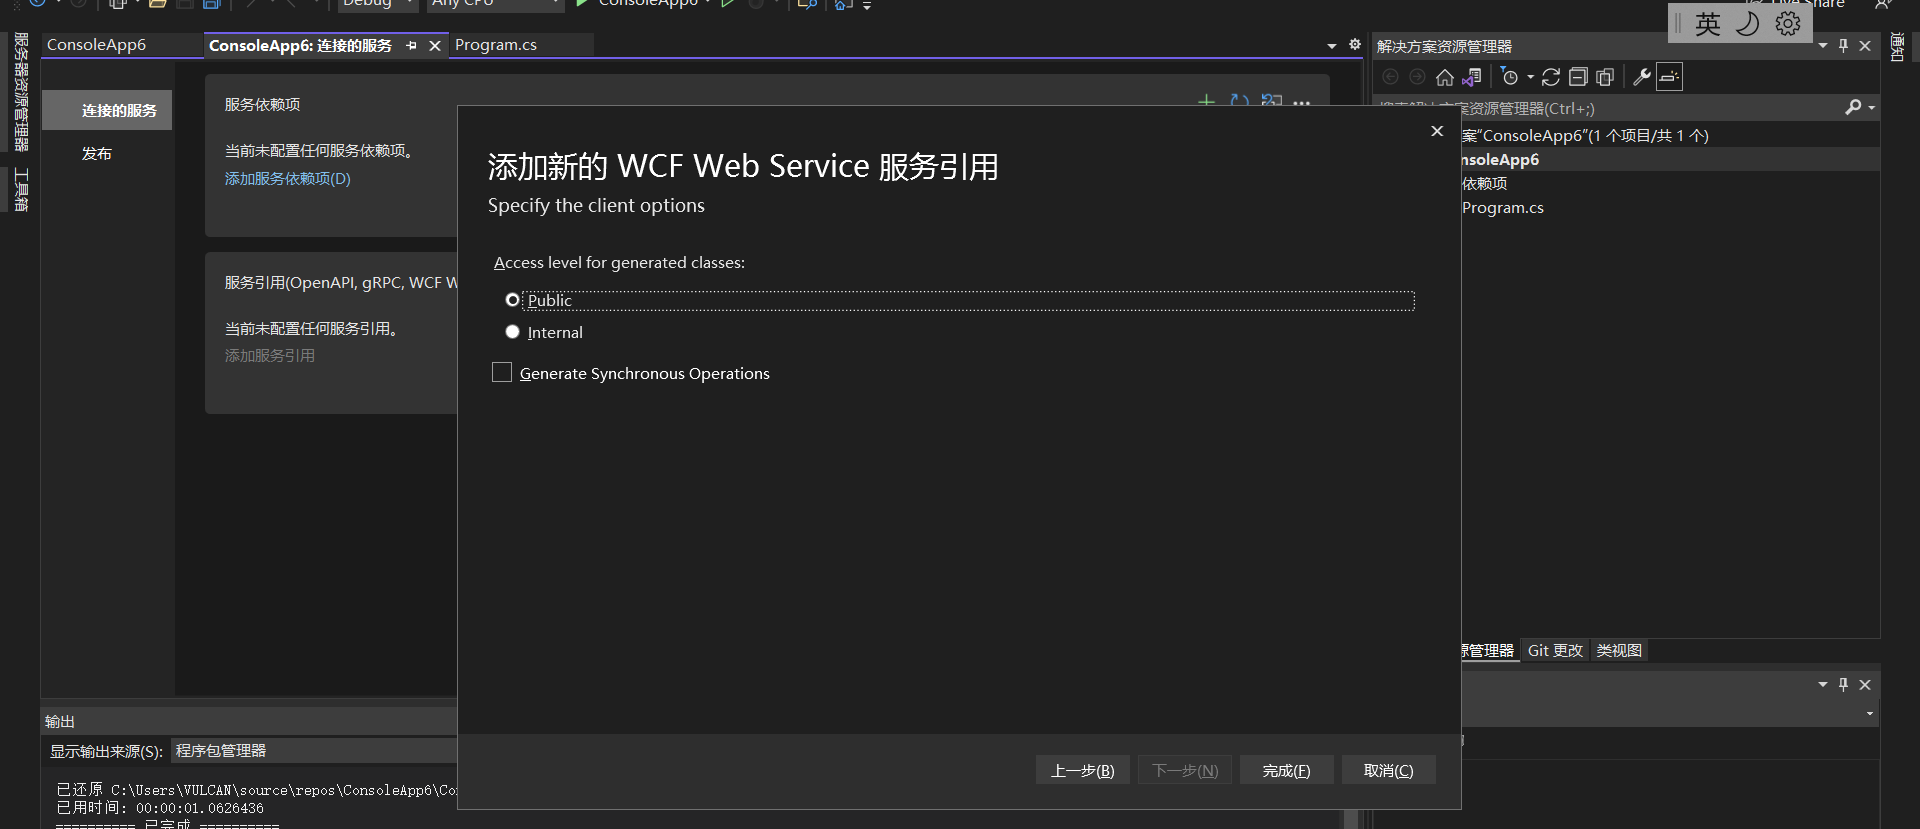
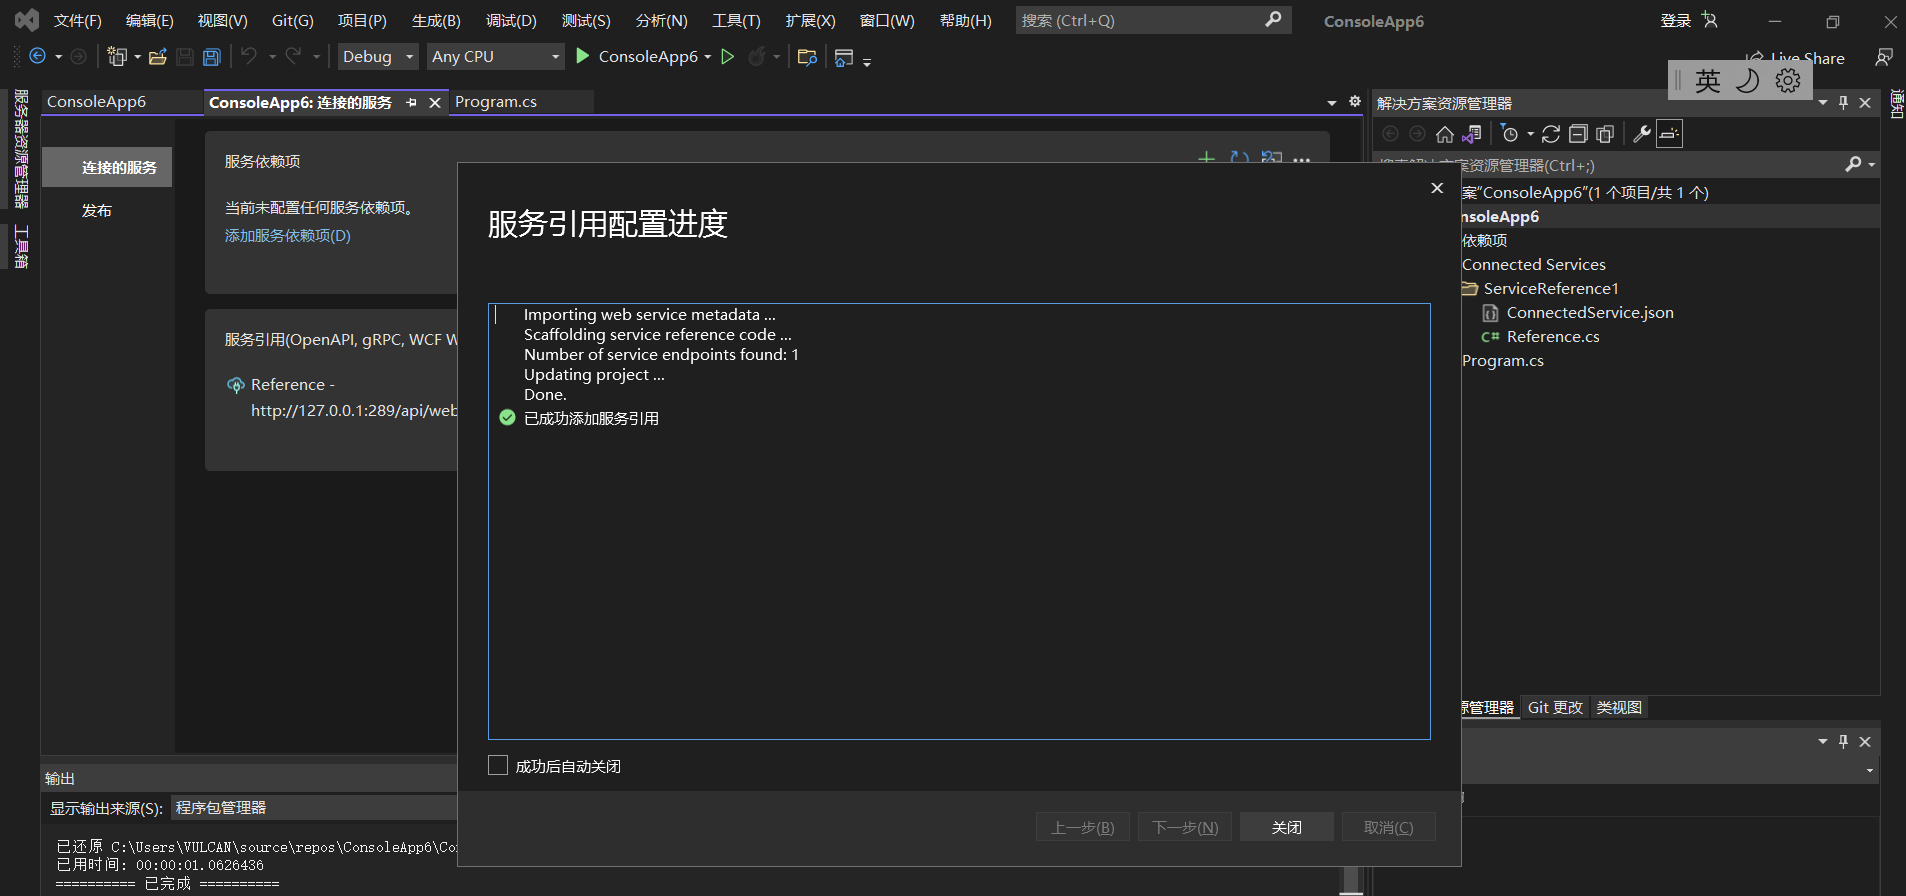
配置完成界面如图所示:
下面就介绍如何在.net 6.0下调用webservice
三、调用WebService
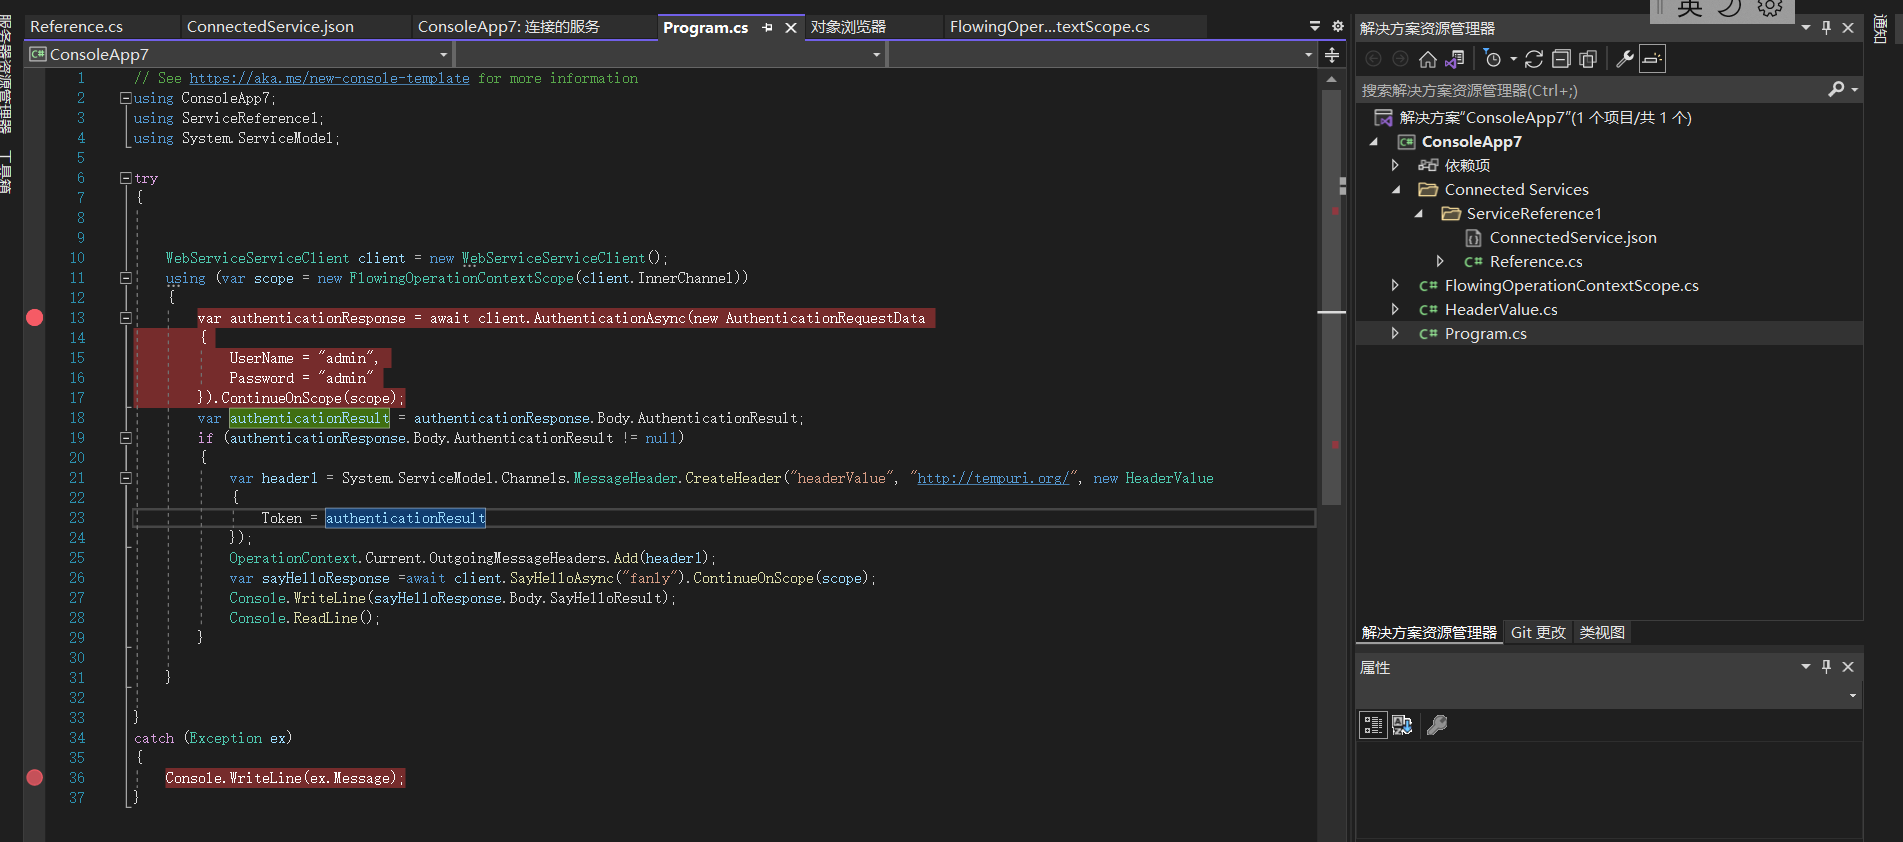
在Program类文件中,调用webservice 提供的sayhello,在调用前需要生成token, 通过token才能正确访问结果,以下是基于.net 6.0,代码如下:
 1 // See https://aka.ms/new-console-template for more information

 2 using ConsoleApp7;

 3 using ServiceReference1;

 4 using System.ServiceModel;

 5

 6 try

 7 {

 8

 9

10     WebServiceServiceClient client = new WebServiceServiceClient();

11     using (var scope = new FlowingOperationContextScope(client.InnerChannel))

12     {

13         var authenticationResponse = await client.AuthenticationAsync(new AuthenticationRequestData

14         {

15             UserName = "admin",

16             Password = "admin"

17         }).ContinueOnScope(scope);

18         var authenticationResult = authenticationResponse.Body.AuthenticationResult;

19         if (authenticationResponse.Body.AuthenticationResult != null)

20         {

21             var header1 = System.ServiceModel.Channels.MessageHeader.CreateHeader("headerValue", "http://tempuri.org/", new HeaderValue

22             {

23                 Token = authenticationResult

24             });

25             OperationContext.Current.OutgoingMessageHeaders.Add(header1);

26             var sayHelloResponse =await client.SayHelloAsync("fanly").ContinueOnScope(scope);

27             Console.WriteLine(sayHelloResponse.Body.SayHelloResult);

28             Console.ReadLine();

29         }

30

31     }

32

33 }

34 catch (Exception ex)

35 {

36     Console.WriteLine(ex.Message);

37 }
以下是基于.net framework 调用webservice 的代码:
 1     internal class Program

 2     {

 3         static  async Task Main(string[] args)

 4         {

 5             try

 6             {

 7

 8                 WebServiceServiceClient client = new WebServiceServiceClient();

 9                 using (var scope = new OperationContextScope(client.InnerChannel))

10                 {

11                     var authenticationResponse = client.Authentication(new AuthenticationRequestData

12                     {

13                         UserName = "admin",

14                         Password = "admin"

15                     });

16                     if (authenticationResponse != null)

17                     {

18                         var header1 = System.ServiceModel.Channels.MessageHeader.CreateHeader("headerValue", "http://tempuri.org/", new HeaderValue

19                         {

20                             Token = authenticationResponse

21                         });

22                         OperationContext.Current.OutgoingMessageHeaders.Add(header1);

23                         var sayHelloResponse = client.SayHello("fanly");

24                         Console.WriteLine(sayHelloResponse);

25                         Console.ReadLine();

26                     }

27

28                 }

29

30             }

31             catch (Exception ex)

32             {

33                 Console.WriteLine(ex.Message);

34             }

35         }

36     }
HeaderValue 代码如下:
namespace ConsoleApp7

{

    public class HeaderValue

    {

        public string Token { get; set; }

    }

}
因为.net 6.0 生成的代码是异步,所以就要修改OperationContextScope 以支持异步,代码如下:
  1  public sealed class FlowingOperationContextScope : IDisposable

  2     {

  3         bool _inflight = false;

  4         bool _disposed;

  5         OperationContext _thisContext = null;

  6         OperationContext _originalContext = null;

  7

  8         public FlowingOperationContextScope(IContextChannel channel):

  9             this(new OperationContext(channel))

 10         {

 11         }

 12

 13         public FlowingOperationContextScope(OperationContext context)

 14         {

 15             _originalContext = OperationContext.Current;

 16             OperationContext.Current = _thisContext = context;

 17         }

 18

 19         public void Dispose()

 20         {

 21             if (!_disposed)

 22             {

 23                 if (_inflight || OperationContext.Current != _thisContext)

 24                     throw new InvalidOperationException();

 25                 _disposed = true;

 26                 OperationContext.Current = _originalContext;

 27                 _thisContext = null;

 28                 _originalContext = null;

 29             }

 30         }

 31

 32         internal void BeforeAwait()

 33         {

 34             if (_inflight)

 35                 return;

 36             _inflight = true;

 37         }

 38

 39         internal void AfterAwait()

 40         {

 41             if (!_inflight)

 42                 throw new InvalidOperationException();

 43             _inflight = false;

 44             OperationContext.Current = _thisContext;

 45         }

 46     }

 47

 48     public static class TaskExt

 49     {

 50         public static SimpleAwaiter<TResult> ContinueOnScope<TResult>(this Task<TResult> @this, FlowingOperationContextScope scope)

 51         {

 52             return new SimpleAwaiter<TResult>(@this, scope.BeforeAwait, scope.AfterAwait);

 53         }

 54

 55         public class SimpleAwaiter<TResult> :

 56             System.Runtime.CompilerServices.INotifyCompletion

 57         {

 58             readonly Task<TResult> _task;

 59

 60             readonly Action _beforeAwait;

 61             readonly Action _afterAwait;

 62

 63             public SimpleAwaiter(Task<TResult> task, Action beforeAwait, Action afterAwait)

 64             {

 65                 _task = task;

 66                 _beforeAwait = beforeAwait;

 67                 _afterAwait = afterAwait;

 68             }

 69

 70             public SimpleAwaiter<TResult> GetAwaiter()

 71             {

 72                 return this;

 73             }

 74

 75             public bool IsCompleted

 76             {

 77                 get

 78                 {

 79                     if (_task.IsCompleted)

 80                         return true;

 81                     _beforeAwait();

 82                     return false;

 83                 }

 84

 85             }

 86

 87             public TResult GetResult()

 88             {

 89                 return _task.Result;

 90             }

 91

 92             // INotifyCompletion

 93             public void OnCompleted(Action continuation)

 94             {

 95                 _task.ContinueWith(task =>

 96                 {

 97                     _afterAwait();

 98                     continuation();

 99                 },

100                 CancellationToken.None,

101                 TaskContinuationOptions.ExecuteSynchronously,

102                 SynchronizationContext.Current != null ?

103                     TaskScheduler.FromCurrentSynchronizationContext() :

104                     TaskScheduler.Current);

105             }

106         }

107     }
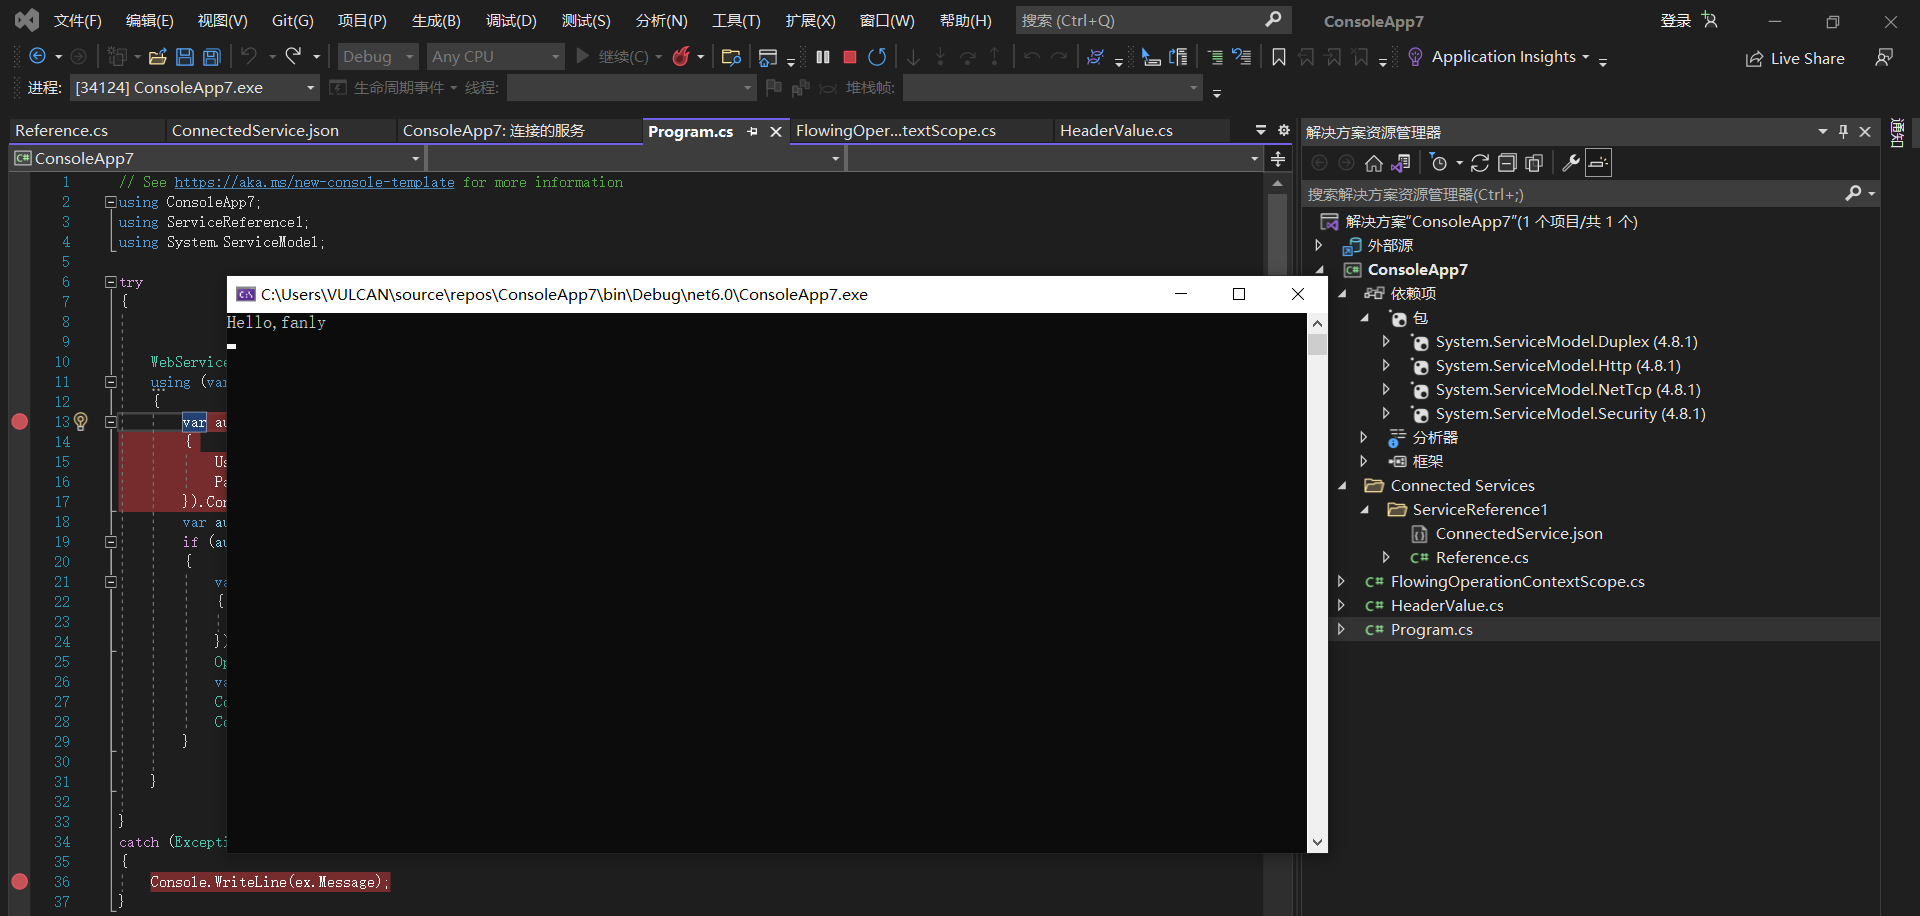
程序输出结果:
四、结尾
surging 正在开发微服务平台(以处于调试阶段),形成独立的项目产品,抛弃之前的代码架构的形式,现如今已经攘括支持WEB, 物联网,流媒体等多种业务场景, 现在开发支持了外层协议有:MQTT,Grpc,, DNS, TCP,UDP,restful,rtmp,httpflv,rtsp,websocket,webservice, 内部可以通过基于thrift 或者netty 做到可靠性的RPC调用,因为有服务治理,服务发现,并且支持了Apollo配置中心,skywalking 链路跟踪,并且支持JAVA和.NET主流开发语言,请大家多多留意surging 的微服务平台。或者你也可以加群联系到我:744677125(老群被封,这是新群)
在surging 微服务引擎下如何搭建webservice和身份验证的更多相关文章
- surging 微服务引擎 2.0 会有多少惊喜?
surging 微服务引擎从2017年6月至今已经有两年的时间,这两年时间有多家公司使用surging 服务引擎,并且有公司搭建了CI/CD,并且使用了k8s 集群,这里我可以说下几家公司的服务搭建情 ...
- 谈谈surging 微服务引擎 2.0的链路跟踪和其它新增功能
一.前言 surging是基于.NET CORE 服务引擎.初始版本诞生于2017年6月份,经过NCC社区二年的孵化,2.0版本将在2019年08月28日进行发布,经历二年的发展,已经全部攘括了微服务 ...
- surging 微服务引擎 -协议主机的Behavior特性
1.前言 因为工作的关系,最近很少更新surging,因为surging 一直处在不温不火的状态,而自己每天利用业余时间进行完善,每天都是疲惫的状态,还要应付新手的提问,曾经一度想放弃,但是有些人劝说 ...
- surging 微服务引擎 1.0 正式发布
surging 是一个分布式微服务引擎,提供高性能RPC远程服务调用,服务引擎支持http.TCP.WS.Mqtt协议,采用Zookeeper.Consul作为surging服务的注册中心,集成了哈希 ...
- CI Weekly #5 | 微服务架构下的持续部署与交付
CI Weekly 围绕『 软件工程效率提升』 进行一系列技术内容分享,包括国内外持续集成.持续交付,持续部署.自动化测试. DevOps 等实践教程.工具与资源,以及一些工程师文化相关的程序员 Ti ...
- 微服务架构下分布式Session管理
转载本文需注明出处:EAII企业架构创新研究院(微信号:eaworld),违者必究.如需加入微信群参与微课堂.架构设计与讨论直播请直接回复此公众号:“加群 姓名 公司 职位 微信号”. 一.应用架构变 ...
- CI Weekly #11 | 微服务场景下的自动化测试与持续部署
又一周过去了,最近我们的工程师正在搞一个"大事情" --「[flow.ci](http://flow.ci/?utm_source=bokeyuan&utm_medium= ...
- 微服务框架下的思维变化-OSS.Core基础思路
如今框架两字已经烂大街了,xx公司架构设计随处可见,不过大多看个热闹,这些框架如何来的,细节又是如何思考的,相互之间的隔离依据又是什么...相信很多朋友应该依然存在自己的疑惑,特别是越来越火热的微服务 ...
- SpringBoot微服务架构下的MVC模型总结
SpringBoot微服务架构下的MVC模型产生的原因: 微服务概念改变着软件开发领域,传统的开源框架结构开发,由于其繁琐的配置流程 , 复杂的设置行为,为项目的开发增加了繁重的工作量,微服务致力于解 ...
- 微服务架构下分布式事务解决方案——阿里GTS
1 微服务的发展 微服务倡导将复杂的单体应用拆分为若干个功能简单.松耦合的服务,这样可以降低开发难度.增强扩展性.便于敏捷开发.当前被越来越多的开发者推崇,很多互联网行业巨头.开源社区等都开始了微服务 ...
随机推荐
- 操作系统 windos
- React整洁的代码的一些原则
1. Model is everything models are the heart of your app. If you have models separated from th rest ...
- Linux常用指令1
1.文件和目录的相关指令: ·cd:打开 ·pwd:查看当前所在的目录 ·mkdir:新建目录 ·rmdir:删除目录 ·ls:文件和目录查看 ·cp:复制 ·rm:删除 ·mv:移动 2.文本文件内 ...
- CH9121小结
当通过网络配置工具将CH9121设置成UDP SERVER模式时,同时通过SRT-NET设置将PC设置成UDP并与CH9121用网线连接.将CH9121配置好与PC信息相匹配的端口号与IP地址,PC端 ...
- c语言实现单链表的倒叙
bool upsidedown_list(LinkList L) { Lnode *head, *tmp, *oldhead; head = L; tmp = L->next; oldhead ...
- ffmpeg编译错误/libfdk-aacenc.c: In function 'aac_encode_init'
ffmpeg编译错误/libfdk-aacenc.c: In function 'aac_encode_init' 需要手动打一个补丁 https://git.libav.org/?p=libav.g ...
- 项目实训DAY7
今天与昨天一样,查论文,并美化了一下功能界面的样式.
- swoft-个基于 Swoole 原生协程的PHP 微服务框架
刚才百度了一下swoft框架,官网打不开了,仓库也暂停了.不由感慨.曾经和同事踩了许多坑使用此极其小众的框架完成微服务项目.使用它的唯一目的就是提高程序性能(底层使用了协程),为此大家都学习了很多新知 ...
- CF823div2B
cf823div2B 题目链接 题目大意 多组测试数据,有\(n\)个点在数轴上,他们想要集会,每个点到目标点\(y\)的时间为$$t_i+|x_i-y|$$ 试求所有点到\(y\)中最长时间的最小值 ...
- HOOK大法
// 请求头hook 测试网站同花顺 OK var header_old = window.XMLHttpRequest.prototype.setRequestHeader;window.XMLHt ...