Linux LVM动态扩容
引用自:
[root@localhost ~]# lsblk

NAME                   MAJ:MIN RM  SIZE RO TYPE MOUNTPOINT

fd0                      :        4K   disk

sda                      :       20G   disk

├─sda1                   :        2M   part

├─sda2                   :        2M   part

├─sda3                   :        1G   part /boot

├─sda4                   :        1K   part

└─sda5                   :       19G   part

  ├─centos-root        :        5G   lvm  /

  ├─centos-swap        :        1G   lvm  [SWAP]

  ├─centos-swap00      :        1G   lvm  [SWAP]

  ├─centos-home        :        2G   lvm  /home

  ├─centos-var         :        1G   lvm  /var

  └─centos-application :        9G   lvm  /application

sdb                      :      20G   disk

sr0                     :     1024M   rom
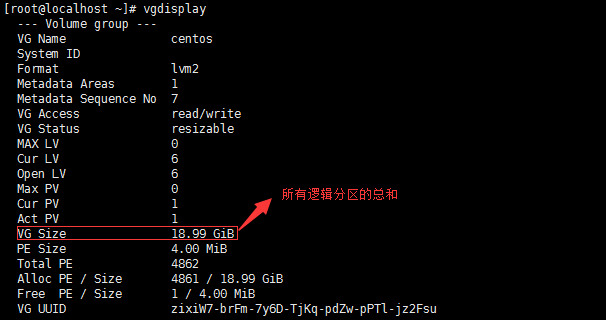
2、查看卷组名称及卷组使用情况 vgdisplay
3、查看当前逻辑卷的空间状态 lvdisplay
[root@localhost ~]# lvdisplay

  --- Logical volume ---

  LV Path                /dev/centos/home

  LV Name                home

  VG Name                centos

  LV UUID                vJAKGc-Nd7w-IbPZ-FSI5-CTSS-XoXt-WcFu2z

  LV Write Access        read/write

  LV Creation host, time localhost, -- :: +

  LV Status              available

  # open

  LV Size                2.00 GiB

  Current LE

  Segments

  Allocation             inherit

  Read ahead sectors     auto

  - currently set to

  Block device           :

  --- Logical volume ---

  LV Path                /dev/centos/swap

  LV Name                swap

  VG Name                centos

  LV UUID                Sgyddc-qr0l-Xry3-xR5f-rYUe-lNkq-3Ia928

  LV Write Access        read/write

  LV Creation host, time localhost, -- :: +

  LV Status              available

  # open

  LV Size                1.00 GiB

  Current LE

  Segments

  Allocation             inherit

  Read ahead sectors     auto

  - currently set to

  Block device           :

  --- Logical volume ---

  LV Path                /dev/centos/var

  LV Name                var

  VG Name                centos

  LV UUID                A0RDo9-Xuz1-7ElO-mwWQ-IHkS-fwDt-YPP1t2

  LV Write Access        read/write

  LV Creation host, time localhost, -- :: +

  LV Status              available

  # open

  LV Size                1.00 GiB

  Current LE

  Segments

  Allocation             inherit

  Read ahead sectors     auto

  - currently set to

  Block device           :

  --- Logical volume ---

  LV Path                /dev/centos/swap00

  LV Name                swap00

  VG Name                centos

  LV UUID                9HyfSy-etlb-74M9-NKiz-AtaC-YPij-i9Tb78

  LV Write Access        read/write

  LV Creation host, time localhost, -- :: +

  LV Status              available

  # open

  LV Size                1.00 GiB

  Current LE

  Segments

  Allocation             inherit

  Read ahead sectors     auto

  - currently set to

  Block device           :

  --- Logical volume ---

  LV Path                /dev/centos/root

  LV Name                root

  VG Name                centos

  LV UUID                fez5HR-4F4j-PRBy-cdfE-syBU-4NIU-DHnNIK

  LV Write Access        read/write

  LV Creation host, time localhost, -- :: +

  LV Status              available

  # open

  LV Size                5.00 GiB

  Current LE

  Segments

  Allocation             inherit

  Read ahead sectors     auto

  - currently set to

  Block device           :

  --- Logical volume ---

  LV Path                /dev/centos/application

  LV Name                application

  VG Name                centos

  LV UUID                UT39NC-88Ru-hcX2-iceA-P84w-yHac-xKf3o0

  LV Write Access        read/write

  LV Creation host, time localhost, -- :: +

  LV Status              available

  # open

  LV Size                8.99 GiB

  Current LE

  Segments

  Allocation             inherit

  Read ahead sectors     auto

  - currently set to

  Block device           :
二、扩容
1、在一中我们通过lvdisplay可以看到最后这个卷组 /dev/centos/application 的大小为8.99G,现在要动态扩容到28.99G。
a、首先添加一块硬盘,然后查看 fdisk -l,可以看到/dev/sdb即为所添加的硬盘.
[root@localhost application]# fdisk -l

Disk /dev/sdb: 21.5 GB,  bytes,  sectors

Units = sectors of  *  =  bytes

Sector size (logical/physical):  bytes /  bytes

I/O size (minimum/optimal):  bytes /  bytes

Disk /dev/sda: 21.5 GB,  bytes,  sectors

Units = sectors of  *  =  bytes

Sector size (logical/physical):  bytes /  bytes

I/O size (minimum/optimal):  bytes /  bytes

Disk label type: dos

Disk identifier: 0x0003a9f3

   Device Boot      Start         End      Blocks   Id  System

/dev/sda1                                 Linux

/dev/sda2                                Linux

/dev/sda3   *                      Linux

/dev/sda4                       Extended

/dev/sda5                    8e  Linux LVM

Disk /dev/mapper/centos-root:  MB,  bytes,  sectors

Units = sectors of  *  =  bytes

Sector size (logical/physical):  bytes /  bytes

I/O size (minimum/optimal):  bytes /  bytes

Disk /dev/mapper/centos-swap:  MB,  bytes,  sectors

Units = sectors of  *  =  bytes

Sector size (logical/physical):  bytes /  bytes

I/O size (minimum/optimal):  bytes /  bytes

Disk /dev/mapper/centos-swap00:  MB,  bytes,  sectors

Units = sectors of  *  =  bytes

Sector size (logical/physical):  bytes /  bytes

I/O size (minimum/optimal):  bytes /  bytes

Disk /dev/mapper/centos-home:  MB,  bytes,  sectors

Units = sectors of  *  =  bytes

Sector size (logical/physical):  bytes /  bytes

I/O size (minimum/optimal):  bytes /  bytes

Disk /dev/mapper/centos-var:  MB,  bytes,  sectors

Units = sectors of  *  =  bytes

Sector size (logical/physical):  bytes /  bytes

I/O size (minimum/optimal):  bytes /  bytes

Disk /dev/mapper/centos-application:  MB,  bytes,  sectors

Units = sectors of  *  =  bytes

Sector size (logical/physical):  bytes /  bytes

I/O size (minimum/optimal):  bytes /  bytes
b、给磁盘分区,此处全部都分出来
[root@localhost application]# fdisk /dev/sdb

Welcome to fdisk (util-linux 2.23.).

Changes will remain in memory only, until you decide to write them.

Be careful before using the write command.

Device does not contain a recognized partition table

Building a new DOS disklabel with disk identifier 0x6f1c09c9.

Command (m for help): n

Partition type:

   p   primary ( primary,  extended,  free)

   e   extended

Select (default p): p

Partition number (-, default ):

First sector (-, default ):

Using default value

Last sector, +sectors or +size{K,M,G} (-, default ):

Using default value

Partition  of type Linux and of size  GiB is set

Command (m for help): w

The partition table has been altered!

Calling ioctl() to re-read partition table.

Syncing disks.
c、将分区类型改为lvm
[root@localhost application]# fdisk /dev/sdb

Welcome to fdisk (util-linux 2.23.).

Changes will remain in memory only, until you decide to write them.

Be careful before using the write command.

Command (m for help): t

Selected partition

Hex code (type L to list all codes): L

   Empty             NEC DOS           Minix / old Lin bf  Solaris

   FAT12             Hidden NTFS Win   Linux swap / So c1  DRDOS/sec (FAT-

   XENIX root        Plan             Linux           c4  DRDOS/sec (FAT-

   XENIX usr       3c  PartitionMagic    OS/ hidden C:  c6  DRDOS/sec (FAT-

   FAT16 <32M        Venix        Linux extended  c7  Syrinx

   Extended          PPC PReP Boot     NTFS volume set da  Non-FS data

   FAT16             SFS               NTFS volume set db  CP/M / CTOS / .

   HPFS/NTFS/exFAT 4d  QNX4.x            Linux plaintext de  Dell Utility

   AIX             4e  QNX4.x 2nd part 8e  Linux LVM       df  BootIt

   AIX bootable    4f  QNX4.x 3rd part   Amoeba          e1  DOS access

 a  OS/ Boot Manag   OnTrack DM        Amoeba BBT      e3  DOS R/O

 b  W95 FAT32         OnTrack DM6 Aux 9f  BSD/OS          e4  SpeedStor

 c  W95 FAT32 (LBA)   CP/M            a0  IBM Thinkpad hi eb  BeOS fs

 e  W95 FAT16 (LBA)   OnTrack DM6 Aux a5  FreeBSD         ee  GPT

 f  W95 Ext'd (LBA) 54  OnTrackDM6      a6  OpenBSD         ef  EFI (FAT-12/16/

  OPUS              EZ-Drive        a7  NeXTSTEP        f0  Linux/PA-RISC b

  Hidden FAT12      Golden Bow      a8  Darwin UFS      f1  SpeedStor

  Compaq diagnost 5c  Priam Edisk     a9  NetBSD          f4  SpeedStor

  Hidden FAT16 <   SpeedStor       ab  Darwin boot     f2  DOS secondary

  Hidden FAT16      GNU HURD or Sys af  HFS / HFS+      fb  VMware VMFS

  Hidden HPFS/NTF   Novell Netware  b7  BSDI fs         fc  VMware VMKCORE

  AST SmartSleep    Novell Netware  b8  BSDI swap       fd  Linux raid auto

1b  Hidden W95 FAT3   DiskSecure Mult bb  Boot Wizard hid fe  LANstep

1c  Hidden W95 FAT3   PC/IX           be  Solaris boot    ff  BBT

1e  Hidden W95 FAT1   Old Minix

Hex code (type L to list all codes): 8e

Changed type of partition 'Linux' to 'Linux LVM'

Command (m for help): p

Disk /dev/sdb: 21.5 GB,  bytes,  sectors

Units = sectors of  *  =  bytes

Sector size (logical/physical):  bytes /  bytes

I/O size (minimum/optimal):  bytes /  bytes

Disk label type: dos

Disk identifier: 0x6f1c09c9

   Device Boot      Start         End      Blocks   Id  System

/dev/sdb1                       8e  Linux LVM
Command (m for help): w
The partition table has been altered!
Calling ioctl() to re-read partition table.
Syncing disks.
2、开始扩容
a、将新加的分区 /dev/sdb1 创建为物理卷
[root@localhost application]# pvcreate /dev/sdb1

  Physical volume "/dev/sdb1" successfully created
b、给卷组‘centos’扩容(此处的centos即为一中vgdisplay 中的centos),将物理卷 /dev/sdb1 扩展至‘centos’卷组
[root@localhost application]# vgextend centos /dev/sdb1

  Volume group "centos" successfully extended
c、此时卷组‘centos’有20G空余空间,将其全部扩展至 /application
[root@localhost application]# lvextend -l +%FREE /dev/mapper/centos-application

  Size of logical volume centos/application changed from 8.99 GiB ( extents) to 28.99 GiB ( extents).

  Logical volume application successfully resized.
d、虽然此时磁盘已经扩展至/application,但是还没有写入文件系统,我们先通过df -hT 查看/application文件格式为xfs,因此,使用xfs_growfs /dev/mapper/centos-application 命令写入。若文件格式为ext4则使用命令resize2fs /dev/mapper/centos-application写入
[root@localhost application]# df -hT

Filesystem                     Type      Size  Used Avail Use% Mounted on

/dev/mapper/centos-root        xfs       .0G 1020M  .0G  % /

devtmpfs                       devtmpfs  483M       483M   % /dev

tmpfs                          tmpfs     493M       493M   % /dev/shm

tmpfs                          tmpfs     493M  6.8M  487M   % /run

tmpfs                          tmpfs     493M       493M   % /sys/fs/cgroup

/dev/mapper/centos-home        xfs       .0G   33M  .0G   % /home

/dev/mapper/centos-application xfs       .0G   33M  .0G   % /application

/dev/mapper/centos-var         xfs      1014M   79M  936M   % /var

/dev/sda3                      xfs      1014M  133M  881M  % /boot

tmpfs                          tmpfs      99M        99M   % /run/user/

[root@localhost application]# xfs_growfs /dev/mapper/centos-application

meta-data=/dev/mapper/centos-application isize=    agcount=, agsize= blks

         =                       sectsz=   attr=, projid32bit=

         =                       crc=        finobt=

data     =                       bsize=   blocks=, imaxpct=

         =                       sunit=      swidth= blks

naming   =version               bsize=   ascii-ci= ftype=

log      =internal               bsize=   blocks=, version=

         =                       sectsz=   sunit= blks, lazy-count=

realtime =none                   extsz=   blocks=, rtextents=

data blocks changed from  to

[root@localhost application]# df -hT

Filesystem                     Type      Size  Used Avail Use% Mounted on

/dev/mapper/centos-root        xfs       .0G 1020M  .0G  % /

devtmpfs                       devtmpfs  483M       483M   % /dev

tmpfs                          tmpfs     493M       493M   % /dev/shm

tmpfs                          tmpfs     493M  6.8M  487M   % /run

tmpfs                          tmpfs     493M       493M   % /sys/fs/cgroup

/dev/mapper/centos-home        xfs       .0G   33M  .0G   % /home

/dev/mapper/centos-application xfs        29G   33M   29G   % /application

/dev/mapper/centos-var         xfs      1014M   79M  936M   % /var

/dev/sda3                      xfs      1014M  133M  881M  % /boot

tmpfs                          tmpfs      99M        99M   % /run/user/
e、可以看到/application大小已经从9G动态扩容到了29G。
三、lvm创建和使用
1、创建和使用流程
建立分区-PV--VG--LV--格式化--挂载
2、fdisk建立分区
#fdisk /dev/sdb //同样分区sdc
n 1 回车 回车
t 8e 回车
p 查看 w退出
# fdisk -l /dev/sdb /dev/sdc | grep "LVM"
3、 转换为物理卷PV
# pvcreate /dev/sdb1 /dev/sdc1
4、创建卷组VG
# vgcreate juanzu /dev/sdb1 /dev/sdc1
5、在卷组中 创建逻辑卷LV
# lvcreate -L 120G -n luoji juanzu
6、mkfs 格式化
#mkfs -t ext4 /dev/juanzu/luoji
7、mount 挂载
#mount /dev/juanzu/luoji /yinpan
df -hT 查看
#df -hT
8、注意:设置文件系统自动挂载
#vi /etc/fstab
设备名称 挂载点目录 文件类型 defaults默认参数(读写) 0(dump备份) 0(启动检查)
/dev/juanzu/luoji /yinpan ext4 defaults 0 0
四、lvm动态扩容总结
1、创建分区
#fdisk /dev/sdb
2、创建物理卷
#pvcreat /dev/sdb1
3、查看卷组名称及使用情况
#vgdisplay
4、将物理卷扩展到卷组
#vgextend centos /dev/sdb1 (此处‘centos’是卷组名称)
5、将卷组中空闲空间扩展到 /home
#lvextend -l +%FREE /dev/mapper/centos-application
6、刷新文件系统使扩容生效
#resize2fs /dev/mapper/centos-application
7、使用reiserfs 文件系统代替ext2/ext3 ,若为xfs则用xfs_growfs
#resize_reiserfs /dev/mapper/cl-home

#xfs_growfs /dev/mapper/cl-home
Linux LVM动态扩容的更多相关文章
- Linux LVM在线扩容
环境: 虚拟化环境,SUSE Linux Enterprise Server 11sp3,直接把虚拟磁盘从100G改成150G. 现有的LVM是100G,/home 的LV需要再加50G. 步骤: f ...
- Linux lvm在线扩容
1.查看磁盘空间 [root@bgd-mysql3 ~]# fdisk -l Disk /dev/sda: 107.4 GB, 107374182400 bytes, 209715200 sector ...
- 微服务架构 ------ 插曲 linux LVM磁盘扩容
1.LVM的基本概念 物理卷(PV):可以在上面建立卷组的媒介,可以是硬盘分区,也可以是硬盘本身或者回环文件,物理卷包括一个特殊的header,其余部分被切割成一块块物理区域. 卷组(VG):将一组物 ...
- linux LVM 系统盘扩容
1.fdisk /dev/sda2.输入n,开始创建新分区3.输入p4.输入w5.mkfs.ext4 /dev/sda36.pvcreate /dev/sda37.vgdisplay 查看VG nam ...
- Linux lvm 分区知识笔记
盘面上可以细分出扇区(Sector)与柱面(Cylinder)两种单位,其中扇区每个为512bytes那么大. 通常所说的"硬盘分区"就是指修改磁盘分区表,它定义了"第n ...
- <实训|第十二天>用LVM对linux分区进行动态扩容
[root@localhost~]#序言在linux中,我们安装软件的途径一般有那些,你们知道吗?在linux中,如果你的磁盘空间不够用了,你知道如何来扩展磁盘吗?动态扩容不仅在工作中还是在其他方面都 ...
- Linux - 通过LVM对磁盘进行动态扩容
目录 1 LVM是什么 1.1 概念解释 1.2 为什么用LVM 1.2.1 不使用LVM时的扩容思路 1.2.2 使用LVM时的扩容思路 1.3 名词解释 2 普通的挂载磁盘方法 2.1 创建分区的 ...
- Linux:lvm磁盘分区,动态扩容
一.lvm磁盘分区: 1,查看新增的磁盘,需要使用root权限 fdisk -l 看到有一个新增的100G磁盘 2,对磁盘进行分区 fdisk /dev/xvdb 1,输入:n 表示创建一个新的分区( ...
- [转载]Linux LVM硬盘管理及LVM扩容
最近项目中一直在用Linux,其中涉及到了Linux的LVM,本来想自己写一篇关于LVM的文章,搜了一下,发现了一篇更好的,转载过来,也感谢作者gaojun 原文Linux LVM硬盘管理及LVM扩容 ...
随机推荐
- 使用lld自动发现监控多实例redis
zabbix 可以通过常见的手段监控到各种服务,通过编写脚本来获取返回值并将获取到的值通过图形来展现出来,包括(系统.服务.业务)层面.可是有些时候在一些不固定的场合监控一些不固定的服务就比较麻烦.例 ...
- 设置Vmware中Kali_linux 共享文件夹
kali_linux_2018.1 安装 Vmware-Tools 创建与 windows 的共享文件夹 vmware 设置共享目录 安装 Vmware-Tools root@kali:~# apt- ...
- 转载:UML学习(三)-----序列图(silent)
原文:http://www.cnblogs.com/silent2012/archive/2011/09/14/2172219.html UML的模型中可分为两种,动态模型和静态模型.用例图.类图和对 ...
- Expm 10_1 带负权值边的有向图中的最短路径问题
[问题描述] 对于一个带负权值边的有向图,实现Bellman-Ford算法,求出从指定顶点s到其余顶点的最短路径,并判断图中是否存在负环. package org.xiu68.exp.exp10; p ...
- django.db.utils.OperationalError: (1045, "Access denied for user 'ODBC'@'localhost' (using password)
错误描述: 从SQLLITE数据库换为MYSQL数据库,执行 python manage.py migrate 命令时,报错:django.db.utils.OperationalError: (10 ...
- Codeforces 1093E Intersection of Permutations [CDQ分治]
洛谷 Codeforces 思路 一开始想到莫队+bitset,发现要T. 再想到分块+bitset,脑子一抽竟然直接开始写了,当然也T了. 最后发现这就是个裸的CDQ分治-- 发现\(a\)不变,可 ...
- bzoj4025 二分图 [分治,并查集]
传送门 思路 是二分图的充要条件:图没有奇环. 考虑按时间分治,用可撤销并查集维护点到根的距离. 仍然可以用一个小trick把两点连边变成根连边,可以看这里. 每次连边时若不连通则连上,否则判一下有没 ...
- Oracle Database 11g : SQL 基础
简介 1:课程目标 2:课程 目标 3:Oracle Database 11g 以及相关产品概览 1:Oracle Database 11g :重点领域 2:Oracle Fusion Middlew ...
- 【batch】批处理文件多参数处理和for循环字符串连接
batch文件写起来,酸爽不谈了.[1]今天在github上发现个好东西batsh,运行地址:https://batsh.org/.[1] 这里需求的场景是:调用run.bat脚本并传入多个参数(相对 ...
- java 命令行运行时报错:找不到或无法加载主类
源码如下: 路径目录(...\src\object) //: ch1.10/Command.java /**@author feilong * @version 1.0 */ package obje ...