vue分页组件table-pagebar
之前一直接触都是原始的前端模型,jquery+bootstrap,冗杂的dom操作,繁琐的更新绑定。接触vue后,对前端MVVM框架有了全新的认识。本文是基于webpack+vue构建,由于之前的工作主要是基于java的服务端开发工作,对前端框架和组件的理解,不够深入,借此来记录在前端框架使用和构建中的点点滴滴。
此分页组件参照于bootstrap-datatable底部分页开发完成,相关参数增加自定义功能。
最终使用展现效果图如下,数据来源于cnodejs【https://cnodejs.org/】
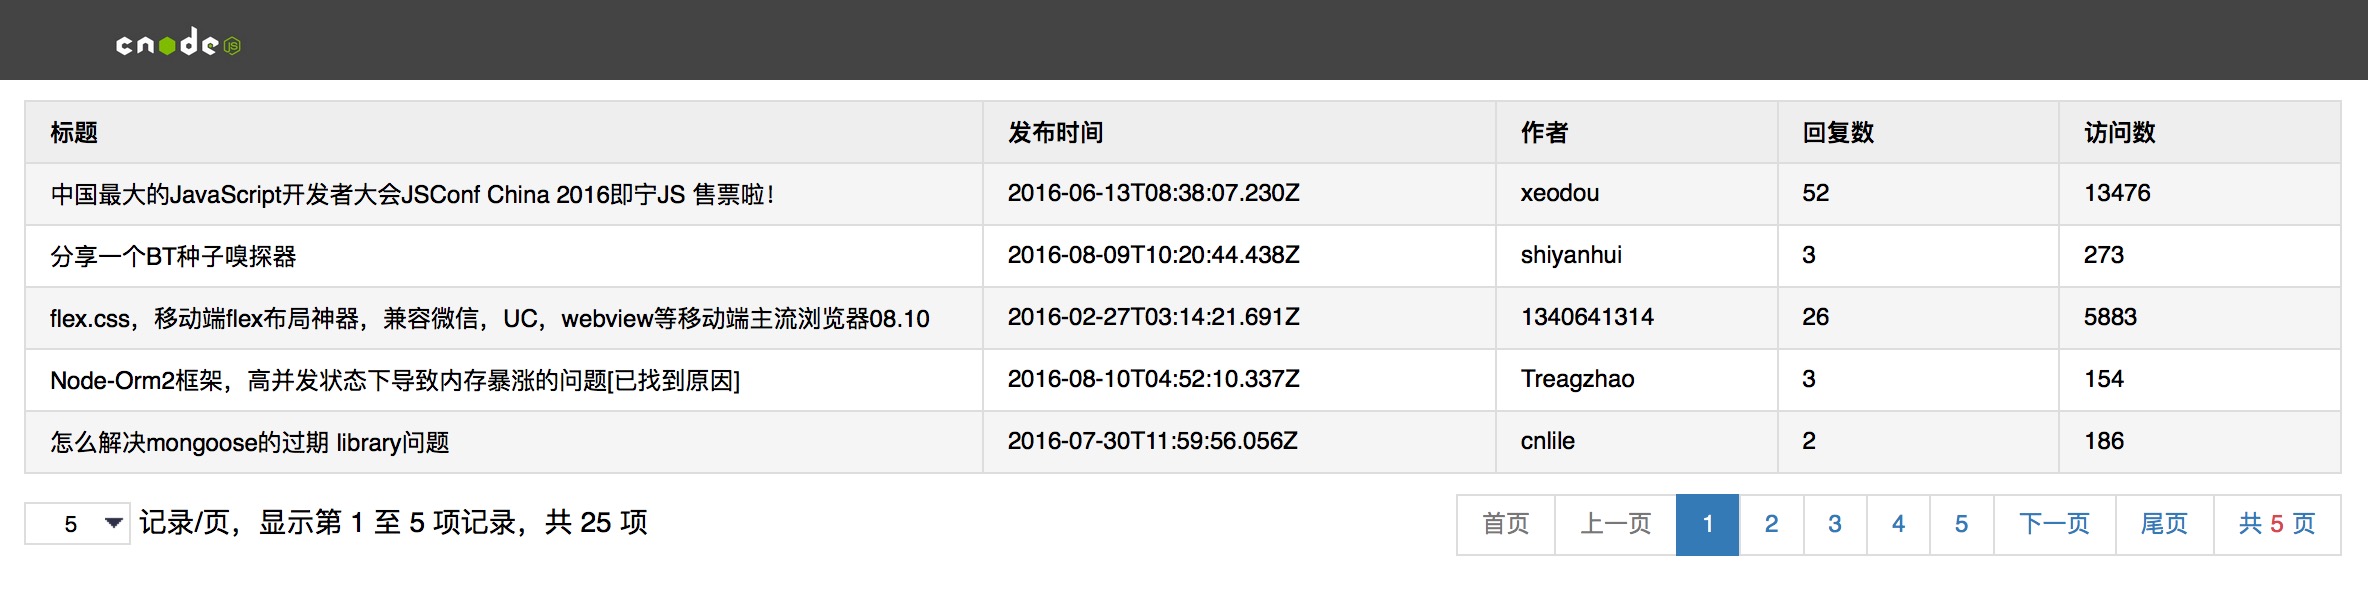
底部分页组件主要由左侧当前数据项数量显示和右侧分页页码两部分组成。组件代码如下:
<template xmlns:v-on="http://www.w3.org/1999/xhtml"
          xmlns:v-bind="http://www.w3.org/1999/xhtml">
    <div class="page-bar">
        <div class="page-size">
            <div>
                <select v-on:change="menuChange()" v-model="limit">
                    <option v-for="item in menu" v-bind:value="item">{{item}}</option>
                </select>
                记录/页,显示第 {{start}} 至 {{end}} 项记录,共 {{totalSize}} 项
            </div>
        </div>
        <div class="page-con">
            <ul>
                <li><a v-on:click="firstClick()" v-bind:class="{ 'disabled': cur == 1}">首页</a></li>
                <li><a v-on:click="preClick()" v-bind:class="{ 'disabled': cur == 1}">上一页</a></li>
                <li v-for="per in pages" v-bind:class="{ 'active': cur == per}">
                    <a v-on:click="pageClick(per)">{{ per }}</a>
                </li>
                <li><a v-on:click="nextClick()" v-bind:class="{ 'disabled': cur == totalPage}">下一页</a></li>
                <li><a v-on:click="lastClick()" v-bind:class="{ 'disabled': cur == totalPage}">尾页</a></li>
                <li><a>共<i>{{totalPage}}</i>页</a></li>
            </ul>
        </div>
        <div class="clear-both"></div>
    </div>
</template>

<script>
    import Ajax from '../ajax'

    export default{
        props: ['page-model'],
        data () {
            return {
                // 初始页
                cur: 1,
                // 请求地址
                url: this.pageModel.url ? this.pageModel.url : "",
                // 请求参数
                param: this.pageModel.param ? this.pageModel.param : {},
                // 请求方法 默认为GET请求
                method: this.pageModel.method ? this.pageModel.method : 'GET',
                // 每页显示数量 默认每页显示10条
                limit: this.pageModel.menu ? this.pageModel.menu[0] : 10,
                // 底部分页基数 默认5
                perSize: this.pageModel.perSize ? this.pageModel.perSize : 5,
                // 每页显示数量 下拉选项
                menu: this.pageModel.menu ? this.pageModel.menu : [5, 10, 50],
                // 分页参数 自定义名称
                pageParamName: this.pageModel.pageParamName ? this.pageModel.pageParamName : ['page', 'limit'],
                // 当前列表显示记录起始数
                start: 0,
                // 当前列表显示记录结束数
                end: 0,
                // 总页数
                totalPage: 0,
                // 记录总数
                totalSize: 0,
                // 分页请求返回数据
                dataList: []
            }
        },
        ready () {
            this.getData();
        },
        methods: {
            // 首页
            firstClick: function () {
                if (this.cur > 1) {
                    this.cur = 1;
                    this.getData();
                }
            },
            // 尾页
            lastClick: function () {
                if (this.cur < this.totalPage) {
                    this.cur = this.totalPage;
                    this.getData();
                }
            },
            // 上一页
            preClick: function () {
                if (this.cur > 1) {
                    this.cur--;
                    this.getData();
                }
            },
            // 下一页
            nextClick: function () {
                if (this.cur < this.totalPage) {
                    this.cur++;
                    this.getData();
                }
            },
            // 页码
            pageClick: function (data) {
                if (data != this.cur) {
                    this.cur = data;
                    this.getData();

                }
            },
            // 刷新显示记录数
            refreshPageCon: function () {
                this.start = (this.cur - 1) * this.limit + 1;
                if (this.totalSize >= this.limit * this.cur) {
                    this.end = this.limit * this.cur;
                } else {
                    this.end = this.totalSize;
                }
            },
            // 分页请求
            getData: function () {
                let _this = this;
                this.param[this.pageParamName[0]] = this.cur;
                this.param[this.pageParamName[1]] = this.limit;
                Ajax({
                    url: _this.url,
                    method: _this.method,
                    data: _this.param,
                    callback: function (res) {
                        // 返回结果数据集
                        this.dataList = res.data;
                        // 返回总记录数
                        _this.totalSize = 25;

                        _this.totalPage = Math.ceil(_this.totalSize / _this.limit);
                        _this.refreshPageCon();
                        _this.$dispatch('refresh', this.dataList);
                    }
                });
            },
            // 每页显示记录数 下拉
            menuChange: function () {
                this.getData();
            },
            getPage: function (curPage, totalPage, pageNum) {
                var leftPage, rightPage;
                curPage = curPage > 1 ? curPage : 1;
                curPage = curPage > totalPage ? totalPage : curPage;
                totalPage = curPage > totalPage ? curPage : totalPage;
                // 左侧页数
                leftPage = curPage - Math.floor(pageNum / 2);
                leftPage = leftPage > 1 ? leftPage : 1;

                // 右侧页数
                rightPage = curPage + Math.floor(pageNum / 2);
                rightPage = rightPage > totalPage ? totalPage : rightPage;

                var curPageNum = rightPage - leftPage + 1;
                // 左侧调整
                if (curPageNum < pageNum && leftPage > 1) {
                    leftPage = leftPage - (pageNum - curPageNum);
                    leftPage = leftPage > 1 ? leftPage : 1;
                    curPageNum = rightPage - leftPage + 1;
                }

                // 右侧调整
                if (curPageNum < pageNum && rightPage < totalPage) {
                    rightPage = rightPage + (pageNum - curPageNum);
                    rightPage = rightPage > totalPage ? totalPage : rightPage;
                }

                var arr = [];
                for (var i = leftPage; i <= rightPage; i++) {
                    arr.push(i);
                }
                return arr;
            }
        },
        computed: {
            pages: function () {
                return this.getPage(this.cur, this.totalPage, this.perSize);
            }
        }
    }
</script>

<style>
    ul, li {
        margin: 0px;
        padding: 0px;
    }

    li {
        list-style: none;
        display: inline;
    }

    .page-bar li:first-child > a {
        margin-left: 0px
    }

    .page-bar a {
        border: 1px solid #ddd;
        text-decoration: none;
        position: relative;
        float: left;
        padding: 6px 12px;
        margin-left: -1px;
        line-height: 1.42857143;
        color: #337ab7;
        cursor: pointer;
    }

    .page-bar a:hover {
        background-color: #eee;
    }

    .page-bar .active a {
        color: #fff;
        cursor: default;
        background-color: #337ab7;
        border-color: #337ab7;
    }

    .page-bar i {
        font-style: normal;
        color: #d44950;
        margin: 0px 4px;
        font-size: 12px;
    }

    .page-bar .page-con, .page-size {
        width: 50%;
        display: block;
        height: 30px;
        float: left;
        line-height: 30px;
    }

    .page-bar .page-con ul {
        float: right;
        padding-left: 15px;
        padding-right: 15px;
        display: inline-block;
        padding-left: 0;
    }

    .page-bar .page-size div {
        padding-left: 15px;
        padding-right: 15px;
        font-size: 14px;
    }

    a.disabled {
        color: #777;
        background-color: #fff;
        border-color: #ddd;
        cursor: not-allowed;
    }

    a.disabled:hover {
        background-color: #fff;
    }

    .clear-both {
        clear: both;
    }

    select {
        border: solid 1px #ddd;
        appearance: none;
        -moz-appearance: none;
        -webkit-appearance: none;
        background: url("../assets/images/arrow.png") no-repeat scroll right center transparent;
        padding-right: 15px;
        padding-left: 15px;
        padding-top: 2px;
        padding-bottom: 2px;
    }

    select::-ms-expand {
        display: none;
    }
</style>
组建模块使用,
<template>
    <Navbar></Navbar>
    <div class="row">
        <table class="table">
            <thead>
            <tr>
                <th>标题</th>
                <th width="20%">发布时间</th>
                <th width="10%">作者</th>
                <th width="10%">回复数</th>
                <th width="10%">访问数</th>
            </tr>
            </thead>
            <tbody>
            <tr v-show="!tabelEmpty" v-for="item in dataList">
                <td>{{item.title}}</td>
                <td>{{item.create_at}}</td>
                <td>{{item.author.loginname}}</td>
                <td>{{item.reply_count}}</td>
                <td>{{item.visit_count}}</td>
            </tr>
            <tr v-show="tabelEmpty" class="empty">
                <td colspan="5">没有匹配的记录</td>
            </tr>
            </tbody>
        </table>
    </div>
    <Pagebar :page-model="pageModel"></Pagebar>
</template>
<script>
    import Navbar from '../components/navbar.vue'
    import Pagebar from '../components/table-pagebar.vue'

    export default {//这里是官方的写法,默认导出,ES6
        components: {
            Navbar,
            Pagebar
        },
        data () {
            return {
                allArticle: "",
                dataList: [],
                pageModel: {
                    url: 'https://cnodejs.org/api/v1/topics',
                    menu: [5, 10, 20]
                },
            }
        },
        computed: {
            tabelEmpty: function () {
                if (this.dataList) {
                    return false;
                } else {
                    return true;
                }
            }
        },
        events: {
            refresh: function (e) {
                this.dataList = e;
            }
        }
    }
</script>
<style>
    body, table {
        font-size: 12px;
    }

    table {
        table-layout: fixed;
        empty-cells: show;
        border-collapse: collapse;
        width: 100%;
        margin: 10px 0;
    }

    td {
        height: 30px;
    }

    div.row {
        margin-left: 15px;
        margin-right: 15px;
    }

    h1, h2, h3 {
        font-size: 12px;
        margin: 0;
        padding: 0;
    }

    .table {
        border: 1px solid #ddd;
        background: #fff;
    }

    .table thead tr {
        background: #eee;
    }

    .table th {
        background-repeat: repeat-x;
        height: 30px;
        text-align: left;
        vertical-align: middle;
    }

    .table tr.empty {
        text-align: center;
    }

    .table td, .table th {
        border: 1px solid #ddd;
        padding: 0 1em 0;
    }

    .table tr:nth-child(odd) td {
        background-color: #f5f5f5;

    }
</style>
vue分页组件table-pagebar的更多相关文章
- java+springBoot+Thymeleaf+vue分页组件的定义
导读 本篇着重介绍java开发环境下,如何写一个vue分页组件,使用到的技术点有java.springBoot.Thymeleaf等: 分页效果图 名称为vuepagerbasic的分页组件,只包含上 ...
- 基于 bootstrap 的 vue 分页组件
申手党点这里下载示例 基于 bootstrap 的 vue 分页组件,我想会有那么一部分同学,在使用Vue的时候不使用单文件组件,因为不架设 NodeJS 服务端.那么网上流传的 *.vue 的各种分 ...
- 打通前后端全栈开发node+vue进阶【课程学习系统项目实战详细讲解】(3):用户添加/修改/删除 vue表格组件 vue分页组件
第三章 建议学习时间8小时 总项目预计10章 学习方式:详细阅读,并手动实现相关代码(如果没有node和vue基础,请学习前面的vue和node基础博客[共10章] 演示地址:后台:demo ...
- vue分页组件重置到首页问题
分页组件,可以借用这个老哥的@暴脾气大大https://www.cnblogs.com/sebastian-tyd/p/7853188.html#4163272 但是有一个问题就是下面评论中@ Mrz ...
- VUE 分页组件
<!DOCTYPE html><html> <head> <meta charset="UTF-8"> <title>& ...
- vue分页组件二次封装---每页请求特定数据
关键步骤: 1.传两个参数:pageCount (每页条数).pageIndex (页码数): 2.bind方法的调用 <!-- 这部分是分页 --> <div class=&quo ...
- vue分页组件
<template> <div> <ul class="pagination"> <li @click="goTo(1)&quo ...
- vue分页组件火狐中出现样式问题
分页的操作到了火狐浏览器会样式 怎么解决? 其实就是将input的type属性变成了text,因为number属性会变成上下的小箭头
- 手把手教你使用Vue/React/Angular三大框架开发Pagination分页组件
DevUI是一支兼具设计视角和工程视角的团队,服务于华为云DevCloud平台和华为内部数个中后台系统,服务于设计师和前端工程师.官方网站:devui.designNg组件库:ng-devui(欢迎S ...
随机推荐
- python内置函数(2)-递归与迭代
这篇文章简单介绍了迭代和递归的概念.两者的区别 什么是迭代: 迭代是重复反馈过程的活动,其目的通常是为了接近并达到所需的目标或结果.每一次对过程的重复被称为一次“迭代”,而每一次迭代得到的结果会被用来 ...
- 第一次用shell脚本来自动运行带参程序
将目录下的part-开头的文件带入程序处理 #!bin/sh FILES=/data5/follow_relation_list_part_00000/part-* file="" ...
- JQuery中html()方法的注意事项
.html方法当不传参数时用来获取元素的html内容, return this[0] && this[0].nodeType === 1 ? this[0].innerHTML.rep ...
- 引用枚举进行对比时 enum需强制转换
枚举类 public enum MailRead { /// <summary> /// 未读 /// </summary> UNREAD=0, /// <summary ...
- WorkFlow WF如何为一个集合赋值
今天刚刚开始学习WorkFlow.无奈WF网络上的学习资料实在太少. 刚刚学到Foreach控制流的使用,需要一个集合参数.经研究,静态赋值可以搞定.动态赋值还没. 首先添加一个List<int ...
- maven02 命令
- c# 委托 delegate
委托是一种存储函数引用的类型,在事件和事件的处理时有重要的用途 通俗的说,委托是一个可以引用方法的类型,当创建一个委托,也就创建一个引用方法的变量,进而就可以调用那个方法,即委托可以调用它所指的方法. ...
- 【衡阳八中noip模拟题】国色天香
庭前芍药妖无格,池上芙蕖净少情.唯有牡丹真国色,花开时节动京城.——唐·刘禹锡<赏牡丹>芍药花再红终究妖艳无格.终不及牡丹,国色天香.——乌拉那拉氏宜修华妃总是想要用自己的气焰打压皇后,正 ...
- MySQL的联结(Join)语法
MySQL的联结(Join)语法 1.内联结.外联结.左联结.右联结的含义及区别: 在讲MySQL的Join语法前还是先回顾一下联结的语法,呵呵,其实连我自己都忘得差不多了,那就大家一起温习吧(如 ...
- python排序(冒泡, 快速)
之前用java时学习的一些基础算法,今天在python上也研究下. 1. 冒泡排序 算法步骤: 50 30 70 90 10 1)50 跟 30 比不用交换. 2)步数+1, 30 跟70比 ...