
linux上源码编译安装mysql-5.6.28
在 linux 上编译安装 mysql-5.6..tar.gz

http://www.mysql.com/

mysql下载地址:

http://www.mysql.com/downloads/mysql/#downloads

mysql 官方网站文档:

https://dev.mysql.com/doc/

、准备工作

yum install -y gcc gcc-c++ cmake make ncurses ncurses-devel  bison

、解压

tar zxf mysql-5.6..tar.gz

、编译

cmake . \

-DCMAKE_INSTALL_PREFIX=/tmp/test/mysql \

-DWITH_INNOBASE_STORAGE_ENGINE=1  \

-DWITH_EXTRA_CHARSETS=all \

-DDEFAULT_CHARSET=utf8  \

-DDEFAULT_COLLATION=utf8_general_ci

make -j 8

make install -j 8

注意:

常见的CMAKE选项

-DCMAKE_INSTALL_PREFIX=/usr/local/mysql    MySQL安装目录

-DWITH_INNOBASE_STORAGE_ENGINE=           安装InnoDB存储引擎

-DWITH_MYISAM_STORAGE_ENGINE=             安装MyISAM存储引擎

-DWITH_MEMORY_STORAGE_ENGINE=             安装内存存储引擎

-DDEFAULT_CHARSET=utf8                     默认编码设置成utf8

-DDEFAULT_COLLATION=utf8_general_ci        默然校验规则是utf8_general_ci

-DWITH_EXTRA_CHARSETS=all                  支持其他所有的编码

-DMYSQL_TCP_PORT=                      MySQL端口指定为3306

-DMYSQL_UNIX_ADDR=/tmp/mysql.sock          指定SOCK文件路径

-DMYSQL_DATADIR=/usr/local/mysql/data      MySQL数据目录

make -j n  支持多线程编译(一般跟内核数相等)

、配置my.cnf

[root@rhel mysql]# pwd

/tmp/test/mysql

mkdir conf

cp support-files/my-default.cnf  conf/

vim my.cnf 详情看下面的附属

、初始化数据库

useradd mysql

#注意  --user  需要用root编译

./scripts/mysql_install_db --defaults-file=/tmp/test/mysql/my.cnf   --user=mysql

./scripts/mysql_install_db --defaults-extra-file=/tmp/test/mysql/conf/my.cnf --user=mysql

、启动数据库

./bin/mysqld_safe --defaults-file=/tmp/test/mysql/my.cnf --user=mysql &

./bin/mysqld_safe --defaults-extra-file=/tmp/test/mysql/conf/my.cnf --user=mysql &

、设置密码

[root@rhel ~]# ss -ln |grep

LISTEN                                  :::                    :::*

./bin/mysqladmin -u root password ''

、账户授权

grant all on *.* to 'mvpbang'@'%' identified by '';

flush  privileges;

、设置系统环境变量

vim /etc/profile

export PATH=$PATH://tmp/test/mysql/bin

source /etc/profile

修改 rc.local ,让 mysql 开机自动运行

echo "mysqld_safe --defaults-extra-file=/tmp/test/mysql/conf/my.cnf --user=mysql &" >>/etc/rc.local

、基本命令的参数说明

[root@rhel mysql]# ./scripts/mysql_install_db --help

Usage: ./scripts/mysql_install_db [OPTIONS]

  --basedir=path       The path to the MySQL installation directory.

  --builddir=path      If using --srcdir with out-of-directory builds, you

                       will need to set this to the location of the build

                       directory where built files reside.

  --cross-bootstrap    For internal use.  Used when building the MySQL system

                       tables on a different host than the target.

  --datadir=path       The path to the MySQL data directory.

                       If missing, the directory will be created, but its

                       parent directory must already exist and be writable.

  --defaults-extra-file=name

                       Read this file after the global files are read.

  --defaults-file=name Only read default options from the given file name.

  --force              Causes mysql_install_db to run even if DNS does not

                       work.  In that case, grant table entries that

                       normally use hostnames will use IP addresses.

  --help               Display this help and exit.

  --ldata=path         The path to the MySQL data directory. Same as --datadir.

  --no-defaults        Don't read default options from any option file.

  --keep-my-cnf        Don't try to create my.cnf based on template.

                       Useful for systems with working, updated my.cnf.

                       Deprecated, will be removed in future version.

  --random-passwords   Create and set a random password for all root accounts

                       and set the "password expired" flag,

                       also remove the anonymous accounts.

  --rpm                For internal use.  This option is used by RPM files

                       during the MySQL installation process.

  --skip-name-resolve  Use IP addresses rather than hostnames when creating

                       grant table entries.  This option can be useful if

                       your DNS does not work.

  --srcdir=path        The path to the MySQL source directory.  This option

                       uses the compiled binaries and support files within the

                       source tree, useful for if you don't want to install

                       MySQL yet and just want to create the system tables.

  --user=user_name     The login username to use for running mysqld.  Files

                       and directories created by mysqld will be owned by this

                       user.  You must be root to use this option.  By default

                       mysqld runs using your current login name and files and

                       directories that it creates will be owned by you.

Any other options are passed to the mysqld program.

[root@rhel mysql]# ./bin/mysqld_safe --help

Usage: ./bin/mysqld_safe [OPTIONS]

  --no-defaults              Don't read the system defaults file

  --defaults-file=FILE       Use the specified defaults file

  --defaults-extra-file=FILE Also use defaults from the specified file

  --ledir=DIRECTORY          Look for mysqld in the specified directory

  --open-files-limit=LIMIT   Limit the number of open files

  --core-file-size=LIMIT     Limit core files to the specified size

  --timezone=TZ              Set the system timezone

  --malloc-lib=LIB           Preload shared library LIB if available

  --mysqld=FILE              Use the specified file as mysqld

  --mysqld-version=VERSION   Use "mysqld-VERSION" as mysqld

  --nice=NICE                Set the scheduling priority of mysqld

  --plugin-dir=DIR           Plugins are under DIR or DIR/VERSION, if

                             VERSION is given

  --skip-kill-mysqld         Don't try to kill stray mysqld processes

  --syslog                   Log messages to syslog with 'logger'

  --skip-syslog              Log messages to error log (default)

  --syslog-tag=TAG           Pass -t "mysqld-TAG" to 'logger'

All other options are passed to the mysqld program.
附上my.cnf
[client]

default-character-set=utf8

[mysql]

auto-rehash

default-character-set=utf8

[mysqld]

#根据实际情况适当调整

innodb_buffer_pool_size = 128M

join_buffer_size = 128M

sort_buffer_size = 2M

read_rnd_buffer_size = 2M

#个性化设置

lower_case_table_names=  #忽略大小写

  #对大批量数据导入导出防止超时

max_allowed_packet=500M

wait_timeout=

interactive_timeout=

#数据库字符集设置(由于编译已经选择,顾不需要设置)

#init_connect='SET collation_connection = utf8_unicode_ci'

#init_connect='SET NAMES utf8'

#character-set-server=utf8

#collation-server=utf8_unicode_ci

#日志记录

#log_bin

#基本信息

basedir = /tmp/test/mysql

datadir = /tmp/test/mysql/data

port =

server_id =

socket = /tmp/test/mysql/data/mysql.sock

sql_mode=NO_ENGINE_SUBSTITUTION,STRICT_TRANS_TABLES

[mysqld_safe]

log-error = /tmp/test/mysql/life.log

pid-file = /tmp/test/mysql/data/mysqld.pid
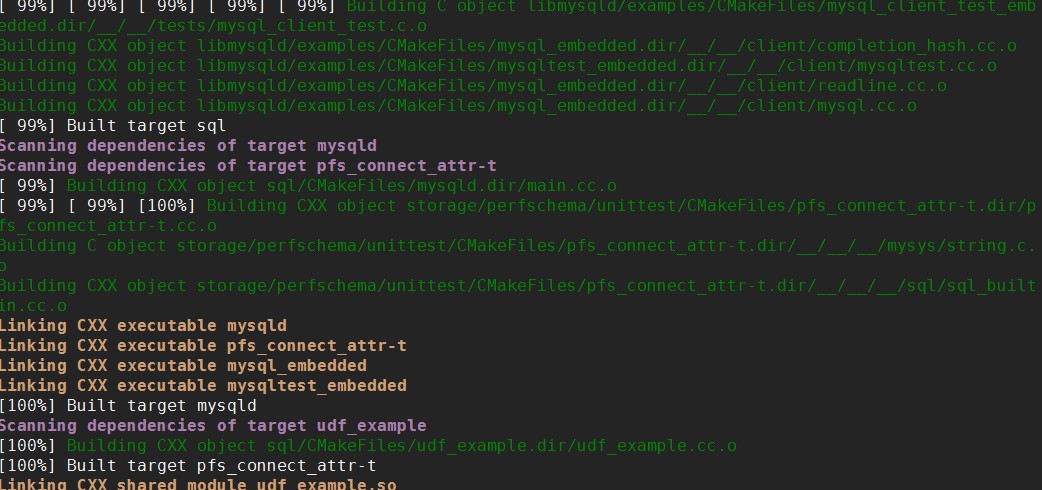
内核编译进度
注意:配置低的编译基本上都是1个小时左右!!!(一般建议放在服务器上编译开多线程)
linux上源码编译安装mysql-5.6.28的更多相关文章
- linux下源码编译安装mysql
1.安装依赖的包: yum install -y gdb cmake ncurses-devel bison bison-devel 2.创建mysql安装目录和数据文件目录 mkdir -p /us ...
- Linux下源码编译安装MySql,centeros7
1. 安cmake工具 # yum install -y cmake 2. 创建mysql用户 #useradd -s /sbin/nologin mysql //设置为非登陆用户(安全) 3. ...
- Linux下源码编译安装MySQL 5.5.8
准备工作: 新建用户和用户组 groupadd mysql useradd -g mysql mysql 1:下载: bison-2.4.2.tar.bz2 cmake-2.8.3.tar.gz ma ...
- CentOS 7上源码编译安装和配置LNMP Web+phpMyAdmin服务器环境
CentOS 7上源码编译安装和配置LNMP Web+phpMyAdmin服务器环境 什么是LNMP? LNMP(别名LEMP)是指由Linux, Nginx, MySQL/MariaDB, PHP/ ...
- CentOS 6.6 下源码编译安装MySQL 5.7.5
版权声明:转自:http://www.linuxidc.com/Linux/2015-08/121667.htm 说明:CentOS 6.6 下源码编译安装MySQL 5.7.5 1. 安装相关工具# ...
- Linux 从源码编译安装 OpenSSH
https://blog.csdn.net/bytxl/article/details/46639073 Linux 从源码编译安装 OpenSSH以及各问题解决 2015年06月25日 17:37: ...
- CentOS源码编译安装MySQL 5.5.15
CentOS源码编译安装MySQL 5.5.15 文章目录 [隐藏] 安装编译工具 下载源码 安装cmake和bison 编译安装MySQL 一些相关设置 安装编译工具 yum install g ...
- Shell脚本一键部署——源码编译安装MySQL及自动补全工具
Shell脚本一键部署--源码编译安装MySQL及自动补全工具 编译安装MySQL 1.软件包 Mysql安装包 将安装包拖至/opt目录下,编辑一个脚本文件,将以下内容复制进去,然后source或者 ...
- 总结源码编译安装mysql
最近在学习源码编译安装LAMP.LNMP时,一直遇到一个难题,就是就是mysql无论怎么源码编译安装,到最后启动服务都提示"Starting MySQL.The server quit wi ...
随机推荐
- C/C++log日志库比较
事实上,在C的世界里面没有特别好的日志函数库(就像Java里面的的log4j,或者C++的log4cxx).C程序员都喜欢用自己的轮子.printf就是个挺好的轮子,但没办法通过配置改变日志的格式或者 ...
- 7.3 netty3基本使用
由于dubbo默认使用的是netty3进行通信的,这里简单的列出一个netty3通信的例子. 一 server端 1 Server package com.hulk.netty.server; imp ...
- 如何确定一个NFS的mount是v3还是v4?
命令如下: nfsstat –m nfsstat –m | grep /home/mymnt 参考资料 ============ https://unix.stackexchange.com/ques ...
- js命名空间写法
很早知道这种写法,由于基础面向对象不够扎实一直在回避,但是面对整站这种方法还是有必要会 <div id="div1">111</div> <div i ...
- Android -- getWidth()与getMeasuredWidth()
getWidth() Return the width of the your view. Returns The width of your view, in pixels. 源代码: public ...
- 【Kafka】Kafka-配置参数详解-参数调优
Kafka-配置参数详解-参数调优 kafka 目录_百度搜索 为什么kafka使用磁盘而不是内存 - CSDN博客 Kafka 配置说明 - 風吹云动 - 博客园 kafka生产服务器配置 - Or ...
- win8下Source Insight has not been installed completely问题的解决
系统:windows8 软件:Source Insight 3.5 安装后打开总是提示如下图错误,没法使用. 卸载重新安装好多次,还是不行,百度一下,终于找到方法,记录一下,方便以后查找. 解决方法: ...
- (转)Pixel-Fillrate显卡像素填充率
[Pixel-Fillrate] “填充率“以每秒钟填充的像素点为单位,“三角形(多边形)生成速度“则表示每秒钟三角形(多边形)生成个数.现在的3D显卡的性能也主要看着两项指标,这两项指标的数值越大, ...
- junit与spring-data-redis 版本对应成功的
spring-data-redis 版本:1.7.2.RELEASE junit 版本:4.12
- 一个十年IT从业者的职场感言:为什么不要自称是“程序员”
转载:https://blog.csdn.net/S_king_/article/details/78529089 如果我可以给每个工程教育增加一门课,它不会涉及编译器.门电路或是时间复杂度,而是一门 ...