【Python】【jupyter-notebook】
1. win7 安装:https://www.cnblogs.com/zlslch/p/6984403.html
1、Jupyter Notebook 和 pip
为了更加方便地写 Python 代码,还需要安装 Jupyter notebook。 利用 pip 安装 Jupyter notebook。
为什么要使用 Jupyter?参考: https://www.zhihu.com/question/37490497
pip: Python 的包管理工具,安装 Python 的同时已经安装好了。
Jupyter notebook: 一个交互式笔记本,支持运行 40 多种编程语言。 利用她来写 Python,代码和运行结果都可以保存下载,十分方便。
2、Jupyter notebook 安装
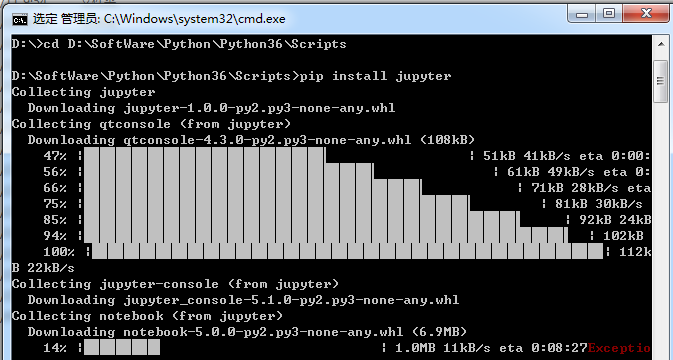
命令行窗口输入: pip install jupyter
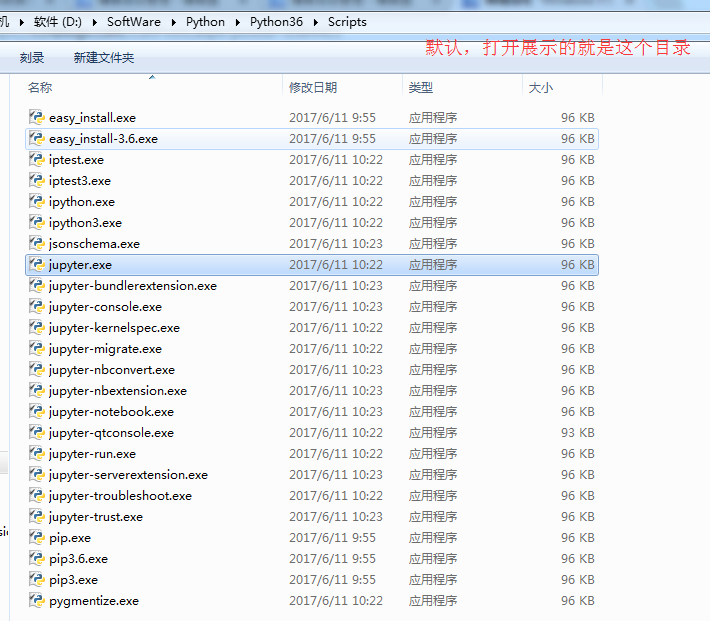
切换到 D:\SoftWare\Python\Python36\Scripts目录下,
当然,若大家是默认安装的话,则在C:\Users\Administrator\AppData\Local\Programs\Python\Python36\Scripts 目录下 。
或者将该目录添加到 path,就不用切换了。
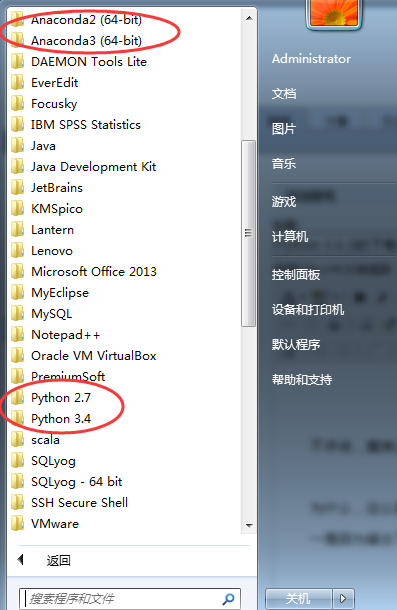
我这里,因为考虑到机器学习深度学习那边,已经安装了Anaconda2和Anaconda3,所以这边的数据分析所用的python3.6.1就不添加到path了。每次去切换到这个目录来,也不麻烦。
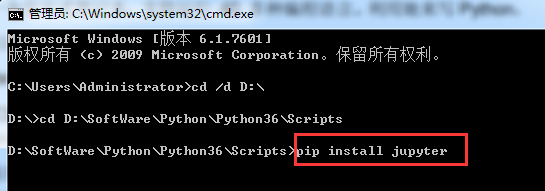

Microsoft Windows [版本 6.1.7601]

版权所有 (c) 2009 Microsoft Corporation。保留所有权利。

C:\Users\Administrator>cd /d D:\

D:\>cd D:\SoftWare\Python\Python36\Scripts

D:\SoftWare\Python\Python36\Scripts>pip install jupyter

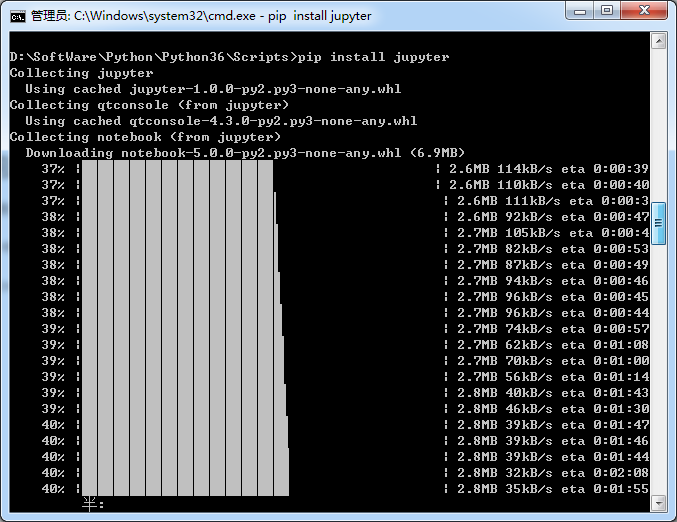


安装成功。
3、 jupyter notebook的启动
命令行窗口输入: jupyter notebook
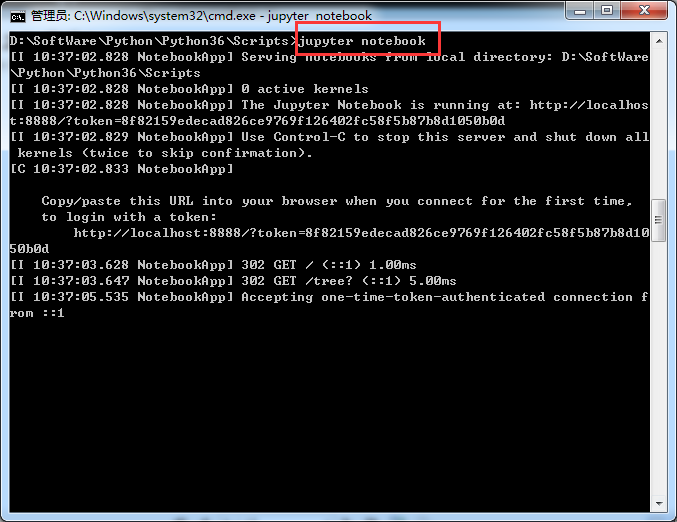
D:\SoftWare\Python\Python36\Scripts>jupyter notebook

[I 10:37:02.828 NotebookApp] Serving notebooks from local directory: D:\SoftWare

\Python\Python36\Scripts

[I 10:37:02.828 NotebookApp] 0 active kernels

[I 10:37:02.828 NotebookApp] The Jupyter Notebook is running at: http://localhos

t:8888/?token=8f82159edecad826ce9769f126402fc58f5b87b8d1050b0d

[I 10:37:02.829 NotebookApp] Use Control-C to stop this server and shut down all

 kernels (twice to skip confirmation).

[C 10:37:02.833 NotebookApp]

    Copy/paste this URL into your browser when you connect for the first time,

    to login with a token:

        http://localhost:8888/?token=8f82159edecad826ce9769f126402fc58f5b87b8d10

50b0d

[I 10:37:03.628 NotebookApp] 302 GET / (::1) 1.00ms

[I 10:37:03.647 NotebookApp] 302 GET /tree? (::1) 5.00ms

[I 10:37:05.535 NotebookApp] Accepting one-time-token-authenticated connection f

rom ::1
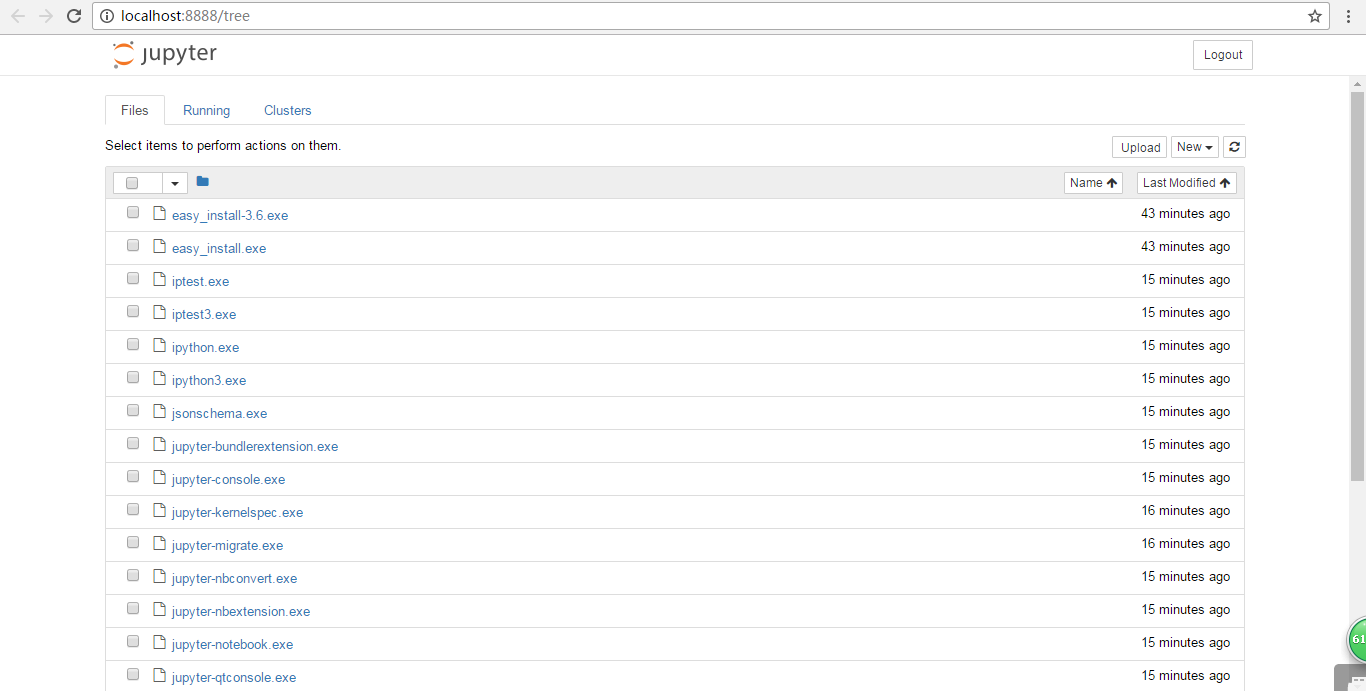
同时,默认浏览器会打开 Jupyter notebook 窗口。 说明 Jupyter notebook 安装成功了。
4、配置 Jupyter notebook
jupyter notebook --generate-config
运行之前
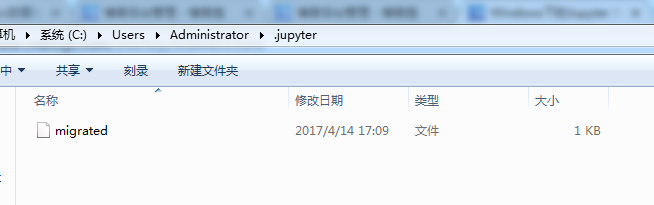
打开“.jupyter”文件夹,可以看到里面有个配置文件。
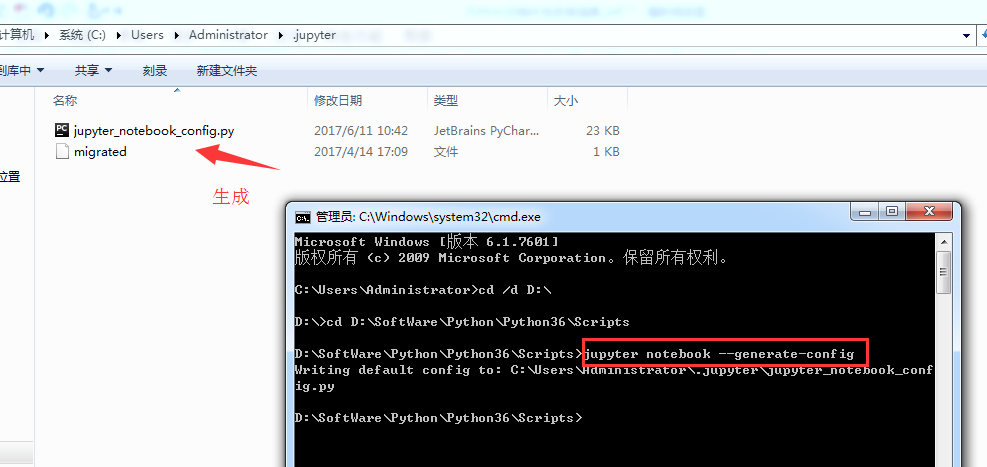
Microsoft Windows [版本 6.1.7601]

版权所有 (c) 2009 Microsoft Corporation。保留所有权利。

C:\Users\Administrator>cd /d D:\

D:\>cd D:\SoftWare\Python\Python36\Scripts

D:\SoftWare\Python\Python36\Scripts>jupyter notebook --generate-config

Writing default config to: C:\Users\Administrator\.jupyter\jupyter_notebook_conf

ig.py

D:\SoftWare\Python\Python36\Scripts>
修改jupyter_notebook_config.py配置文件
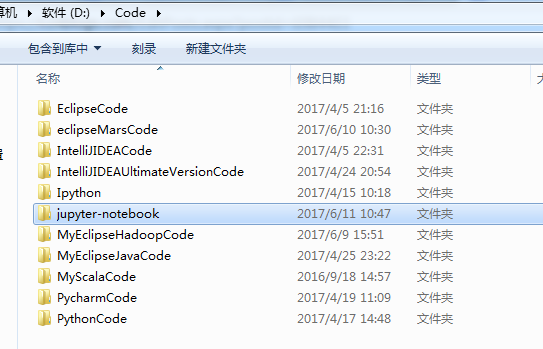
打开这个配置文件,找到“c.NotebookApp.notebook_dir=……”,把路径改成自己的工作目录。

比如,这里要变更为
## The directory to use for notebooks and kernels.
c.NotebookApp.notebook_dir = 'D:\Code\jupyter-notebook'
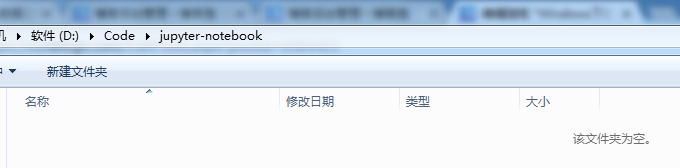
,当然,文件夹 jupyter-notebook 需要自己创建好。

配置文件修改完成后, 以后在 jupyter notebook 中写的代码等都会保存在自己创建的目录中。
jupyter notebook的自定义启动(变了)
配置文件修改成后,就可以启动 jupyter notebook 了,命令行窗口中输入 jupyter notebook,
默认浏览器就会打开一个页面
jupyter notebook的启动
命令行窗口输入: jupyter notebook
以前是
D:\SoftWare\Python\Python36\Scripts>jupyter notebook

[I 10:37:02.828 NotebookApp] Serving notebooks from local directory: D:\SoftWare

\Python\Python36\Scripts

[I 10:37:02.828 NotebookApp] 0 active kernels

[I 10:37:02.828 NotebookApp] The Jupyter Notebook is running at: http://localhos

t:8888/?token=8f82159edecad826ce9769f126402fc58f5b87b8d1050b0d

[I 10:37:02.829 NotebookApp] Use Control-C to stop this server and shut down all

 kernels (twice to skip confirmation).

[C 10:37:02.833 NotebookApp]

    Copy/paste this URL into your browser when you connect for the first time,

    to login with a token:

        http://localhost:8888/?token=8f82159edecad826ce9769f126402fc58f5b87b8d10

50b0d

[I 10:37:03.628 NotebookApp] 302 GET / (::1) 1.00ms

[I 10:37:03.647 NotebookApp] 302 GET /tree? (::1) 5.00ms

[I 10:37:05.535 NotebookApp] Accepting one-time-token-authenticated connection f

rom ::1
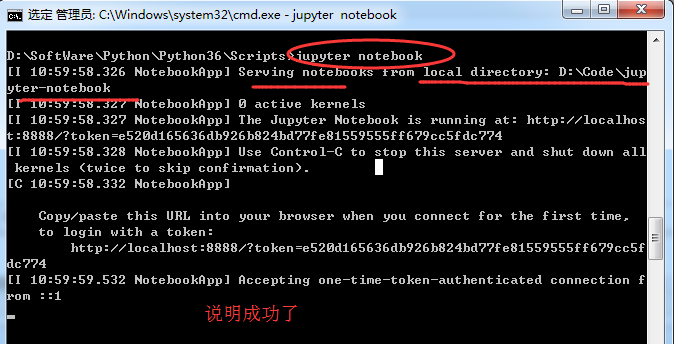
现在是
Microsoft Windows [版本 6.1.7601]

版权所有 (c) 2009 Microsoft Corporation。保留所有权利。

C:\Users\Administrator>cd /d D:\

D:\>cd D:\SoftWare\Python\Python36\Scripts


D:\SoftWare\Python\Python36\Scripts>jupyter notebook

[I 10:59:58.326 NotebookApp] Serving notebooks from local directory: D:\Code\jup

yter-notebook

[I 10:59:58.327 NotebookApp] 0 active kernels

[I 10:59:58.327 NotebookApp] The Jupyter Notebook is running at: http://localhos

t:8888/?token=e520d165636db926b824bd77fe81559555ff679cc5fdc774

[I 10:59:58.328 NotebookApp] Use Control-C to stop this server and shut down all

 kernels (twice to skip confirmation).

[C 10:59:58.332 NotebookApp]

    Copy/paste this URL into your browser when you connect for the first time,

    to login with a token:

        http://localhost:8888/?token=e520d165636db926b824bd77fe81559555ff679cc5f

dc774

[I 10:59:59.532 NotebookApp] Accepting one-time-token-authenticated connection f

rom ::1

当然,其实啊,这个玩意非常的简单和方便。关于修改名字、上传等操作,后续关注的我博客。
常见问题及解决方案
如何添加 Path?
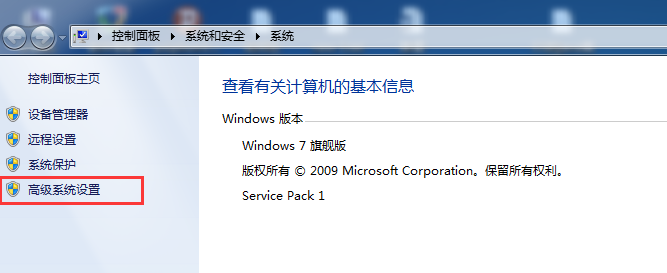
计算机-右击-单机“属性”
单机“高级系统设置”
单机“环境变量”
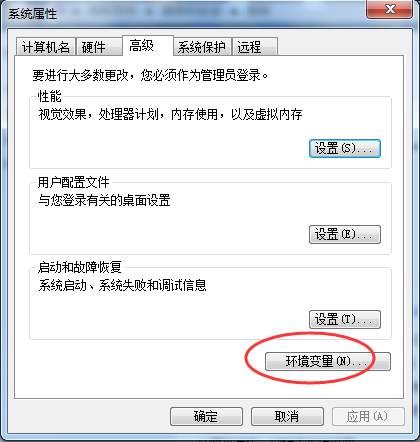
找到系统变量 path,编辑
在最后加上 2 个路径:
C:\Users\Administrator\AppData\Local\Programs\Python\Python36
C:\Users\Administrator\AppData\Local\Programs\Python\Python36\Scripts
说明:以上默认安装路径,每个电脑上是类似的,找到复制这个路径加到 Path 中即可
我的路径是已经改了,在下面的这篇博客里,可以看到
Windows下的Python 3.6.1的下载与安装(适合32bits和64bits)(图文详解)
这是我自定义的Python 的安装目录 (D:\SoftWare\Python\Python36\Scripts)
jupyter notebook 闪退
解决办法:更换默认浏览器。 ,建议用谷歌浏览器或者火狐浏览器
【Python】【jupyter-notebook】的更多相关文章
- 【python / mxnet / gluoncv / jupyter notebook】变换场景的同一行人多重识别
程序环境为高性能集群:CPU:Intel Xeon Gold 6140 Processor * 2(共36核心)内存:512GB RAMGPU:Tesla P100-PCIE-16GB * 2 数 ...
- 【python / mxnet / gluoncv / jupyter notebook】基于mxnet和gluoncv的图像内容识别
程序环境为高性能集群:CPU:Intel Xeon Gold 6140 Processor * 2(共36核心)内存:512GB RAMGPU:Tesla P100-PCIE-16GB * 2 In ...
- 【python / mxnet / gluoncv / jupyter notebook】基于mxnet和gluoncv的图像分割
程序环境为高性能集群: CPU:Intel Xeon Gold 6140 Processor * 2(共36核心)内存:512GB RAMGPU:Tesla P100-PCIE-16GB * 2 In ...
- 【Python从入门到精通】(九)Python中字符串的各种骚操作你已经烂熟于心了么?
您好,我是码农飞哥,感谢您阅读本文,欢迎一键三连哦. 本文将重点介绍Python字符串的各种常用方法,字符串是实际开发中经常用到的,所有熟练的掌握它的各种用法显得尤为重要. 干货满满,建议收藏,欢迎大 ...
- ❤️【Python从入门到精通】(二十七)更进一步的了解Pillow吧!
您好,我是码农飞哥,感谢您阅读本文,欢迎一键三连哦. 进一步介绍Pillow库的使用,详细了解 干货满满,建议收藏,需要用到时常看看. 小伙伴们如有问题及需要,欢迎踊跃留言哦~ ~ ~. 前言 本文是 ...
- 【Python】和【Jupyter notebook】的正确安装方式?
学了那么久Python,你的Python安装方式正确吗?今天给你看看什么才是Python正确的安装方式,教程放在下面了,喜欢的记得点赞. Python安装 Python解答Q群:660193417## ...
- 【Python五篇慢慢弹】快速上手学python
快速上手学python 作者:白宁超 2016年10月4日19:59:39 摘要:python语言俨然不算新技术,七八年前甚至更早已有很多人研习,只是没有现在流行罢了.之所以当下如此盛行,我想肯定是多 ...
- 【Python五篇慢慢弹】数据结构看python
数据结构看python 作者:白宁超 2016年10月9日14:04:47 摘要:继<快速上手学python>一文之后,笔者又将python官方文档认真学习下.官方给出的pythondoc ...
- 【python自动化第十一篇】
[python自动化第十一篇:] 课程简介 gevent协程 select/poll/epoll/异步IO/事件驱动 RabbitMQ队列 上节课回顾 进程: 进程的诞生时为了处理多任务,资源的隔离, ...
- 【Python学习笔记之二】浅谈Python的yield用法
在上篇[Python学习笔记之一]Python关键字及其总结中我提到了yield,本篇文章我将会重点说明yield的用法 在介绍yield前有必要先说明下Python中的迭代器(iterator)和生 ...
随机推荐
- AI赌神称霸德扑的秘密,刚刚被《科学》“曝光”了
AI赌神称霸德扑的秘密,刚刚被<科学>“曝光”了 称霸德州扑克赛场的赌神Libratus,是今年最瞩目的AI明星之一. 刚刚,<科学>最新发布的预印版论文,详细解读了AI赌神背 ...
- Django后端项目---- rest framework(3)
一.版本 程序也来越大时,可能通过版本不同做不同的处理 没用rest_framework之前,我们可以通过以下这样的方式去获取. class UserView(APIView): def get(se ...
- 同行span标签设置display:inline-block;overflow:hidden垂直对齐问题
1 问题描述:一个div包含 三个span 当span2 类样式设置如下图时,将导致垂直方向不对齐的情况 2解决方案: 将前面的也设置同样的样式 overflow:hidden; display:in ...
- vue angular 分别实现分页
1 vue实现分页组件 paginate组件 <template> <div class="pagination-wrap" v-cloak v-if=" ...
- Java常考面试题(一)
https://blog.csdn.net/linzhiqiang0316/article/details/80473906
- java中BufferedImage类的用法
1. BufferedImage是Image的一个子类,Image和BufferedImage的主要作用就是将一副图片加载到内存中. BufferedImage生成的图片在内存里有一个图像缓冲区,利用 ...
- 数据分析之Matplotlib
一.Matplotlib的基础知识 Matplotlib中的基本图表包括的元素 •x轴和y轴 axis 水平和垂直的轴线 •x轴和y轴刻度 tick 刻度标示坐 ...
- javaweb笔记—04(预编译和泛型)
预编译:ps对象1.ps可进行预编译,占位符传值,性能高于sta的(数据库驱动层有优化)2.比较灵活,数据库将预编译的SQL缓存了,第二次访问,就不用预编译,直接执行.3.较为安全,不会发生SQL注入 ...
- 安装ubuntu18.04.1
下载ubuntu:https://www.ubuntu.com/download/desktop 在虚拟机创建好ubuntu18.04.1后无法启动(选择的是linux,ubuntu64位),提示:此 ...
- es破解xpack
环境:OS:CentOS 7elasticsearch:6.5.0 1.vim LicenseVerifier.java package org.elasticsearch.license; impo ...