01:adminLTE2基本使用
1.1 adminLTE介绍
1、adminLTE 介绍
1、基于Bootstrap3高度可定制的响应式管理模板,免去前端架构师大量的js和css的编写
2、adminLTE除了可以使用bootstrap3的大多数样式之外,自身也提供了一些非常实用的样式包装,并且在样式演示中已经基本罗列出来了。
3、adminLTE的插件中使用的基本都是bootstrap和jquery的插件。
2、adminLTE 功能
1、AdminLTE 也同样具备了后台应有模板,像登录模板、注册模板、个人模板、404模板、500模板、空白模板等,这些可以在下载后在 Examples 菜单里查看到。
2、里面的组件 Widgets 页面,不要以为是一些像 easyui 的组件,其实也是 AdminLTE 定义的一些 css 样式,像 box 样式,是里面最基础最常用的一个。
3、里面的 js 插件除了bootstrap 自带那模态窗、导航、下拉菜单外,其它就是集成一些有名的第三方插件,像 select2、CK Editor、iCheck、DataTables 等等。
3、网址
1、adminLTE官网:https://adminlte.io/
2、官方模板:http://adminlte.la998.com/
1.2 基本使用(base.html)
1、利用adminLTE完成最基础后台界面(base.html)
{% load static %}
<!DOCTYPE html>
<html>
<head>
<meta charset=utf-8">
<meta http-equiv="X-UA-Compatible" content="IE=edge">
<meta http-equiv="refresh" content="{% block refresh_time %}{% endblock %}">
<title>{% block title %}{% endblock %}{% if settings.SITE_TITLE %} | {{ settings.SITE_TITLE }}{% endif %}</title>
<meta content="width=device-width, initial-scale=1, maximum-scale=1, user-scalable=no" name="viewport">
<link rel="stylesheet" href="/static/AdminLTE/dist/css/AdminLTE.min.css" type="text/css">
<link rel="stylesheet" href="/static/AdminLTE/bootstrap/css/bootstrap.css" type="text/css">
<link rel="stylesheet" href="/static/AdminLTE/fonts/font-awesome.css" type="text/css"/>
<link rel="stylesheet" href="/static/AdminLTE/ionicons/ionicons.css" type="text/css">
<link rel="stylesheet" href="/static/AdminLTE/dist/css/AdminLTE.css" type="text/css">
<link rel="stylesheet" href="/static/AdminLTE/plugins/select2/select2.css">
<link rel="stylesheet" href="/static/DataTables-1.10.12/media/css/dataTables.bootstrap.css">
<link rel="shortcut icon" href="/static/opwf.ico">
<link rel="stylesheet" href="/static/bootstrap-datetimepicker/css/bootstrap-datetimepicker.min.css">
<!-- AdminLTE Skins. Choose a skin from the css/skins
folder instead of downloading all of them to reduce the load. -->
<link rel="stylesheet" href="/static/AdminLTE/dist/css/skins/_all-skins.min.css">
<!-- jQuery 2.2.0 -->
<script src="/static/AdminLTE/plugins/jQuery/jQuery-2.2.0.min.js"></script>
<!--[if IE 8]>
<script type="text/javascript" src="/static/js/jquery-1.9.1.js"></script>
<![endif]-->
<style>
.errorlist {
color: red;
}
.error {
color: red;
}
</style>
{% block extra_css %}{% endblock %}
{% block extra_js %}{% endblock %}
<!--[if lt IE 9]>
<script src="/static/js/html5shiv.js"></script>
<script src="/static/js/respond.min.js"></script>
<![endif]-->
</head>
<!-- 菜单头部颜色:skin-blue表示头部为蓝色 -->
<body class="hold-transition skin-blue sidebar-mini">
<div class="wrapper">
<!-- 第一部分:头部菜单-->
<header class="main-header">
<a href="/" class="logo">
<span class="logo-mini"><b>公司名</b></span>
<span class="logo-lg"><b>公司名称</b>·系统平台名称</span>
</a>
<nav class="navbar navbar-static-top">
<a href="#" class="sidebar-toggle" data-toggle="offcanvas" role="button">
<span class="sr-only">Toggle navigation</span>
</a>
<div class="navbar-custom-menu">
<ul class="nav navbar-nav">
<!-- 右侧用户信息 -->
<li class="dropdown user user-menu">
<a href="#" class="dropdown-toggle" data-toggle="dropdown">
<i class="glyphicon glyphicon-user"></i>
<span>张三<i class="caret"></i></span>
</a>
<ul class="dropdown-menu">
<li class="user-header bg-light-blue">
<p>
张三
<small>财务部</small>
</p>
</li>
<!-- 当点击用户信息时才出现:修改密码/注销 -->
<li class="user-footer">
<div class="pull-left">
<a href="#"
class="btn btn-default btn-flat">更改密码</a>
</div>
<div class="pull-right">
<a href="#"
class="btn btn-default btn-flat">注销</a>
</div>
</li>
</ul>
</li>
</ul>
</div>
</nav>
</header>
<!-- 第二部分:左侧菜单栏 -->
<aside class="main-sidebar">
{% include "left_side.html" %}
</aside>
<!-- 第三部分:后台中间内容-->
<div class="content-wrapper">
<!-- 1、content01:头部与内容中间的分隔部分 -->
<section class="content-header">
<h1>
<small>
{% block console_name %}
{% endblock %}
</small>
</h1>
<!-- 内容最上面的导航 -->
<ol class="breadcrumb">
{# <!-- {% include "nav_header.html" %} -->#}
{% block ol_a_link %}
{% endblock %}
</ol>
</section>
<!-- 2、content02:页面主要内容 -->
<section class="content">
{% block main_content %}
{% endblock %}
</section>
</div>
<!-- 第四部分:页面底部 -->
<footer class="main-footer">
<strong>Copyright © 2017-2018 <a href="#">公司名称-部门名称</a>.</strong>
</footer>
</div>
<!-- Bootstrap 3.3.5 -->
<script src="/static/AdminLTE/bootstrap/js/bootstrap.min.js"></script>
<!-- date-range-picker -->
<script src="/static/AdminLTE/plugins/moment/moment.min.js"></script>
<script src="/static/AdminLTE/plugins/daterangepicker/daterangepicker.js"></script>
<!-- bootstrap color picker -->
<script src="/static/AdminLTE/plugins/colorpicker/bootstrap-colorpicker.min.js"></script>
<!-- bootstrap time picker -->
<script src="/static/AdminLTE/plugins/timepicker/bootstrap-timepicker.min.js"></script>
<!-- SlimScroll 1.3.0 -->
<script src="/static/AdminLTE/plugins/slimScroll/jquery.slimscroll.min.js"></script>
<!-- iCheck 1.0.1 -->
<script src="/static/AdminLTE/plugins/iCheck/icheck.min.js"></script>
<!-- FastClick -->
<script src="/static/AdminLTE/plugins/fastclick/fastclick.js"></script>
<!-- AdminLTE App -->
<script src="/static/AdminLTE/dist/js/app.min.js"></script>
<script src="/static/bootstrap-datetimepicker/js/bootstrap-datetimepicker.min.js"></script>
<script src="/static/bootstrap-datetimepicker/js/locales/bootstrap-datetimepicker.zh-CN.js"></script>
<script src="/static/DataTables-1.10.12/media/js/jquery.dataTables.min.js"></script>
<script src="/static/DataTables-1.10.12/media/js/dataTables.bootstrap.min.js"></script>
<script src="/static/AdminLTE/plugins/select2/select2.full.min.js"></script>
{% block end_js %}
{% endblock %}
<script>
{% if request.path != '/' %}
$(function () {
var q = '{{ request.path }}';
var left_ui = q.split('/')[1];
//alert(left_ui);
try {
var test = document.getElementById(left_ui);
test.className += " active"
}
catch (err) {
}
});
{% endif %}
</script>
</body>
</html>
base.html
<!--左侧菜单-->

<section class="sidebar">

    <ul class="sidebar-menu">

        <li class="treeview" id="accounts">

            <a href="#">

                <i class="fa fa-user"></i>

                <span>用户中心</span>

                <i class="fa fa-angle-left pull-right"></i>

            </a>

            <ul class="treeview-menu">

                <li><a href="#"><i class="fa fa-circle-o"></i>个人信息</a></li>

            </ul>

        </li>

        <li class="treeview" id="workflow">

            <a href="#">

                <i class="fa fa-sticky-note"></i>

                <span>我的工单</span>

                <i class="fa fa-angle-left pull-right"></i>

            </a>

            <ul class="treeview-menu">

                <li>

                    <a href="#"><i class="fa fa-circle-o text-aqua"></i>新建工单</a>

                </li>

                <li>

                    <a href="#"><i class="fa fa-circle-o text-aqua"></i>审批中工单</a>

                </li>

                <li>

                    <a href="#"><i class="fa fa-circle-o text-aqua"></i>被退回工单</a>

                </li>

                <li>

                    <a href="#"><i class="fa fa-circle-o text-green"></i>完成工单</a>

                </li>

                <li>

                    <a href="#"><i class="fa fa-circle-o text-red"></i>待审批工单</a>

                </li>

                <li>

                    <a href="#"><i class="fa fa-circle-o text-yellow"></i>已审批工单</a>

                </li>

                <li>

                    <a href="#"><i class="fa fa-circle-o text-blue"></i>知悉工单</a>

                </li>

            </ul>

        </li>

        <li class="treeview" id="workordermanager">

            <a href="#">

                <i class="fa fa-suitcase"></i>

                <span>管理</span>

                <i class="fa fa-angle-left pull-right"></i>

            </a>

            <ul class="treeview-menu">

                <li><a href="#"><i class="fa fa-circle-o"></i>所有工单</a>

                </li>

                <li><a href="#"><i class="fa fa-circle-o"></i><span>部门管理</span></a>

                <li><a href="#"><i

                        class="fa fa-circle-o"></i><span>审批角色管理</span></a></li>

                <li><a href="#"><i

                        class="fa fa-circle-o"></i><span>审批人员管理</span></a></li>

                <li><a href="#"><i

                        class="fa fa-circle-o"></i><span>工单配置管理</span></a>

                <li><a href="#"><i class="fa fa-circle-o"></i>Token管理</a>

            </li>

            </ul>

        </li>

    </ul>

</section>

<!--左侧菜单-->
left_side.html 左侧菜单
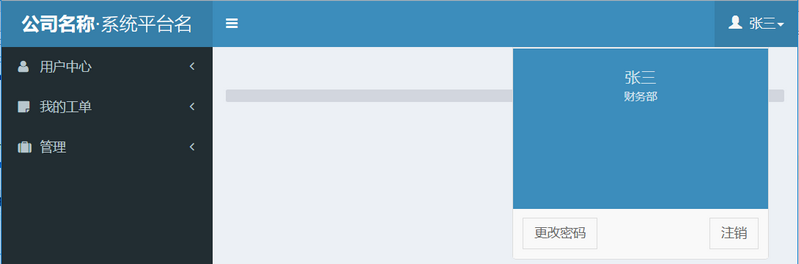
2、base.html 效果图
1.3 引入base.html完成 index.html页面
1、index.html页面
{% extends "base.html" %}

{% block title %}运维工单平台{% endblock %}

{% block console_name %}

    运维工单平台

{% endblock %}

{% block extra_js %}

{% endblock %}

{% block ol_a_link %}

{% endblock %}

{% block main_content %}

    <div class="row">

        <div class="col-lg-3 col-xs-3">

            <div class="small-box bg-aqua">

                <div class="inner" id="server_count">

                    <p>我的进行中工单</p>

                    <h3>110</h3>

                </div>

                <a href="#">详情</a>

                <div class="icon">

                    <i class="ion ion-gear-a"></i>

                </div>

            </div>

        </div>

        <div class="col-lg-3 col-xs-3">

            <div class="small-box bg-aqua">

                <div class="inner" id="server_count">

                    <p>我的所有工单</p>

                    <h3>44</h3>

                </div>

                <a href="#">详情</a>

                <div class="icon">

                    <i class="ion ion-gear-a"></i>

                </div>

            </div>

        </div>

        <div class="col-lg-3 col-xs-3">

            <div class="small-box bg-aqua">

                <div class="inner" id="user_count">

                    <p>待我审批工单</p>

                    <h3>33</h3>

                </div>

                <a href="#">详情</a>

                <div class="icon">

                    <i class="ion ion-person-stalker"></i>

                </div>

            </div>

        </div>

        <div class="col-lg-3 col-xs-3">

            <div class="small-box bg-aqua">

                <div class="inner" id="user_count">

                    <p>我已审批工单</p>

                    <h3>22</h3>

                </div>

                <a href="#">详情</a>

                <div class="icon">

                    <i class="ion ion-person-stalker"></i>

                </div>

            </div>

        </div>

        <div class="col-xs-12">

            <div class="box box-success">

                <div class="box-header with-border">

                    <h3 class="box-title">30日工单统计</h3>

                    <div class="box-tools pull-right">

                        <button type="button" class="btn btn-box-tool" data-widget="collapse"><i

                                class="fa fa-minus"></i>

                        </button>

                        <button type="button" class="btn btn-box-tool" data-widget="remove"><i class="fa fa-times"></i>

                        </button>

                    </div>

                </div>

                <div class="box-body">

                    <div class="chart">

                        <canvas id="myChart" style="height: 300px; width: 627px;"></canvas>

                    </div>

                </div>

            </div>

        </div>

    </div>

{% endblock %}

{% block end_js %}

    <script src="/static/AdminLTE/plugins/chartjs/Chart.js"></script>

    <script type="application/javascript">

        $(function () {

            var areaChartData = {

                labels:['1', '2', '3', '4', '5', '6', '7'],    // X轴显示内容,Y轴数据会根据数据线自动生成

                // datasets是一个列表,列表中每个字典都是一条数据线

                datasets: [

                    {

                        label: "申请",

                        //背景颜色

                        fillColor: 'rgba(' + (Math.floor(Math.random() * 256)) + ',' + (Math.floor(Math.random() * 256)) + ',' + (Math.floor(Math.random() * 256)) + ', 0.4' + ')',

                        //路径颜色

                        strokeColor: 'rgba(' + (Math.floor(Math.random() * 256)) + ',' + (Math.floor(Math.random() * 256)) + ',' + (Math.floor(Math.random() * 256)) + ', 0.4' + ')',

                        //数据点颜色

                        pointColor: 'rgba(' + (Math.floor(Math.random() * 256)) + ',' + (Math.floor(Math.random() * 256)) + ',' + (Math.floor(Math.random() * 256)) + ', 0.4' + ')',

                        {#                        fillColor: "rgba(210, 214, 222, 1)",#}

                        {#                        strokeColor: "rgba(210, 214, 222, 1)",#}

                        {#                        pointColor: "rgba(210, 214, 222, 1)",#}

                        {#                        pointStrokeColor: "#d1091b",#}

                        {#                        pointHighlightFill: "#0eff93",#}

                        {#                        pointHighlightStroke: "rgba(220,220,220,1)",#}

                        data: ['1', '53', '10', '15', '20', '25', '33'],

                    },

                    {

                        label: "审批",

                        //背景颜色

                        fillColor: 'rgba(' + (Math.floor(Math.random() * 256)) + ',' + (Math.floor(Math.random() * 256)) + ',' + (Math.floor(Math.random() * 256)) + ', 0.4' + ')',

                        //路径颜色

                        strokeColor: 'rgba(' + (Math.floor(Math.random() * 256)) + ',' + (Math.floor(Math.random() * 256)) + ',' + (Math.floor(Math.random() * 256)) + ', 0.4' + ')',

                        //数据点颜色

                        pointColor: 'rgba(' + (Math.floor(Math.random() * 256)) + ',' + (Math.floor(Math.random() * 256)) + ',' + (Math.floor(Math.random() * 256)) + ', 0.4' + ')',

                        {#                        fillColor: "rgba(210, 214, 222, 1)",#}

                        {#                        strokeColor: "rgba(210, 214, 222, 1)",#}

                        {#                        pointColor: "rgba(210, 214, 222, 1)",#}

                        {#                        pointStrokeColor: "#d16397",#}

                        {#                        pointHighlightFill: "#2d35ff",#}

                        {#                        pointHighlightStroke: "rgba(220,220,220,1)",#}

                        data: ['1', '4', '10', '17', '10', '15', '20'],

                    }

                ]

            };

            var areaChartOptions = {

                //Boolean - If we should show the scale at all

                showScale: true,

                //Boolean - Whether grid lines are shown across the chart

                scaleShowGridLines: false,

                //String - Colour of the grid lines

                scaleGridLineColor: "rgba(0,0,0,.05)",

                //Number - Width of the grid lines

                scaleGridLineWidth: 1,

                //Boolean - Whether to show horizontal lines (except X axis)

                scaleShowHorizontalLines: true,

                //Boolean - Whether to show vertical lines (except Y axis)

                scaleShowVerticalLines: true,

                //Boolean - Whether the line is curved between points

                bezierCurve: true,

                //Number - Tension of the bezier curve between points

                bezierCurveTension: 0.3,

                //Boolean - Whether to show a dot for each point

                pointDot: false,

                //Number - Radius of each point dot in pixels

                pointDotRadius: 4,

                //Number - Pixel width of point dot stroke

                pointDotStrokeWidth: 1,

                //Number - amount extra to add to the radius to cater for hit detection outside the drawn point

                pointHitDetectionRadius: 20,

                //Boolean - Whether to show a stroke for datasets

                datasetStroke: true,

                //Number - Pixel width of dataset stroke

                datasetStrokeWidth: 2,

                //Boolean - Whether to fill the dataset with a color

                datasetFill: true,

                //String - A legend template

                {#      legendTemplate: "<ul class=\"<%=name.toLowerCase()%>-legend\"><% for (var i=0; i<datasets.length; i++){%><li><span style=\"background-color:<%=datasets[i].lineColor%>\"></span><%if(datasets[i].label){%><%=datasets[i].label%><%}%></li><%}%></ul>",#}

                //Boolean - whether to maintain the starting aspect ratio or not when responsive, if set to false, will take up entire container

                maintainAspectRatio: true,

                //Boolean - whether to make the chart responsive to window resizing

                responsive: true,

                multiTooltipTemplate: "<%= datasetLabel %> : <%= value %>"

            };

            var ctx = document.getElementById("myChart").getContext("2d");

            var myLineChart = new Chart(ctx);

            var mychartoption = areaChartOptions;

            mychartoption.datasetFill = false;

            myLineChart.Line(areaChartData, mychartoption);

            {#            window.mychart = new Chart(ctx).Line(areaChartData, {#}

            {#                responsive : true,#}

            {#                animation: true,#}

            {#                barValueSpacing : 5,#}

            {#                barDatasetSpacing : 1,#}

            {#                tooltipFillColor: "rgba(0,0,0,0.8)",#}

            {#                multiTooltipTemplate: "<%= datasetLabel %> : <%= value %>"#}

            {#            });#}

            {#            var netifin = document.getElementById("myChart2").getContext("2d");#}

            {#            var linechart_netifin = new Chart(netifin);#}

            {#            var linechartoptions_netifin = areaChartOptions;#}

            {#            linechartoptions_netifin.datasetFill = false;#}

            {#            linechart_netifin.Line(areaChartData2, linechartoptions_netifin);#}

        })

    </script>

{% endblock %}
index.html
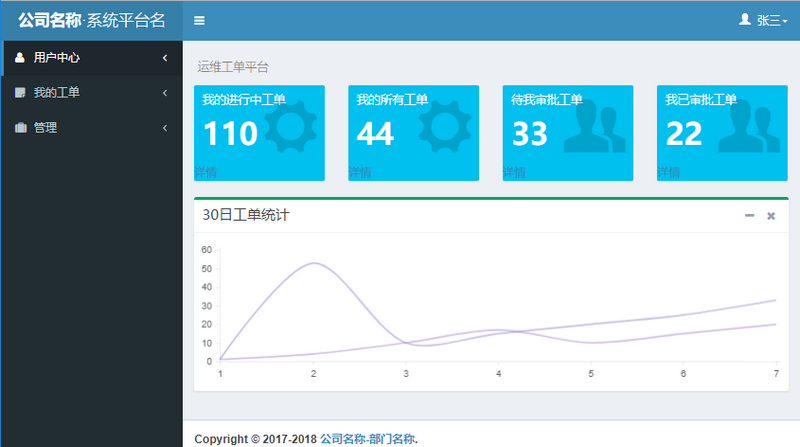
2、index.html效果图
1.4 常规表单
1、常规表单
{% extends "base.html" %}

{% block title %}运维工单平台{% endblock %}

{% block console_name %}

    运维工单平台

{% endblock %}

{% block extra_js %}

{% endblock %}

{% block ol_a_link %}

{% endblock %}

{% block main_content %}

    <div class="col-md-6">

          <!-- Horizontal Form -->

          <div class="box box-info">

            <div class="box-header with-border">

              <h3 class="box-title">Horizontal Form</h3>

            </div>

            <!-- /.box-header -->

            <!-- form start -->

            <form class="form-horizontal">

              <div class="box-body">

                <div class="form-group">

                  <label for="inputEmail3" class="col-sm-2 control-label">Email</label>

                  <div class="col-sm-10">

                    <input type="email" class="form-control" id="inputEmail3" placeholder="Email">

                  </div>

                </div>

                <div class="form-group">

                  <label for="inputPassword3" class="col-sm-2 control-label">Password</label>

                  <div class="col-sm-10">

                    <input type="password" class="form-control" id="inputPassword3" placeholder="Password">

                  </div>

                </div>

                <div class="form-group">

                  <div class="col-sm-offset-2 col-sm-10">

                    <div class="checkbox">

                      <label>

                        <input type="checkbox"> Remember me

                      </label>

                    </div>

                  </div>

                </div>

              </div>

              <!-- /.box-body -->

              <div class="box-footer">

                <button type="submit" class="btn btn-default">Cancel</button>

                <button type="submit" class="btn btn-info pull-right">Sign in</button>

              </div>

              <!-- /.box-footer -->

            </form>

          </div>

    </div>

{% endblock %}
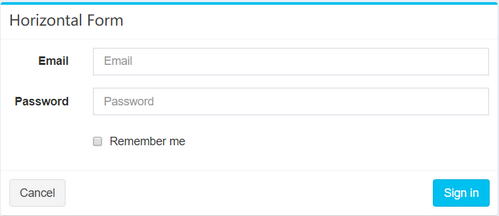
form.html
01:adminLTE2基本使用的更多相关文章
- 01.SQLServer性能优化之----强大的文件组----分盘存储
汇总篇:http://www.cnblogs.com/dunitian/p/4822808.html#tsql 文章内容皆自己的理解,如有不足之处欢迎指正~谢谢 前天有学弟问逆天:“逆天,有没有一种方 ...
- 用Kotlin创建第一个Android项目(KAD 01)
原文标题:Create your first Android project using Kotlin (KAD 01) 作者:Antonio Leiva 时间:Nov 21, 2016 原文链接:h ...
- Java企业实训 - 01 - Java前奏
前言: 虽然个人专攻.NET方向,不过由于个人是干教育行业的,方方面面的东西,不能说都必须精通,但肯定多少都会涉及到. 一个菜鸟学员,从啥都不会,经过一步步学习,最后到企业上手掌管一个模块甚至一个项目 ...
- Node.js 教程 01 - 简介、安装及配置
系列目录: Node.js 教程 01 - 简介.安装及配置 Node.js 教程 02 - 经典的Hello World Node.js 教程 03 - 创建HTTP服务器 Node.js 教程 0 ...
- 0042 MySQL学习笔记-入门--01
基本概念: 数据库DB(database): 数据的仓库,数据的集合,是数据的一种结构化的存储 数据库管理系统DBMS(database management system): 管理数据库的一套软件 ...
- Android快乐贪吃蛇游戏实战项目开发教程-01项目概述与目录
一.项目简介 贪吃蛇是一个很经典的游戏,也很适合用来学习.本教程将和大家一起做一个Android版的贪吃蛇游戏. 我已经将做好的案例上传到了应用宝,无病毒.无广告,大家可以放心下载下来把玩一下.应用宝 ...
- ArtifactTransferException: Failure to transfer org.apache.openejb:javaee-api:jar:5.0-1
最近在myeclipse上创建maven类型的web项目的时候,出现了一个错误. ArtifactTransferException: Failure to transfer org.apache.o ...
- Python学习--01入门
Python学习--01入门 Python是一种解释型.面向对象.动态数据类型的高级程序设计语言.和PHP一样,它是后端开发语言. 如果有C语言.PHP语言.JAVA语言等其中一种语言的基础,学习Py ...
- 异步编程系列第01章 Async异步编程简介
p { display: block; margin: 3px 0 0 0; } --> 2016.10.11补充 三个月过去了,回头来看,我不得不承认这是一系列失败的翻译.过段时间,我将重新翻 ...
随机推荐
- 使用socat查看ios日志
仅供记录自己查看 mac连接ios后进程ios shell apt-get socat安装 socat socat - UNIX-CONNECT:/var/run/lockdown/syslog.so ...
- sql注入学习笔记,什么是sql注入,如何预防sql注入,如何寻找sql注入漏洞,如何注入sql攻击 (原)
(整篇文章废话很多,但其实是为了新手能更好的了解这个sql注入是什么,需要学习的是文章最后关于如何预防sql注入) (整篇文章废话很多,但其实是为了新手能更好的了解这个sql注入是什么,需要学习的是文 ...
- efcore从数据库快速生成实体及context
有些项目开发时先建立数据库,再用codefirst来书写entity和EntityConfiguration,比较耗费功夫. 1.在vs2017中新建个asp.net core的web项目,或者其他项 ...
- idea创建java的web项目
2. 3. 4. 5. 6. 步骤八: 点击那个倒立的三角形,然后点击Edit Configurations; 步骤八: 步骤九:配置tocat服务器 步骤十:哎,发现,我怎么就只有一个选项呀,art ...
- 【转】LoadRunner压力测试:测试报告结果分析
见:https://blog.csdn.net/haoui123/article/details/62036723
- css selectors tips
from https://saucelabs.com/resources/articles/selenium-tips-css-selectorsSauce Labs uses cookies to ...
- 20155228 2016-2017-2 《Java程序设计》第5周学习总结
20155228 2016-2017-2 <Java程序设计>第5周学习总结 教材学习内容总结 异常处理 try-catch语法:JVM执行try区块中的代码,如果发生错误就会跳到catc ...
- plsql 代码自动补全
1.新建一个文件,命名不限定,文件内容为自动补全内容,比如: i=INSERTu=UPDATEs=SELECTf=FROMw=WHEREo=ORDER BYd=DELETEdf=DELETE FROM ...
- Python: 字典dict: 相同点
问题:怎么样在两个字典中找相同点 answer: eg1: 下面2个字典 a={'x':1,'y':2,'z':3}, b={'w':10,'x':11,'y':2}, 1)找相同点: a.ke ...
- Hive 修改表结构常用操作
添加列 add columns alter table table_name add columns (id int comment '主键ID' ) ; 默认在表所有字段之后,分区字段之前. 替换 ...