在 WPF 中集成 ASP.NET Core 和 WebView2 用于集成 SPA 应用
背景
我们有些工具在 Web 版中已经有了很好的实践,而在 WPF 中重新开发也是一种费时费力的操作,那么直接集成则是最省事省力的方法了。
修改项目文件
我们首先修改项目文件,让 WPF 项目可以包含 ASP.NET Core 的库,以及引用 WebView2 控件。
<Project Sdk="Microsoft.NET.Sdk">

  <PropertyGroup>

	<OutputType>WinExe</OutputType>

	<TargetFramework>net8.0-windows</TargetFramework>

	<Nullable>enable</Nullable>

	<ImplicitUsings>enable</ImplicitUsings>

	<UseWPF>true</UseWPF>

  </PropertyGroup>

  <ItemGroup>

    <!-- 这里插入 WebView2 的包,用于显示网页 -->

	<PackageReference Include="Microsoft.Web.WebView2" Version="1.0.2478.35" />

    <!-- 这里插入 ASP.NET Core 的框架引用,用于代理资源文件 -->

	<FrameworkReference Include="Microsoft.AspNetCore.App" />

  </ItemGroup>

  <ItemGroup>

    <!-- 这里模仿 ASP.NET Core,将 SPA 资源文件存于 wwwroot 文件夹下 -->

	<None Update="wwwroot\**">

	  <CopyToOutputDirectory>Always</CopyToOutputDirectory>

	</None>

  </ItemGroup>

</Project>
修改 App.xaml 和 App.xaml.cs 以使用 ASP.NET Core 的 WebApplication.CreateBuilder()
这里为了全局使用依赖注入,我们将 WebApplication.CreateBuilder() 放在 App.xaml.cs 中全局使用。为了使用依赖注入应注释掉默认启动窗口,并接管 Startup 事件。
<Application x:Class="WpfAircraftViewer.App"

             xmlns="http://schemas.microsoft.com/winfx/2006/xaml/presentation"

             xmlns:x="http://schemas.microsoft.com/winfx/2006/xaml"

             xmlns:local="clr-namespace:WpfAircraftViewer"

             Startup="ApplicationStartup">

    <!-- 这里将 StartupUri 属性删除,然后注册 Startup 事件 -->

    <Application.Resources>

    </Application.Resources>

</Application>
然后通过修改 Startup 事件的代码来实现相应的加载动作。
using Microsoft.AspNetCore.Builder;

using Microsoft.AspNetCore.StaticFiles;

using Microsoft.Extensions.DependencyInjection;

using System.Windows;

namespace WpfAircraftViewer

{

    /// <summary>

    /// Interaction logic for App.xaml

    /// </summary>

    public partial class App : Application, IAsyncDisposable

    {

        public WebApplication? WebApplication { get; private set; }

        public async ValueTask DisposeAsync()

        {

            if (WebApplication is not null)

            {

                await WebApplication.DisposeAsync();

            }

            GC.SuppressFinalize(this);

        }

        private async void ApplicationStartup(object sender, StartupEventArgs e)

        {

            // 这里是创建 ASP.NET 版通用主机的代码

            var builder = WebApplication.CreateBuilder(Environment.GetCommandLineArgs());

            // 注册主窗口和其他服务

            builder.Services.AddSingleton<MainWindow>();

            builder.Services.AddSingleton(this);

            var app = builder.Build();

            // 这里是文件类型映射,如果你的静态文件在浏览器中加载报 404,那么需要在这里注册,这里我加载一个 3D 场景文件的类型

            var contentTypeProvider = new FileExtensionContentTypeProvider();

            contentTypeProvider.Mappings[".glb"] = "model/gltf-binary";

            app.UseStaticFiles(new StaticFileOptions

            {

                ContentTypeProvider = contentTypeProvider,

            });

            // 你如果使用了 Vue Router 或者其他前端路由了,需要在这里添加这句话让路由返回前端,而不是 ASP.NET Core 处理

            app.MapFallbackToFile("/index.html");

            WebApplication = app;

            // 处理退出事件,退出 App 时关闭 ASP.NET Core

            Exit += async (s, e) => await WebApplication.StopAsync();

            // 显示主窗口

            MainWindow = app.Services.GetRequiredService<MainWindow>();

            MainWindow.Show();

            await app.RunAsync().ConfigureAwait(false);

        }

    }

}
此时,我们已经可以正常开启一个默认界面的 MainWindow 了。
使用 WebView2 控件
这时我们就可以先将 SPA 文件从 npm 项目的 dist 复制到 wwwroot 了,在编辑 MainWindow 加入 WebView2 控件后就可以查看了。
<Window x:Class="WpfAircraftViewer.MainWindow"

        xmlns="http://schemas.microsoft.com/winfx/2006/xaml/presentation"

        xmlns:x="http://schemas.microsoft.com/winfx/2006/xaml"

        xmlns:d="http://schemas.microsoft.com/expression/blend/2008"

        xmlns:mc="http://schemas.openxmlformats.org/markup-compatibility/2006"

        xmlns:local="clr-namespace:WpfAircraftViewer"

        xmlns:wv2="clr-namespace:Microsoft.Web.WebView2.Wpf;assembly=Microsoft.Web.WebView2.Wpf"

        mc:Ignorable="d" MinHeight="450" MinWidth="800" SnapsToDevicePixels="True">

        <!-- 在上面加入 xmlns:wv2 属性用于引用 WebView2 控件 -->

    <Grid>

        <!-- 这里插入 WebView2 控件,我们默认可以让 Source 是 http://localhost:5000,这是 ASP.NET Core 的默认监听地址 -->

        <wv2:WebView2 Name="webView"

                  Source="{Binding SourceUrl, FallbackValue='http://localhost:5000'}" AllowDrop="True" SnapsToDevicePixels="True"/>

    </Grid>

</Window>
我们可以继续编辑窗口的信息,让他可以关联 ASP.NET Core 的监听地址。
using Microsoft.AspNetCore.Hosting.Server;

using Microsoft.AspNetCore.Hosting.Server.Features;

using System.Windows;

namespace WpfAircraftViewer

{

    /// <summary>

    /// Interaction logic for MainWindow.xaml

    /// </summary>

    public partial class MainWindow : Window

    {

        public string SourceUrl { get; set; }

        public MainWindow(IServer server)

        {

            InitializeComponent();

            // 这里通过注入的 IServer 对象来获取监听的 Url

            var addresses = server.Features.Get<IServerAddressesFeature>()?.Addresses;

            SourceUrl = addresses is not null ? (addresses.FirstOrDefault() ?? "http://localhost:5000") : "http://localhost:5000";

            // 无 VM,用自身当 VM

            DataContext = this;

        }

    }

}
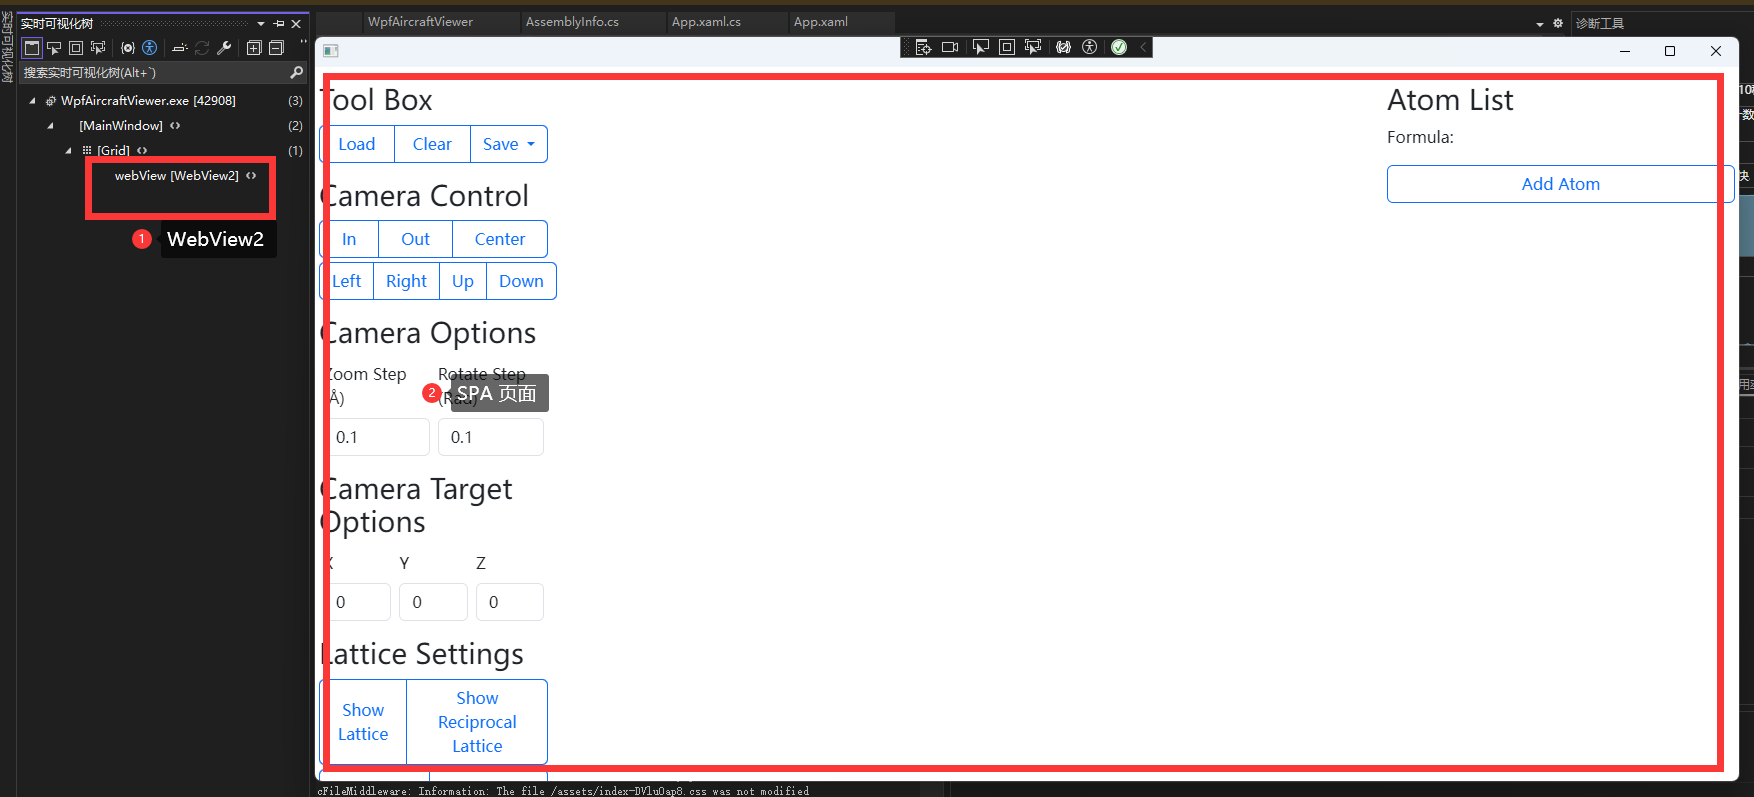
这时我们就可以看到窗口打开了我们的 SPA 页面了。
在 WPF 中集成 ASP.NET Core 和 WebView2 用于集成 SPA 应用的更多相关文章
- 【译】.NET 7 预览版 1 中的 ASP.NET Core 更新
原文 | Daniel Roth 翻译 | 郑子铭 .NET 7 预览版 1 现已推出!这是 .NET 下一个主要版本的第一个预览版,其中将包括使用 ASP.NET Core 进行 Web 开发的下一 ...
- 在Visual Studio 2017中使用Asp.Net Core构建Angular4应用程序
前言 Visual Studio 2017已经发布了很久了.做为集成了Asp.Net Core 1.1的地表最强IDE工具,越来越受.NET系的开发人员追捧. 随着Google Angular4的发布 ...
- 【Asp.Net Core】在Visual Studio 2017中使用Asp.Net Core构建Angular4应用程序
前言 Visual Studio 2017已经发布了很久了.做为集成了Asp.Net Core 1.1的地表最强IDE工具,越来越受.NET系的开发人员追捧. 随着Google Angular4的发布 ...
- 5. abp集成asp.net core
一.前言 参照前篇<4. abp中的asp.net core模块剖析>,首先放张图,这也是asp.net core框架上MVC模块的扩展点 二.abp的mvc对象 AbpAspNetCor ...
- 从零搭建一个IdentityServer——集成Asp.net core Identity
前面的文章使用Asp.net core 5.0以及IdentityServer4搭建了一个基础的验证服务器,并实现了基于客户端证书的Oauth2.0授权流程,以及通过access token访问被保护 ...
- 在docker中运行ASP.NET Core Web API应用程序
本文是一篇指导快速演练的文章,将介绍在docker中运行一个ASP.NET Core Web API应用程序的基本步骤,在介绍的过程中,也会对docker的使用进行一些简单的描述.对于.NET Cor ...
- 在Linux和Windows的Docker容器中运行ASP.NET Core
(此文章同时发表在本人微信公众号"dotNET每日精华文章",欢迎右边二维码来关注.) 译者序:其实过去这周我都在研究这方面的内容,结果周末有事没有来得及总结为文章,Scott H ...
- 丙申年把真假美猴王囚禁在容器中跑 ASP.NET Core 1.0
var appInsights=window.appInsights||function(config){ function r(config){t[config]=function(){var i= ...
- Docker容器中运行ASP.NET Core
在Linux和Windows的Docker容器中运行ASP.NET Core 译者序:其实过去这周我都在研究这方面的内容,结果周末有事没有来得及总结为文章,Scott Hanselman就捷足先登了. ...
- docker中运行ASP.NET Core Web API
在docker中运行ASP.NET Core Web API应用程序 本文是一篇指导快速演练的文章,将介绍在docker中运行一个ASP.NET Core Web API应用程序的基本步骤,在介绍的过 ...
随机推荐
- 论文阅读:A new approach solve the multi-product multi-period inventory lot sizing with supplier selection problem
论文:A new approach solve the multi-product multi-period inventory lot sizing with supplier selection ...
- k8s之helm部署mysql集群
一.简介 Helm Helm 是 Kubernetes 的包管理器. Chart Helm使用的包格式称为 chart.chart存储在Chart Repository. chart就是一个描述Kub ...
- BZOJ 4403序列统计
假设存在一个满足条件的长度为i的不下降序列(显然是一定存在的)那么只需要从中选出i个数即可 (不必在意选出具体数的大小,可以把满足条件的序列写下来,选几个数感受一下). 但是$n \choose m ...
- 将项目封装进docker进行迁移和使用
首先要理解docker的基本使用,本文不做过多阐述,博主也对docker没有了解透彻. 这里列一下docker的基本命令: docker info # 查看docker信息 docker -v # 查 ...
- 接口文档神器apidoc
1.apidoc介绍 1.apidoc是什么? api文档生成工具:基于源代码备注创建的接口文档: 2.apidoc优势是啥? 超简单文档生成器:几乎支持目前主流的所有风格的注释, 如可在C#.Go. ...
- 《C# in depth》第6章C#6.0中的更改(十四)——表达式体
表达式体成员是一种在C# 6及以上版本中引入的语法.它允许开发人员使用Lambda表达式来简化方法或属性的定义. 在使用表达式体成员时,可以将方法或属性的实现写在一个Lambda表达式中,然后直接返回 ...
- kubernetes集群最新版安装
原文地址:https://haiyux.cc/2022/09/21/k8s-install/ 虚拟机准备 我这里准备了三台虚拟机,分别部署一个master和两个node,操作系统位ubuntu 20. ...
- js判断元素内文字是否超出元素宽度,溢出隐藏
<!DOCTYPE html> <html lang="en"> <head> <meta charset="UTF-8&quo ...
- dbeaver导出结果集中乱码
重要的一步 需要点击
- Sample HL7 ADT Messages
Here are a few sample ADT messages for testing that I've picked up over time. I may edit this post l ...