
lnmp平台搭设
软件链接:https://pan.baidu.com/s/14gAZ67iXWhEdzvEXMiGfVg 提取码:ai1s
只是在一台服务器上搭设,为centos7.2环境
安装步骤:
安装编译工具及库文件
# yum -y install make apr* autoconf automake curl-devel gcc gcc-c++  openssl openssl-devel gd kernel keyutils
patch perl kernel-headers compat* mpfr cpp glibc libgomp libstdc++-devel keyutils-libs-devel libcom_err-devel
libsepol-devel libselinux-devel krb5-devel zlib-devel libXpm* freetype libjpeg* libpng*  libtool* libxml2
libxml2-devel patch libcurl-devel bzip2-devel freetype-devel
因为centos7.2默认安装了mariadb-libs,所以先要卸载掉
#rpm -qa | grep mariadb
rpm -e --nodeps mariadb-libs
注: 相关依赖包的作用
cmake:由于从MySQL5.5版本开始弃用了常规的configure编译方法,所以需要CMake编译器,用于设置mysql的编译参数。如:安装目录、数据存放目录、字符编码、排序规则等。
Boost #从MySQL 5.7.5开始Boost库是必需的,mysql源码中用到了C++的Boost库,要求必须安装boost1.59.0或以上版本
GCC是Linux下的C语言编译工具,mysql源码编译完全由C和C++编写,要求必须安装GCC
bison:Linux下C/C++语法分析器
ncurses:字符终端处理库
# tar -xvf cmake-3.5.2.tar.gz
# cd cmake-3.5.2/
# ./bootstrap && gmake && gmake install
注意:cmake –version ---查看cmake版本
对ncurses-5.9.tar.gz包的操作
# tar -xvf ncurses-5.9.tar.gz
# cd ncurses-5.9/
# ./configure && make && make install
对bison-3.0.4.tar.gz包的操作
# tar -xvf bison-3.0.4.tar.gz
# cd bison-3.0.4/
# ./configure && make && make install
对boost_1_59_0.tar.gz的操作
# tar -xvf boost_1_59_0.tar.gz
# mv boost_1_59_0 /usr/local/boost
创建mysql用户和用户组及目录
# groupadd -r mysql && useradd -r -g mysql -s /bin/false -M mysql
创建mysql安装目录
#mkdir /usr/local/mysql        ---创建目录
#mkdir /usr/local/mysql/data    ---数据库目录
编译安装mysql
# tar -xvf mysql-5.7.14.tar.gz
# cd mysql-5.7.14/
# cmake -DCMAKE_INSTALL_PREFIX=/usr/local/mysql  [MySQL安装的根目录]
-DMYSQL_DATADIR=/usr/local/mysql /data   [MySQL数据库文件存放目录]
-DSYSCONFDIR=/etc  [MySQL配置文件所在目录]
-DWITH_MYISAM_STORAGE_ENGINE=1  [添加MYISAM引擎支持]
-DWITH_INNOBASE_STORAGE_ENGINE=1 [添加InnoDB引擎支持]
-DWITH_ARCHIVE_STORAGE_ENGINE=1   [添加ARCHIVE引擎支持]
-DMYSQL_UNIX_ADDR=/usr/local/mysql/mysql.sock  [指定mysql.sock位置]
-DWITH_PARTITION_STORAGE_ENGINE=1   [安装支持数据库分区]
-DEXTRA_CHARSETS=all   [使MySQL支持所有的扩展字符]
-DDEFAULT_CHARSET=utf8   [设置MySQL的默认字符集为utf8]
-DDEFAULT_COLLATION=utf8_general_ci   [设置默认字符集校对规则]
-DWITH-SYSTEMD=1  [可以使用systemd控制mysql服务]
-DWITH_BOOST=/usr/local/boost   [指向boost库所在目录]
注2:为了加快编译速度可以按下面的方式编译安装
# make -j $(grep processor /proc/cpuinfo | wc –l) && make install
-j参数表示根据CPU核数指定编译时的线程数,可以加快编译速度。默认为1个线程编译。
注3:若要重新运行cmake配置,需要删除CMakeCache.txt文件,如果服务器硬件不行,只能使用 make && make install 去编译,我测试过,服务器会报make内部错误,其实就是资源不够用了,这里切记
# make clean
# rm -rf CMakeCache.txt
优化Mysql的执行路径
# vim /etc/profile
export PATH=$PATH:/usr/local/mysql/bin
# source /etc/profile
设置权限并初始化MySQL系统授权表
# cd /usr/local/mysql
# chown -R mysql:mysql .
# bin/mysqld --initialize--user=mysql --basedir=/usr/local/mysql --datadir=/usr/local/mysql/data
注1:以root初始化操作时要加--user=mysql参数,生成一个随机密码(注意保存登录时用)
注2:MySQL 5.7.6之前的版本执行这个脚本初始化系统数据库
# /usr/local/mysql/bin/mysql_install_db --user=mysql --basedir=/usr/local/mysql --datadir=/usr/local/mysql/data
# 5.7.6之后版本初始系统数据库脚本(本文使用此方式初始化)
# /usr/local/mysql/bin/mysqld --initialize --user=mysql --basedir=/usr/local/mysql --datadir=/usr/local/mysql/data
但是很少一次就能完成的,这是我在初始化时出现的错误,大家可以参考下
# /usr/local/mysql/bin/mysqld --initialize --user=mysql --basedir=/usr/local/mysql --datadir=/usr/local/mysql/data
2018-04-26T08:18:26.037908Z 0 [Warning] TIMESTAMP with implicit DEFAULT value is deprecated. Please use --explicit_defaults_for_timestamp server option (see documentation for more details).
2018-04-26T08:18:26.039282Z 0 [ERROR] --initialize specified but the data directory has files in it. Aborting.
2018-04-26T08:18:26.039315Z 0 [ERROR] Aborting

[root@localhost mysql]# bin/mysqld --initialize --user=mysql --basedir=/usr/local/mysql --datadir=/usr/local/mysql/data
2018-04-26T08:19:26.814450Z 0 [Warning] TIMESTAMP with implicit DEFAULT value is deprecated. Please use --explicit_defaults_for_timestamp server option (see documentation for more details).
2018-04-26T08:19:26.816048Z 0 [ERROR] --initialize specified but the data directory has files in it. Aborting.
2018-04-26T08:19:26.816082Z 0 [ERROR] Aborting
我上完查了一下,说是/初始化data目录下有数据文件被终止,于是我就把文件/data/下面的文件移动到了别处,再次初始化的
# mv ./* /data/
# bin/mysqld --initialize --user=mysql --basedir=/usr/local/mysql --datadir=/usr/local/mysql/data
2018-04-26T08:20:48.352191Z 0 [Warning] TIMESTAMP with implicit DEFAULT value is deprecated. Please use --explicit_defaults_for_timestamp server option (see documentation for more details).
2018-04-26T08:20:48.633613Z 0 [Warning] InnoDB: New log files created, LSN=45790
2018-04-26T08:20:48.674899Z 0 [Warning] InnoDB: Creating foreign key constraint system tables.
2018-04-26T08:20:48.746230Z 0 [Warning] No existing UUID has been found, so we assume that this is the first time that this server has been started. Generating a new UUID: b9ae4c35-492a-11e8-9783-000c29b38466.
2018-04-26T08:20:48.748467Z 0 [Warning] Gtid table is not ready to be used. Table 'mysql.gtid_executed' cannot be opened.
2018-04-26T08:20:48.750974Z 1 [Note] A temporary password is generated for root@localhost: mZxo(zeof8Z.
注意:如果使用–initialize参数初始化系统数据库之后,会生成root用户的一个临时密码“mZxo(zeof8Z".
修改文件中配置选项,如下所示,添加如下配置项.
# cp support-files/my-default.cnf /etc/my.cnf
# vim /etc/my.cnf
 basedir = /usr/local/mysql
 datadir = /usr/local/mysql/data
 port = 3306
 server_id = 1
 socket = /usr/local/mysql/mysql.sock
 log-error=/usr/local/mysql/data/mysqld.err
配置mysql自动启动
# cp /usr/local/mysql/support-files/mysql.server  /etc/init.d/mysqld
# chkconfig mysqld on
# systemctl start mysqld
启动数据库
[root@localhost share]# mysql -uroot -p
Enter password:
Welcome to the MySQL monitor.  Commands end with ; or \g.
Your MySQL connection id is 5
Server version: 5.7.14

Copyright (c) 2000, 2016, Oracle and/or its affiliates. All rights reserved.

Oracle is a registered trademark of Oracle Corporation and/or its
affiliates. Other names may be trademarks of their respective
owners.

Type 'help;' or '\h' for help. Type '\c' to clear the current input statement.

mysql>
退出重新设置密码
#  mysqladmin  -uroot -p password '123456'
Enter password: 此处输入原来的密码
mysqladmin: [Warning] Using a password on the command line interface can be insecure.
Warning: Since password will be sent to server in plain text, use ssl connection to ensure password safety.
安装nginx
解压zlib和pcre,不需要编译
# tar -xvf zlib-1.2.8.tar.gz
# tar -xvf pcre-8.39.tar.gz
创建用户www,作为启用服务时的程序用户
# groupadd www
# useradd -g www www -s /sbin/nologin
解压源码包,编译安装,并启动
# tar -xvf nginx-1.10.2.tar.gz
# cd nginx-1.10.2/
# ./configure --prefix=/usr/local/nginx1.10 --with-http_dav_module --with-http_stub_status_module
--with-http_addition_module --with-http_sub_module  --with-http_flv_module --with-http_mp4_module
--with-pcre=/data/src/pcre-8.39 --with-zlib=/data/src/zlib-1.2.8 --with-http_ssl_module
--with-http_gzip_static_module --user=www --group=www
# make && make install
# ln -s /usr/local/nginx1.10/sbin/nginx  /usr/local/sbin/
# nginx
# ps -ef |grep nginx
root      73290      1  0 17:25 ?        00:00:00 nginx: master process nginx
www       73291  73290  0 17:25 ?        00:00:00 nginx: worker process
root      73293   2142  0 17:25 pts/1    00:00:00 grep --color=auto nginx
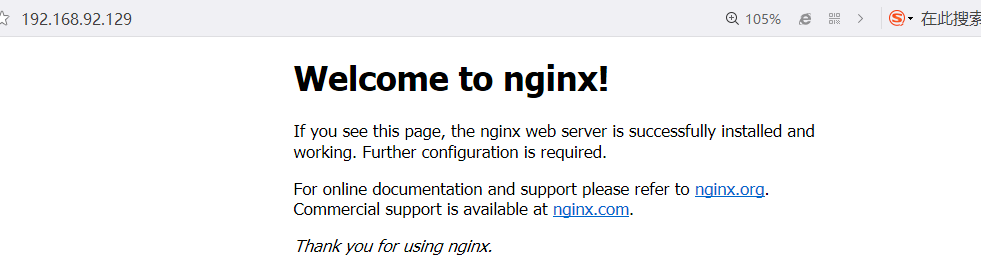
本地测试即可,也可在浏览器上测试,不过要关闭防火墙或者放行80端口。
# curl localhost
<!DOCTYPE html>
<html>
<head>
<title>Welcome to nginx!</title>
<style>
    body {
        width: 35em;
        margin: 0 auto;
        font-family: Tahoma, Verdana, Arial, sans-serif;
    }
</style>
</head>
<body>
<h1>Welcome to nginx!</h1>
<p>If you see this page, the nginx web server is successfully installed and
working. Further configuration is required.</p>

<p>For online documentation and support please refer to
<a href="http://nginx.org/">nginx.org</a>.<br/>
Commercial support is available at
<a href="http://nginx.com/">nginx.com</a>.</p>

<p><em>Thank you for using nginx.</em></p>
</body>
</html>
浏览器上访问
安装php
# tar -xvf libmcrypt-2.5.7.tar.gz
# cd libmcrypt-2.5.7/
# ./configure && make && make install
创建链接库文件
# ln -s /usr/local/mysql/lib/libmysqlclient.so.20.3.1 /usr/local/mysql/lib/libmysqlclient_r.so
安装php模块
# tar -xvf php-5.6.27.tar.gz
# cd php-5.6.27/
# ./configure --prefix=/usr/local/php5.6 --with-config-file-path=/etc  --with-mysql=/usr/local/mysql
--with-mysqli=/usr/local/mysql/bin/mysql_config --with-mysql-sock=/usr/local/mysql/mysql.sock
--with-gd --with-iconv --with-libxml-dir=/usr --with-mhash --with-mcrypt
--with-config-file-scan-dir=/etc/php.d --with-bz2 --with-zlib --with-freetype-dir --with-png-dir
--with-jpeg-dir --enable-xml --enable-bcmath --enable-shmop --enable-sysvsem --enable-inline-optimization
 --enable-mbregex --enable-fpm --enable-mbstring --enable-ftp --enable-gd-native-ttf --with-openssl
--enable-pcntl --enable-sockets --with-xmlrpc --enable-zip --enable-soap --without-pear --with-gettext
--enable-session --with-mcrypt --with-curl
# make&& make install
# cp php.ini-production /etc/php.ini
编辑配置文件/etc/php.ini ,修改后的内容如下:
date.timezone = PRC  //设置时区
expose_php = Off  //禁止显示php版本的信息
short_open_tag = On  //支持php短标签
post_max_size = 16M    //上传文件大小
max_execution_time = 300  //php脚本最大执行时间
max_input_time = 300  //以秒为单位对通过POST、GET以及PUT方式接收数据时间进行限制
always_populate_raw_post_data = -1
mbstring.func_overload = 0
创建php-fpm服务启动脚本:
# cp sapi/fpm/init.d.php-fpm /etc/init.d/php-fpm
# chmod +x /etc/init.d/php-fpm
# chkconfig --add php-fpm
# chkconfig php-fpm on
提供php-fpm配置文件并编辑:
# cp /usr/local/php5.6/etc/php-fpm.conf.default  /usr/local/php5.6/etc/php-fpm.conf
# vim /usr/local/php5.6/etc/php-fpm.conf
pid = run/php-fpm.pid
user = www
group = www
listen = 127.0.0.1:9000
pm.max_children = 300
pm.start_servers = 10
pm.min_spare_servers = 10
pm.max_spare_servers = 10
启动php-fpm服务
# systemctl start php-fpm
# ps -ef |grep php-fpm
root      84346      1  0 18:16 ?        00:00:00 php-fpm: master process (/usr/local/php5.6/etc/php-fpm.conf)
www       84347  84346  0 18:16 ?        00:00:00 php-fpm: pool www
www       84348  84346  0 18:16 ?        00:00:00 php-fpm: pool www
www       84349  84346  0 18:16 ?        00:00:00 php-fpm: pool www
www       84350  84346  0 18:16 ?        00:00:00 php-fpm: pool www
www       84351  84346  0 18:16 ?        00:00:00 php-fpm: pool www
www       84352  84346  0 18:16 ?        00:00:00 php-fpm: pool www
www       84353  84346  0 18:16 ?        00:00:00 php-fpm: pool www
www       84354  84346  0 18:16 ?        00:00:00 php-fpm: pool www
www       84355  84346  0 18:16 ?        00:00:00 php-fpm: pool www
www       84356  84346  0 18:16 ?        00:00:00 php-fpm: pool www
root      84358   2048  0 18:16 pts/0    00:00:00 grep --color=auto php-fpm
配置nginx支持php
# vim  /usr/local/nginx1.10/conf/nginx.conf

user  www;
worker_processes  4;

#error_log  logs/error.log;
#error_log  logs/error.log  notice;
#error_log  logs/error.log  info;

#pid        logs/nginx.pid;
events {
    worker_connections  1024;
}
http {
    include       mime.types;
    default_type  application/octet-stream;

    #log_format  main  '$remote_addr - $remote_user [$time_local] "$request" '
    #                  '$status $body_bytes_sent "$http_referer" '
    #                  '"$http_user_agent" "$http_x_forwarded_for"';

    #access_log  logs/access.log  main;
    sendfile        on;
    #tcp_nopush     on;

    #keepalive_timeout  0;
    keepalive_timeout  65;
    #gzip  on;
    server {
        listen       80;
        server_name  localhost;

        charset utf-8;

        #access_log  logs/host.access.log  main;

        location / {
            root   html;
            index  index.php index.html index.htm;
        }

        location ~ \.php$ {
        root html;
                          fastcgi_pass 127.0.0.1:9000;
                          fastcgi_index index.php;
                  fastcgi_index index.php;
        include fastcgi.conf;
                }

        #error_page  404              /404.html;

        # redirect server error pages to the static page /50x.html
        #
        error_page   500 502 503 504  /50x.html;
        location = /50x.html {
            root   html;
        }
        location /status {
        stub_status on;
        }
    }
检测nginx是否有语法错误
 # nginx -t
       nginx: the configuration file /usr/local/nginx1.10/conf/nginx.conf syntax is ok
       nginx: configuration file /usr/local/nginx1.10/conf/nginx.conf test is successful
重启nginx
# killall -s HUP nginx
测试LNMP
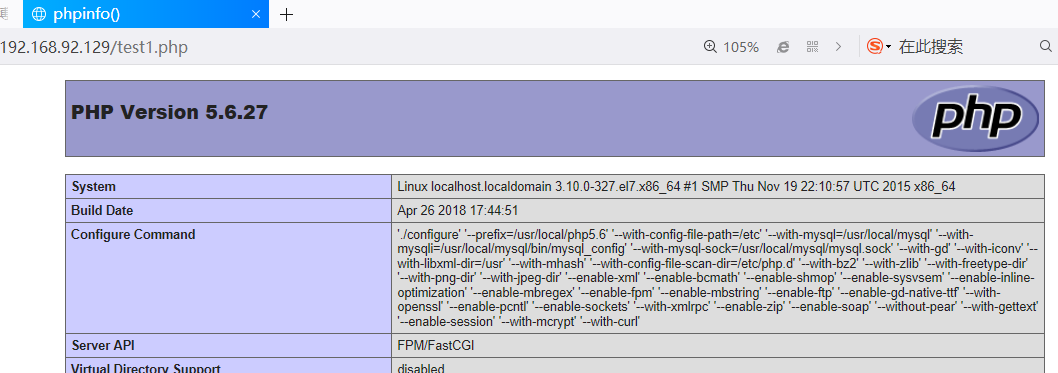
进入nginx默认的网页根目录,创建.php的测试页
# vim /usr/local/nginx1.10/html/test1.php
<?php
phpinfo()
?>
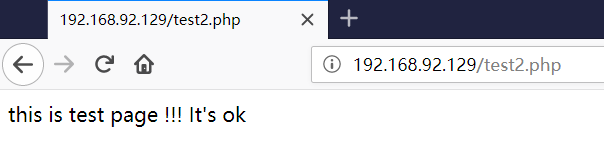
# vim /usr/local/nginx1.10/html/test2.php
<?php
$link=mysql_connect('localhost','root','123456');
if($link) echo "this is test page !!! It's ok";
mysql_close();
?>
访问结果
总结, 不难,要心细。那么现在lnmp环境现在结束了!!!
lnmp平台搭设的更多相关文章
- LNMP平台搭建---PHP安装篇
在前面三篇中,我们安装了Linux系统.Web服务器Nginx.MySQL数据库服务器,这篇就来将搭建动态网站的最后一步:PHP安装. Nginx服务器只能响应静态资源请求,对于动态资源请求就不行了, ...
- LNMP平台搭建---MySQL安装篇
在前两篇中,安装了一个基本的Web服务器,但是只能提供静态网页查看,要做成动态网站,就必须要数据库或其他编程语言支持了,这里先介绍MySQL数据库的安装. MySQL是一个开源的数据库,在互联网行业应 ...
- lnmp平台菜鸟入门级笔记
LNMP平台搭建 Mysql安装 MySQL安装 回复收藏 分享 1 下载MySQL数据库l到/usr/local/src/[root@xin tmp]# cd ...
- LNMP平台搭建---Nginx安装篇
在上一篇博文<LNMP平台搭建---Linux系统安装篇>中,我们安装了CentOS版本的Linux操作系统,现在,我们来安装一个Web服务器,大标题写着LNMP,其中的N就是Nginx, ...
- LNMP平台搭建---Linux系统安装篇
在互联网网站开发领域,有一个名词,大家一定不陌生,那就是LAMP,经典的Web服务器环境,由Linux+Apache+MySQL+PHP组成,,后来,一个名叫Nginx的Web服务器开源出来了,因其更 ...
- 源码搭建lnmp平台
lnmp平台是指利用linux操作系统,nginx服务器,mysql数据库和php语言搭建高性能web服务器,负载均衡器和邮件代理服务器. 原理图:‘
- docker:Dockerfile构建LNMP平台
docker:Dockerfile构建LNMP平台 1.dockerfile介绍 Dockerfile是Docker用来构建镜像的文本文件,包含自定义的指令和格式.可以通过docker buil ...
- Puppet基于Master/Agent模式实现LNMP平台部署
前言 随着IT行业的迅猛发展,传统的运维方式靠大量人力比较吃力,运维人员面对日益增长的服务器和运维工作,不得不把很多重复的.繁琐的工作利用自动化处理.前期我们介绍了运维自动化工具ansible的简单应 ...
- 脚本_部署LNMP平台
#!bin/bash#功能:部署LNMP平台,实际运行脚本时,需要去除备注.#作者:liusingbonfunction menu { //定义函数menu ...
随机推荐
- MVC 开发模式
1.M:Model 模型:实体类和业务和dao 2.V:view 视图:JSP 3.C:Controller 控制器:servlet 3.1 作用:视图和逻辑分离 4.MVC适用场景:大型项目开 ...
- 牛客训练六:海啸(二维树状数组+vector函数的使用)
题目链接:传送门 思路: 二维树状数组, vector(first,last)函数中assign函数相当于将first中的函数清空,然后将last中的值赋值给first. 参考文章:传送门 #incl ...
- 微信小程序toast框的使用
1.wx.showToast() 方法可以配置toast框的提示文字,消失的时间,显示的图标 wx.showToast({ title: '请链接网络', icon:"none", ...
- Win7 VS2017简单编译FFMPEG播放器FFPlay
Win平台简单编译FFPlay播放器,顺便纪念下雷霄骅,一年前刚学FFMPEG时还看过他的博客,昨晚再次搜FFMPEG文章时才知道人已经走了... 做成了视频放到B站 https://www.bili ...
- High-radix routers
The idea is to reduce H (hops), by adding explicit links between physically distant routers, thus re ...
- js判断软键盘是否开启弹出
移动端关于页面布局,如果底部有position:fixed的盒子,又有input,当软键盘弹出收起都会影响页面布局.这时候Android可以监听resize事件,代码如下,而ios没有相关事件. va ...
- python基础之列表list元组tuple
作者:tongqingliu 转载请注明出处:http://www.cnblogs.com/liutongqing/p/7041763.html python基础之列表list元组tuple 列表li ...
- uva12298(生成函数)
生成函数的一般应用: #include<iostream> #include<cstring> #include<cmath> #include<cstdio ...
- Leetcode--680. Valid Palindrome II(easy)
Given a non-empty string s, you may delete at most one character. Judge whether you can make it a pa ...
- SRM483
250pt 题意:给定一个[0,1)间的实数,一个分母不超过maxDen的分数逼近.. 思路:直接枚举.然后判断. code: #line 7 "BestApproximationDiv1. ...