
CentOS6.4 配置Tengine
1、安装Nginx所需的pcre-devel库
yum install -y gcc gcc-c++

wget ftp://ftp.csx.cam.ac.uk/pub/software/programming/pcre/pcre-8.33.tar.gz

tar zxvf pcre-8.33.tar.gz

cd pcre-8.33
./configure --prefix=/usr/local/pcre

make
make install
2、安装Tengine
yum install openssl openssl-devel

wget http://tengine.taobao.org/download/tengine-1.5.1.tar.gz

tar zxvf tengine-1.5..tar.gz

cd tengine-1.5.

./configure --prefix=/usr/local/nginx --with-http_stub_status_module --with-pcre=/usr/local/pcre-8.33

make

make install
注意:--with-pcre=/usr/local/software/pcre-8.33 指定的是源码包解压的路径
3、配置Tengine
创建用户组和用户
groupadd www

useradd -g www www
编辑主配置文件
vi /usr/local/nginx/conf/nginx.conf
user www www;   #指定运行的用户和用户组

worker_processes  ;    #指定要开启的进程数,一般为CPU的核心数或两倍

error_log  logs/error.log  crit;        #全局日志 debug|info|notice|warn|error|crit

pid        logs/nginx.pid;      #指定进程id的存储文件位置

worker_rlimit_nofile ;

events {

    use epoll;  #对于Linux系统epoll工作模式是首选

    worker_connections  ;  #每个进程的最大连接数

    #在执行操作系统命令"ulimit -n 65536"后worker_connections的设置才能生效

}

http {

    include       mime.types;

    default_type  application/octet-stream;

    log_format  main  '$remote_addr - $remote_user [$time_local] "$request" '

                      '$status $body_bytes_sent "$http_referer" '

                      '"$http_user_agent" "$http_x_forwarded_for"';

    access_log  logs/access.log  main;

    charset  utf-;

    server_names_hash_bucket_size ;

    client_header_buffer_size 32k;

    large_client_header_buffers  128k; #最大缓存为4个128KB

    client_max_body_size 20m;   #允许客户端请求的最大的单个文件字节数

    sendfile on;        #开启高效文件传输模式

    tcp_nopush on;      #用于防止网络阻塞

    tcp_nodelay on;     #用于防止网络阻塞

    keepalive_timeout  ;      #超过这个时间之后服务器会关闭该连接

    client_header_timeout ;   #客户端请求头读取超时时间,超过这个时间客户端还没发数据NGINX就返回408错误

    client_body_timeout ;     #客户端请求主体读取超时时间,超过这个时间客户端还没发数据NGINX就返回408错误

    server_tokens on;   #不显示nginx版本信息

    include gzip.conf;  #HttpGzip的配置文件

    include proxy.conf; #配置代理文件

    include vhost.conf; #虚拟主机的配置文件

    include backend.conf;       #配置后端的服务器列表文件

}
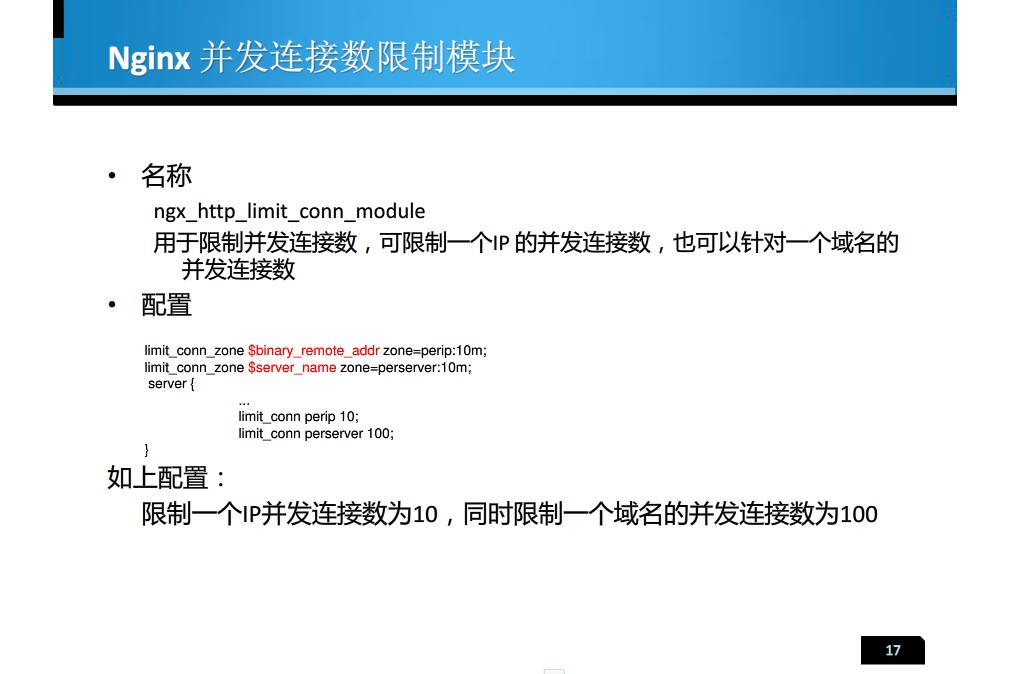
limit_req_zone $binary_remote_addr zone=req_one:10m rate=1r/s;
#10m是会话状态存储空间 rate=1r/s是每个地址每秒只能请求一次 (在vhost.conf还有配置)
limit_conn_zone $binary_remote_addr zone=req_one:10m;
#设置IP并发 (在vhost.conf还有配置)
编辑HttpGzip的配置文件
vi /usr/local/nginx/conf/gzip.conf
gzip on;

gzip_min_length 1k;     #设置允许压缩的页面最小字节数。

gzip_buffers  16k;     #用来存储gzip的压缩结果

gzip_http_version 1.1;  #识别HTTP协议版本

gzip_comp_level ;      #设置gzip的压缩比 - 1压缩比最小但最快 9相反

gzip_types text/plain application/x-javascript text/css application/xml;        #指定压缩类型

gzip_proxied any;       #无论后端服务器的headers头返回什么信息,都无条件启用压缩

gzip_vary on;

gzip_disable "MSIE [1-6].";     #禁用IE6的gzip压缩
编辑代理文件
vi /usr/local/nginx/conf/proxy.conf
proxy_redirect off;

proxy_set_header Host $host;

proxy_set_header X-Real-IP $remote_addr;

proxy_set_header X-Forwarded-For $proxy_add_x_forwarded_for;

client_body_buffer_size  512k;

proxy_connect_timeout ;

proxy_read_timeout ;

proxy_send_timeout ;

proxy_buffer_size 32k;

proxy_buffers  64k;

proxy_busy_buffers_size 128k;
编辑虚拟主机的配置文件
vi /usr/local/nginx/conf/vhost.conf
server {

    listen ;

    server_name localhost;

    index index.jsp index.htm index.html;

    root /usr/local/tomcat7/webapps/ROOT;

    location / {
        proxy_pass http://backend;

        proxy_pass_header Set-Cookie;

    }

    location /NginxStatus {

        stub_status on;

        access_log off;

        auth_basic "NginxStatus";

    }

}
location ~ .*\.(zip|thumb)$ {
root /usr/local/download;
limit_conn req_one 1; #IP下载并发为1 req_one在nginx.conf中配置的 limit_conn_zone $binary_remote_addr zone=req_one:10m;
limit_rate 500k; #限速500k
expires 30d;
}
limit_req zone=req_one burst=100; #req_one在nginx.conf中有配置,当超过rate时请求就会放到burst中burst也满了就503 req_one在nginx.conf中配置的 llimit_req_zone $binary_remote_addr zone=req_one:10m rate=100r/s;
limit_rate_after 3m;
limit_rate 512k; 这两句话的意思是先以最快的速度下载3MB,然后再以512KB的速度下载。
将扩展名为zip,thumb的静态文件都交给Nginx处理,root为静态文件的目录,而expires用为指定静态文件的过期时间30天。
location ~ ^/(upload|download)/ {
root /usr/local;
expires 30d;
}
将upload,download下的所有文件都交给Nginx处理,upload和download目录包含在/usr/local目录中
编辑后端的服务器列表文件
vi /usr/local/nginx/conf/backend.conf
upstream backend {

    ip_hash;

    server 127.0.0.1: max_fails= fail_timeout=60s;

}
4、设置Tengine开机启动
vi /etc/rc.d/init.d/nginx
#!/bin/bash

# Tengine Startup script# processname: nginx

# chkconfig: -

# description: nginx is a World Wide Web server. It is used to serve

# pidfile: /var/run/nginx.pid

# config: /usr/local/nginx/conf/nginx.conf

nginxd=/usr/local/nginx/sbin/nginx

nginx_config=/usr/local/nginx/conf/nginx.conf

nginx_pid=/usr/local/nginx/logs/nginx.pid

RETVAL=

prog="nginx"

# Source function library.

. /etc/rc.d/init.d/functions

# Source networking configuration.

. /etc/sysconfig/network

# Check that networking is up.

[ ${NETWORKING} = "no" ] && exit

[ -x $nginxd ] || exit

# Start nginx daemons functions.

start() {

if [ -e $nginx_pid ];then

echo "tengine already running...."

exit

fi

echo -n $"Starting $prog: "

daemon $nginxd -c ${nginx_config}

RETVAL=$?

echo

[ $RETVAL =  ] && touch /var/lock/subsys/nginx

return $RETVAL

}

# Stop nginx daemons functions.

stop() {

echo -n $"Stopping $prog: "

killproc $nginxd

RETVAL=$?

echo

[ $RETVAL =  ] && rm -f /var/lock/subsys/nginx /usr/local/nginx/logs/nginx.pid

}

reload() {

echo -n $"Reloading $prog: "

#kill -HUP `cat ${nginx_pid}`

killproc $nginxd -HUP

RETVAL=$?

echo

}

# See how we were called.

case "$1" in

start)

start

;;

stop)

stop

;;

reload)

reload

;;

restart)

stop

start

;;

status)

status $prog

RETVAL=$?

;;

*)

echo $"Usage: $prog {start|stop|restart|reload|status|help}"

exit

esac

exit $RETVAL
保存退出
chmod  /etc/rc.d/init.d/nginx   #赋予文件执行权限

chkconfig  --level  nginx on   #设置开机启动
service nginx start
5、其他

CentOS6.4 配置Tengine的更多相关文章
- CentOS6.4 配置Tengine(转)
CentOS6.4 配置Tengine 1.安装Nginx所需的pcre-devel库 yum install -y gcc gcc-c++ wget ftp://ftp.csx.cam.ac.u ...
- CentOS-6.5安装配置Tengine
一.安装pcre: cd /usr/local/src wget http://downloads.sourceforge.net/project/pcre/pcre/8.34/pcre-8.34.t ...
- 单机运行环境搭建之 --CentOS-6.5安装配置Tengine
一.安装pcre: cd /usr/local/src wget http://downloads.sourceforge.net/project/pcre/pcre/8.34/pcre-8.34 ...
- CentOS6.6 安装 Tengine 笔记
Tengine官网上有个非常简单的教程,中间并未涉及到一些常用的设置,所以仅供参考.一下午为本人的安装步骤及过程. 1.安装必要的编译环境好 由于Tengine安装需要使用源代码自行编译,所以在安装前 ...
- 在CentOS6上配置MHA过程全记录
在CentOS6上配置MHA过程全记录 MHA(Master High Availability)是一款开源的MariaDB or MySQL高可用程序,为MariaDB or MySQL主从复制架构 ...
- centos6 网卡配置,多IP设置
##云服务器 centos6网卡配置 #设置出口IP vim /etc/sysconfig/network-scripts/ifcfg-eth0DEVICE=seth0 #网卡名称 BOOTPROTO ...
- centos6 安装配置ss笔记
2018-05-17 centos6 安装配置ss笔记 操作环境:Centos 6 x86_64 bbr 服务器地址:美国 1.准备VPS 在https://www.bwh1.net可购买,购买时已默 ...
- CentOS6.5配置 cron
CentOS6.5配置 cron 任务 - mengjiaoduan的博客 - CSDN博客https://blog.csdn.net/mengjiaoduan/article/details/649 ...
- Centos6.7配置Nginx+Tomcat简单整合
系统环境:Centos 6.7 软件环境:JDK-1.8.0_65.Nginx-1.10.3.Tomcat-8.5.8 文档环境:/opt/app/ 存放软件目录,至于mkdir创建文件就不用再说了 ...
随机推荐
- PHP使用CURL上传|下载文件
CURL下载文件 /** * @param string $img_url 下载文件地址 * @param string $save_path 下载文件保存目录 * @param string $fi ...
- Insertion Sort List
对链表进行插入排序,比对数组排序麻烦一点. ListNode *insertSortList(ListNode *head) { ListNode dummy(-); for (ListNode *c ...
- Leetcode 之Convert Sorted Array to Binary Search Tree(54)
思路很简单,用二分法,每次选中间的点作为根结点,用左.右结点递归. TreeNode* sortedArrayToBST(vector<int> &num) { return so ...
- django动态表格总结
应用场景: A与B之间存在一对多关系. CBV实现方案: CreateView/UpdateView + inlineformset + jquery 具体: view方面:重写post/get方法, ...
- luarocks install with lua5.1 and luajit to install lapis
# in luarocks source directory...git clone https://github.com/archoncap/luarockscd luarocks ./config ...
- Maximum Product Subarray
Find the contiguous subarray within an array (containing at least one number) which has the largest ...
- 23.跳台阶问题[Fib]
[题目] 一个台阶总共有n级,如果一次可以跳1级,也可以跳2级.求总共有多少总跳法,并分析算法的时间复杂度. [分析] 首先我们考虑最简单的情况.如果只有1级台阶,那显然只有一种跳法.如果有2级台阶, ...
- Java for LeetCode 059 Spiral Matrix II
Given an integer n, generate a square matrix filled with elements from 1 to n2 in spiral order. For ...
- 在一个JSP页面中包含另一个JSP页面的三种方式
转载自://http://blog.163.com/neu_lxb/blog/static/179417010201121343132918/ (1)include指令 includ ...
- 使用wkhtmltopdf实现HTML转PDF的解决方案
最近,项目需要将HTML页面转换为PDF文件,所以就研究了下HTML转PDF的解决方案,发现网上比较流行的解决方案有3种: (1)iText (2)Flying Saucer (3)wkhtmltop ...