Ubuntu14.04 Server amd64 配置 Apache+MySQL+Django
sudo apt-get update

sudo apt-get upgrade
然后
sudo apt-get install apache2

sudo apt-get install libapache2-mod-wsgi

sudo apt-get install python-django

sudo apt-get install mysql-server mysql-client

sudo apt-get install python-mysqldb
设置apache文件夹权限
cd /etc/apache2

sudo nano apache2.conf
<Directory />

        Options FollowSymLinks

        AllowOverride None

        #Require all denied

        Allow from all

</Directory>
井号是我加的,Alow from all也是加的,改成这个样子就是了。
sudo mkdir /home/djangoapps

sudo mkdir /home/djangoapps/work
创建Django工程(网页文件夹)
cd /home/djangoapps/work

django-admin startproject mysite
建wsgi
在随便哪里建wsgi,比如
sudo nano /home/djangoapps/work/mysite/apache/django.wsgi
填入如下内容
import os

import sys

path = '/home/djangoapps/work/mysite'

if path not in sys.path:

    sys.path.insert(0, '/home/djangoapps/work/mysite')

os.environ['DJANGO_SETTINGS_MODULE'] = 'mysite.settings'

import django.core.handlers.wsgi

application = django.core.handlers.wsgi.WSGIHandler()
path是刚创建的工程文件夹位置,对应"mysite"的地方都是对应那个工程的名字。
建站点设置文件
cd /etc/apache2/sites-available

sudo nano mysite.conf
填入如下内容
<VirtualHost *:80>

    #ServerName hello.djangoserver

    DocumentRoot /home/djangoapps/work/mysite

    <Directory /home/djangoapps/work/mysite>

        Order allow,deny

        Allow from all

    </Directory>

    WSGIDaemonProcess mydjangosite processes=2 threads=15 display-name=%{GROUP}

    WSGIProcessGroup mydjangosite

    WSGIScriptAlias / /home/djangoapps/work/mysite/apache/django.wsgi

</VirtualHost>
为了让内容干净,解释就在外面说了:
sudo a2ensite mysite

sudo service apache2 reload
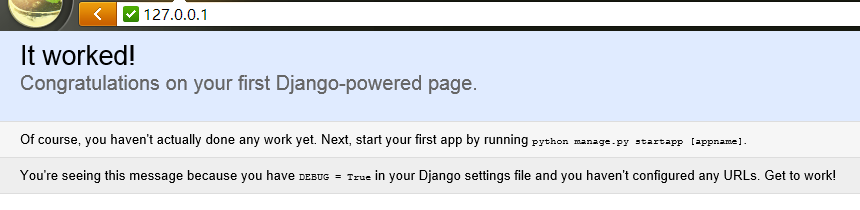
Django站点已经配置好了,但是这时访问127.0.0.1看到的是apache页面。
sudo a2dissite -default

sudo service apache2 reload
这时就能正常访问刚建的django站点了。
cd /etc/apache2

sudo nano ports.conf
看到Listen 80了吧,下面加一行 Listen 8000,就能用8000端口了。
sudo service apache2 reload
这样127.0.0.1访问的是apache站点,127.0.0.1:8000访问的就是我们的django站点了。
mod_wsgi 有两种运行模式,

第一种是嵌入模式,类似于mod_python,直接在apache进程中运行,这样的好处是不需要另外增加进程,但是坏处也很明显,所有内存都和apache共享,如果和mod_python一样造成内存漏洞的话,就会危害整个apache。而且如果apache是用worker mpm,mod_wsgi也就强制进入了线程模式,这样子对于非线程安全的程序来说就没法用了。

这种模式下只需要在apache下面设置

WSGIScriptAlias /path /path-to-wsgi

即可生效,对于小型脚本的话,直接用这种模式即可。

第二种是后台模式,类似于FastCGI的后台,mod_wsgi会借apache的外壳,另外启动一个或多个进程,然后通过socket通信和apache的进程联系。

这种方式只要使用以下配置即可开启:

#启动WSGI后台,site1是后台名字

WSGIDaemonProcess site1 processes=2 threads=15 display-name=%{GROUP}

#分配当前上下文应该使用哪个WSGI后台,可以放在Location里面指定

WSGIProcessGroup site1

#根据当前上下文的ProcessGroup分配到对应的后台

WSGIScriptAlias /path /path-to-wsgi

后台模式由于是与apache进程分离了,内存独立,而且可以独立重启,不会影响apache的进程,如果你有多个项目(django),可以选择建立多个后台或者共同使用一个后台。

比如在同一个VirtualHost里面,不同的path对应不同的django项目,可以同时使用一个Daemon:

WSGIDaemonProcess default processes=1 threads=1 display-name=%{GROUP}

WSGIProcessGroup default

WSGIScriptAlias /project1 “/home/website/project1.wsgi”

WSGIScriptAlias /project2 “/home/website/project2.wsgi”

这样子两个django都使用同一个WSGI后台。

也可以把不同的项目分开,分开使用不同的后台,这样开销比较大,但就不会耦合在一起了。

display-name是后台进程的名字,这样方便重启对应的进程,而不需要全部杀掉。

WSGIDaemonProcess site1 processes=1 threads=1 display-name=%{GROUP}

WSGIDaemonProcess site2 processes=1 threads=1 display-name=%{GROUP}

<Location “/project1″>

WSGIProcessGroup site1

</Location>

WSGIScriptAlias /project1 “/home/website/project1.wsgi”

<Location “/project1″>

WSGIProcessGroup site2

</Location>

WSGIScriptAlias /project2 “/home/website/project2.wsgi”

对于django 1.0以下的版本,由于官方认定不是线程安全的,所以建议使用多进程单线程模式

processes=n threads=1

但是我自己在用django 0.9.6,使用多线程模式在很多项目里面基本都没有问题,包括在worker模式下面使用mod_python,其实是一样的道理,呵呵。

升级到django 1.0以后,就可以放心的使用多进程多线程模式了:

processes=2 threads=64

这样子性能会更好。

下面是两种模式的英文原文:

When hosting WSGI applications using mod_wsgi, one of two primary modes of operation can be used. In ‘embedded’ mode, mod_wsgi works in a similar way to mod_python in that the Python application code will be executed within the context of the normal Apache child processes. WSGI applications when run in this mode will therefore share the same processes as other Apache hosted applications using Apache modules for PHP and Perl.

An alternate mode of operation available with Apache 2.X on UNIX is ‘daemon’ mode. This mode operates in similar ways to FASTCGI/SCGI solutions, whereby distinct processes can be dedicated to run a WSGI application. Unlike FASTCGI/SCGI solutions however, a separate infrastructure is not needed when implementing the WSGI application and everything is handled automatically by mod_wsgi.

Because the WSGI applications in daemon mode are being run in their own processes, the impact on the normal Apache child processes used to serve up static files and host applications using Apache modules for PHP, Perl or some other language is much reduced. Daemon processes may if required also be run as a distinct user ensuring that WSGI applications cannot interfere with each other or access information they shouldn’t be able to.
查看
Ubuntu14.04 Server amd64 配置 Apache+MySQL+Django的更多相关文章
- ubuntu14.04(server amd64)免密码sudo
vi /etc/sudoers.d/nopasswd4sudo 加入以下内容 用户名 ALL=(ALL) NOPASSWD : ALL
- ubuntu14.04 server ftp 服务安装配置详解
ubuntu14.04 server ftp 服务安装配置详解 cheungmine 2016-01-27 http://wiki.ubuntu.com.cn/Vsftpd 0 安装好vsftpd服务 ...
- 记录在Ubuntu 18.04系统中安装Apache, MySQL和PHP环境
虽然我们在Linux VPS.服务器安装WEB环境比较方便,可以选择面板或者一键包,但是有些我们需要深入学习的网友不会选择一键安装,而是会尝试编译安装.这样可以学到一些内在的技术.一般我们较为习惯选择 ...
- 阿里云ubuntu12.04环境下配置Apache+PHP+PHPmyadmin+MYsql
此教程中使用的相关IP等设置,在你的环境中要做相应修改. 使用之前更新apt-get,因为服务器基本上是一个裸系统 apt-get update;apt-get upgrade; 1 我们使用root ...
- Ubuntu14.04安装和配置Tomcat8.0.12(转)
Ubuntu14.04长的好看,所以一时间很感兴趣,研究各种软件的安装和开发环境的配置.今天先把安装的tomcat 8.0.12的教程分享给大家.如果你需要,请收藏!!! 工具/原料 系统环境:U ...
- Ubuntu14.04安装和配置Tomcat8.0.12
Ubuntu14.04长的好看,所以一时间很感兴趣,研究各种软件的安装和开发环境的配置.今天先把安装的tomcat 8.0.12的教程分享给大家.如果你需要,请收藏!!! 官方网站下载最新的tom ...
- ubuntu14.04下简易二进制安装mysql
下载mysql-commnunity的5.6.24通用二进制版 tar解压 我安装到/opt目录,所以mv到/opt/ 可选,建了个软链 ln -s *** mysql 添加运行mysql服务的用户和 ...
- ubuntu14.04上Trac配置记录
系统环境:ubuntu14.04 (并假设Apache2服务可以正常运行) 1. 安装软件: sudo aptitude install trac python-mysqldb 2. 创建数据库Tra ...
- Mac OS X 配置 Apache+Mysql+PHP 详细教程
网上的教程已经有很多,这里简洁的记录一下.以 Mac OS X Mavericks 10.9.X 为例. 先附上如何进入指定目录文件夹,按键盘 Command + Shift + G ,然后输入指定目 ...
随机推荐
- 解决win8下chrome浏览器打开提示没有注册类的方法
今天又把win8装回来了,继续装了个chrome浏览器,但是发现只能从安装的文件打开,从快捷方式或者快速启动栏都会提示没有注册类.找到一种解决的办法是删除注册表中的相关键值,具体如下: 1.打开注册表 ...
- [Effective JavaScript 笔记] 第5条:避免对混合类型使用==运算符
“1.0e0”=={valueOf:function(){return true;}} 是值是多少? 这两个完全不同的值使用==运算符是相等的.为什么呢?请看<[Effective JavaSc ...
- [Effective JavaScript 笔记]第52条:数组字面量优于数组构造函数
js的优雅很大程序要归功于程序中常见的构造块(Object,Function及Array)的简明的字面量语法.字面量是一种表示数组的优雅方法. var a=[1,2,3,5,7,8]; 也可以使用构造 ...
- [Effective JavaScript 笔记]第6章:库和API设计--个人总结
前言 又到了一章的总结,这章里的内容.是把我从一个代码的使用者,如何换位成一个代码的编写者.如何让别人用自己的代码更容易,不用去注意太多的无用细节,不用记住冗长的函数名.在使用API时怎样避免使用者会 ...
- ajax页面排序的序号问题
文章是从我的个人博客上粘贴过来的, 大家也可以访问我的主页 www.iwangzheng.com 目前使用的ajax排序是这样的. 每个table , 都要这样声明 ( table 中必须有2个属性: ...
- 浅谈B树
B树即二叉搜索树: 1.所有非叶子结点至多拥有两个儿子(Left和Right): 2.所有结点存储一个关键字: 3.非叶子结点的左指针指向小于其关键字的子树,右指针指向大于其关键字的子树: 如: ...
- rocksdb 编译安装 日志
Compilation RocksDB's library should be able to compile without any dependency installed, although w ...
- C++公有继承
is-a.has-a和like-a.组合.聚合和继承 两组概念的区别 - cbk861110的专栏 - 博客频道 -CSDN.NET http://blog.csdn.net/cbk861110/ar ...
- sharepoint更新多行文本webparth
前台 <script> function Copy() { var value = document.getElementById("<%=BodyBox.ClientID ...
- git无法clone远程代码库及git代理设置
git作为一个版本管理神器,日常工作中自然也就少不了了:特别是Android开发,github和google是逃不过的了.然而很多时候需要用到git克隆远程的代码库,众所周知的原因google.and ...