
Dome 多人人脸识别 face_recognition
Dome 多人人脸识别 face_recognition
注意
face_recognition 依赖 face_recognition_models
中文字体文件需要自己下载
1.多人人脸识别
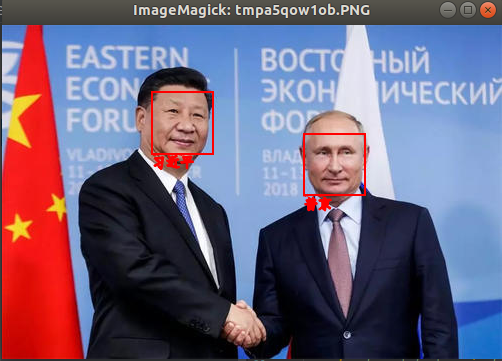
# 多人 人脸识别

import os

import numpy as np

import face_recognition

from PIL import Image, ImageDraw, ImageFont

PATH = 'face_imgs'

TMP_IMG = 'tt4.jpeg'

# 制作所有可用图像特征码列表

dirs = os.listdir(PATH)

names = [i.split('.')[0] for i in dirs]

face_codes = []

for img_dir in dirs:

   current_image = face_recognition.load_image_file(f'{PATH}/{img_dir}')

   face_codes.append(face_recognition.face_encodings(current_image)[0])

# 读取目标图片并识别人脸

image = face_recognition.load_image_file(TMP_IMG)

pil_image = Image.fromarray(image)

d = ImageDraw.Draw(pil_image)

# 定位所有找到的脸的位置

face_locations = face_recognition.face_locations(image)

# 循环找到的所有人脸

results = []

for face_location in face_locations:

   # 打印每张脸的位置信息

   top, right, bottom, left = face_location

   # 抠人脸图

   face_image = image[top:bottom, left:right]

   # 求特征码

   # o_face_code.append(face_recognition.face_encodings(np.array(face_image))[0])

   result = face_recognition.compare_faces(face_codes,

                                           face_recognition.face_encodings(np.array(face_image))[0],

                                           tolerance=0.4)

   results.append(result)

   # 画矩形

   d.rectangle((left, top, right, bottom), None, 'red', width=2)

   # 画文字_中文

   name = ''

   for na in np.unique(np.array(names)[result]):

       name += f'{na} '

   path_to_ttf = r'font/simfang.ttf'

   font = ImageFont.truetype(path_to_ttf, size=14)  # 设置字体

   d.text(xy=(left, bottom), text=name, fill='red', font=font, stroke_width=1)

pil_image.show()
2.人脸检测
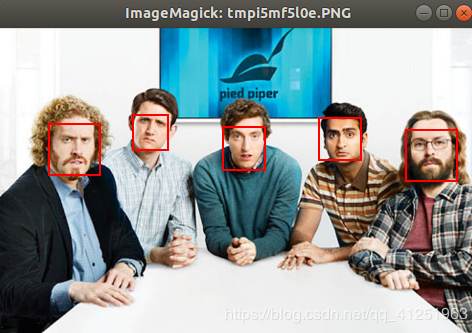
from PIL import Image, ImageDraw

import face_recognition

# 读取图片并识别人脸

image = face_recognition.load_image_file("t2.png")

face_locations = face_recognition.face_locations(image)

print(face_locations)

pil_image = Image.fromarray(image)

d = ImageDraw.Draw(pil_image)

# 遍历每个人脸,并标注

faceNum = len(face_locations)

for i in range(0, faceNum):

   top = face_locations[i][0]

   right = face_locations[i][1]

   bottom = face_locations[i][2]

   left = face_locations[i][3]

   rect = (left, top, right, bottom)

   d.rectangle(rect, None, outline='red', width=2)

pil_image.show()
3.人脸检测加抠图
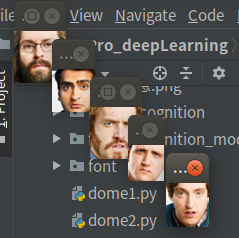
from PIL import Image

import face_recognition

#加载图像文件

image = face_recognition.load_image_file("t2.png")

#定位所有找到的脸的位置

face_locations = face_recognition.face_locations(image)

# 循环找到的所有人脸

for face_location in face_locations:

       # 打印每张脸的位置信息

       top, right, bottom, left = face_location

       print("A face is located at pixel location Top: {}, Left: {}, Bottom: {}, Right: {}".format(top, left, bottom, right))

       # 指定人脸的位置信息,然后显示人脸图片

       face_image = image[top:bottom, left:right]

       pil_image = Image.fromarray(face_image)

       pil_image.show()
4.关键点检查
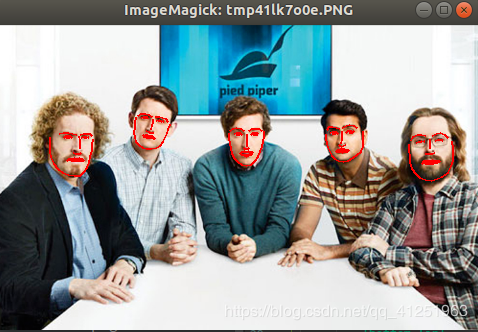
from PIL import Image, ImageDraw

import face_recognition

# 将jpg文件加载到numpy 数组中

image = face_recognition.load_image_file("t2.png")

#查找图像中所有面部的所有面部特征

face_landmarks_list = face_recognition.face_landmarks(image)

print("I found {} face(s) in this photograph.".format(len(face_landmarks_list)))

pil_image = Image.fromarray(image)

d = ImageDraw.Draw(pil_image)

for face_landmarks in face_landmarks_list:

   #打印此图像中每个面部特征的位置

   facial_features = [

       'chin',

       'left_eyebrow',

       'right_eyebrow',

       'nose_bridge',

       'nose_tip',

       'left_eye',

       'right_eye',

       'top_lip',

       'bottom_lip'

   ]

   for facial_feature in facial_features:

       print("The {} in this face has the following points: {}".format(facial_feature, face_landmarks[facial_feature]))

   #在图像中画出每个人脸特征!

   for facial_feature in facial_features:

       d.line(face_landmarks[facial_feature], width=2, fill='red')

pil_image.show()
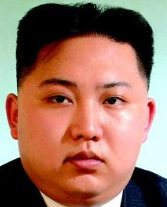
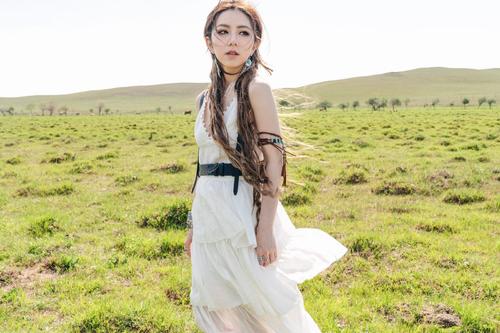
5.关键点检查加毁容
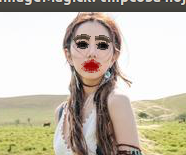
** 据说是美颜来着,怎么成这样我也......emmmmmm**
import face_recognition

from PIL import Image, ImageDraw

# Load the jpg file into a numpy array

image = face_recognition.load_image_file("tt3.jpg")

# Find all facial features in all the faces in the image

face_landmarks_list = face_recognition.face_landmarks(image)

for face_landmarks in face_landmarks_list:

   # Create a PIL imageDraw object so we can draw on the picture

   pil_image = Image.fromarray(image)

   d = ImageDraw.Draw(pil_image, 'RGBA')

   # 画个浓眉

   d.polygon(face_landmarks['left_eyebrow'], fill=(68, 54, 39, 128))

   d.polygon(face_landmarks['right_eyebrow'], fill=(68, 54, 39, 128))

   d.line(face_landmarks['left_eyebrow'], fill=(68, 54, 39, 150), width=5)

   d.line(face_landmarks['right_eyebrow'], fill=(68, 54, 39, 150), width=5)

   # 涂个性感的嘴唇

   d.polygon(face_landmarks['top_lip'], fill=(150, 0, 0, 128))

   d.polygon(face_landmarks['bottom_lip'], fill=(150, 0, 0, 128))

   d.line(face_landmarks['top_lip'], fill=(150, 0, 0, 64), width=8)

   d.line(face_landmarks['bottom_lip'], fill=(150, 0, 0, 64), width=8)

   # 闪亮的大眼睛

   d.polygon(face_landmarks['left_eye'], fill=(255, 255, 255, 30))

   d.polygon(face_landmarks['right_eye'], fill=(255, 255, 255, 30))

   # 画眼线

   d.line(face_landmarks['left_eye'] + [face_landmarks['left_eye'][0]], fill=(0, 0, 0, 110), width=6)

   d.line(face_landmarks['right_eye'] + [face_landmarks['right_eye'][0]], fill=(0, 0, 0, 110), width=6)

   pil_image.show()
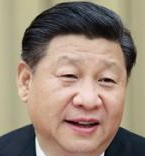
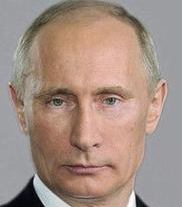
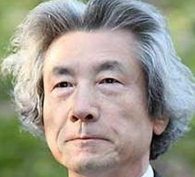
原图


Dome 多人人脸识别 face_recognition的更多相关文章
- Python 人工智能之人脸识别 face_recognition 模块安装
Python人工智能之人脸识别face_recognition安装 face_recognition 模块使用系统环境搭建 系统环境 Ubuntu / deepin操作系统 Python 3.6 py ...
- 可学习的多人人脸识别程序(基于Emgu CV)
源代码下载(需要安装Emgu CV,安装方法请百度) 很多朋友使用Emgu CV遇到CvInvoke()的报错,我找到一种解决方法. 把EmguCV目录下bin里面的所有dll复制到C:\WINDOW ...
- 开源人脸识别face_recognition
环境:python36 1.安装dlib.face_recognition windows版 下载dlib,cp后面是py版本 下载地址:https://pypi.org/simple/dlib/ 提 ...
- opencv学习之路(41)、人脸识别
一.人脸检测并采集个人图像 //take_photo.cpp #include<opencv2/opencv.hpp> using namespace cv; using namespac ...
- 手把手教你用1行代码实现人脸识别 --Python Face_recognition
环境要求: Ubuntu17.10 Python 2.7.14 环境搭建: 1. 安装 Ubuntu17.10 > 安装步骤在这里 2. 安装 Python2.7.14 (Ubuntu17.10 ...
- face_recognition开源人脸识别库:离线识别率高达99.38%
基于Python的开源人脸识别库:离线识别率高达99.38%——新开源的用了一下感受一下 原创 2017年07月28日 21:25:28 标签: 人脸识别 / 人脸自动定位 / 人脸识别开源库 / f ...
- Github开源人脸识别项目face_recognition
Github开源人脸识别项目face_recognition 原文:https://www.jianshu.com/p/0b37452be63e 译者注: 本项目face_recognition是一个 ...
- 基于Python的face_recognition库实现人脸识别
一.face_recognition库简介 face_recognition是Python的一个开源人脸识别库,支持Python 3.3+和Python 2.7.引用官网介绍: Recognize a ...
- 利用face_recognition,dlib与OpenCV调用摄像头进行人脸识别
用已经搭建好 face_recognition,dlib 环境来进行人脸识别 未搭建好环境请参考:https://www.cnblogs.com/guihua-pingting/p/12201077. ...
随机推荐
- Java技术-3-Java程序基本结构
下面是一个完整的Java程序, /** * 可以用来自动创建文档的注释 */ public class Hello { public static void main(String[] args) { ...
- 前端每日实战:149# 视频演示如何用纯 CSS 创作一个宝路薄荷糖的动画
效果预览 按下右侧的"点击预览"按钮可以在当前页面预览,点击链接可以全屏预览. https://codepen.io/comehope/pen/oagrvz 可交互视频 此视频是可 ...
- JavaScript对象(一)
Part One:对象的创建对象的创建,可以使用new Object() 或者 Object.creat(),该方法为静态函数 var foo = Object.create({x:1,y:2}); ...
- webpack知识锦集(一)
ebpack是一个javascript应用吃那个程序的静态模块打包器(module bundler).处理时候会递归构建一个依赖关系图,包含每个模块,将模块打包成一个或者多个bundle. 核心概念: ...
- 教你高效使用数据可视化BI软件创建医院卫生耗材运营监控大屏
灯果数据可视化BI软件是新一代人工智能数据可视化大屏软件,内置丰富的大屏模板,可视化编辑操作,无需任何经验就可以创建属于你自己的大屏.大家可以在他们的官网下载软件. 本文以医院卫生耗材运营监控大屏 ...
- 2019年高校微信小程序开发大赛学习笔记
学做小程序(学堂在线笔记)一.传统布局 text-align:center //水平居中 margin-bottom: 60px //设置间距 二.弹性盒子布局 display:flex; flex- ...
- 什么是YUM
什么是Yum Yum(全称为 Yellow dog Updater, Modified)是一个在RedHat以及CentOS等Linux系统中的Shell前端软件包管理器.基于RPM包管理,能够从指定 ...
- Androidstudio实现一个简易的加法器——分享两种方法实现(日常作业练习)
Androidstudio实现一个简易的加法器——分享两种方法实现(日常作业练习) ...
- 回想笔记 瞎比比 域名注册 解析绑定ip 下载证书 设置证书 重定向http到https请求
2019.7.27 回想笔记 拥有腾讯云服务器一台 阿里云注册5元域名,进行备案 完成之后 使用解析 绑定服务器ip地址 ,使用域名可以访问到web服务器而不是通过直接暴露ip地址进行访问 证书购买 ...
- Python 3:ImportError “No Module named Setuptools”的解决方法
sudo apt-get install python-setuptools python3-setuptools