使用ViewPager+Fragment实现选项卡切换效果
实现效果
本实例主要实现用ViewPage和Fragment实现选项卡切换效果,选项卡个数为3个,点击选项卡或滑动屏幕会切换Fragment并实现选项卡下方下边框条跟随移动效果。
本程序用android4.2.2真机调试,为方便部署,我使用adbWireless做为部署工具,电脑和手机接入同一局域网,在PC端输入名称 adb connect 手机端ip 默认连接5555端口。之后再Eclipse的Devices中即可看到介入设备。前提是android系统需要Root。如下图:

设计实现
- 创建项目(此过程不做赘述)
- 在activity_main.xml中设置布局。xml内容如下:
<LinearLayout xmlns:android="http://schemas.android.com/apk/res/android"

    xmlns:tools="http://schemas.android.com/tools"

    android:layout_width="match_parent"

    android:layout_height="match_parent"

    android:orientation="vertical"

    tools:context="com.example.fengzhengapp.MainActivity" >

    <LinearLayout

        android:layout_width="match_parent"

        android:layout_height="48dp"

        android:orientation="horizontal" >

        <TextView

            android:id="@+id/tv_hot"

            android:layout_width="wrap_content"

            android:layout_height="fill_parent"

            android:layout_weight="1.0"

            android:background="#ffEAEAEA"

            android:gravity="center"

            android:text="@string/tab_hot"

            android:textSize="18sp" />

        <TextView

            android:id="@+id/tv_news"

            android:layout_width="wrap_content"

            android:layout_height="fill_parent"

            android:layout_weight="1.0"

            android:background="#ffEAEAEA"

            android:gravity="center"

            android:text="@string/tab_news"

            android:textSize="18sp" />

        <TextView

            android:id="@+id/tv_fav"

            android:layout_width="wrap_content"

            android:layout_height="fill_parent"

            android:layout_weight="1.0"

            android:background="#ffEAEAEA"

            android:gravity="center"

            android:text="@string/tab_favorite"

            android:textSize="18sp" />

    </LinearLayout>

    <ImageView

        android:id="@+id/cursor"

        android:layout_width="wrap_content"

        android:layout_height="wrap_content"

        android:scaleType="matrix"

        android:src="@drawable/bgborder" />

    <android.support.v4.view.ViewPager

        android:id="@+id/myViewPager"

        android:layout_width="match_parent"

        android:layout_height="0dp"

        android:layout_weight="1"

        android:flipInterval="30" >

    </android.support.v4.view.ViewPager>

</LinearLayout>
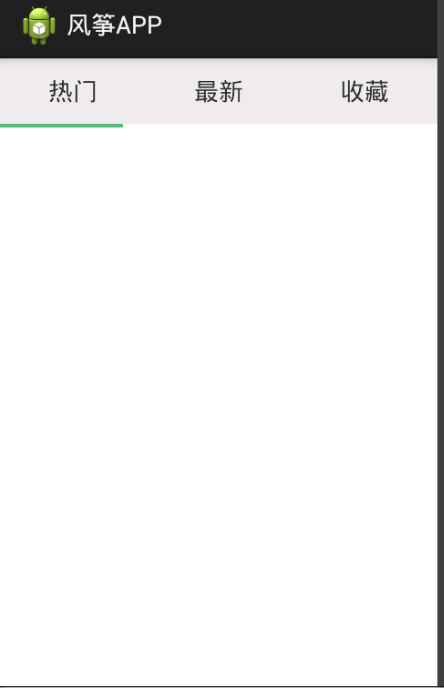
上面布局页实现的效果如下:
- 接下来,增加3个Fragment布局页 ,分别在里面填充简单的内容
第一个:
<?xml version="1.0" encoding="utf-8"?>

<LinearLayout xmlns:android="http://schemas.android.com/apk/res/android"

    android:layout_width="match_parent"

    android:layout_height="match_parent"

    android:orientation="vertical" >

    <TextView

        android:id="@+id/txtHot"

        android:layout_width="match_parent"

        android:layout_height="match_parent"

        android:layout_weight="1"

        android:text="this is the hot tab" >

    </TextView>

</LinearLayout>
第二个:
<?xml version="1.0" encoding="utf-8"?>

<LinearLayout xmlns:android="http://schemas.android.com/apk/res/android"

    android:layout_width="match_parent"

    android:layout_height="match_parent"

    android:orientation="vertical" >

    <TextView

        android:id="@+id/txtNews"

        android:layout_width="match_parent"

        android:layout_height="match_parent"

        android:layout_weight="1"

        android:text="this is the news tab" >

    </TextView>

</LinearLayout>
第三个:
<?xml version="1.0" encoding="utf-8"?>

<LinearLayout xmlns:android="http://schemas.android.com/apk/res/android"

    android:layout_width="match_parent"

    android:layout_height="match_parent"

    android:orientation="vertical" >

    <TextView

        android:id="@+id/txtFav"

        android:layout_width="match_parent"

        android:layout_height="match_parent"

        android:layout_weight="1"

        android:text="this is the Fav tab" >

    </TextView>

</LinearLayout>
以上3个Fragment的布局文件已创建完毕,每个文件中只显示简单的文本内容,用做演示。
- 加载3个Fragment到Activity中。
首先实现3个Fragment对应的后台类
热点布局页对应的类:
import android.os.Bundle;

import android.support.v4.app.Fragment;

import android.view.LayoutInflater;

import android.view.View;

import android.view.ViewGroup;

public class FragmentHot extends Fragment {

	@Override

	public View onCreateView(LayoutInflater inflater, ViewGroup container,

			Bundle savedInstanceState) {

		View view = inflater.inflate(R.layout.fragmenthot, container, false);

		return view;

	}

}
news布局页对应的类:
import android.os.Bundle;

import android.support.v4.app.Fragment;

import android.view.LayoutInflater;

import android.view.View;

import android.view.ViewGroup;

public class FragmentNews extends Fragment {

	@Override

	public View onCreateView(LayoutInflater inflater, ViewGroup container,

			Bundle savedInstanceState) {

		View view = inflater.inflate(R.layout.fragmentnews, container, false);

		return view;

	}

}
收藏布局页对应的类:
import android.os.Bundle;

import android.support.v4.app.Fragment;

import android.view.LayoutInflater;

import android.view.View;

import android.view.ViewGroup;

public class FragmentFavorite extends Fragment {

	@Override

	public View onCreateView(LayoutInflater inflater, ViewGroup container,

			Bundle savedInstanceState) {

		View view = inflater.inflate(R.layout.fragmentfav, container, false);

		return view;

	}

}
- 之后再activity中初始化这3个Fragment
注意要点:
Activity继承自FragmentActivity
要实现一个FragmentPagerAdapter,内容如下:
import java.util.ArrayList;

import android.support.v4.app.Fragment;

import android.support.v4.app.FragmentManager;

import android.support.v4.app.FragmentPagerAdapter;

public class MyFragmentAdapter extends FragmentPagerAdapter {

	ArrayList<Fragment> list;

	public MyFragmentAdapter(FragmentManager fm,ArrayList<Fragment> list){

		super(fm);

		this.list = list;

	}

	@Override

	public Fragment getItem(int arg0) {

		// TODO Auto-generated method stub

		return list.get(arg0);

	}

	@Override

	public int getCount() {

		// TODO Auto-generated method stub

		return list.size();

	}

}
然后在Activity中实现切换和动画效果,代码如下:
import java.util.ArrayList;

import android.app.Activity;

import android.graphics.BitmapFactory;

import android.graphics.Matrix;

import android.os.Bundle;

import android.support.v4.app.Fragment;

import android.support.v4.view.ViewPager;

import android.support.v4.view.ViewPager.OnPageChangeListener;

import android.util.DisplayMetrics;

import android.util.Log;

import android.view.Menu;

import android.view.View;

import android.support.v4.app.FragmentActivity;

import android.view.MenuItem;

import android.view.animation.Animation;

import android.view.animation.TranslateAnimation;

import android.widget.ImageView;

import android.widget.TextView;

import android.widget.Toast;

public class MainActivity extends FragmentActivity {

	private ViewPager mViewPager;

	private ArrayList fragments;

	private TextView view1, view2, view3;

    private int currIndex;

    private ImageView image;

    private static int bmpW;//横线图片宽度

    private static int offset;//图片移动的偏移量

	@Override

	protected void onCreate(Bundle savedInstanceState) {

		super.onCreate(savedInstanceState);

		setContentView(R.layout.activity_main);

		initViewPager();

		InitTextView();

		InitImage();

	}

	@Override

	public boolean onCreateOptionsMenu(Menu menu) {

		// Inflate the menu; this adds items to the action bar if it is present.

		getMenuInflater().inflate(R.menu.main, menu);

		return true;

	}

	@Override

	public boolean onOptionsItemSelected(MenuItem item) {

		// Handle action bar item clicks here. The action bar will

		// automatically handle clicks on the Home/Up button, so long

		// as you specify a parent activity in AndroidManifest.xml.

		int id = item.getItemId();

		if (id == R.id.action_settings) {

			return true;

		}

		return super.onOptionsItemSelected(item);

	}

	private void InitTextView(){

		view1 = (TextView) findViewById(R.id.tv_hot);

		view2 = (TextView) findViewById(R.id.tv_news);

		view3 = (TextView) findViewById(R.id.tv_fav);

		view1.setOnClickListener(new txtListener(0));

		view2.setOnClickListener(new txtListener(1));

		view3.setOnClickListener(new txtListener(2));

	}

	//内部类 重写TextView点击事件

	public class txtListener implements View.OnClickListener{

		private int index = 0;

		public txtListener(int i){

			index = i;

		}

		@Override

		public void onClick(View v){

			mViewPager.setCurrentItem(index);

		}

	}

	/*

     * 初始化图片的位移像素

     */

    public void InitImage(){

        image = (ImageView)findViewById(R.id.cursor);

        bmpW = BitmapFactory.decodeResource(getResources(), R.drawable.bgborder).getWidth();

        DisplayMetrics dm = new DisplayMetrics();

        getWindowManager().getDefaultDisplay().getMetrics(dm);

        int screenW = dm.widthPixels;

        offset = (screenW/3 - bmpW)/2;

        Log.i("screenW",String.valueOf(screenW));

        Log.i("bmpW",String.valueOf(bmpW));

        Log.i("offset",String.valueOf(offset));

        //imgageview设置平移,使下划线平移到初始位置(平移一个offset)

        Matrix matrix = new Matrix();

        matrix.postTranslate(offset, 0);

        image.setImageMatrix(matrix);

    }

	private void initViewPager(){

		mViewPager = (ViewPager)findViewById(R.id.myViewPager);

		fragments = new ArrayList<Fragment>();

		Fragment fragmentHot = new FragmentHot();

		Fragment fragmentNews = new FragmentNews();

		Fragment fragmentFav = new FragmentFavorite();

		fragments.add(fragmentHot);

		fragments.add(fragmentNews);

		fragments.add(fragmentFav);

		mViewPager.setAdapter(new MyFragmentAdapter(getSupportFragmentManager(), fragments));

		mViewPager.setCurrentItem(0);

		mViewPager.setOnPageChangeListener(new myOnPageChangeListener());

	}

	public class myOnPageChangeListener implements OnPageChangeListener {

		private int one = offset*2 +bmpW;//两个相邻页面的偏移量

		@Override

		public void onPageScrolled(int arg0, float arg1, int arg2) {

		}

		@Override

		public void onPageScrollStateChanged(int arg0) {

			// TODO Auto-generated method stub

		}

		@Override

        public void onPageSelected(int arg0) {

            // TODO Auto-generated method stub

			Log.i("aaaaaaaaaaaaa",String.valueOf(arg0));

			Log.i("one",String.valueOf(one));

            Animation animation = new TranslateAnimation(currIndex*one,arg0*one,0,0);//平移动画

            currIndex = arg0;

            animation.setFillAfter(true);//动画终止时停留在最后一帧,不然会回到没有执行前的状态

            animation.setDuration(200);//动画持续时间0.2秒

            image.startAnimation(animation);//是用ImageView来显示动画的

            //int i = currIndex + 1;

           // Toast.makeText(MainActivity.this, "您选择了第"+i+"个页卡", Toast.LENGTH_SHORT).show();

        }

    }

}
源代码地址请访问这里:源码
使用ViewPager+Fragment实现选项卡切换效果的更多相关文章
- Android - FragmentTabHost 与 Fragment 制作页面切换效果
使用 FragmentTabHost 与 Fragment 制作页面切换效果 API 19 TabHost已经不建议使用了.用 FragmentTabHost 来代替TabHost.实际上 Fragm ...
- Android - TabHost 与 Fragment 制作页面切换效果
Android - TabHost 与 Fragment 制作页面切换效果 Android API 19 , API 23 三个标签页置于顶端 效果图: 在文件BoardTabHost.java中定义 ...
- 使用jquery实现选项卡切换效果
几张简陋的框架效果图 页面加载时: 选项卡操作后: css样式: <style type="text/css"> *{margin:0px;padding:0px;} ...
- 用html+css+js实现选项卡切换效果
文章转载自:http://tongling.github.io/JSCards/ 用html+css+js实现选项卡切换效果 使用之前学过的综合知识,实现一个新闻门户网站上的常见选项卡效果: 文字素材 ...
- [前端] html+css+javascript 实现选项卡切换效果
用html+css+js实现选项卡切换效果使用之前学过的综合知识,实现一个新闻门户网站上的常见选项卡效果: 文字素材:房产: 275万购昌平邻铁三居 总价20万买一居 200万内购五环三居 140万安 ...
- JS实现选项卡切换效果
1.在网页制作过程中,我们经常会用到选项卡切换效果,它能够让我们的网页在交互和布局上都能得到提升 原理:在布局好选项卡的HTML结构后,我们可以看的出来,选项卡实际上是三个选项卡标头和三个对应的版块, ...
- 纯js实现网页tab选项卡切换效果
纯js实现网页tab选项卡切换效果 百度搜索 js 点击菜单项就可以切换内容的效果
- vue实现tab选项卡切换效果
tab选项卡切换效果: 通过点击事件传入参数,然后通过v-show来进行切换显示 <template> <div class="box"> <div ...
- vue实现选项卡切换效果
效果如下: 说明: 这里我使用的原理是利用vue中的v-show/显示隐藏指令,当为true的时候显示,为false的时候隐藏 1html代码: <head> <meta chars ...
随机推荐
- maven 速度快的镜像
<mirrors> <mirror> <id>CN</id> <name>UK Central</name> <url&g ...
- Double的精度问题
/** * 自定义Math工具类 * */ public class MyMathTools { /** * 提供精确的小数位四舍五入处理. * * @param v * 需要四舍五入的数字 * @p ...
- find out the neighbouring max D_value by counting sort in stack
#include <stdio.h> #include <malloc.h> #define MAX_STACK 10 ; // define the node of stac ...
- WebADNuke整理
在webconfig上增添 <webadnuke> <database> <add name="SqlDbProvider" type="C ...
- 【转】npm publish 发布
<h3 class="catListTitle">一.npm包结构(编写)</h3> npm包实际是一个存档文件,即一个目录直接打包为.zip或tar.gz ...
- 在DirectX9中使用DXUT定制按钮来控制模型旋转的问题
使用DXUT中的按钮控件类实现 控制模型旋转的过程如下: 1.创建一个CDXUTDialog对话框,并绑定至CDXUTDialogResourceManager对话框资源管理器. 2.绑定回调函数GU ...
- HDU5509 : Pattern String
只要求出两个字符串的最小表示,然后就可以判断是否循环同构. 枚举最小表示的开头在哪个位置,然后求出Hash值,如果两个串的Hash值集合有交,那么说明循环同构. 因为串经过压缩,原串的长度很大,不能直 ...
- T-SQL Recipes之Organizing and Archiving Data
The Problem 当我们处理存档数据或内存数据时,我们想要自定义命名表名,数据库,架构加上日期,时间,或者应用名时,用标准的TSQL来实现是比较困难的. 假设我们有一张日志表,增长速度异常快.但 ...
- [Leetcode] Number of Digit Ones
Given an integer n, count the total number of digit 1 appearing in all non-negative integers less th ...
- C#遍历DataSet中数据的几种方法总结
//多表多行多列的情况foreach (DataTable dt in YourDataset.Tables) //遍历所有的datatable{foreach (DataRow dr in dt.R ...