Android 极光推送集成
集成Jpush
1.用Android Studio创建一个Demo
2.创建激光推送开发者账号,要创建极光推送开发者帐号,请访问极光推送官方网站https://www.jiguang.cn/push
3.在Portal上创建应用
使用注册账号登陆,进入极光控制台后,点击“创建应用”按钮。创建帐号进入极光推送后,首先显示的是创建应用的界面。填上你的应用程序的名称,以及 Android包名这二项就可以了。
4.手动集成,导入相关文件 http://docs.jiguang.cn/jpush/client/Android/android_guide/

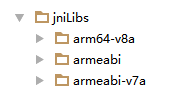
注意:在Android studio中需要建立jni文件夹,在更名为jniLibs,把so文件导进去。
再复制res中的drawable-hdpi,layout,values文件中的资源导入到建立的工程对应的同名目录下
3.配置AndroidManifest.xml
3.1添加权限(注意改包名)
<permission

        android:name="您应用的包名.permission.JPUSH_MESSAGE"

        android:protectionLevel="signature" />

    <uses-permission android:name="您应用的包名.permission.JPUSH_MESSAGE" />

    <uses-permission android:name="android.permission.RECEIVE_USER_PRESENT" />

    <uses-permission android:name="android.permission.INTERNET" />

    <uses-permission android:name="android.permission.WAKE_LOCK" />

    <uses-permission android:name="android.permission.READ_PHONE_STATE" />

    <uses-permission android:name="android.permission.WRITE_EXTERNAL_STORAGE" />

    <uses-permission android:name="android.permission.READ_EXTERNAL_STORAGE" />

    <uses-permission android:name="android.permission.VIBRATE" />

    <uses-permission android:name="android.permission.MOUNT_UNMOUNT_FILESYSTEMS" />

    <uses-permission android:name="android.permission.ACCESS_NETWORK_STATE" />

    <uses-permission android:name="android.permission.WRITE_SETTINGS" />

    <uses-permission android:name="android.permission.ACCESS_WIFI_STATE" />
3.2复制核心代码(执意更改包名以及appkey)
<!-- Required SDK 核心功能-->

        <!-- 可配置android:process参数将PushService放在其他进程中 -->

        <service

            android:name="cn.jpush.android.service.PushService"

            android:enabled="true"

            android:exported="false" >

            <intent-filter>

                <action android:name="cn.jpush.android.intent.REGISTER" />

                <action android:name="cn.jpush.android.intent.REPORT" />

                <action android:name="cn.jpush.android.intent.PushService" />

                <action android:name="cn.jpush.android.intent.PUSH_TIME" />

            </intent-filter>

        </service>

        <!-- since 1.8.0 option 可选项。用于同一设备中不同应用的JPush服务相互拉起的功能。 -->

        <!-- 若不启用该功能可删除该组件,将不拉起其他应用也不能被其他应用拉起 -->

         <service

             android:name="cn.jpush.android.service.DaemonService"

             android:enabled="true"

             android:exported="true">

             <intent-filter >

                 <action android:name="cn.jpush.android.intent.DaemonService" />

                 <category android:name="您应用的包名"/>

             </intent-filter>

         </service>

        <!-- Required SDK核心功能-->

        <receiver

            android:name="cn.jpush.android.service.PushReceiver"

            android:enabled="true" >

          <intent-filter android:priority="1000">

                <action android:name="cn.jpush.android.intent.NOTIFICATION_RECEIVED_PROXY" />

                <category android:name="您应用的包名"/>

            </intent-filter>

            <intent-filter>

                <action android:name="android.intent.action.USER_PRESENT" />

                <action android:name="android.net.conn.CONNECTIVITY_CHANGE" />

            </intent-filter>

            <!-- Optional -->

            <intent-filter>

                <action android:name="android.intent.action.PACKAGE_ADDED" />

                <action android:name="android.intent.action.PACKAGE_REMOVED" />

                <data android:scheme="package" />

            </intent-filter>

        </receiver>

        <!-- Required SDK核心功能-->

        <activity

            android:name="cn.jpush.android.ui.PushActivity"

            android:configChanges="orientation|keyboardHidden"

            android:theme="@android:style/Theme.NoTitleBar"

            android:exported="false" >

            <intent-filter>

                <action android:name="cn.jpush.android.ui.PushActivity" />

                <category android:name="android.intent.category.DEFAULT" />

                <category android:name="您应用的包名" />

            </intent-filter>

        </activity>

        <!-- SDK核心功能-->

        <activity

            android:name="cn.jpush.android.ui.PopWinActivity"

            android:configChanges="orientation|keyboardHidden"

            android:exported="false"

            android:theme="@style/MyDialogStyle">

            <intent-filter>

                <category android:name="android.intent.category.DEFAULT" />

                <category android:name="您应用的包名" />

            </intent-filter>

        </activity>

        <!-- Required SDK核心功能-->

        <service

            android:name="cn.jpush.android.service.DownloadService"

            android:enabled="true"

            android:exported="false" >

        </service>

        <!-- Required SDK核心功能-->

        <receiver android:name="cn.jpush.android.service.AlarmReceiver" />

        <!-- User defined. 用户自定义的广播接收器-->

         <receiver

             android:name="您自己定义的Receiver"

             android:enabled="true">

             <intent-filter>

                 <!--Required 用户注册SDK的intent-->

                 <action android:name="cn.jpush.android.intent.REGISTRATION" />

                 <!--Required 用户接收SDK消息的intent-->

                 <action android:name="cn.jpush.android.intent.MESSAGE_RECEIVED" />

                 <!--Required 用户接收SDK通知栏信息的intent-->

                 <action android:name="cn.jpush.android.intent.NOTIFICATION_RECEIVED" />

                 <!--Required 用户打开自定义通知栏的intent-->

                 <action android:name="cn.jpush.android.intent.NOTIFICATION_OPENED" />

                 <!-- 接收网络变化 连接/断开 since 1.6.3 -->

                 <action android:name="cn.jpush.android.intent.CONNECTION" />

                 <category android:name="您应用的包名" />

             </intent-filter>

         </receiver>

        <!-- Required. For publish channel feature -->

        <!-- JPUSH_CHANNEL 是为了方便开发者统计APK分发渠道。-->

        <!-- 例如: -->

        <!-- 发到 Google Play 的APK可以设置为 google-play; -->

        <!-- 发到其他市场的 APK 可以设置为 xxx-market。 -->

        <!-- 目前这个渠道统计功能的报表还未开放。-->

        <meta-data android:name="JPUSH_CHANNEL" android:value="developer-default"/>

        <!-- Required. AppKey copied from Portal -->

        <meta-data android:name="JPUSH_APPKEY" android:value="您应用的Appkey"/>
4.创建自己的广播接收器MyReceiver
/**

 * 自定义接收器

 * <p>

 * 如果不定义这个 Receiver,则:

 * 1) 默认用户会打开主界面

 * 2) 接收不到自定义消息

 */

public class MyReceiver extends BroadcastReceiver {

    private static final String TAG = "JPush";

    private List<String> list = new ArrayList<>();

    public void onReceive(Context context, Intent intent) {

        Bundle bundle = intent.getExtras();

        if (JPushInterface.ACTION_REGISTRATION_ID.equals(intent.getAction())) {

            String regId = bundle.getString(JPushInterface.EXTRA_REGISTRATION_ID);

            Log.d(TAG, "[MyReceiver] 接收Registration Id : " + regId);

        } else if (JPushInterface.ACTION_MESSAGE_RECEIVED.equals(intent.getAction())) {

            Log.d(TAG, "收到了自定义消息。消息内容是:" + bundle.getString(JPushInterface.EXTRA_MESSAGE));

            // 自定义消息不会展示在通知栏,完全要开发者写代码去处理

            String content = bundle.getString(JPushInterface.EXTRA_MESSAGE);

            Toast.makeText(context, content, Toast.LENGTH_SHORT).show();

        } else if (JPushInterface.ACTION_NOTIFICATION_RECEIVED.equals(intent.getAction())) {

            // 在这里可以做些统计,或者做些其他工作

        } else if (JPushInterface.ACTION_NOTIFICATION_OPENED.equals(intent.getAction())) {

            String content = bundle.getString(JPushInterface.EXTRA_ALERT);

//此处,我们取出的是通知的内容。还可以取出别的信息,这个大家可自行处理

//           在这里可以自己写代码去定义用户点击后的行为

            Intent i = new Intent(context, TestActivity.class);

            i.putExtra("content", content);

            i.setFlags(Intent.FLAG_ACTIVITY_NEW_TASK);

            context.startActivity(i);

        } else {

        }

    }

}
5.集成Jpush Android SDK的混淆
在工程的混淆文件proguard.jar中添加以下配置
-dontoptimize

-dontpreverify

-dontwarn cn.jpush.**

-keep class cn.jpush.* { ; }

-dontwarn cn.jiguang.**

-keep class cn.jiguang.* { ; }
6.注册(最好在application中注册)
JPushInterface.init(this);
这样,在极光推送控制台推送消息,程序就可以接收了。
Android 极光推送集成的更多相关文章
- Android 极光推送造成IM服务绑定失败bug
由于极光推送对8.0的支持问题,升级到了最新版本的极光推送.但是最新版本的极光推送,默认将推送服务设置到了新的进程里面,由此引发 Android 极光推送多进程造成的application运行两次 和 ...
- JPushDemo【极光推送集成,基于v3.1.8版本】
版权声明:本文为HaiyuKing原创文章,转载请注明出处! 前言 这个Demo只是记录极光推送的集成,不能运行. 使用步骤 一.项目组织结构图 注意事项: 1. 导入类文件后需要change包名以 ...
- android极光推送
版权声明:本文为博主原创文章,未经博主允许不得转载. Android开发记录18-集成推送服务的一点说明 关于推送服务,国内有很多选择,笔者也对它们进行了一个详细的对比,一般我们产品选择推送服务主要考 ...
- 【android极光推送】—从客户端到后台,一文通吃
sion android:name="android.permission.VIBRATE" /> <uses-permission android:name=&quo ...
- Android 极光推送JPush---自定义提示音
极光推送提供三种方法实现Notification通知 三方开发平台发送普通消息,客户端设置PushNotificationBuilder,实现基础的Notification通知 三方开放平台发送普通消 ...
- 极光推送集成——iOS10 接受消息问题及解决
iOS10升级后极光推送发生了很大的变化,要求Xcode更新到8.0及以上版本才可以实现iOS10接受消息的方法 常见错误 这个问题困扰了我一天,辛亏好友盼神帮我解决,在此再次感谢盼神.一下是解决办法 ...
- android极光推送初步了解
推送可以及时,主动的与用户发起交互 (1)继承jar包,照示例AndroidManifest.xml添加. (2)自定义MyApp继承自Application,在onCreate方法中调用JPushI ...
- iOS极光推送集成步骤
1.下载SDK,导入Xcode 2.在苹果开发者中心建立AppId与bundleID进行关联,注意勾选推送功能 3.在苹果开发者中心建立推送证书 4.在极光后台建立应用且上传推送证书 5.建立描述文件 ...
- android 极光推送 声音与振动 的关闭和开启
前言:最近刚好在写一些推送方面的东西,又是新手,不断在网上找资料,很少,不过还是找到了一些,反正百度我是再也不想百度了,谷歌一下子就能找到想要的. 废话不多说. 1.主要方法就是如下一个函数 priv ...
随机推荐
- centos 下安装docker
官方文档比较累赘,简化就三步 1.安装依赖 yum -y install gcc gcc-c++ yum-utils device-mapper-persistent-data lvm2 2.添加re ...
- Laravel/Lumen 分组求和问题 where groupBy sum
在Laravel中使用分组求和,如果直接使用Laravel各数据库操作方法,应该会得出来如下代码式: DB::table('table_a') ->where('a','=',1) ->g ...
- C++ substr 的两个用法
substr是C++语言函数,主要功能是复制子字符串,要求从指定位置开始,并具有指定的长度. basic_string substr(size_type _Off = 0,size_type _C ...
- Mac 下 Nginx 配置使用
安装 homebrew /usr/bin/ruby -e "$(curl -fsSL https://raw.githubusercontent.com/Homebrew/install/m ...
- 大爽Python入门教程 1-4 习题
大爽Python入门公开课教案 点击查看教程总目录 1 [思考]方向变换 小明同学站在平原上,面朝北方,向左转51次之后(每次只转90度), 小明面朝哪里?小明转过了多少圈? (360度为一圈,圈数向 ...
- 如何设计一个高内聚低耦合的模块——MegEngine 中自定义 Op 系统的实践经验
作者:褚超群 | 旷视科技 MegEngine 架构师 背景介绍 在算法研究的过程中,算法同学们可能经常会尝试定义各种新的神经网络层(neural network layer),比如 Layer No ...
- python实现图像直方图
目录: (一)直方图的使用 正文: (一)直方图的使用 1 from matplotlib import pyplot as plt 2 def plot_demo(image): 3 print(i ...
- PAT A1091——BFS
Acute Stroke One important factor to identify acute stroke (急性脑卒中) is the volume of the stroke core. ...
- [bzoj3351]Regions
这道题有一种较为暴力的做法,对于每个点枚举所有与r2为该属性的询问并加以修改,最坏时间复杂度为o(nq),然而是可过的(97s) 发现只有当r2相同的询问数特别多时才会达到最坏时间复杂度,因此如果删除 ...
- 千呼万唤,web人脸识别登录完整版来了,这样式我爱了
大家好,我是小富~ 在我最开始写文章的时候曾经写过一篇文章 基于 Java 实现的人脸识别功能,因为刚开始码字不知道写点什么,就简单弄了个人脸识别的Demo. 但让我没想到的是,在过去的一年里有好多好 ...