
搭建 Nginx 服务
今日内容
- 上一篇测试
- c出现问题
- web 服务
- 部署 Nginx
内容详细
上一篇测试
NFS共享文件步骤

- 服务端

[root@backup ~]# yum install nfs-utils rpcbind -y

[root@backup ~]# mkdir /backup

[root@backup ~]# vim /etc/exports

/backup 172.16.1.0/20(rw,sync,all_squash,anonuid=666,anongid=666)

[root@backup ~]# groupadd www -g 666

[root@backup ~]# useradd www -u 666 -g 666 -M -r -s /sbin/nologin

[root@backup ~]# chown -R www.www /backup

[root@backup ~]# systemctl start nfs-server rpcbind

- 客户端

[root@backup ~]# yum install nfs-utils -y

[root@backup ~]# mount -t nfs 172.16.1.31:/backup /opt

2、安装WEb服务的步骤

[root@backup ~]# yum install httpd php php-devel -y

[root@backup ~]# cd /var/www/html
出现的问题
1、nfsnobody

2、NFS挂载无法持久化

	1、通过开机自启动脚本挂载

		[root@web01 html]# vim /etc/rc.local

		/usr/bin/mount -t nfs 172.16.1.31:/web/upload /var/www/html/upload

		[root@web01 html]# chmod +x /etc/rc.d/rc.local

	2、通过/etc/fstab配置文件

		[root@web02 ~]# vim /etc/fstab

		# 挂载点                  挂载的目录            类型   设置默认权限    0 不备份 1 备份     0 不检查 1 检查

172.16.1.31:/web/upload  /var/www/html/upload   nfs       defaults          0                0

		[root@web02 ~]# mount -a
web 服务
1、web 服务简介
2、网络模型
网络模型

	select

	poll

	epoll
3、web 服务器软件
1、apache

2、Nginx

官网:https://nginx.org/

软件:https://nginx.org/download/
部署 Nginx
1、安装
1、yum 安装
登录 Nginx 官网 nginx.org

选择 download --> 稳定版本下载

    [root@web01 ~]# vim /etc/yum.repos.d/nginx.repo

    [root@web01 ~]# yum install nginx -y

	[root@web01 ~]# systemctl stop httpd

	[root@web01 ~]# systemctl start nginx
2、二进制安装
3、编译安装
	[root@web01 ~]#  wget https://nginx.org/download/nginx-1.20.2.tar.gz

	[root@web01 ~]# tar -xf nginx-1.20.2.tar.gz

	[root@web01 nginx-1.20.2]# ./configure

	[root@web01 nginx-1.20.2]# make

	[root@web01 nginx-1.20.2]# make install
2、平滑增加 Nginx 模块
增加模块必须重新编译。

[root@web01 ~]# tar -xf nginx-1.20.2.tar.gz

[root@web01 ~]# cd nginx-1.20.2

[root@web01 nginx-1.20.2]#./configure  --with-http_ssl_module

[root@web01 nginx-1.20.2]#make

[root@web01 nginx-1.20.2]#make install
3、Nginx 的命令
1、-v : 打印版本号

[root@web01 ~]# nginx -v

nginx version: nginx/1.20.2

2、-V : 打印版本号和配置项

[root@web01 ~]# nginx -V

nginx version: nginx/1.20.2

built by gcc 4.8.5 20150623 (Red Hat 4.8.5-44) (GCC)

built with OpenSSL 1.0.2k-fips  26 Jan 2017

TLS SNI support enabled

configure arguments: --prefix=/etc/nginx

3、-t : 检查配置文件

[root@web01 ~]# nginx -t

nginx: the configuration file /etc/nginx/nginx.conf syntax is ok

nginx: configuration file /etc/nginx/nginx.conf test is successful

4、-T : 测试配置文件并启动

5、-q :打印错误日志

6、-s : 操作进程

	stop	:停止

	quit	:退出

	reopen	:重启

	reload	:重载

7、-p : 指定nginx的工作目录

8、-e : 指定错误日志路径

9、-c : 指定配置文件的路径

10、-g : 设置一个全局的Nginx配置项

[root@web01 ~]# nginx -g 'daemon off;'
4、Nginx 配置文件
存放目录
	/etc/nginx/nginx.conf

配置分为 全局配置 和 模块配置
1、全局配置
1、user : 指定 Nginx 启动用户

2、worker_processes : 定义 Nginx 的 worker 进程数

	auto == CPU数量

3、error_log : 错误日志路径

4、pid : pid 的存放文件路径
user  nginx;

worker_processes  auto;

error_log  /var/log/nginx/error.log notice;

pid        /var/run/nginx.pid;
2、模块配置
# events : 模块配置

1、events : 模块配置

    1.1、worker_connections :每一个worker进程最多同时接入多少个请求

    2.2、use : 指定Nginx的网络模型(select、poll、epoll)

2、http : web服务的模块

    2.1、include : 加载外部的配置项(可以降低当前配置文件的复杂度)

    2.2、default_type : 如果找不到文件的类型,则按照指定默认类型处理

    2.3、log_format : 定义日志格式

        log_format json '{"@timestamp":"$time_iso8601",'

            '"host":"$server_addr",'

            '"service":"nginxTest",'

            '"trace":"$upstream_http_ctx_transaction_id",'

            '"log":"log",'

            '"clientip":"$remote_addr",'

            '"remote_user":"$remote_user",'

            '"request":"$request",'

            '"http_user_agent":"$http_user_agent",'

            '"size":$body_bytes_sent,'

            '"responsetime":$request_time,'

            '"upstreamtime":"$upstream_response_time",'

            '"upstreamhost":"$upstream_addr",'

            '"http_host":"$host",'

            '"url":"$uri",'

            '"domain":"$host",'

            '"xff":"$http_x_forwarded_for",'

            '"referer":"$http_referer",'

            '"status":"$status"}';

        access_log /var/log/nginx/access.log json ;

    2.4、sendfile : 高效读取文件

    2.5、keepalive_timeout : 长连接保持连接的

        HTTP 1.0 短链接

        HTTP 1.1 长连接

    2.6、server : 网址模块

        2.6.1、listen : 监听的端口

        2.6.2、server_name : 定义域名

        2.6.3、location : 访问路径( '/' 表示访问任何地址都会到这里)

            6.6.3.1、root : 指定网址路径

            6.6.3.2、index : 指定网址的索引文件
http {

    include       /etc/nginx/mime.types;

    default_type  application/octet-stream;

    log_format  main  '$remote_addr - $remote_user [$time_local] "$request" '

                      '$status $body_bytes_sent "$http_referer" '

                      '"$http_user_agent" "$http_x_forwarded_for"';

    access_log  /var/log/nginx/access.log  main;

    sendfile        on;

    #tcp_nopush     on;

    keepalive_timeout  65;

    #gzip  on;

    include /etc/nginx/conf.d/*.conf;

}
# server 模块

	目录 : /etc/nginx/conf.d/default.conf

	作用 : 指定输入相应域名时 'server_name  localhost;'

			会进入对应的(访问路径)网页目录 和 首页

				'root   /usr/share/nginx/html;

        		index  index.html index.htm;'

server {

    listen       80;

    server_name  localhost;

    #access_log  /var/log/nginx/host.access.log  main;

    location / {

        root   /usr/share/nginx/html;

        index  index.html index.htm;

    }
5、搭建游戏网站
超级玛丽
1、创建访问目录
	mkdir /opt/super_Maro

[root@web01 opt]# mkdir super_Maro
2、上传游戏原代码
xftp 上传

或

lrzsz 拖拽
3、编辑网站的配置文件( *.conf )
网站的配置文件创建在 /etc/nginx/conf.d/ 目录下

配置文件命名	: *.conf

[root@web01 conf.d]# vim /etc/nginx/conf.d/game.conf

server {

        listen 80;

        server_name game.maro.com;

        location / {

                root /opt/super_Maro;

                index index.html;

        }

}
3、测试配置文件是否正常
[root@web01 conf.d]# nginx -t

nginx: the configuration file /etc/nginx/nginx.conf syntax is ok

nginx: configuration file /etc/nginx/nginx.conf test is successful
4、重启Nginx
[root@web01 conf.d]# systemctl restart nginx
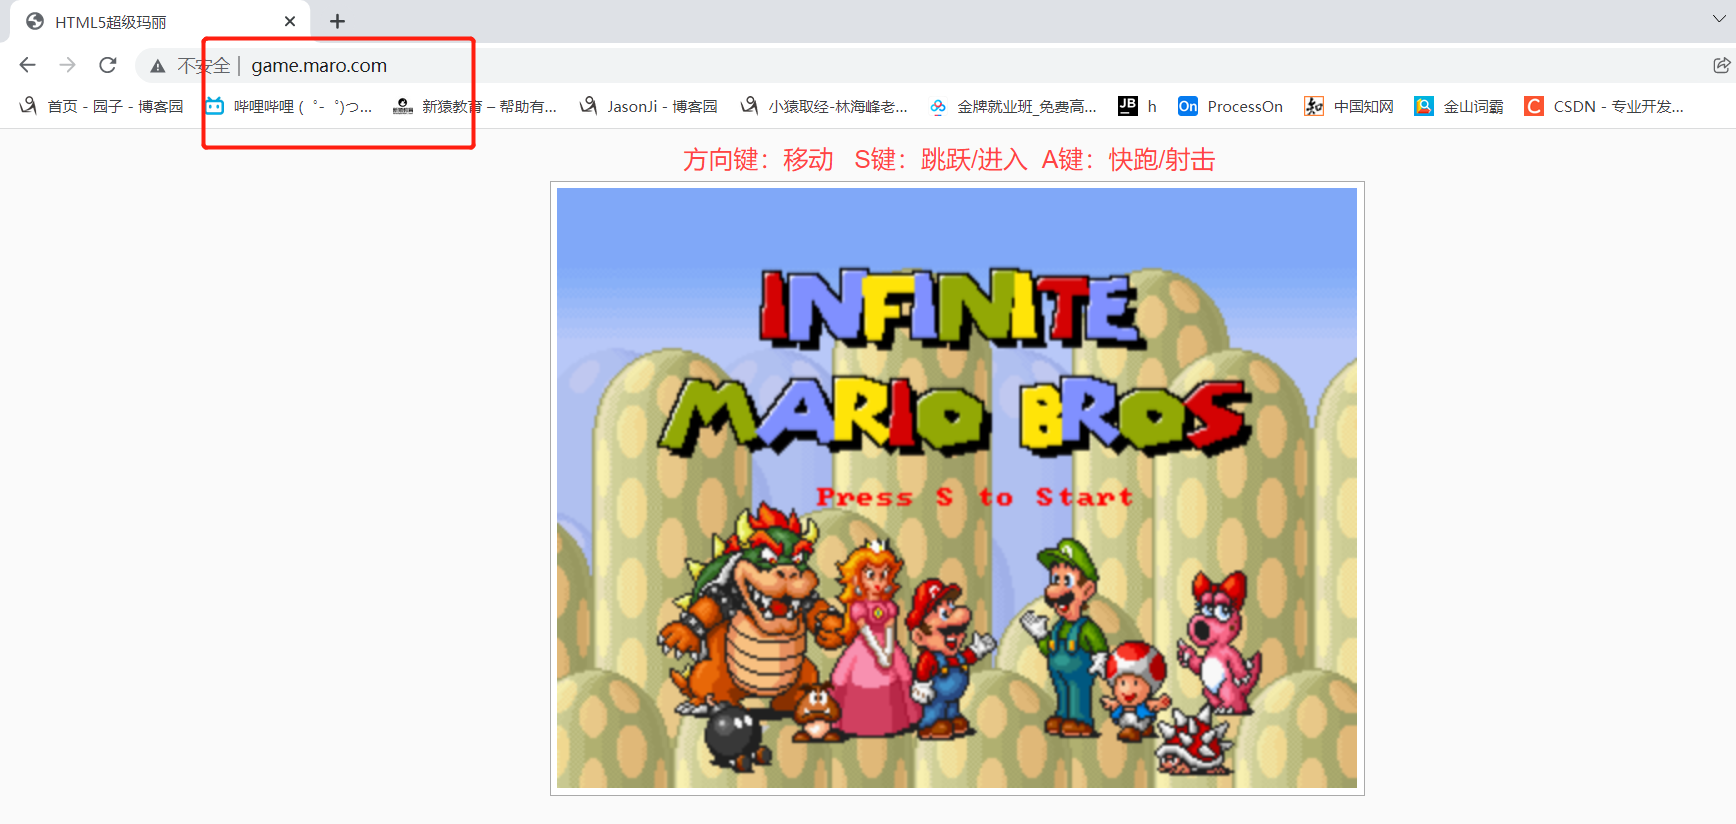
5、域名解析
C:\Windows\System32\drivers\etc\hosts

172.16.1.7 game.maro.com
注意
如果修改了 域名解析文件 hosts 还是用不了 该域名访问相应网址

应该时 Notepad++ 没有权限保存修改结果,给予权限多保存几次就可以了
附录(nginx 配置文件)
/etc/nginx/nginx.conf

[root@web01 nginx]# cat nginx.conf

user  nginx;

worker_processes  auto;

error_log  /var/log/nginx/error.log notice;

pid        /var/run/nginx.pid;

events {

    worker_connections  1024;

}

http {

    include       /etc/nginx/mime.types;

    default_type  application/octet-stream;

    log_format  main  '$remote_addr - $remote_user [$time_local] "$request" '

                      '$status $body_bytes_sent "$http_referer" '

                      '"$http_user_agent" "$http_x_forwarded_for"';

    access_log  /var/log/nginx/access.log  main;

    sendfile        on;

    #tcp_nopush     on;

    keepalive_timeout  65;

    #gzip  on;

    include /etc/nginx/conf.d/*.conf;

}
搭建 Nginx 服务的更多相关文章
- 搭建Nginx服务
Nginx 是一个高性能的 http 和反向代理服务器,也是一个 IMAP/POP3/SMPT 服务器. Nginx 是由 logor Sysoev 为俄罗斯访问第二的 Ranbler.ru 站点开发 ...
- Linux之Nginx服务 nfs文件存储 负载均衡
一.搭建Nginx服务 Nginx 是俄罗斯人编写的十分轻量级的HTTP 服务器,Nginx,它的发音为"engine X",是一个高性能的HTTP和反向代理服务器,同时也是一个I ...
- nginx服务傻瓜搭建
nginx服务傻瓜搭建 安装步骤: 一.先准备好相关源码包和程序包,如下图 所有包都在云服务器的/src目录下. 二.安装 1.安装nginx服务器,支持vod stream.fileupload c ...
- pm2命令,端口查询,mongodb服务启动,nginx服务启动,n模块的使用,搭建nodejs服务器环境,搭建oracledb服务器环境 linux的环境搭建
pm2命令 pm2 ls //查询pm2 启动的列表 pm2 start app.js //启动文件 pm2 restart app //重启项目 pm2 logs app //监控项目执行日志打印 ...
- python3.x +django + nginx + uwsgi 搭建web服务
最近一直在用django开发自己的网站.在开发和线上环境的对接过程中遇到了许多的坑.所以想以一个老鸟的经历来写一下怎么 搭建web服务 一.python3.x .django .nginx .uwsg ...
- 三、直播整体流程 五、搭建Nginx+Rtmp直播流服务
HTML5实现视频直播功能思路详解_html5教程技巧_脚本之家 https://m.jb51.net/html5/587215.html 三.直播整体流程 直播整体流程大致可分为: 视频采集端:可以 ...
- ubuntu 搭建Mercurial 服务(nginx)
ubuntu 搭建Mercurial 服务(nginx) 环境:ubuntu 12.05 Mercurial 步骤: (1)安装nginx 和 Mercurial: sudo apt-get ins ...
- Nginx学习之配置RTMP模块搭建推流服务
写在开始 小程序升级实时音视频录制及播放能力,开放 Wi-Fi.NFC(HCE) 等硬件连接功能.同时提供按需加载.自定义组件和更多访问层级等新特性,增强了第三方平台的能力,以满足日趋丰富的业务需求. ...
- Linux服务-搭建Nginx
任务目标:二进制安装nginx包,作为web服务修改配置文件,让配置生效,验证配置 首先使用yum 来安装 nginx 服务,基于epel-release平台的nginx需要epel的支持,所以要先安 ...
随机推荐
- Web发送邮件
1.首先注册一个163邮箱 自己的邮箱地址是xyqq769552629@163.com 登陆的密码是自己设定 使用邮箱发邮件,邮件必须开启pop和smtp服务,登陆邮件 开启SMTP服务,这个时候提示 ...
- Flink 非对齐Unaligned的checkpoint(源码分析)
本文源码基于flink1.14 在帮助用户排查任务的时候,经常会发现部分task处理的慢,在Exactly once语义时需要等待快照的对齐而白白柱塞的情况 在flink1.11版本引入了非对齐的ch ...
- 《Go组件设计与实现》-netpoll的总结
主要针对字节跳动的netpoll网络库进行总结.netpoll网络库相比于go本身的net标准库更适合高并发场景. 基础知识 netpoll与go.net库一样使用epoll这种IO多路复用机制处理网 ...
- 【Java】流程控制
文章目录 流程控制 一.用户交互scanner 1.1 Scanner对象 1.2 Scanner进阶使用 二.顺序结构 三.选择结构 3.1 if单选择结构 3.2 if双选择结构 3.3 if多选 ...
- JavaScript中数字常用方法
数字常用方法 (1)返回0-1(不包含1)随机小数(random()) 格式:Math.random() var num=parseInt(Math.random()*11) //拿到0-10中的随机 ...
- WebGPU图形编程(4):构建一个彩色的正方形<学习引自徐博士教程>
本节我们来复原一个彩色的正方形,前提告知,本节的shaders和main的代码从结构上有调整,我会更加详细的描述每行的代码意思: 源代码下载地址:https://github.com/jack1232 ...
- Tomcat访问项目出现HTTP状态404-未找到,类型 状态报告 描述 源服务器未能找到目标资源的表示或者是不愿公开一个已经存在的资源表示。Apache Tomcat/9.0.40
错误提示如图,无任何消息提示,控制台也没有错误. 解决方法: IDEA,上方菜单栏点击Run–>Edit Configurations-,选择Deployment,将Application co ...
- python利用正则表达式提取文本中特定内容
正则表达式是一个特殊的字符序列,它能帮助你方便的检查一个字符串是否与某种模式匹配. Python 自1.5版本起增加了re 模块,它提供 Perl 风格的正则表达式模式. re 模块使 Python ...
- Redis内存满了怎么办(新年快乐)
Redis内存满了怎么办(新年快乐) 入我相思门,知我相思苦. 长相思兮长相忆,短相思兮无穷极. 一.配置文件 Redis长期使用或者不设置过期时间,导致内存爆满或不足,可以到Redis的配置文件re ...
- 3,linux-yum源配置-systemctl服务管理-文件权限
3,linux-yum源配置-systemctl服务管理-文件权限 小问答: 1.配置好阿里云yum源 生成yum缓存 下载nginx,并且启动nginx服务,使用浏览器访问10.0.0.10:80 ...