Using Let’s Encrypt for free SSL Certs with Netscaler
Using Let’s Encrypt for free SSL Certs with Netscaler
If you haven’t heard, Let’s Encrypt (https://letsencrypt.org/) has its free and open CA service up and running and in public beta.
That means right now, you can go get yourself free SSL certificates for any web property that you own.
These SSL certs are cross-signed by IdenTrust, meaning they will be trusted by all major browsers. The premise behind this service is to offer an automated system by which certificates can be issued on a routine basis.
These certificates are short lived, only 90 day, but that’s intentional, as they’re meant to enforce the use of the provided automation. This keeps the process secure, it ensures the proper ownership of the website and validity of the request, and provides a consistent mechanism for acquiring and applying certificates.
During this beta period there are a number of scenarios in which full automation is supported:
- apache which is your traditional and widely used webserver
- standalone server for web-facing services that need SSL but aren’t necessarily doing traditional HTTP/web
- webroot for using an existing directory on an existing webserver
In these scenarios, the Let’s Encrypt automation is launched via cron (or whatever), which in turn contacts the CA, provides an environment against which the CA can validate the domain owner, then installs the created/updated certificate (full docs here).
Unfortunately (but predictably), there’s no direct integration or automation between the Let’s Encrypt service and Netscaler (Let’s encrypt is still beta afterall). The Let’s Encrypt CA can, however, be used to issue certificates that are then used by the Netscaler, but this is a manual process. The good news is that the Let’s Encrypt automation is module-based, so some intrepid soul can create a Netscaler module that works with the service.
This post, while not as good as a module, is my overview for using Let’s Encrypt manual process in conjunction with Netscaler to get some free SSL certs.
I will cover the following topics:
- Creation of a Let’s Encrypt PKI server. In the automated apache/webroot scenarios, this is not necessary as the work is all done on the webservers themselves. For the manual method, a server must be used as a launch pad for the automation and will also be used to work/script with the Netscaler. Also note that I’m just calling it a PKI server, but this is not something that you’ll see when researching Let’s Encrypt, and I would guess that this kind of goes against their vision. The idea is automation of these processes. By adding an intermediate server into the mix, we are definitely complicating matters. In an ideal world, the Netscaler would have something built-in that would be aware of how to work with Let’s Encrypt or a module would be created that tells Let’s Encrypt know how to work with the Netscaler. But hey, this works too.
- Leverage the Netscaler to satisfy the challenge/response requirement for Let’s Encrypt’s certificate issuance process. We will use a responder policy on a content-switching vserver to do this.
- Create the certificate. Via Let’s Encrypt scripts
- Converting the issued certificates to a Netscaler compatible format, and installing those certificates for use by a Netscaler vServer.
Keep in mind that this service has me giddy because I’m constantly changing my lab and needing (wanting) new certs. But by no means is this limited to lab use. I intend to use these certificates as a rapid way to acquire certificates for POCs where things can slow down when trying to get certs issued or paid for.
Enterprises should also be looking at this as a potential way to offset the ongoing issue/renew costs of certificates from non-free vendors. Of course these certificates are not necessarily appropriate for large, enterprise-scale web properties, as the more advanced site verification options are not covered by these certificates. But I think there’s plenty of opportunity to secure some sites for free that would otherwise not be.
A few disclaimers:
- I assume you know how to work in Linux.
- I assume that you’ve visited http://letsencrypt.org and have an understanding on the certification process.
- I assume you are fairly comfortable with Netscaler, and basic networking.
- I assume you know how SSL certs work.
So here we go:
Step 1:Get yourself some Linux and install it.
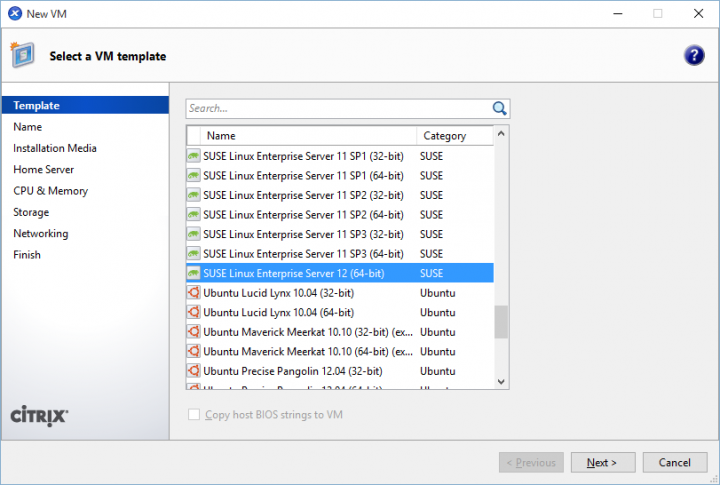
I like OpenSUSE, or Cent. Both have easy, fast network install boot ISOS. Here’s OpenSUSE on XenServer as an example, but use whatever you want. There are minimal requirements and I give you the commands to install what is needed on top of most base deployments. You would just have to find your appropriate package manager (zypper, yum, apt, etc). I’m not going to link you to the Linux install media. Google is your friend.
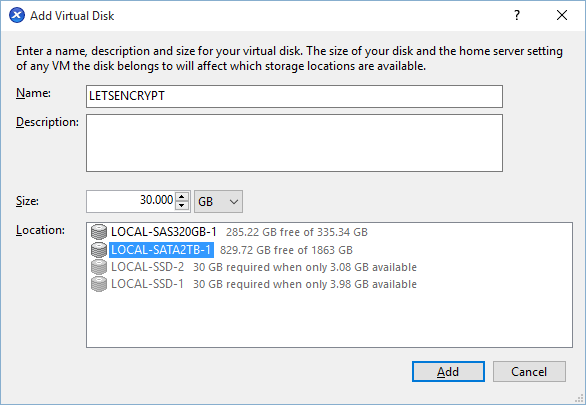
- Create a VM for your Server. For OpenSUSE (13+) it’s OK to use the SLES12 template. “Other install media” is also an acceptable template.
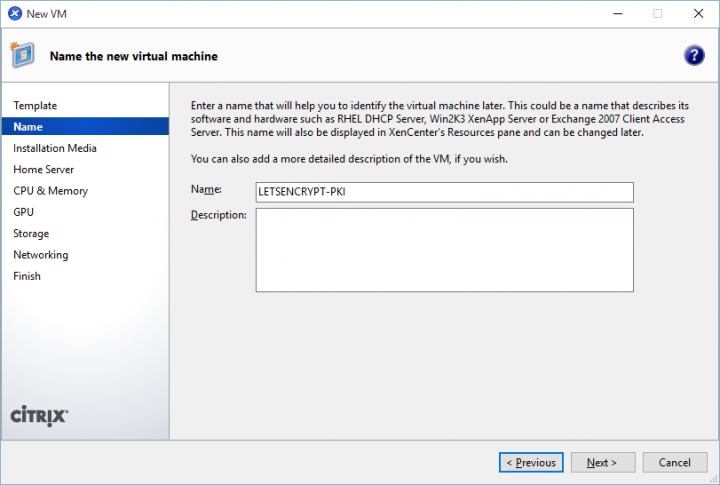
- Give it a name
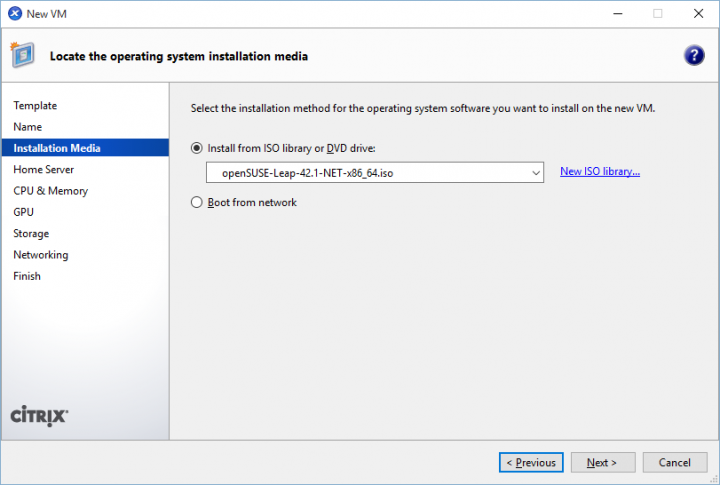
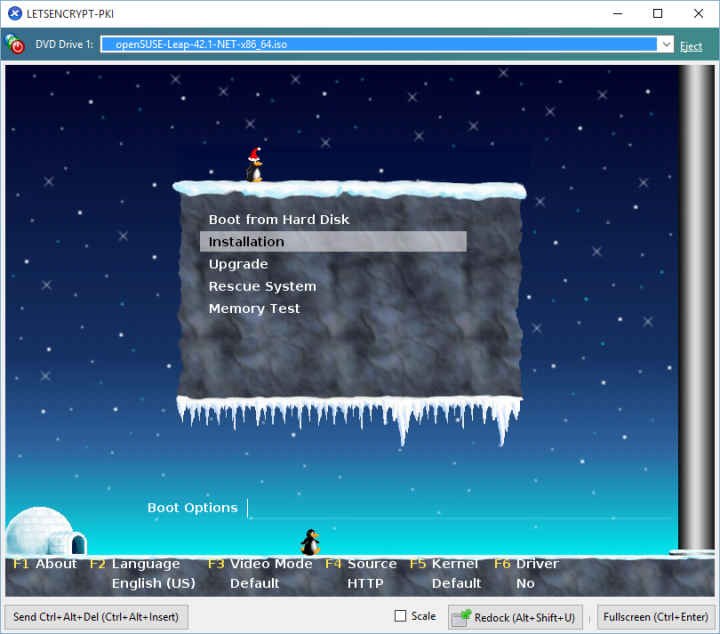
- Mount the net installer ISO (or the full DVD. Net installer is just my preference)
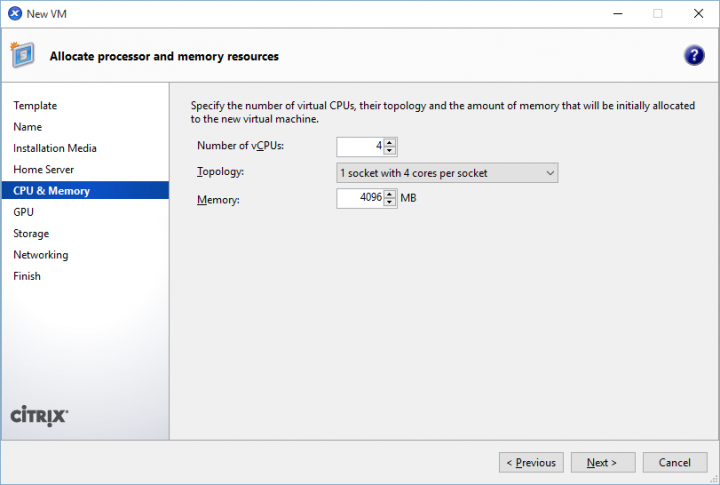
- I gave mine plenty of giddy-up.
- Again, plenty of disk space. Nothing is really going to accumulate here. Thin provisioned disk, no commitment.
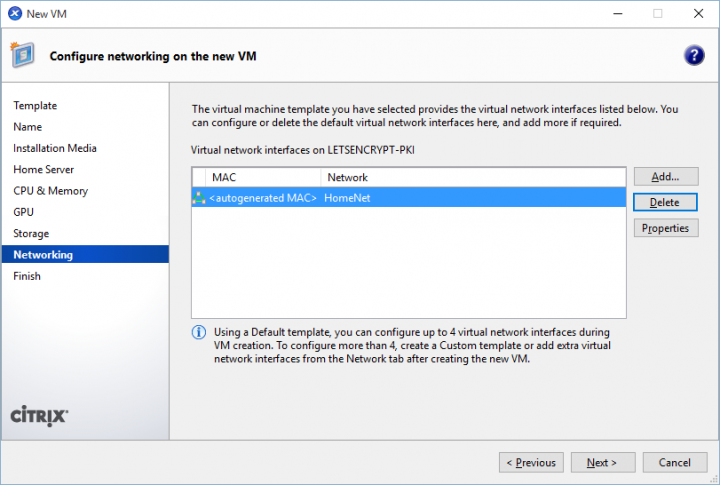
- Put it on a network
- OpenSUSE’s installer is festive at the time of this writing.
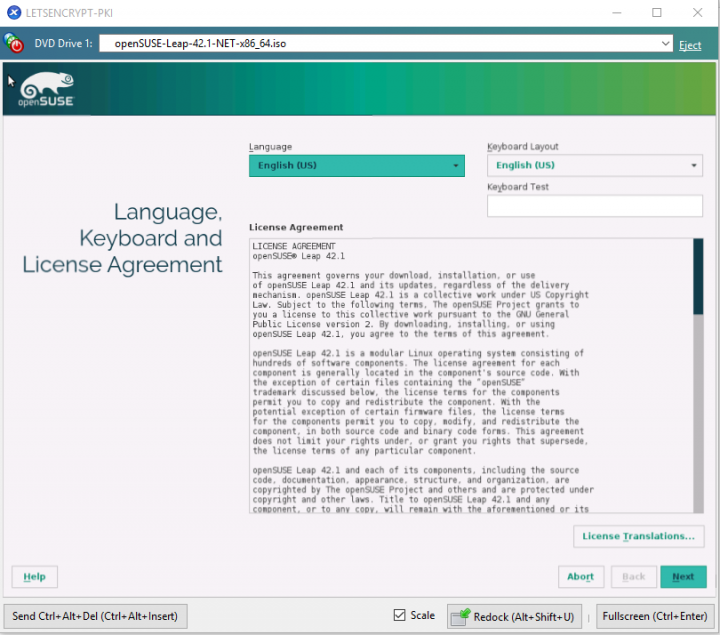
- Agree to the EULA
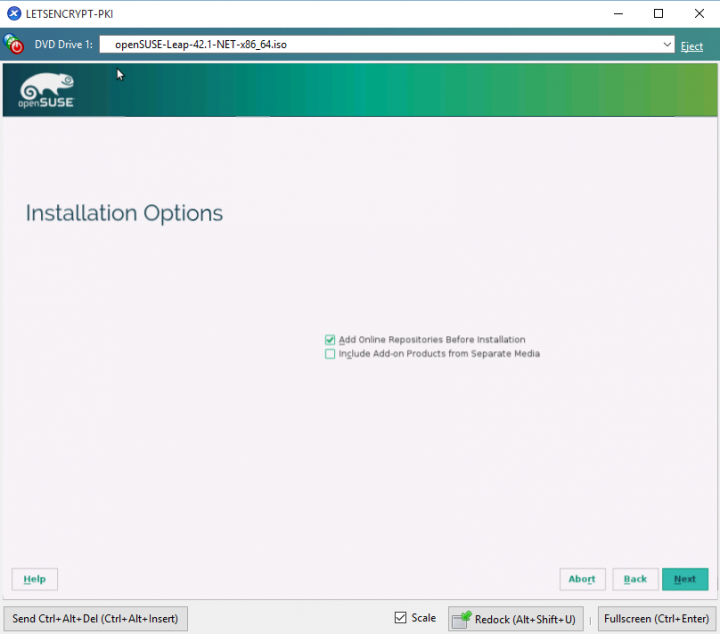
- I include online repos so that everything is up to date.
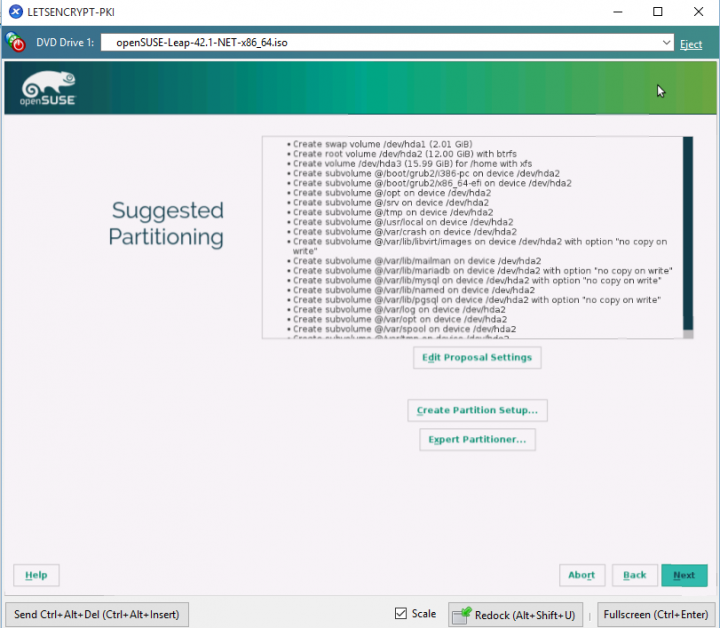
- I go with defaults on partitioning. No need to get fancy here.
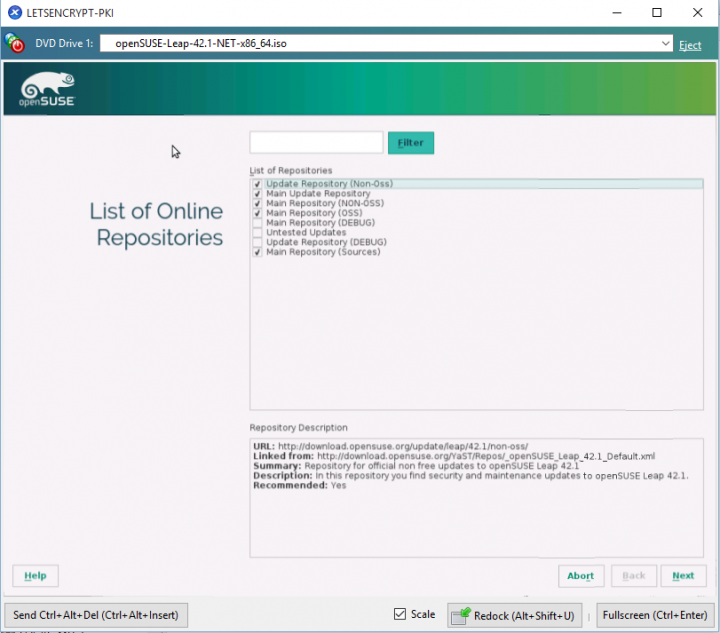
- I included the listed repositories. Again, depending on distro YMMV.
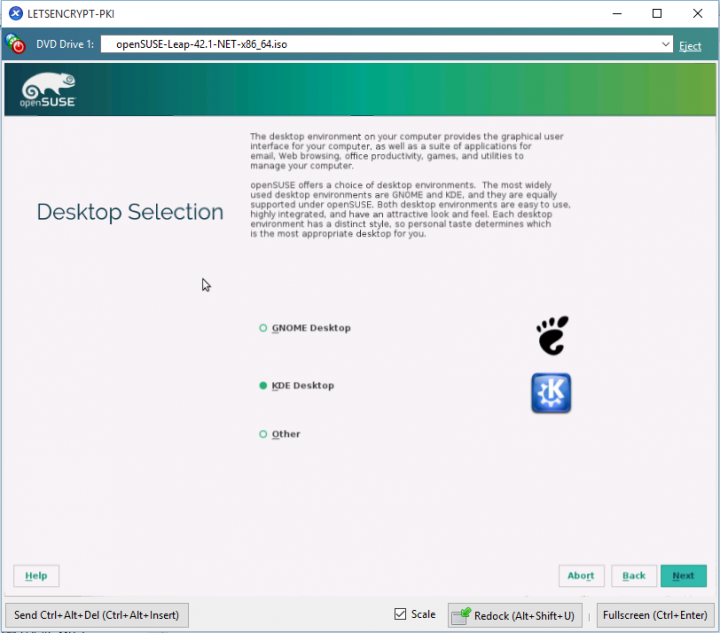
- I prefer KDE to GNOME but in reality this is basically just being used with SSH, so the GUI selection is largely irrelevant.
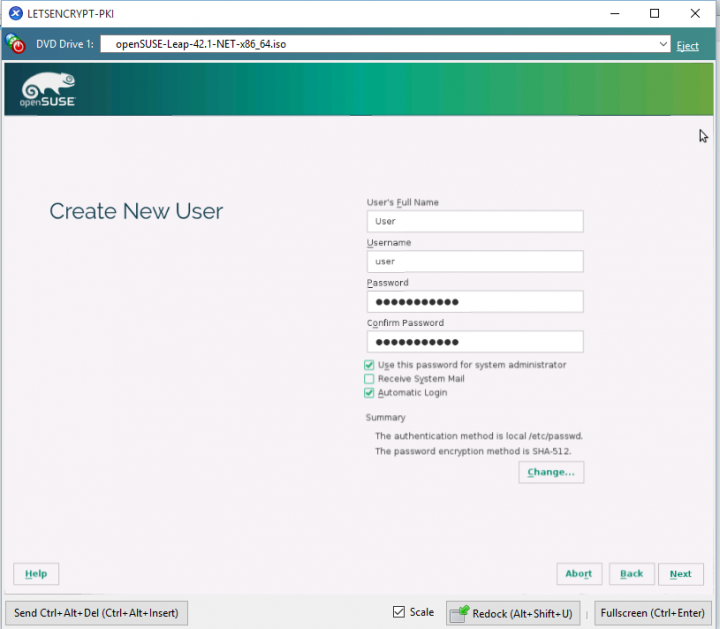
- Create a simple user. This is a point at which you may want to consult with your security team if such a thing exists. If you will be using this in production, it’s important that this server be hardened as it will contain private keys and all of the tools required to register and renew certificates. If someone steals my lab certificate I won’t be heartbroken.
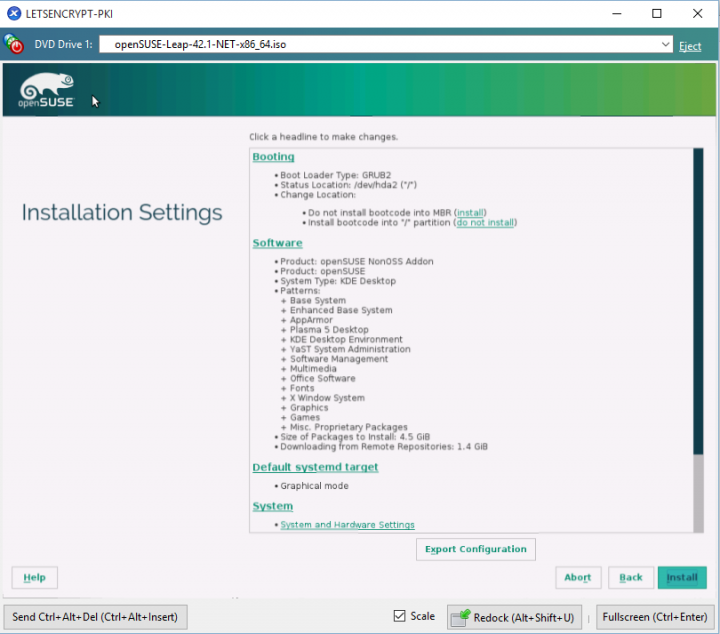
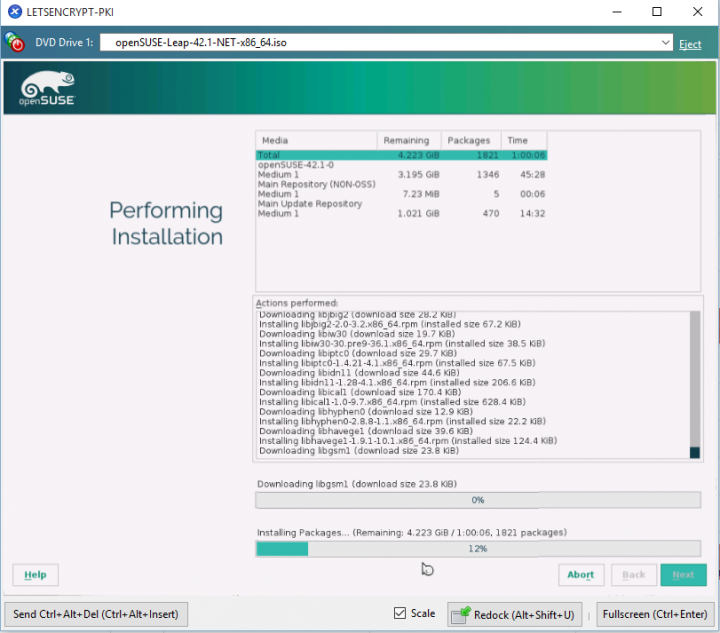
- Let er go.
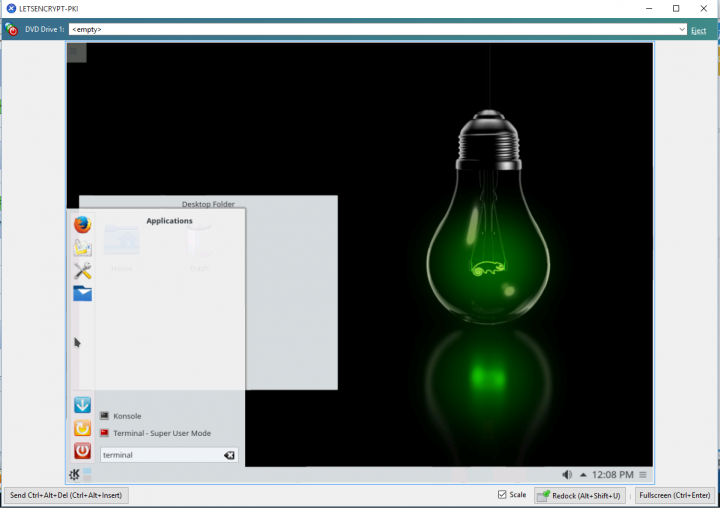
- Once the installation has completed, open up a terminal in the console window and get the system ready for remote/PuTTY access.
- Get the IP address with ifconfig
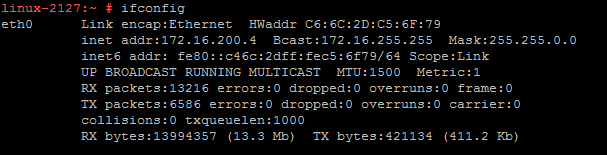
- Turn on the ssh server **again, security is an issue here. Use best practices in production!
systemctl enable sshd
service sshd start
- Turn off the firewall **see above. Use best practices in production!
yast firewall disable
- Get the IP address with ifconfig
- Log in via PuTTY or your terminal of choice
- Install prerequisites and get environment ready for the automation from Let’s Encrypt. In this example, I use the home folder of the user but in production this would live somewhere more appropriate like opt. Several other prerequisites (like gcc, python, and others) will be installed as part of the git install, just accept any prompts.
zypper –n in git
cd ~ && git clone <a href="https://github.com/letsencrypt/letsencrypt">https://github.com/letsencrypt/letsencrypt</a>
cd letsencrypt
./letsencrypt-auto --help
Step 2: Leverage the Netscaler to act as a web server that will provide a valid response to the Let’s Encrypt CA.
In most automated cases, the Let’s Encrypt scripts will place a marker onto the webserver in some specific location as part of the challenge/response when requesting a certificate.
During the process, a request will be sent from the CA to the webserver to confirm that this marker is there. This establishes that the person making the request owns the webserver and thereby would be authorized to issue the request for a certificate.
Since we are most likely looking to cert a Netscaler Gateway we can just have the Netscaler platform itself (via a content switching vserver) answer specific requests with specific responses in the form of this Let’s Encrypt marker. The same would hold true for any lbvserver or csvserver that we wish to cert, we just need a policy that answers Let’s Encrypt with the validation marker.
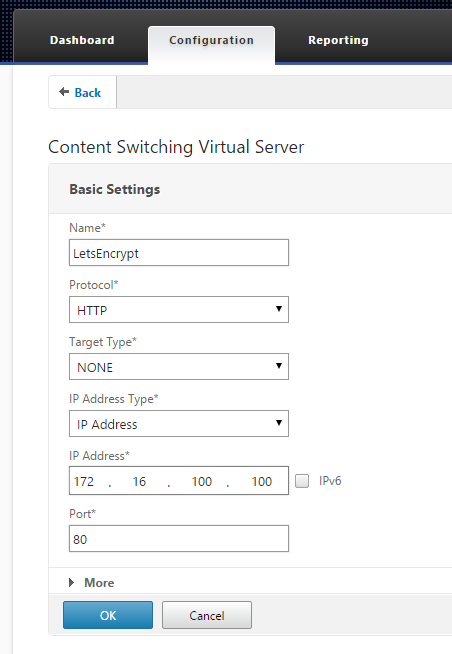
In this example, I will leverage a content switching vserver that listens on port 80 on the same IP of my Netscaler Gateway in order to offer up the validation key when an HTTP request is sent to the same FQDN as my gateway.
- Create response page that answers for letsencrypt. This will be the unique marker.
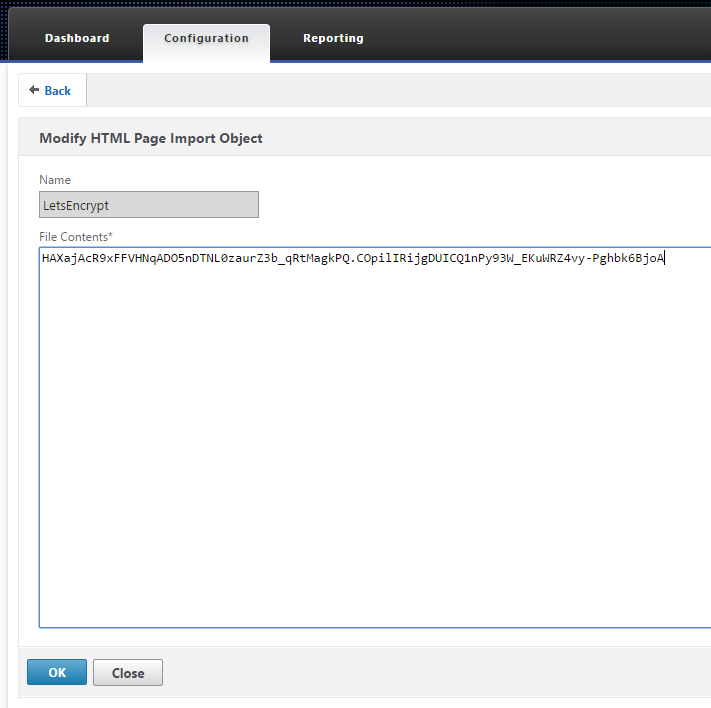
Netscaler > AppExpert > Responder > HTML Page Imports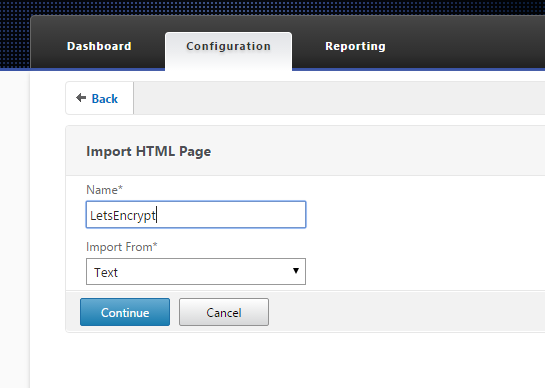 Just enter some temporary text into the file contents and press done.
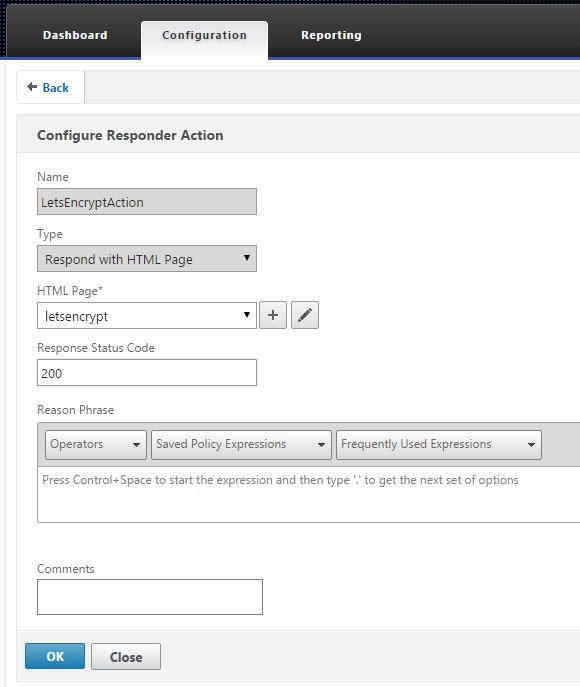
- Netscaler > AppExpert > Responder > Action
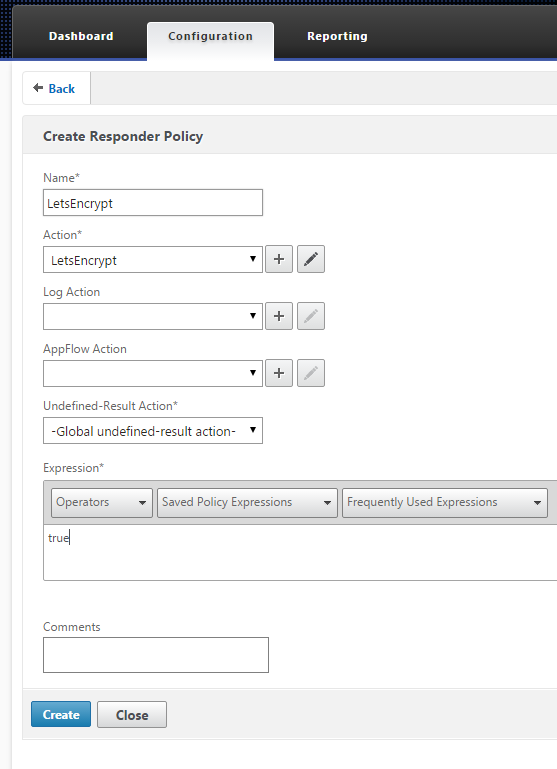
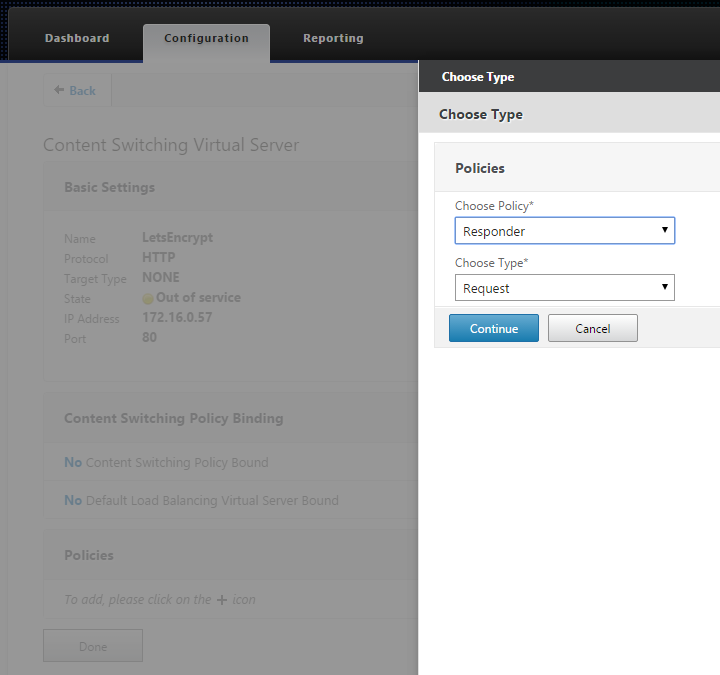
- Netscaler > AppExpert > Responder > Policies
- Create content switching vserver on port 80 with same IP as gateway address. This is where firewall rules, routes, etc. should be added. We are using the same IP address since we already know that the external DNS name of the website points to it. We will just communicate on port 80 in this example. If we wanted traffic to go through 443, we would be better-served mapping the responder policy to the gateway and instead of using in the expression, only present this responder policy when the path exactly matches the Let’s Encrypt trusted path.
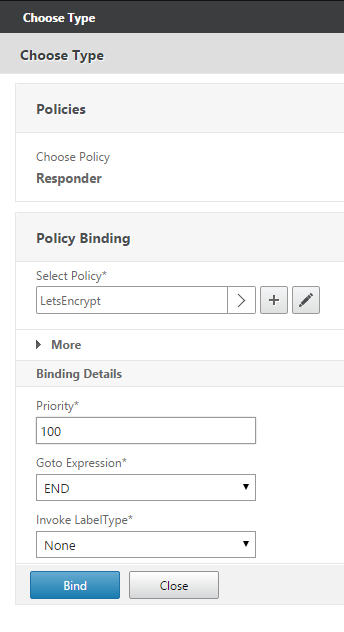
- Bind your responder policy to this content switching server. In this example, I have the responder policy answering all requests because the expression is set to “true” which matches all requests. If you wanted to be more granular you would instead create an expression that looked for a specific path in the request (for example).
- Visit the http side of the URL you are wanting to cert (http://gateway.domain.com) and ensure that the resulting page is just the temporary text you entered in step 1.
Step 3: Create the certificate
- In the PuTTY window on your Let’s Encrypt server we just really need to enter one command. Of interest are the –email and –d parameters. These will represent the FQDN of the site you are certing. The e-mail address is not used in the process but will be part of the certificate that is issued, so it should be a real address. In the example below I’m certing “domain.com”. **also note that the screenshot represents a different domain but just because I took a screenshot from my lab, sorry for the inconsistency. **also also note that you don’t have to do 2k keys, the default is 4k.
letsencrypt-auto certonly --manual --email admin@domain.com -d domain.com --rsa-key-size 2048
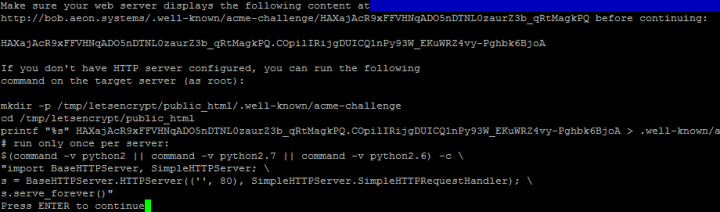 Don’t press enter yet!Note first few lines. The path with acme-challenge would be the full path to use for a more specific responder policy.
 - The 4th line here with the long string of letters is the custom text that we will put into the html responder page. Just copy this text to the clipboard
- Netscaler > AppExpert>Responder>HTML Page Imports
- open the LetsEncrypt html page, paste in the string of characters
- open the LetsEncrypt html page, paste in the string of characters
- Visit http://domain.com and ensure that the response is a page with the updated string of text.
- Ok… now press enter in that PuTTY window. Let’s Encypt will validate that the page presented contains the expected text and will then issue the certificate, assuming that your responder is properly working and the response matches what Let’s Encrypt expects.
- Upon success, Let’s Encrypt will produce a set of files in /etc/letsencrypt/live/domain.com/. These PEMs need to be converted before they will work with the netscaler.
pem – the actual server cert
chain.pem – the intermediate certificates required
fullchain.pem – the server cert + the chain
privkey.pem – the private key for the server cert
- Upon success, Let’s Encrypt will produce a set of files in /etc/letsencrypt/live/domain.com/. These PEMs need to be converted before they will work with the netscaler.
Step 4: Get the certs on the netscaler
- Convert the certs to a Netscaler appropriate format.
cd ~
openssl rsa -outform der -in /etc/letsencrypt/live/domain.com/privkey.pem –out ~/domain.com.server.key
openssl x509 -outform der -in /etc/letsencrypt/live/domain.com/cert.pem -out ~/domain.com.server.cer
openssl x509 -outform der -in /etc/letsencrypt/live/domain.com/chain.pem -out ~/domain.com.chain.cer
- Copy the certificates over to the netscaler
scp ~/domain.com.* nsroot@<netscalerip>:/nsconfig/ssl
- Install the certificates
Netscaler > Traffic Management > SSL > Certificates
Install server cert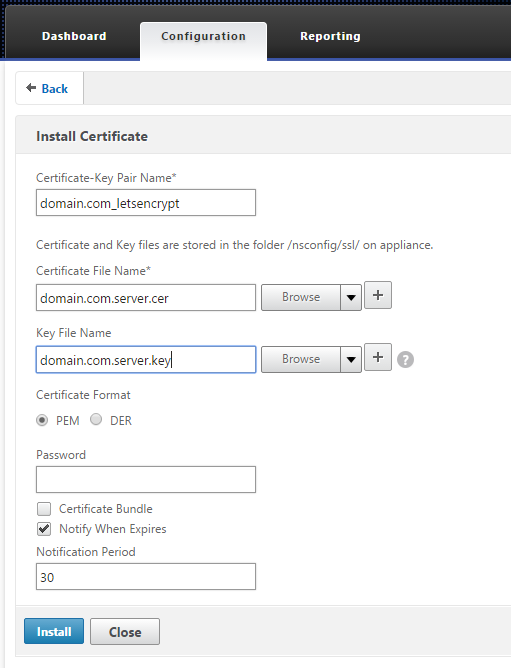
- Install chain

- Select the domain.com_letsencrypt certificate and click Action, then Link and select the domain.com_letsencryptchain certificate.
You are now ready to bind the new cert to your ssl vserver or gateway! Be sure to turn off your content switching vserver either by blocking it at the firewall, or disabling the vserver (or both). You would only need to turn this back on in 90 days and repeat steps 3 & 4 to renew the certificate.
There are many ways to skin this cat, but I figured since I was issuing these certificates to my Netscaler Gateway anyway, I may as well use the Netscaler to play the role of the web tier too!
Happy certing!
Using Let’s Encrypt for free SSL Certs with Netscaler的更多相关文章
- error setting certificate verify locations: CAfile: E:/git/Git/mingw64/ssl/certs/ca-bundle.crt
一.问题: 当git clone项目时报 error setting certificate verify locations: CAfile: E:/git/Git/mingw64/ssl/cert ...
- Jenkins 配置 Git 错误解决:CAfile: C:/Program Files/Git/mingw64/ssl/certs/ca-bundle.crt
错误信息: Failed to connect to repository : Command "C:/tools/Git/bin/git.exe ls-remote -h https:/X ...
- 【转】IIS - 自动申请、部署Let's Encrypt的免费SSL证书
IIS - 自动申请.部署Let's Encrypt的免费SSL证书(让网站实现HTTPS协议) 2017-12-19发布:hangge阅读:161 一.HTTPS 协议介绍 1,什么是 HTTP ...
- Let's Encrypt 免费通配符 SSL 证书申请教程——但是也需要email,域名所有权等,如果是黑产用的话会这样用吗?会不会暴露自己身份???
Let's Encrypt 免费通配符 SSL 证书申请教程 from:https://blog.csdn.net/English0523/article/details/79608464 2018 ...
- IIS - 自动申请、部署Let's Encrypt的免费SSL证书(让网站实现HTTPS协议)
IIS - 自动申请.部署Let's Encrypt的免费SSL证书(让网站实现HTTPS协议) 2017-12-19发布:hangge阅读:161 一.HTTPS 协议介绍 1,什么是 HTTP ...
- git clone报错:“server certificate verification failed. CAfile: /etc/ssl/certs/ca-certificates.crt CRLfile: none”
I can push by clone project using ssh, but it doesn't work when I clone project with https. it shows ...
- CAfile: /etc/ssl/certs/ca-certificates.crt CRLfile: none 解决方法
参考:CAfile: /etc/ssl/certs/ca-certificates.crt CRLfile: none 环境 主系统 OS X,虚拟机,Ubuntu 14.04 64bit. 问题描述 ...
- docker获取Let's Encrypt永久免费SSL证书
一 起因 官方的cerbot太烦了,不建议使用 还不如野蛮生长的acme.sh,而这里介绍docker运行cerbot获取Let's Encrypt永久免费SSL证书 二 选型 cerbot的证书不会 ...
- Cross platform GUI for creating SSL certs with OpenSSL
Someone said: from : https://micksmix.wordpress.com/2012/08/09/xca-cross-platform-gui-for-creating-s ...
随机推荐
- java异常处理 throw RuntimeException时不需要同时方法中声明抛出throws 异常等待调用者catch进行捕获 子父类异常问题
package com.swift.exception1; public class Demo_Exception { public static void main(String[] args) { ...
- link链接外部样式表
一个完整的link标签: <link href="[css adress]" rel="stylesheet" type="text/css&q ...
- Make a Person-freecodecamp算法题目
Make a Person 1.要求 用下面给定的方法构造一个对象:方法有 getFirstName(), getLastName(), getFullName(), setFirstName(fir ...
- CI的子目录控制器问题
不管是根目录还是子目录里面的文件名必须是首字母大写,否则会报404
- DFS练习-HDU1010
题目来源:HDU1010 DFS的基本原则已经差不多了,但是一些技巧仍然比较难想,所以还是加强练习,然后总结一下. 还是先看题意 ,指定迷宫的长,宽以及走出迷宫的具体时间N,M,T. 其中(1 < ...
- 概述「DAG加边至强连通」模型&&luoguP2746校园网Network of Schools
模型概述 有一DAG,问最少加多少条边能够使图强连通. 题目描述 一些学校连入一个电脑网络.那些学校已订立了协议:每个学校都会给其它的一些学校分发软件(称作“接受学校”).注意即使 B 在 A 学校的 ...
- UVA_1434_YAPTCHA
The math department has been having problems lately. Due to immense amount of unsolicited automated ...
- Mybatis-数据插入
传统jdbc数据插入 1.在Java代码for循环插入 executeUpdate() 2.批处理方法addBatch(Statement.Prestatement) addBatch() execu ...
- 读键值对封装成Map
描述: 有配置文件address_relation.properties,记录地址关系,有如下数据:ZSSS=ZS%,ZSPD, 封装到Map代码如下: public static void main ...
- scrapy--多爬虫
大家好,我胡汉三又回来了!!!开心QAQ 由于最近一直在忙工作的事,之前学的一些爬虫知识忘得差不多了,只能再花多一些时间来回顾,否则根本无法前进.所以在这里也像高中老师那样提醒一下大家,--每天晚上花 ...