Windows Phone开发(45):推送通知大结局——Raw通知
原文:Windows Phone开发(45):推送通知大结局——Raw通知
为什么叫大结局呢?因为推送通知服务就只有三种,前面扯了两种,就剩下一种——Raw通知。
前面我们通过两节的动手实验,相信大家都知道了,推送通知其实并不复杂,为什么呢?你看到了的,不管是哪种方式,使用方法基本一样,如果你不愿意写代码的话,完全可以把代码Copy几下就完事了,三种推送通知的实现代码是一样的,而仅仅是发送的内容不同罢了。
Raw推送通知比起前面两种更简单,因为它没有规范的格式,只要你向指定URI POST一个字节流数组就OK,也就是说,只要能变成byte[]的东西都可以发送。不过,不应该发送过大的数据,一般用于发送一些简短的文本信息就行了,别想着用来发送文件!!
严重提醒:要接收Raw通知,你的WP应用程序必须在前台运行,不然是收不到的,之与Toast通知可不一样,如果你的程序不在前台运行,推送的通知就会被XX掉。
好了,F话就不说了,开始操练吧。
先做发送通知的服务器端,这回就用WPF来做吧,界面我先截个TU。
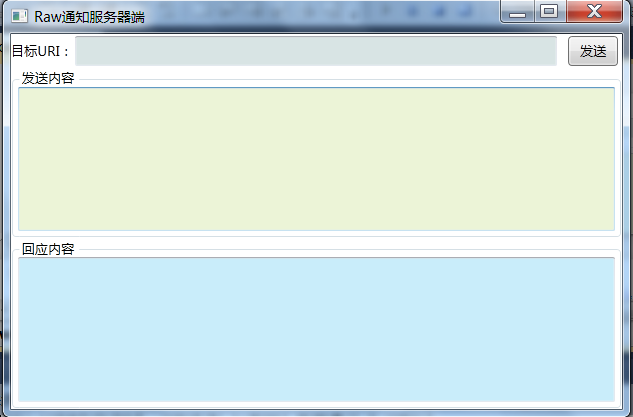
这就是用WPF的好处,截图中大家未必能看到窗口上用到哪些控件,设置了哪些属性,但是,如果我把XAML一贴,我想大家就懂了。
<Window x:Class="RawNtfServer.MainWindow"

        xmlns="http://schemas.microsoft.com/winfx/2006/xaml/presentation"

        xmlns:x="http://schemas.microsoft.com/winfx/2006/xaml"

        Title="Raw通知服务器端" Height="350" Width="525">

    <Grid>

        <Grid.RowDefinitions>

            <RowDefinition Height="Auto" />

            <RowDefinition />

            <RowDefinition />

        </Grid.RowDefinitions>

        <Grid Grid.Row="0">

            <Grid.ColumnDefinitions>

                <ColumnDefinition Width="auto"/>

                <ColumnDefinition Width="*"/>

                <ColumnDefinition Width="auto"/>

            </Grid.ColumnDefinitions>

            <TextBlock Grid.Column="0" Text="目标URI:" VerticalAlignment="Center"/>

            <TextBox Name="txtUri" Grid.Column="1" Margin="2" Background="#FFD8E4E4"/>

            <Button Grid.Column="2" Padding="8,3,8,3" Margin="7,2,3,2" Content="发送" Click="OnSend"/>

        </Grid>

        <GroupBox Grid.Row="1" Header="发送内容">

            <TextBox VerticalScrollBarVisibility="Auto" TextWrapping="Wrap" Name="txtMsg" Background="#FFECF4D7" />

        </GroupBox>

        <GroupBox Grid.Row="2" Header="回应内容">

            <TextBox Name="txtResp" VerticalScrollBarVisibility="Auto" TextWrapping="Wrap" Background="#FFC9EDFA" />

        </GroupBox>

    </Grid>

</Window>
好,前台干好了,去搞搞后台吧。
using System;

using System.Collections.Generic;

using System.Linq;

using System.Text;

using System.Windows;

using System.Windows.Controls;

using System.Windows.Data;

using System.Windows.Documents;

using System.Windows.Input;

using System.Windows.Media;

using System.Windows.Media.Imaging;

using System.Windows.Navigation;

using System.Windows.Shapes;

using System.Net;

using System.IO;

using System.Net.Mime;

namespace RawNtfServer

{

    /// <summary>

    /// MainWindow.xaml 的交互逻辑

    /// </summary>

    public partial class MainWindow : Window

    {

        public MainWindow()

        {

            InitializeComponent();

        }

        private void OnSend(object sender, RoutedEventArgs e)

        {

            if (txtUri.Text==""||txtMsg.Text=="")

            {

                MessageBox.Show("请输入必备的参数。"); return;

            }

            HttpWebRequest request = (HttpWebRequest)WebRequest.Create(txtUri.Text);

            request.Method = WebRequestMethods.Http.Post;

            request.ContentType = MediaTypeNames.Text.Plain;

            // HTTP标头:

            // X-NotificationClass:3

            // 3:立即发送

            // 13:450秒后发送

            // 23:900秒后发送

            request.Headers.Add("X-NotificationClass", "3");

            byte[] buffer = Encoding.UTF8.GetBytes(txtMsg.Text);

            request.ContentLength = buffer.Length;

            using (Stream s = request.GetRequestStream())

            {

                s.Write(buffer, 0, buffer.Length);

            }

            // 接收响应

            HttpWebResponse response = (HttpWebResponse)request.GetResponse();

            string hds = "";

            foreach (string key in response.Headers.AllKeys)

            {

                hds += key + " : " + response.Headers.Get(key) + "\r\n";

            }

            txtResp.Text = hds;

        }

    }

}
有没有觉得代码很熟悉?和前两节中的例子像不?
好了,服务器端Done,下面轮到WP客户端了。
布局不用TU了,放心,无图有真相。上XAML。
        <!--ContentPanel - 在此处放置其他内容-->

        <Grid x:Name="ContentPanel" Grid.Row="1" Margin="12,0,12,0">

            <ListBox Name="lbMsg"/>

        </Grid>
简单吧,就一个控件——ListBox,待会儿我们接受到的通知,就扔到它里面。
OK,看看后台的C#代码。
using System;

using System.Collections.Generic;

using System.Linq;

using System.Net;

using System.Windows;

using System.Windows.Controls;

using System.Windows.Documents;

using System.Windows.Input;

using System.Windows.Media;

using System.Windows.Media.Animation;

using System.Windows.Shapes;

using Microsoft.Phone.Controls;

using Microsoft.Phone.Notification;

namespace WPClient

{

    public partial class MainPage : PhoneApplicationPage

    {

        // 构造函数

        public MainPage()

        {

            InitializeComponent();

            HttpNotificationChannel Channel = null;

            string ChannelName = "raw";

            Channel = HttpNotificationChannel.Find(ChannelName);

            if (Channel==null)

            {

                Channel = new HttpNotificationChannel(ChannelName);

                Channel.ChannelUriUpdated += new EventHandler<NotificationChannelUriEventArgs>(Channel_ChannelUriUpdated);

                Channel.ErrorOccurred += new EventHandler<NotificationChannelErrorEventArgs>(Channel_ErrorOccurred);

                Channel.HttpNotificationReceived += new EventHandler<HttpNotificationEventArgs>(Channel_HttpNotificationReceived);

                Channel.Open();

            }

            else

            {

                Channel.ChannelUriUpdated += new EventHandler<NotificationChannelUriEventArgs>(Channel_ChannelUriUpdated);

                Channel.ErrorOccurred += new EventHandler<NotificationChannelErrorEventArgs>(Channel_ErrorOccurred);

                Channel.HttpNotificationReceived += new EventHandler<HttpNotificationEventArgs>(Channel_HttpNotificationReceived);

                System.Diagnostics.Debug.WriteLine("URI: {0}", Channel.ChannelUri.ToString());

            }

        }

        void Channel_HttpNotificationReceived(object sender, HttpNotificationEventArgs e)

        {

            string msg = "";

            using (System.IO.Stream stream=e.Notification.Body)

            {

                System.IO.StreamReader rd = new System.IO.StreamReader(stream, System.Text.Encoding.UTF8);

                msg = rd.ReadToEnd();

            }

            Dispatcher.BeginInvoke(() =>

                {

                    this.lbMsg.Items.Add(DateTime.Now.ToLongTimeString() + "  " + msg);

                });

        }

        void Channel_ErrorOccurred(object sender, NotificationChannelErrorEventArgs e)

        {

            Dispatcher.BeginInvoke(() =>

                {

                    MessageBox.Show(e.Message);

                });

        }

        void Channel_ChannelUriUpdated(object sender, NotificationChannelUriEventArgs e)

        {

            Dispatcher.BeginInvoke(() =>

                {

                    System.Diagnostics.Debug.WriteLine("URI: {0}",e.ChannelUri.ToString());

                });

        }

    }

}
避免有朋友说代码看不懂,这回我是Ctrl + A后再贴出来的。
下面来执行一下,首先运行WP端,可以同时运行,随你喜欢。 ,但至少要让WP模拟器或手机收到云服务器分配的URI。

把这个URI复制,填到服务器端的窗口中,然后输入你要发送的东东,点击“发送”。
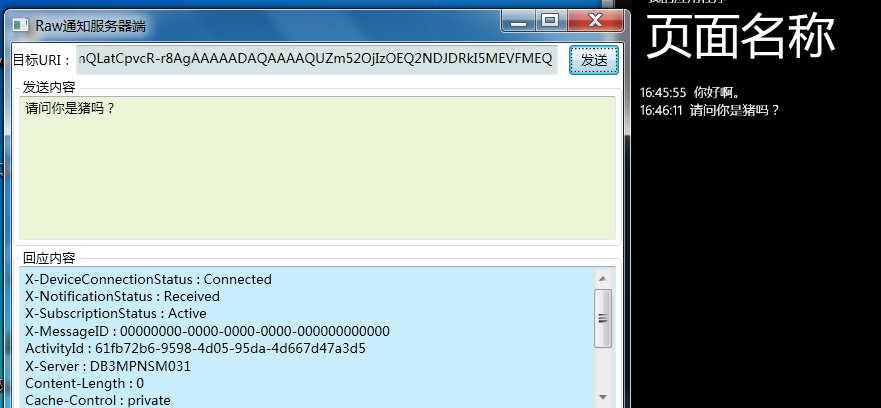
嗯,就是这样用,应该不复杂吧?
在收发消息的过程中,编码时建议使用UTF-8,貌似这个不会有乱码。
哈,牛就吹到这了,下一节我们玩一玩比较恐怖的东西——Socket。
Windows Phone开发(45):推送通知大结局——Raw通知的更多相关文章
- 背水一战 Windows 10 (121) - 后台任务: 推送通知
[源码下载] 背水一战 Windows 10 (121) - 后台任务: 推送通知 作者:webabcd 介绍背水一战 Windows 10 之 后台任务 推送通知 示例演示如何接收推送通知/WebA ...
- fir.im Weekly - 关于 iOS10 适配、开发、推送的一切
"小程序"来了,微信变成名副其实的 Web OS,新一轮的Web App 与Native App争论四起.程序员对新技术永远保持灵敏的嗅觉和旺盛的好奇心,@李锦发整理了微信小程序资 ...
- iOS开发 iOS10推送必看
iOS10更新之后,推送也是做了一些小小的修改,下面我就给大家仔细说说.希望看完我的这篇文章,对大家有所帮助. 一.简单入门篇---看完就可以简单适配完了 相对简单的推送证书以及环境的问题,我就不在这 ...
- 【FAQ】HMS Core推送服务与本地创建通知消息如何相互覆盖?
我们知道,单独使用HMS Core推送服务或本地创建通知消息,都可以实现通知消息的覆盖,方式分别为: 1.本地创建通知消息(简称本地通知消息) 通过notificationManager.notify ...
- atitit.极光消息推送服务器端开发实现推送 jpush v3. 总结o7p
atitit.极光消息推送服务器端开发实现推送 jpush v3. 总结o7p 1. 推送所设计到底功能1 1.1. 内容压缩1 1.2. 多引擎1 2. reg ,设置appkey and pw ...
- 【WP 8.1开发】推送通知测试服务端程序
所谓推送通知,用老爷爷都能听懂的话说,就是: 1.我的服务器将通知内容发送到微软的通知服务器,再由通知服务器帮我转发消息. 2.那么,微软的推送服务器是如何知道我的服务器要发消息给哪台手机呢?手机客户 ...
- Xcode8开发iOS10推送通知过程
iOS10发布后,简书优先开发增加了iOS10的新通知.本文分享整个feature的开发过程遇到的问题. 1.工程配置 Xcode8发生了很大的变化,直接打开原来的工程编译运行,这个时候是获取不到Pu ...
- 【Android应用开发】 推送原理解析 极光推送使用详解 (零基础精通推送)
作者 : octopus_truth 转载请注明出处 : http://blog.csdn.net/shulianghan/article/details/45046283 推送技术产生场景 : -- ...
- android开发(25) - 推送的实现,使用百度云推送
什么叫推送? 中文名称:推送 英文名称:push 定义:描述因特网内容提供者和因特网用户之间工作方式的术语.“推送”指因特网内容提供者定期向预订用户“提供”数据. 项目中有可能会用到推送.如果自己写一 ...
随机推荐
- android ListView中CheckBox错位的解决
貌似已经非常晚了,可是还是想记下笔记,想让今天完满. 在ListView中加了checkBox,但是发现点击改变其选中状态的时候,发现其位置错乱.状态改变的并非你选中的,百思不得其解.后面通过上网查资 ...
- Swift - 使用xib添加新界面
除了使用storyboard外,我们还可以使用xib来设计并创建页面. 1,下面通过一个样例来演示: (1)点击主界面的“信息”按钮,页面切换到信息界面 (2)点击信息界面的“返回”,关闭信息界面,回 ...
- Linux红黑树(二)——访问节点
核心对红黑树使用两点说明 1.头文件 <Documentation/rbtree.txt> Linux's rbtree implementation lives in the file ...
- ABP分层设计
ABP分层设计 一.为什么要分层 分层架构是所有架构的鼻祖,分层的作用就是隔离,不过,我们有时候有个误解,就是把层和程序集对应起来,就比如简单三层架构中,在你的解决方案中,一般会有三个程序集项目:XX ...
- 自适应滤波器(Adaptive Filter)
======= Wikipedia的解释 ======= 自适应滤波器是能够根据输入信号自动调整性能进行数字信号处理的数字滤波器.作为对比,非自适应滤波器有静态的滤波器系数,这些静态系数一起组成传递函 ...
- 怎么用CIFilter给图片加上各种各样的滤镜_1
近期在做对图像处理的app,而要对图像进行处理,CoreImage是离不开的框架. 上网Google了一下,大部分的博客都是仅仅讲了怎么给图像加上怀旧(CISepiaTone).模糊(CIBloom) ...
- TCP、UDP数据包大小的限制(UDP数据包一次发送多大为好)——数据帧的物理特性决定的,每层都有一个自己的数据头,层层递减
1.概述 首先要看TCP/IP协议,涉及到四层:链路层,网络层,传输层,应用层. 其中以太网(Ethernet)的数据帧在链路层 IP包在网络层 TCP或UDP包在传输层 TCP或UDP中的数据(Da ...
- 广东省-IT公司红黑榜排名
红榜Top100 Order Company Name Point Change 1 百富计算机技术(深圳)有限公司 94.00 -- 2 中国网通广州分公司 88.00 -- 3 深圳市汇 ...
- 基于Linux根据僵尸网络病毒平台《比尔盖茨》
感觉分析的非常好,所以决定翻译出来,希望和大家多多交流O(∩_∩)O~ 转载请注明出处:http://blog.csdn.net/u010484477 O(∩_∩)O谢谢 keyword:病毒 ...
- 计算机视觉与模式识别代码合集第二版three
计算机视觉与模式识别代码合集第二版three Topic Name Reference code Optical Flow Horn and Schunck's Optical Flow ...