Monkeyrunner 录制脚本&回放
本文主要解释如何使用monkeyrunner来实现脚本的录制和回放
一:准备条件
在电脑端配置 Android SDK环境 java 环境
下载好 SDK后添加环境变量 E:\android-sdk-windows\tools 添加到path上
查看adb环境搭配成功与否
输入cmd-回车-输入adb shell
显示如下
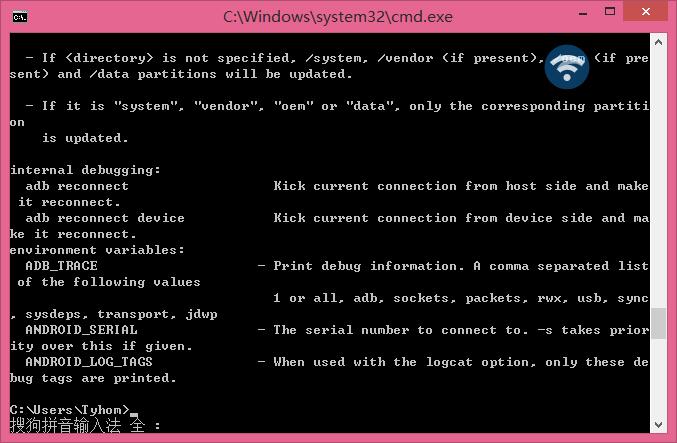
OK 这样就adb配置环境好了
java环境同上原理 就不一一说了
二: 用到的录制、回放脚本
录制脚本: monkey_recorder.py
#!/usr/bin/env monkeyrunner

# Copyright 2010, The Android Open Source Project

#

# Licensed under the Apache License, Version 2.0 (the "License");

# you may not use this file except in compliance with the License.

# You may obtain a copy of the License at

#

#     http://www.apache.org/licenses/LICENSE-2.0

#

# Unless required by applicable law or agreed to in writing, software

# distributed under the License is distributed on an "AS IS" BASIS,

# WITHOUT WARRANTIES OR CONDITIONS OF ANY KIND, either express or implied.

# See the License for the specific language governing permissions and

# limitations under the License.

from com.android.monkeyrunner import MonkeyRunner as mr

from com.android.monkeyrunner.recorder import MonkeyRecorder as recorder

device = mr.waitForConnection()

recorder.start(device)
回放脚本: monkey_playback.py
#!/usr/bin/env monkeyrunner

# Copyright 2010, The Android Open Source Project

#

# Licensed under the Apache License, Version 2.0 (the "License");

# you may not use this file except in compliance with the License.

# You may obtain a copy of the License at

#

#     http://www.apache.org/licenses/LICENSE-2.0

#

# Unless required by applicable law or agreed to in writing, software

# distributed under the License is distributed on an "AS IS" BASIS,

# WITHOUT WARRANTIES OR CONDITIONS OF ANY KIND, either express or implied.

# See the License for the specific language governing permissions and

# limitations under the License.

import sys

from com.android.monkeyrunner import MonkeyRunner

# The format of the file we are parsing is very carfeully constructed.

# Each line corresponds to a single command.  The line is split into 2

# parts with a | character.  Text to the left of the pipe denotes

# which command to run.  The text to the right of the pipe is a python

# dictionary (it can be evaled into existence) that specifies the

# arguments for the command.  In most cases, this directly maps to the

# keyword argument dictionary that could be passed to the underlying

# command.

# Lookup table to map command strings to functions that implement that

# command.

CMD_MAP = {

    'TOUCH': lambda dev, arg: dev.touch(**arg),

    'DRAG': lambda dev, arg: dev.drag(**arg),

    'PRESS': lambda dev, arg: dev.press(**arg),

    'TYPE': lambda dev, arg: dev.type(**arg),

    'WAIT': lambda dev, arg: MonkeyRunner.sleep(**arg)

    }

# Process a single file for the specified device.

def process_file(fp, device):

    for line in fp:

        (cmd, rest) = line.split('|')

        try:

            # Parse the pydict

            rest = eval(rest)

        except:

            print 'unable to parse options'

            continue

        if cmd not in CMD_MAP:

            print 'unknown command: ' + cmd

            continue

        CMD_MAP[cmd](device, rest)

def main():

    file = sys.argv[1]

    fp = open(file, 'r')

    device = MonkeyRunner.waitForConnection()

    process_file(fp, device)

    fp.close();

if __name__ == '__main__':

    main()
三: 使用方法,在CMD下进入android的sdk下的tools目录下,进行下面的操作
录制: 1、在cmd下输入monkeyrunner monkey_recorder.py,将打开下面的窗口
该窗口的功能:
1、可以自动显示手机当前的界面
2、自动刷新手机的最新状态
3、点击手机界面即可对手机进行操作,同时会反应到真机,而且会在右侧插入操作脚本
4:、wait: 用来插入下一次操作的时间间隔,点击后即可设置时间,单位是秒
Press a Button:用来确定需要点击的按钮,包括menu、home、search,以及对按钮的press、down、up属性
Type Something:用来输入内容到输入框
Fling:用来进行拖动操作,可以向上、下、左、右,以及操作的范围
Export Actions:用来导出脚本
Refresh Display:用来刷新手机界面,估计只有在断开手机后,重新连接时才会用到
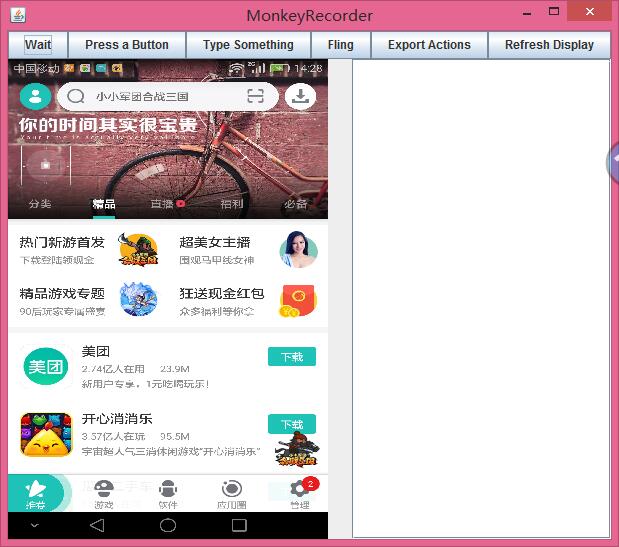
最后一个为录制的文件,这里需要使用绝对路径
PS: 录制后的脚本可以进行二次更改,而且每一步操作需要有时间间隔,以保证测试的正确性
欢迎关注老王公众号

Monkeyrunner 录制脚本&回放的更多相关文章
- Android自动化测试之MonkeyRunner录制和回放脚本
Android自动化测试之MonkeyRunner录制和回放脚本(十一) 分类: 自动化测试 Android自动化 2013-02-22 10:57 7346人阅读 评论(2) 收藏 举报 andro ...
- [转] Android自动化测试之MonkeyRunner录制和回放脚本(四)
测试脚本录制: 方案一: 我们先看看以下monkeyrecoder.py脚本: #Usage: monkeyrunner recorder.py #recorder.py http://mirror ...
- 【转】Android自动化测试之MonkeyRunner录制和回放脚本(四)
测试脚本录制: 方案一: 我们先看看以下monkeyrecoder.py脚本: #Usage: monkeyrunner recorder.py #recorder.py http://mirror ...
- monkeyrunner录制和回放功能
脚本录制 网上先是搜索了一下,说是SDK--tools目录下有monkey_recorder.py和monkey_playback.py的脚本,但是我的没有找到所以可以自己编辑个脚本保存即可~ 先编辑 ...
- 【monkeyrunner】monkeyrunner脚本录制和回放
脚本录制 1.连接你已经打开调试模式的ANDROID设备或模拟器,输入adb devices 2.运行录制脚本.在cmd窗口输入 monkeyrunner recorder.py #recorder. ...
- Monkeyrunner脚本的录制与回放
继上一篇monkeyrunner环境搭建:http://www.cnblogs.com/zh-ya-jing/p/4351245.html 之后,我们可以进一步学习monkeyrunner了. 我也是 ...
- MonkeyRunner Mac环境 录制脚本和回放 批量回放
1.MonkeyRunner是AndroidSDK自带的一个东西,在SDK目录中的tools\bin文件夹中 2.配置环境变量 编辑环境变量:打开终端输入:open ~/.bash_profile 将 ...
- monkeyrunner之录制与回放(七)
monkeyrunner为我们提供了录制 回放的功能. 录制与回放使用原因:实际项目,需求变更频繁,且测试任务多,我们没有足够时间去写测试脚本,这是就可以进行录制脚本,然后通过回放,跑完需要的流程. ...
- Android自动化学习笔记之MonkeyRunner:MonkeyRunner的录制和回放
---------------------------------------------------------------------------------------------------- ...
随机推荐
- grunt + sass 使用记录
环境依赖 Nodejs for grunt Ruby for sass 配置文件 package.json { "name": "app", "ver ...
- uvm_analysis_port——TLM1事务级建模方法(二)
UVM中的TLM1端口,第一类是用于uvm_driver 和uvm_sequencer连接端口,第二类是用于其他component之间连接的端口,如uvm_monitor和uvm_scoreboard ...
- zabbix中监控项报错
报错信息: zabbix报错(Not all processes could be identified, non-owned process info will not be shown, you ...
- JeeSite 工作流Activiti的应用实例
新建流程模型 在线办公-流程管理-模型管理-新建模型 点击“提交”后会立即跳转到“流程在线设计器”页面,请看下一章节 在线流程设计器 在线办公流程管理模型管理模型管理编辑 整体流程图 mat ...
- GitLab一个非标准的端口远程仓库导致clone失败
首先看下报错信息 当gitlab服务器ssh端口不是默认的22时,使用ssh连接gitlab会出现上面的错误 解决方法: 修改/etc/gitlab/gitlab.rd gitlab_rails['g ...
- 网络编程——基于UDP的网络化CPU性能检测
网络化计算机性能检测软件的开发,可对指定目标主机的CPU利用率进行远程检测,并自动对远程主机执行性能指标进行周期性检测,最终实现图形化显示检测结果. 网络通信模块:(客户端类似,因为udp是对等通信) ...
- centos下的安装mysql,jdk
mysql: 如果你是用rpm安装, 检查一下RPM PACKAGE:rpm -qa | grep -i mysql如果mysql已经安装在本机,则会列出mysql安装过的文件 ,像mysql-ser ...
- 自动释放池的前世今生 ---- 深入解析 autoreleasepool
http://draveness.me/autoreleasepool.html 关注仓库,及时获得更新:iOS-Source-Code-Analyze Follow: Draveness · Git ...
- 【BZOJ4698】[SDOI2008] Sandy的卡片(后缀数组+二分)
点此看题面 大致题意: 给你\(N\)个序列,若定义两个相同子串为一个子串内所有数加上一个数后能变成另一个串,求所有序列中的最长相同子串的长度. 简单的转化 首先,我们对题目进行一个简单的转化. 要求 ...
- 【BZOJ1076】[SCOI2008] 奖励关(状压DP)
点此看题面 大致题意:总共有\(n\)个宝物和\(k\)个回合,每个回合系统将随机抛出一个宝物(抛出每个宝物的概率皆为\(1/n\)),吃掉一个宝物可以获得一定的积分(积分可能为负),而吃掉某个宝物有 ...