vue-cli打包到部署到nginx服务器
最近公司把云平台产品用vue 前后端分离的框架来写,前面大部分开发都比较顺利,后面打包部署出了bug
现在记录下自己遇到的哪些坑
1,我直接npm run build 打包出来,打开dist目录下面的index.html 空白页,页面上出现
no "NODE ENV"是我打包时没有指定打包到哪个环境
正确打包是 npm run build:prod
2.关于vue-router 中mode:'history'的设置,导致我页面打包后也是路由无法跳转
而且出现的bug是语法错误,unexpected toke <
无奈我去掉了history ,重新打包,就可以了
3.关于Nginx的配置nginx.conf
这里先复习下nginx命令,安装nginx点击这里可以查看
start nginx 启动并服务
tasklist /fi "imagename eqnginx.exe" 查看是否启动
nginx -s reload 改变配置文件时,需重启nginx工作进程
关闭进程
nginx -s stop 关闭服务
nginx -s quit 安全关闭
taskkill /F/IM nginx.exe 关闭所有nginx服务
下面整理下正确打包,部署到nginx的方法
新手小白建议在mode:hash 下先运行
第一步:打包(mode:hash)
1.打包后第一个问题是打开dist中的index.html没有显示页面,空白页面。
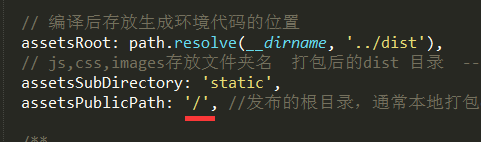
一、打开config的文件夹中的index.js

如图把assetsPUblicPath修改为‘./’
然后再次打包发现路由的内容不法渲染并且无任何错误,
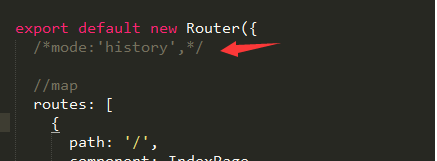
二、把路由中的model注释掉
三、再次打开dist中的index.html,可以看到页面,路由也是正确的则表示可以把dis目录拿到nginx部署了
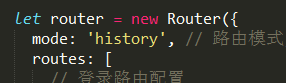
第一步:打包(mode:history)
一、打包是直接写/根路径,而不是相对路径
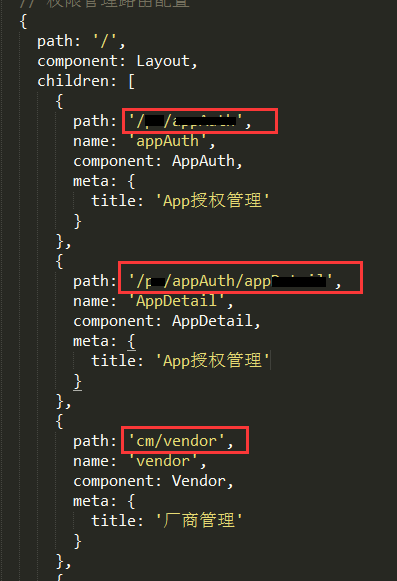
二、路由path前面全部要加上/,history模拟的是跳转地址路径
三、nginx加上下面的配置,其他和hash方式全部一样
第二步:如何部署nginx
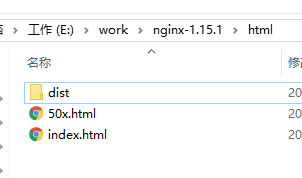
1.把dis目录复制到nginx下的html文件夹下面
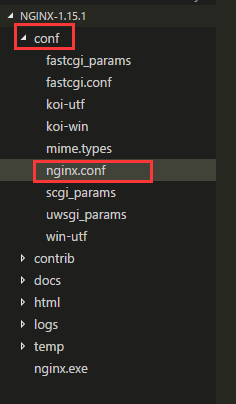
2.打开nginx.conf配置文件
代码如下:
#user nobody;
worker_processes ; #error_log logs/error.log;
#error_log logs/error.log notice;
#error_log logs/error.log info; #pid logs/nginx.pid; events {
worker_connections ;
} http {
include mime.types;
default_type application/octet-stream; #log_format main '$remote_addr - $remote_user [$time_local] "$request" '
# '$status $body_bytes_sent "$http_referer" '
# '"$http_user_agent" "$http_x_forwarded_for"'; #access_log logs/access.log main; sendfile on;
#tcp_nopush on; #keepalive_timeout ;
keepalive_timeout ; #gzip on; server {
listen ; #自定义你服务器的端口号
server_name localhost; #自定义你的IP或者域名,localhost:127.0.0.1 本地的IP #charset koi8-r; #access_log logs/host.access.log main; root E:\work\aiotcloud\yihao01-web-management\dist; #dist目录指向你本地的工作目录,相当重要
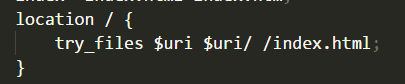
index index.html index.htm; #打开默认文件为index.html #官网介绍设置这条可以解决history路由的问题
location / {
try_files $uri $uri/ /index.html;
} #####################################
# 下面这些地址全部是nginx代理后台服务器的地址再转发给前端,解决跨域问题
####################################### # 模块1
location /securityAuthentication/{
proxy_pass http://192.168.0.16:6804;
add_header Content-Type "text/plain;charset=utf-8";
add_header 'Access-Control-Allow-Origin' '*';
add_header 'Access-Control-Allow-Credentials' 'true';
add_header 'Access-Control-Allow-Methods' 'GET, POST';
} # 模块2
location /admin/{
proxy_pass http://192.168.0.16:6810;
add_header Content-Type "text/plain;charset=utf-8";
add_header 'Access-Control-Allow-Origin' '*';
add_header 'Access-Control-Allow-Credentials' 'true';
add_header 'Access-Control-Allow-Methods' 'GET, POST';
} # 模块3
location /permission/{
proxy_pass http://192.168.0.16:6810;
add_header Content-Type "text/plain;charset=utf-8";
add_header 'Access-Control-Allow-Origin' '*';
add_header 'Access-Control-Allow-Credentials' 'true';
add_header 'Access-Control-Allow-Methods' 'GET, POST';
} # 模块4
location /configurationManagement/{
proxy_pass http://192.168.0.16:6812;
add_header Content-Type "text/plain;charset=utf-8";
add_header 'Access-Control-Allow-Origin' '*';
add_header 'Access-Control-Allow-Credentials' 'true';
add_header 'Access-Control-Allow-Methods' 'GET, POST';
} # 模块5
location /device/{
proxy_pass http://192.168.0.16:6806;
add_header Content-Type "text/plain;charset=utf-8";
add_header 'Access-Control-Allow-Origin' '*';
add_header 'Access-Control-Allow-Credentials' 'true';
add_header 'Access-Control-Allow-Methods' 'GET, POST';
} #error_page /.html; # redirect server error pages to the static page /50x.html
#
error_page /50x.html;
location = /50x.html {
root html;
} # proxy the PHP scripts to Apache listening on 127.0.0.1:
#
#location ~ \.php$ {
# proxy_pass http://127.0.0.1;
#} # pass the PHP scripts to FastCGI server listening on 127.0.0.1:
#
#location ~ \.php$ {
# root html;
# fastcgi_pass 127.0.0.1:;
# fastcgi_index index.php;
# fastcgi_param SCRIPT_FILENAME /scripts$fastcgi_script_name;
# include fastcgi_params;
#} # deny access to .htaccess files, if Apache's document root
# concurs with nginx's one
#
#location ~ /\.ht {
# deny all;
#}
} # another virtual host using mix of IP-, name-, and port-based configuration
#
#server {
# listen ;
# listen somename:;
# server_name somename alias another.alias; # location / {
# root html;
# index index.html index.htm;
# }
#} # HTTPS server
#
#server {
# listen ssl;
# server_name localhost; # ssl_certificate cert.pem;
# ssl_certificate_key cert.key; # ssl_session_cache shared:SSL:1m;
# ssl_session_timeout 5m; # ssl_ciphers HIGH:!aNULL:!MD5;
# ssl_prefer_server_ciphers on; # location / {
# root html;
# index index.html index.htm;
# }
#} }
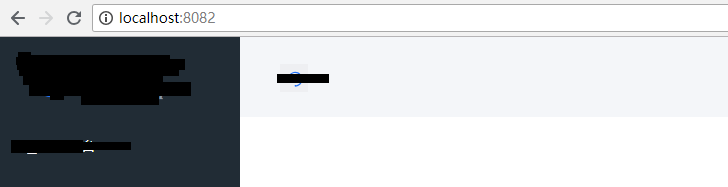
3.win+R打开命令窗口,cd 到nginx文件夹,start nginx启动服务
4.在浏览器输入localhost:8082 就可以看到nginx服务启动的页面啦!
vue-cli打包到部署到nginx服务器的更多相关文章
- vue项目打包部署到nginx 服务器上
假如要实现的效果如下 http://ip/vue =>是进入首页访问的路径是 usr/local/nginx/html/vue http://ip/website =>是进 ...
- vue项目打包本地后通过nginx解决跨域
前言 有时候我们打包好vue项目让后端人员部署项目时可能会有小插曲,为了不麻烦后端人员和避免尴尬,最好的办法就是在本地自己先测一下,而在本地运行打包后的项目会遇到接口跨域的问题.我平时经常用的方法就是 ...
- uniapp H5 打包并部署到 nginx
个人也是了百度了挺久的了,花费的时间( 俩个半小时 ) uniapp 的打包首先要先配置,配置好了才能去进行打包,如图所示. 这只是第一步. 注意: 1.运行基础路径最好用 ./ ,如果配置了其他请自 ...
- vue cli 打包项目造成css背景图路径错误
vue cli做项目的时候难免会碰到,css引用背景图或者css,js之间的相互引用!!!这时候打包后可能会出现一个错误!!如下图: 写法: 错误: 会无端多出一个“/css/static/” 这样就 ...
- Vue Cli 打包之后静态资源路径不对的解决方法
cli2版本: 将 config/index.js 里的 assetsPublicPath 的值改为 './' . build: { ... assetsPublicPath: './', ... } ...
- Vue打包之后部署到 express 服务器上
Part.1 安装 express npm install express body-parer --save Part.2 在项目根目录下创建 app.js 文件作为启动 express 服务器代码 ...
- 如何将Vue项目部署到Nginx 服务器中
https://blog.csdn.net/qq_35366269/article/details/91385689
- 【Vue】基于nodejs的vue项目打包编译部署
一·项目编译 1·进入项目目录下的终端执行命令 npm run build 正常情况如下图,如遇到错误不会编译成功,且编译后的html文件不能正常渲染. 2·编译完成后进入项目下的dist目录运行生成 ...
- 使用Maven完成自动化打包并部署到Linux服务器下(Tomcat7)
最近在使用maven,顺便尝试了下tomcat部署.网上找到了很多资料但是都不是最新的,所以贴上比较新的Tomcat7部署代码和配置,方便以后回顾-->测试OK. 1. 首先是配置Tomcat ...
随机推荐
- 【Spark笔记】Windows10 本地搭建单机版Spark开发环境
0x00 环境及软件 1.系统环境 OS:Windows10_x64 专业版 2.所需软件或工具 JDK1.8.0_131 spark-2.3.0-bin-hadoop2.7.tgz hadoop-2 ...
- 【PyTorch深度学习60分钟快速入门 】Part3:神经网络
神经网络可以通过使用torch.nn包来构建. 既然你已经了解了autograd,而nn依赖于autograd来定义模型并对其求微分.一个nn.Module包含多个网络层,以及一个返回输出的方法f ...
- maven package,clean,install,compile命令
1.Ideal中显示 2.各个阶段干嘛的? compile,编译命令,会在项目路径下生成一个target目录,在该目录中包含一个classes文件夹,里面全是生成的class文件及字节码文件 pack ...
- HTML中多种空格转义字符
记录一下,空格的转义字符分为如下几种: 1. &160#;不断行的空白(1个字符宽度) 2. &8194#;半个空白(1个字符宽度) 3. &8195#;一个空白(2个 ...
- centos7指定yum安装软件路径
网上的命令都是垃圾 yum -c /etc/yum.conf --installroot=/opt/all_venv/ --releasever=/ install nginx 该命令简单解释如下: ...
- [转]Ionic国际化解决方案
本文转自:http://www.cnblogs.com/crazyprogrammer/p/7904436.html 1. 核心内容 使用Angular2的国际化(i18n)库:ngx-tra ...
- jquery 截取屏幕
<!DOCTYPE html> <html> <head> <meta charset="utf-8"> <meta name ...
- Java学习笔记之——break 和continue
break:(中文翻译:打断) 可以使用在switch和循环结构中 表示的含义:立刻结束当前switch或者或者循环结构 continue:(中文翻译:继续) 只可以使用在循环结构中 表示含义:结束本 ...
- Nhibernate学习的第一天
书本:https://www.tutorialspoint.com/nhibernate/index.htm 第一天学习内容 概念 Nhibernate是一个ORM框架. ORM框架:将声明的类映射到 ...
- jsp使用servlet实现文件上传
1.在index.jsp中写入以下代码 <form method="post" action="demo3" enctype="multipar ...