
CentOS7.X安装LMMP环境Nginx+PHP+Mysql详解
前言:
作为PHP开发者,我们常用的线上环境就是LNMP,合理的搭建也是必须掌握的技能,下面就利用源码的方式详细介绍下LNMP环境Nginx+PHP+Mysql的详细搭建步骤:
版本说明:
Nginx:nginx-1.14.1(最新版本)
PHP:php-7.2.12(最新版本)
Mysql:mysql-5.7.24
一、编译环境的安装:GCC,make,C++编译器
yum -y install gcc automake autoconf libtool make
yum -y install gcc gcc-c++
二、类库的安装:PCRE库、Zlib库、openssl
1.选定源码下载目录
可以是任何目录,建议目录为/usr/local/src
cd /usr/local/src
2.安装PCRE库,官方地址:https://ftp.pcre.org/pub/pcre/
cd /usr/local/src

wget https://ftp.pcre.org/pub/pcre/pcre-8.42.tar.gz

tar -zxvf pcre-8.42.tar.gz

cd pcre-8.42

./configure

make && make install
3.安装Zlib库,官方地址:http://www.zlib.net/
cd /usr/local/src

wget http://www.zlib.net/zlib-1.2.11.tar.gz

tar -zxvf zlib-1.2.11.tar.gz

cd zlib-1.2.11

./configure

make && make install
4.安装openssl官方地址:https://www.openssl.org/source/
cd /usr/local/src

wget https://www.openssl.org/source/openssl-1.0.2t.tar.gz

tar -zxvf openssl-1.0.2t.tar.gz

cd openssl-1.0.2t

./config

make && make install
备注:prefix 是安装目录,openssldir是配置文件目录
三、Nginx的安装
官方地址:http://nginx.org/en/download.html
1.下载Nginx官方稳定包并解压:
cd /usr/local/src

wget http://nginx.org/download/nginx-1.14.1.tar.gz

tar -zxvf nginx-1.14.1.tar.gz

cd nginx-1.14.1
2.添加nginx用户和用户组
groupadd -r nginx

useradd -r -g nginx nginx
3.配置nginx安装参数
./configure \

--prefix=/usr/local/nginx \

--sbin-path=/usr/local/nginx/sbin/nginx \

--conf-path=/usr/local/nginx/nginx.conf \

--pid-path=/usr/local/nginx/nginx.pid \

--user=nginx \

--group=nginx \

--with-http_ssl_module \

--with-http_flv_module \

--with-http_mp4_module  \

--with-http_stub_status_module \

--with-http_gzip_static_module \

--http-client-body-temp-path=/var/tmp/nginx/client/ \

--http-proxy-temp-path=/var/tmp/nginx/proxy/ \

--http-fastcgi-temp-path=/var/tmp/nginx/fcgi/ \

--http-uwsgi-temp-path=/var/tmp/nginx/uwsgi \

--http-scgi-temp-path=/var/tmp/nginx/scgi \

--with-pcre=/usr/local/src/pcre-8.42 \

--with-zlib=/usr/local/src/zlib-1.2.11 \

--with-openssl=/usr/local/src/openssl-1.0.2t
注意:当前所在目录为/usr/local/src/nginx-1.14.1
--with-pcre=/usr/local/src/pcre-8.42 指的是pcre-8.42 的源码路径。
--with-zlib=/usr/local/src/zlib-1.2.11 指的是zlib-1.2.11 的源码路径。
--with-openssl=/usr/local/src/openssl-1.0.2t指的是openssl-1.0.2t的源码路径。
4.编译安装
make && make install
5.启动
/usr/local/nginx/sbin/nginx
注意:若mkdir /var/tmp/nginx/client failed的提示,请手动创建:
mkdir -p /var/tmp/nginx/client
打开浏览器访问此服务器的 IP,如果浏览器出现 Welcome to nginx! 则表示 Nginx 已经安装并运行成功!
6.查看nginx版本
nginx -v
输入以上登陆Nginx命令可能出现的问题:-bash: nginx: command not found
解决:添加软连接即可
ln -s /usr/local/nginx/sbin/nginx /usr/bin/
四、PHP安装
官方地址:http://www.php.net/downloads.php
1.添加C、C++编译器(若前面安装过就跳过此步)
yum -y install gcc gcc-c++ glibc
2.添加PHP扩展依赖
yum install -y libxml2-devel openssl-devel libcurl-devel libjpeg-devel libpng-devel libicu-devel openldap-devel
3.下载PHP官方稳定包并解压:
cd /usr/local/src

wget https://www.php.net/distributions/php-7.1.32.tar.gz

tar -zvxf php-7.1.32.tar.gz

cd php-7.1.32
4.添加nginx用户和用户组
groupadd -r www

useradd -r -g www www
5.配置PHP安装参数
./configure --prefix=/usr/local/php \
--with-config-file-path=/usr/local/php/etc \
--with-libdir=lib64 \
--enable-fpm \
--enable-mysqlnd \
--with-mysql=mysqlnd \
--with-mysqli=mysqlnd \
--with-pdo-mysql=mysqlnd \
--enable-opcache \
--enable-pcntl \
--enable-mbstring \
--enable-soap \
--enable-zip \
--enable-calendar \
--enable-bcmath \
--enable-exif \
--enable-ftp \
--enable-intl \
--with-openssl \
--with-zlib \
--with-curl \
--with-gd \
--with-gettext \
--with-mhash \
--with-ldap
注意:不同PHP版本,配置参数有部分不同,仅供参考
6.编译安装
make && make install
7.为php-fpm提供配置文件
cp php.ini-production /usr/local/php/etc/php.ini

cd /usr/local/php/etc/

cp php-fpm.conf.default php-fpm.conf

cd /usr/local/php/etc/php-fpm.d/

cp www.conf.default www.conf
8.把PHP加入环境变量
执行命令 #vi /etc/profile在文件末尾加上如下两行代码
PATH=$PATH:/usr/local/php/bin

export PATH
然后执行命令 #source /etc/profile ,执行完可通过 #echo $PATH命令查看是否添加成功
9.查看php版本
php -v
10.启动
/usr/local/php/sbin/php-fpm
验证是否启动成功(如果此命令输出有几个php-fpm进程就说明启动成功了)
ps -aux | grep php-fpm
五、Nginx服务器解析PHP文件之Nginx.conf简易配置
1.编辑Nginx.conf
vim /usr/local/nginx/nginx.conf
#user  nobody;

worker_processes  1;

#error_log  logs/error.log;

#error_log  logs/error.log  notice;

#error_log  logs/error.log  info;

#pid        logs/nginx.pid;

events {

    worker_connections  1024;

}

http {

    include       mime.types;

    default_type  application/octet-stream;

    log_format  main  '$remote_addr - $remote_user [$time_local] "$request" '

                      '$status $body_bytes_sent "$http_referer" '

                      '"$http_user_agent" "$http_x_forwarded_for"';

    access_log  logs/access.log  main;

    sendfile        on;

    #tcp_nopush     on;

    #keepalive_timeout  0;

    keepalive_timeout  65;

    #gzip  on;

    server {

        listen       80;

        server_name  127.0.0.1;

        #charset koi8-r;

        #access_log  logs/host.access.log  main;

        location / {

            root   /var/local/www;

            index index.php index.html index.htm;

        }

        #error_page  404              /404.html;

        # redirect server error pages to the static page /50x.html

        #

        error_page   500 502 503 504  /50x.html;

        location = /50x.html {

            root   /var/local/www;

        }

        # proxy the PHP scripts to Apache listening on 127.0.0.1:80

        #

        #location ~ \.php$ {

        #    proxy_pass   http://127.0.0.1;

        #}

        # pass the PHP scripts to FastCGI server listening on 127.0.0.1:9000

        #

        location ~ \.php$ {

            root           /var/local/www;

            fastcgi_pass   127.0.0.1:9000;

            fastcgi_index  index.php;

            #fastcgi_param  SCRIPT_FILENAME  /scripts$fastcgi_script_name;

           fastcgi_param  SCRIPT_FILENAME  $document_root$fastcgi_script_name;

            include        fastcgi_params;

        }

        # deny access to .htaccess files, if Apache's document root

        # concurs with nginx's one

        #

        #location ~ /\.ht {

        #    deny  all;

        #}

    }

    # another virtual host using mix of IP-, name-, and port-based configuration

    #

    #server {

    #    listen       8000;

    #    listen       somename:8080;

    #    server_name  somename  alias  another.alias;

    #    location / {

    #        root   html;

    #        index  index.html index.htm;

    #    }

    #}

    # HTTPS server

    #

    #server {

    #    listen       443 ssl;

    #    server_name  localhost;

    #    ssl_certificate      cert.pem;

    #    ssl_certificate_key  cert.key;

    #    ssl_session_cache    shared:SSL:1m;

    #    ssl_session_timeout  5m;

    #    ssl_ciphers  HIGH:!aNULL:!MD5;

    #    ssl_prefer_server_ciphers  on;

    #    location / {

    #        root   html;

    #        index  index.html index.htm;

    #    }

    #}

}
注意:
- 红色标记部分为修改部分;
- 原文件目录存放默认位置为:/usr/local/nginx/html,现将文件存放目录修改为:/var/local/www;
2.重启Nginx服务器
/usr/loca/nginx/sbin/nginx -s reload
3.测试php文件
创建index.php文件
vi /var/local/www/index.php
4.输入内容,保存
<?php

    phpinfo();

?>
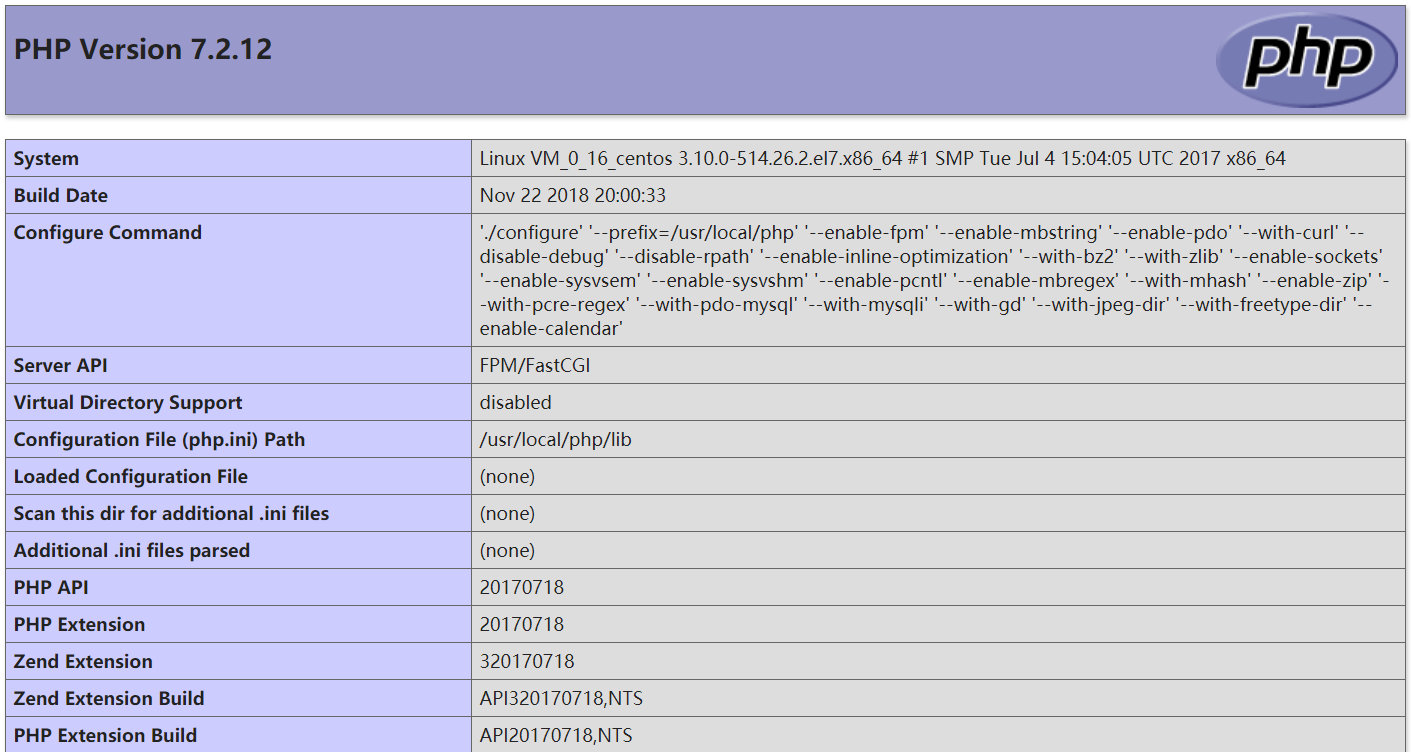
5.浏览器访问http://服务器ip/index.php,看到如下信息即表示成功。
六、Mysql安装
官方地址:https://dev.mysql.com/downloads/mysql/
1.下载源码包,并解压
wget https://cdn.mysql.com//Downloads/MySQL-5.7/mysql-5.7.28-linux-glibc2.12-x86_64.tar.gz

tar -zxvf mysql-5.7.28-linux-glibc2.12-x86_64.tar.gz
2.添加Mysql用户和用户组
groupadd mysql

useradd -r -g mysql mysql
3.复制
cp -r mysql-5.7.28-linux-glibc2.12-x86_64 /usr/local/mysql
4.修改Mysql目录所属者
cd /usr/local/mysql

chown -R mysql:mysql ./
5.初始化,安装Mysql数据库,并生成临时密码(注意:版本不同可能格式不同)
bin/mysqld --initialize --user=mysql --basedir=/usr/local/mysql --datadir=/usr/local/mysql/data
如图:

注意点:
a.若输入以上命令可能出现的问题:bin/mysqld: error while loading shared libraries: libnuma.so.1: cannot open shared object file: No such file or directory
原因:缺少numactl软件包
解决:安装numactl软件包
yum -y install numactl
再次执行初始化命令,即可成功;
b.若输入以上命令可能出现的问题:bin/mysqld: error while loading shared libraries: libaio.so.1: cannot open shared object file: No such file or directory
原因:缺少libaio软件包
解决:安装libaio软件包
yum -y install libaio
再次执行初始化命令,即可成功;
6.配置my.cnf(简易配置)
vi /etc/my.cnf
[mysqld]

basedir=/usr/local/mysql

datadir=/usr/local/mysql/data

socket=/tmp/mysql.sock

# Disabling symbolic-links is recommended to prevent assorted security risks

symbolic-links=0

# Settings user and group are ignored when systemd is used.

# If you need to run mysqld under a different user or group,

# customize your systemd unit file for mariadb according to the

# instructions in http://fedoraproject.org/wiki/Systemd

character_set_server=utf8

init_connect='SET NAMES utf8

lower_case_table_names = 1

[mysqld_safe]

log-error=/var/log/mysqld.log

pid-file=/usr/local/mysql/data/mysqld.pid

#

# include all files from the config directory

#

!includedir /etc/my.cnf.d
注意:红色为修改部分;
7.添加开机启动
cp /usr/local/mysql/support-files/mysql.server /etc/init.d/mysqld
8.修改 vim /etc/init.d/mysqld
vim /etc/init.d/mysqld
在46行 修改代码:
basedir=/usr/local/mysql
datadir=/usr/local/mysql/data
9.启动mysql服务
service mysqld start
10.通过以下脚本可实现对mysql服务的管理
/etc/init.d/mysqld start

/etc/init.d/mysqld stop

/etc/init.d/mysqld restart

/etc/init.d/mysqld reload

/etc/init.d/mysqld status
chkconfig --add /etc/init.d/mysqld
12.设置终端模式开机启动:
chkconfig mysqld on
13.执行完上述命令后,就可以使用service对nginx服务的管理
service mysqld start

service mydqld stop

service mysqld restart

service mysqld reload

service mysqld status
14.根据生成的原始密码,登陆Mysql
mysql -u root -p
输入以上登陆Mysql命令可能出现的问题:-bash: mysql: command not found
解决:添加软连接
ln -s /usr/local/mysql/bin/mysql /usr/bin
15.修改原密码为root,并刷新权限(注意:要在登陆Mysql情况下修改)
alter user 'root'@'localhost' identified by 'root';

flush privileges; //刷新权限
至此全部成功安装了
CentOS7.X安装LMMP环境Nginx+PHP+Mysql详解的更多相关文章
- Python安装与环境变量配置 入门详解 - 精简归纳
Python安装与环境变量配置 入门详解 - 精简归纳 JERRY_Z. ~ 2020 / 9 / 24 转载请注明出处!️ 目录 Python安装与环境变量配置 入门详解 - 精简归纳 一.下载Py ...
- GoSDK的安装及环境变量配置 入门详解 - 精简归纳
GoSDK的安装及环境变量配置 入门详解 - 精简归纳 JERRY_Z. ~ 2020 / 10 / 29 转载请注明出处!️ 目录 GoSDK的安装及环境变量配置 入门详解 - 精简归纳 一.进入G ...
- Centos7 在线安装开发环境 jdk1.8+mysql+tomcat
写在最前 刚刚开始接触Linux,并折腾着在服务器上部署自己的项目,当然作为一个后端开发人员,必不可少的东西肯定是 JDK Mysql Tomcat容器 每天记录一天,每天进步一点点~~ 1.更新系统 ...
- vagrant(二)配置文件vagrantfile详解 以及安装php、nginx、mysql
上一篇文章完整的讲叙了如何安装一个vagrant的环境.这里主要说一说vagrant的配置文件Vagrantfile. 一 配置详解 在我们的开发目录下有一个文件Vagrantfile,里面包含有大量 ...
- CentOS 7 用户怎样安装 LNMP(Nginx+PHP+MySQL)
关于 Nginx (发音 “engine x”)这是一款免费.开源.高效的 HTTP 服务器,Nginx是以稳定著称,丰富的功能,结构简单,低资源消耗.本教程演示如何在CentOS 6.5服务器(适用 ...
- CentOS7+CDH5.14.0安装全流程记录,图文详解全程实测-总目录
CentOS7+CDH5.14.0安装全流程记录,图文详解全程实测-总目录: 0.Windows 10本机下载Xshell,以方便往Linux主机上上传大文件 1.CentOS7+CDH5.14.0安 ...
- Nginx的配置详解
人无再少年,花有重开日——风城玫瑰 德里克·罗斯 Nginx是一款轻量级的HTTP服务器,采用事件驱动的异步非阻塞处理方式框架,这让其具有极好的IO性能,时常用于服务端的反向代理和负载均衡. Ngin ...
- 【转】jumpserver 堡垒机环境搭建(图文详解)
jumpserver 堡垒机环境搭建(图文详解) 摘要: Jumpserver 是一款由python编写开源的跳板机(堡垒机)系统,实现了跳板机应有的功能.基于ssh协议来管理,客户端无需安装ag ...
- Tomcat系列之服务器的安装与配置以及各组件详解
Tomcat系列之服务器的安装与配置以及各组件详解 大纲 一.前言 二.安装与配置Tomcat 三.Tomcat 目录的结构 四.Tomcat 配置文件 注,本文的测试的操作系统为CentOS 6.4 ...
随机推荐
- java C 类自动转换规则
C类型转换规则
- 怎样让两个DIV在同一水平线上面显示
css定义第二个div. float:right或者left. margin-top:0px 确保第二个DIV的宽度.如果宽度宽的话,会自动到下方的.
- mysql导入自定义函数不成功的解决方法
进入mysql控制台:mysql -uroot -p set global log_bin_trust_function_creators=1;
- $gopath not set的解决办法
执行安装 sudo go get github.com/nsf/gocode 提示: cannot download, $GOPATH not set. For more details see: g ...
- 每天一个linux命令(6):cp
1.命令简介 cp(Copy file):将源文件复制至目标文件,或将多个源文件复制至目标目录. 2.用法 cp [选项]... [-T] 源文件 目标文件 或:cp [选项]... 源文件... 目 ...
- phpBB3导入用户的Python脚本
关联的数据表 在phpBB3中导入用户时, 需要处理的有两张表, 一个是 users, 一个是 user_group. 如果是新安装的论坛, 在每次导入之前, 用以下语句初始化: DELETE FRO ...
- (原)ubuntu上编译PANet/Detectron.pytorch时-std=c99的错误
转载请注明出处: https://www.cnblogs.com/darkknightzh/p/10494787.html 在ubuntu上编译PANet/Detectron.pytorch时,总提示 ...
- CoreGraphics之CGContextSaveGState与UIGraphicsPushContext
转至:https://www.jianshu.com/p/be38212c0f79 CoreGraphics与UIKit 这边从iOS绘图教程 提取一些重要的内容. Core Graphics Fra ...
- TLB的作用及工作原理
TLB的作用及工作过程 以下内容摘自<步步惊芯——软核处理器内部设计分析>一书 页表一般都很大,并且存放在内存中,所以处理器引入MMU后,读取指令.数据需要访问两次内存:首先通过查询页表得 ...
- 谈谈tmpdir与innodb_tmpdir的区别和用处
[背景] innodb_tmpdir是在innodb online ddl中提到的一个参数:大致的意思是innodb在做online-ddl的时候会向临时目录写入“临时排序文件” 而这些文件的大小基本 ...