Android通知栏沉浸式/透明化完整解决方案
转载请注明出处:http://www.cnblogs.com/cnwutianhao/p/6640649.html
参考文献:https://github.com/ljgsonx/adaptiveStatusBar
Google在Android 4.4版本加入了半透明的界面样式,在Android 5.0的时候推出了Material Design的概念。
这些样式的加入使得原本死板、丑陋、和App颜色不一致的通知栏变得更亲和、顺眼、用户体验更友好。
作者是常年做对日项目的,对日项目以界面简洁功能强大而著称。最近客户要求UI方面做一些改变,让App看上去给用户感觉更友好。所以就提到了Android 4.4以后的通知栏问题。
网上关于通知栏的文章铺天盖地,什么沉浸式,什么半透明。。。挺会拽词。也不乏有Android大神也写过类似的文章,但是那文章能看?长篇大论,程序员够累了,哪有那些时间看你在那里车轱辘话满天飞,说了一大顿表达不明白,浪费时间,写的一堆垃圾文章。
本篇文章杜绝冗余,做到最简单,最实用,对日项目比的不是代码量,而是最少的代码写出最漂亮的程序。
文章对应的项目已上传到Github,欢迎Star,欢迎Fork。地址:https://github.com/cnwutianhao/ImmersiveDemo
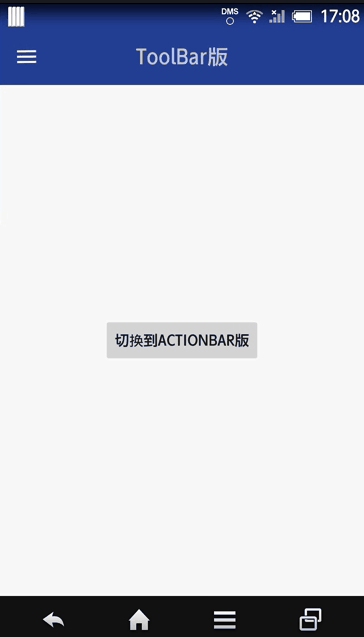
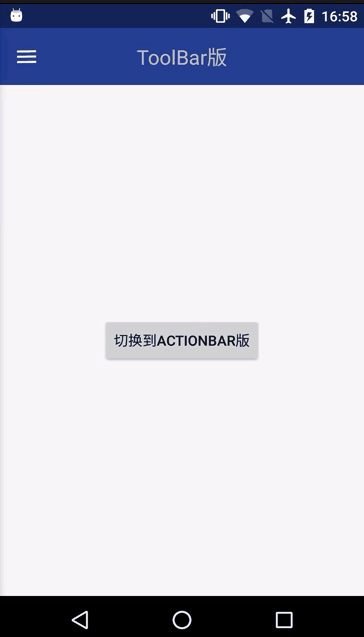
先上Gif图,Android 4.4 和 Android 6.0 实现样式效果之后的对比图
Android 4.4 Android 6.0
实现样式效果我们有两种方案
①DrawerLayout+Toolbar
②ActionBar
下面我们就来一一实现
①DrawerLayout+Toolbar
添加依赖库(谷歌提供)
compile 'com.android.support:design:25.3.1'
布局代码1:使用 DrawerLayout做最外层,引入NavigationView侧边抽屉控件
<?xml version="1.0" encoding="utf-8"?>

<android.support.v4.widget.DrawerLayout xmlns:android="http://schemas.android.com/apk/res/android"

    xmlns:app="http://schemas.android.com/apk/res-auto"

    xmlns:tools="http://schemas.android.com/tools"

    android:id="@+id/id_drawerlayout"

    android:layout_width="match_parent"

    android:layout_height="match_parent"

    tools:context="com.tnnowu.android.demo17032801.MainActivity">

    <include layout="@layout/content_layout" />

    <android.support.design.widget.NavigationView

        android:id="@+id/id_navigationview"

        android:layout_width="match_parent"

        android:layout_height="match_parent"

        android:layout_gravity="left"

        app:itemTextColor="@color/c_light_gray3" />

</android.support.v4.widget.DrawerLayout>
布局代码2:里层嵌套Toolbar
<?xml version="1.0" encoding="utf-8"?>

<LinearLayout xmlns:android="http://schemas.android.com/apk/res/android"

    xmlns:app="http://schemas.android.com/apk/res-auto"

    android:layout_width="match_parent"

    android:layout_height="match_parent"

    android:orientation="vertical">

    <android.support.v7.widget.Toolbar

        android:id="@+id/toolbar"

        android:layout_width="match_parent"

        android:layout_height="wrap_content"

        android:background="#30469b"

        android:paddingTop="@dimen/toolbar_padding_top"

        app:popupTheme="@style/ThemeOverlay.AppCompat.Light"

        app:theme="@style/ThemeOverlay.AppCompat.Dark.ActionBar">

        <TextView

            android:layout_width="wrap_content"

            android:layout_height="wrap_content"

            android:layout_gravity="center"

            android:text="ToolBar版"

            android:textSize="20sp" />

    </android.support.v7.widget.Toolbar>

    <!--内容显示布局-->

    <RelativeLayout

        android:layout_width="match_parent"

        android:layout_height="match_parent">

        <Button

            android:id="@+id/goToActionBar"

            android:layout_width="wrap_content"

            android:layout_height="wrap_content"

            android:layout_centerInParent="true"

            android:text="切换到ActionBar版" />

    </RelativeLayout>

</LinearLayout>
Style样式:无ActionBar
<style name="AppThemeNoActionBar" parent="Theme.AppCompat.Light.NoActionBar">

    <!-- Customize your theme here. -->

    <item name="colorPrimary">@color/colorPrimary</item>

    <item name="colorPrimaryDark">@color/colorPrimaryDark</item>

    <item name="colorAccent">@color/colorAccent</item>

</style>
主程序代码:除了要在onCreate()里面初始化 DrawerLayout、NavigationView、Toolbar控件 即initViews(),还要在onCreate()里面添加手机系统版本判断和相应的样式适配initImmersive()
private void initViews() {

        mDrawerLayout = (DrawerLayout) findViewById(R.id.id_drawerlayout);

        mNagigationView = (NavigationView) findViewById(R.id.id_navigationview);

        mNagigationView.inflateHeaderView(R.layout.header_nav);

        mNagigationView.inflateMenu(R.menu.menu_nav);

        mToolbar = (Toolbar) findViewById(R.id.toolbar);

        mBtn = (Button) findViewById(R.id.goToActionBar);

        mToolbar.setTitle("");

        if (mToolbar != null) {

            setSupportActionBar(mToolbar);

        }

        ActionBarDrawerToggle mActionBarDrawerToggle = new ActionBarDrawerToggle(this, mDrawerLayout, mToolbar, R.string.open, R.string.close);

        mActionBarDrawerToggle.syncState();

        mDrawerLayout.setDrawerListener(mActionBarDrawerToggle);

        mBtn.setOnClickListener(new View.OnClickListener() {

            @Override

            public void onClick(View v) {

                startActivity(new Intent(MainActivity.this, DemoActionBarActivity.class));

            }

        });

    }
private void initImmersive() {

        if (Build.VERSION.SDK_INT >= Build.VERSION_CODES.KITKAT) {

            WindowManager.LayoutParams localLayoutParams = getWindow().getAttributes();

            localLayoutParams.flags = (WindowManager.LayoutParams.FLAG_TRANSLUCENT_STATUS | localLayoutParams.flags);

            if (Build.VERSION.SDK_INT < Build.VERSION_CODES.LOLLIPOP) {

                //将侧边栏顶部延伸至status bar

                mDrawerLayout.setFitsSystemWindows(true);

                //将主页面顶部延伸至status bar;虽默认为false,但经测试,DrawerLayout需显示设置

                mDrawerLayout.setClipToPadding(false);

            }

        }

    }
这样Drawlayout + Toolbar就实现了样式改变。
②ActionBar
布局代码
<?xml version="1.0" encoding="utf-8"?>

<LinearLayout xmlns:android="http://schemas.android.com/apk/res/android"

    android:layout_width="match_parent"

    android:layout_height="match_parent"

    android:background="@color/colorPrimary"

    android:fitsSystemWindows="true"

    android:orientation="vertical">

    <!--内容显示布局-->

    <RelativeLayout

        android:layout_width="match_parent"

        android:layout_height="match_parent"

        android:background="@color/c_light_white">

        <Button

            android:id="@+id/goBack"

            android:layout_width="wrap_content"

            android:layout_height="wrap_content"

            android:layout_centerInParent="true"

            android:text="返回到ToolBar版" />

    </RelativeLayout>

</LinearLayout>
Style样式:有ActionBar
<style name="AppThemeActionBar" parent="Theme.AppCompat.Light.DarkActionBar">

    <!-- Customize your theme here. -->

    <item name="colorPrimary">@color/colorPrimary</item>

    <item name="colorPrimaryDark">@color/colorPrimaryDark</item>

    <item name="colorAccent">@color/colorAccent</item>

</style>
主程序代码:
public class DemoActionBarActivity extends AppCompatActivity {

    private Button mBtn;

    @Override

    protected void onCreate(Bundle savedInstanceState) {

        super.onCreate(savedInstanceState);

        setContentView(R.layout.activity_main_actionbar);

        if (Build.VERSION.SDK_INT >= Build.VERSION_CODES.KITKAT) {

            WindowManager.LayoutParams localLayoutParams = getWindow().getAttributes();

            localLayoutParams.flags = (WindowManager.LayoutParams.FLAG_TRANSLUCENT_STATUS | localLayoutParams.flags);

        }

        initView();

    }

    private void initView() {

        mBtn = (Button) findViewById(R.id.goBack);

        mBtn.setOnClickListener(new View.OnClickListener() {

            @Override

            public void onClick(View v) {

                finish();

            }

        });

    }

}
这样ActionBar就实现了样式改变。
无冗余代码,对日项目都在用的代码你为何不尝试使用。
关注我的新浪微博,获取更多Android开发资讯!
关注科技评论家,领略科技、创新、教育以及最大化人类智慧与想象力!
Android通知栏沉浸式/透明化完整解决方案的更多相关文章
- Android:沉浸式状态栏(一)工具类
参考自Android 沉浸式状态栏完美解决方案 基本功能 状态栏深色或浅色图标切换 自定义状态栏背景 设置沉浸式状态栏 先准备几个工具类 1.SystemBarTintManager package ...
- Android 中沉浸式状态栏实现
Android 中沉浸式状态栏实现方式如下 计算状态栏高度及调用沉浸式状态栏的相关API方法 package com.example.status; import android.annotation ...
- 8.Android 系统状态栏沉浸式/透明化解决方案
转载:http://www.jianshu.com/p/34a8b40b9308 前言 网上已经有很多有关于系统状态栏的解决方案,这篇文章也不会有什么新奇的解决方案,都是本人经过自己试验,统计提炼出来 ...
- Android App 沉浸式状态栏解决方案
伴随着 Android 5.0 发布的 Material Design,让 Android 应用告别了以前的工程师审美,迎来了全新的界面,灵动的交互,也让越来越多的 App 开始遵从 material ...
- Android 沉浸式状态栏完美解决方案
现在搜索Android 沉浸式状态栏,真的是一堆一堆,写的特别多,但是真正用的舒服的真没有,在这里自己整理一下开发记录 注意,在使用这个步骤过程之前,请把之前设置的代码注释一下 把布局带有androi ...
- 81.Android之沉浸式状态栏攻略
转载:http://blog.csdn.net/lmj623565791/article/details/48649563/ 一.概述 近期注意到QQ新版使用了沉浸式状态栏,ok,先声明一下:本篇博客 ...
- 【Android】沉浸式状态栏实现
在Android4.4(API 19)及以后的版本中都增加了对沉浸式状态栏的支持,实现起来也很简单,将application的主题稍作修改即可: <style name="AppThe ...
- Android 之 沉浸式状态栏及顶部状态栏背景色设置
现在很多应用都引用了沉浸式状态栏,如QQ,效果下图: 效果很酷炫,其实设置也很简单.但是,需要注意的是,这种效果只能在API19以及以上版本中才能够做到. 方法一: 首先,如果想让界面Activity ...
- Android中沉浸式状态栏的应用
在Android5.0版本后,谷歌公司为Android系统加入了很多新特性,刷新了Android用户的体验度.而其中的一个新特性就是沉浸式状态栏.那么问题来了,很多非移动端的小伙伴就要问了,什么是沉浸 ...
随机推荐
- 移动H5开发入门教程:12点webAPP前端开发经验
如果你是一名移动H5前端开发人员,25学堂的小编认为下面的分享的12点webAPP前端开发经验是你必须掌握的基础知识点.算是一篇移动H5开发入门教程吧! 1. viewport:也就是可视区域.对于桌 ...
- ubuntu 下 python模块 mysql-python安装(转)
原文:http://www.cnblogs.com/51kata/p/5406468.html 直接运行如下命令 sudo pip install MySQL-python 报如下错误 xxx@ubu ...
- bzoj千题计划183:bzoj1197: [HNOI2006]花仙子的魔法
http://www.lydsy.com/JudgeOnline/problem.php?id=1197 题意转化:在n维空间中放m个n维球,问最多将空间分成几部分 f[i][j] 表示在i维空间中放 ...
- 高并发数据库之MySql性能优化实战总结
向MySQL发送一个请求时MySQL具体的操作过程 慢查询 1.慢查询 SHOW VARIABLES LIKE '%quer%' 索引优化技巧 1.对于创建的多列索引(复合)索引,只要查询条件使用了最 ...
- 小议 开源中国 I LOVE YOU js代码
今天在开源中国看到一篇神作<I LOVE YOU js代码>是17号的文章了,也许你已经看过了. 文章非常有意思,由 5 个 "爱心" 组成的一段js代码,能正常执行, ...
- asp.net C#母版页和内容页事件排版加载顺序生命周期
asp.net C#母版页和内容页事件排版加载顺序生命周期 关于ASP页面Page_Load发生在事件之前而导致的问题已经喜闻乐见,对于问题的解释也很全面,但是如何解决问题则较少有人说明,我就再 简单 ...
- CTSC2018&APIO2018游记
CTSC2018&APIO2018游记 Day 0 傍晚出发,从长沙通往帝都的软卧哟. 然而长沙某中学坐高铁比我们晚出发还早到 Day 1 为了正经地写游记我决定忍住不在博客里吐槽酒店. 午饭 ...
- Java Service Wrapper将java程序设置为服务
有时候我们希望我们java写的程序作为服务注册到系统中,Java Service Wrapper(下面简称wrapper)是目前较为流行的将Java程序部署成Windows服务的解决方案, 本文将讨论 ...
- 通过图片获取gps地理位置
别人说通过一张照片就可以定位你的位置,看来个视频,仔细研究了一下自己的照片没想到真的可以做到,想想真的有点可怕. 如何通过一张照片去定位这张照片的经纬度下面我以我手机中的照片为例. 我们通过pytho ...
- C语言内存分布
C语言内存分布 典型的C语言程序内存表示分区共有5个部分: 正文段 Text segment 已初始化数据段(数据段)Initialized data segment 未初始化数据段(bss)Unin ...