Spring Authorization Server的使用
Spring Authorization Server的使用
一、背景
在 Spring Security 5中,现在已经不提供了 授权服务器 的配置,但是 授权服务器 在我们平时的开发过程中用的还是比较多的。不过 Spring 官方提供了一个 由Spring官方主导,社区驱动的授权服务 spring-authorization-server,目前已经到了 0.1.2 的版本,不过该项目还是一个实验性的项目,不可在生产环境中使用,此处来使用项目搭建一个简单的授权服务器。
二、前置知识
1、了解 oauth2 协议、流程。可以参考阮一峰的这篇文章
2、JWT、JWS、JWK的概念
JWT:指的是 JSON Web Token,由 header.payload.signture 组成。不存在签名的JWT是不安全的,存在签名的JWT是不可窜改的。
JWS:指的是签过名的JWT,即拥有签名的JWT。
JWK:既然涉及到签名,就涉及到签名算法,对称加密还是非对称加密,那么就需要加密的 密钥或者公私钥对。此处我们将 JWT的密钥或者公私钥对统一称为 JSON WEB KEY,即 JWK。
三、需求
1、 完成授权码(authorization-code)流程。
最安全的流程,需要用户的参与。
2、 完成客户端(client credentials)流程。
没有用户的参与,一般可以用于内部系统之间的访问,或者系统间不需要用户的参与。
3、简化模式在新的 spring-authorization-server 项目中已经被弃用了。
4、刷新令牌。
5、撤销令牌。
6、查看颁发的某个token信息。
7、查看JWK信息。
8、个性化JWT token,即给JWT token中增加额外信息。
完成案例:
张三通过QQ登录的方式来登录CSDN网站。
登录后,CSDN就可以获取到QQ颁发的token,CSDN网站拿着token就可以获取张三在QQ资源服务器上的 个人信息 了。
角色分析
张三: 用户即资源拥有者
CSDN:客户端
QQ:授权服务器
个人信息: 即用户的资源,保存在资源服务器中
四、核心代码编写
1、引入授权服务器依赖
<dependency>

    <groupId>org.springframework.security.experimental</groupId>

    <artifactId>spring-security-oauth2-authorization-server</artifactId>

    <version>0.1.2</version>

</dependency>
2、创建授权服务器用户
张三通过QQ登录的方式来登录CSDN网站。
此处完成用户张三的创建,这个张三是授权服务器的用户,此处即QQ服务器的用户。
@EnableWebSecurity

public class DefaultSecurityConfig {

    @Bean

    SecurityFilterChain defaultSecurityFilterChain(HttpSecurity http) throws Exception {

        http

                .authorizeRequests(authorizeRequests ->

                        authorizeRequests.anyRequest().authenticated()

                )

                .formLogin();

        return http.build();

    }

    @Bean

    public PasswordEncoder passwordEncoder() {

        return new BCryptPasswordEncoder();

    }

    // 此处创建用户,张三。

    @Bean

    UserDetailsService users() {

        UserDetails user = User.builder()

                .username("zhangsan")

                .password(passwordEncoder().encode("zhangsan123"))

                .roles("USER")

                .build();

        return new InMemoryUserDetailsManager(user);

    }

}
3、创建授权服务器和客户端
张三通过QQ登录的方式来登录CSDN网站。
此处完成QQ授权服务器和客户端CSDN的创建。
package com.huan.study.authorization.config;

import com.nimbusds.jose.jwk.JWKSet;

import com.nimbusds.jose.jwk.RSAKey;

import com.nimbusds.jose.jwk.source.JWKSource;

import com.nimbusds.jose.proc.SecurityContext;

import org.springframework.beans.factory.annotation.Autowired;

import org.springframework.context.annotation.Bean;

import org.springframework.context.annotation.Configuration;

import org.springframework.core.Ordered;

import org.springframework.core.annotation.Order;

import org.springframework.jdbc.core.JdbcTemplate;

import org.springframework.security.config.annotation.web.builders.HttpSecurity;

import org.springframework.security.config.annotation.web.configuration.OAuth2AuthorizationServerConfiguration;

import org.springframework.security.config.annotation.web.configurers.oauth2.server.authorization.OAuth2AuthorizationServerConfigurer;

import org.springframework.security.crypto.password.PasswordEncoder;

import org.springframework.security.oauth2.core.AuthorizationGrantType;

import org.springframework.security.oauth2.core.ClientAuthenticationMethod;

import org.springframework.security.oauth2.jwt.JwtDecoder;

import org.springframework.security.oauth2.server.authorization.JdbcOAuth2AuthorizationConsentService;

import org.springframework.security.oauth2.server.authorization.JdbcOAuth2AuthorizationService;

import org.springframework.security.oauth2.server.authorization.OAuth2AuthorizationConsentService;

import org.springframework.security.oauth2.server.authorization.OAuth2AuthorizationService;

import org.springframework.security.oauth2.server.authorization.client.JdbcRegisteredClientRepository;

import org.springframework.security.oauth2.server.authorization.client.RegisteredClient;

import org.springframework.security.oauth2.server.authorization.client.RegisteredClientRepository;

import org.springframework.security.oauth2.server.authorization.config.ProviderSettings;

import org.springframework.security.web.SecurityFilterChain;

import org.springframework.security.web.util.matcher.RequestMatcher;

import java.security.KeyPair;

import java.security.KeyPairGenerator;

import java.security.NoSuchAlgorithmException;

import java.security.interfaces.RSAPrivateKey;

import java.security.interfaces.RSAPublicKey;

import java.time.Duration;

import java.util.UUID;

/**

 * 认证服务器配置

 *

 * @author huan.fu 2021/7/12 - 下午2:08

 */

@Configuration

public class AuthorizationConfig {

    @Autowired

    private PasswordEncoder passwordEncoder;

	/**

     * 个性化 JWT token

     */

    class CustomOAuth2TokenCustomizer implements OAuth2TokenCustomizer<JwtEncodingContext> {

        @Override

        public void customize(JwtEncodingContext context) {

            // 添加一个自定义头

            context.getHeaders().header("client-id", context.getRegisteredClient().getClientId());

        }

    }

    /**

     * 定义 Spring Security 的拦截器链

     */

    @Bean

    @Order(Ordered.HIGHEST_PRECEDENCE)

    public SecurityFilterChain authorizationServerSecurityFilterChain(HttpSecurity http) throws Exception {

        // 设置jwt token个性化

        http.setSharedObject(OAuth2TokenCustomizer.class, new CustomOAuth2TokenCustomizer());

        // 授权服务器配置

        OAuth2AuthorizationServerConfigurer<HttpSecurity> authorizationServerConfigurer =

                new OAuth2AuthorizationServerConfigurer<>();

        RequestMatcher endpointsMatcher = authorizationServerConfigurer.getEndpointsMatcher();

        return http

                .requestMatcher(endpointsMatcher)

                .authorizeRequests(authorizeRequests -> authorizeRequests.anyRequest().authenticated())

                .csrf(csrf -> csrf.ignoringRequestMatchers(endpointsMatcher))

                .apply(authorizationServerConfigurer)

                .and()

                .formLogin()

                .and()

                .build();

    }

    /**

     * 创建客户端信息,可以保存在内存和数据库,此处保存在数据库中

     */

    @Bean

    public RegisteredClientRepository registeredClientRepository(JdbcTemplate jdbcTemplate) {

        RegisteredClient registeredClient = RegisteredClient.withId(UUID.randomUUID().toString())

                // 客户端id 需要唯一

                .clientId("csdn")

                // 客户端密码

                .clientSecret(passwordEncoder.encode("csdn123"))

                // 可以基于 basic 的方式和授权服务器进行认证

                .clientAuthenticationMethod(ClientAuthenticationMethod.BASIC)

                // 授权码

                .authorizationGrantType(AuthorizationGrantType.AUTHORIZATION_CODE)

                // 刷新token

                .authorizationGrantType(AuthorizationGrantType.REFRESH_TOKEN)

                // 客户端模式

                .authorizationGrantType(AuthorizationGrantType.CLIENT_CREDENTIALS)

                // 密码模式

                .authorizationGrantType(AuthorizationGrantType.PASSWORD)

                // 简化模式,已过时,不推荐

                .authorizationGrantType(AuthorizationGrantType.IMPLICIT)

                // 重定向url

                .redirectUri("https://www.baidu.com")

                // 客户端申请的作用域,也可以理解这个客户端申请访问用户的哪些信息,比如:获取用户信息,获取用户照片等

                .scope("user.userInfo")

                .scope("user.photos")

                .clientSettings(clientSettings -> {

                    // 是否需要用户确认一下客户端需要获取用户的哪些权限

                    // 比如:客户端需要获取用户的 用户信息、用户照片 但是此处用户可以控制只给客户端授权获取 用户信息。

                    clientSettings.requireUserConsent(true);

                })

                .tokenSettings(tokenSettings -> {

                    // accessToken 的有效期

                    tokenSettings.accessTokenTimeToLive(Duration.ofHours(1));

                    // refreshToken 的有效期

                    tokenSettings.refreshTokenTimeToLive(Duration.ofDays(3));

                    // 是否可重用刷新令牌

                    tokenSettings.reuseRefreshTokens(true);

                })

                .build();

        JdbcRegisteredClientRepository jdbcRegisteredClientRepository = new JdbcRegisteredClientRepository(jdbcTemplate);

        if (null == jdbcRegisteredClientRepository.findByClientId("csdn")) {

            jdbcRegisteredClientRepository.save(registeredClient);

        }

        return jdbcRegisteredClientRepository;

    }

    /**

     * 保存授权信息,授权服务器给我们颁发来token,那我们肯定需要保存吧,由这个服务来保存

     */

    @Bean

    public OAuth2AuthorizationService authorizationService(JdbcTemplate jdbcTemplate, RegisteredClientRepository registeredClientRepository) {

        JdbcOAuth2AuthorizationService authorizationService = new JdbcOAuth2AuthorizationService(jdbcTemplate, registeredClientRepository);

        class CustomOAuth2AuthorizationRowMapper extends JdbcOAuth2AuthorizationService.OAuth2AuthorizationRowMapper {

            public CustomOAuth2AuthorizationRowMapper(RegisteredClientRepository registeredClientRepository) {

                super(registeredClientRepository);

                getObjectMapper().configure(SerializationFeature.FAIL_ON_EMPTY_BEANS, false);

                this.setLobHandler(new DefaultLobHandler());

            }

        }

        CustomOAuth2AuthorizationRowMapper oAuth2AuthorizationRowMapper =

                new CustomOAuth2AuthorizationRowMapper(registeredClientRepository);

        authorizationService.setAuthorizationRowMapper(oAuth2AuthorizationRowMapper);

        return authorizationService;

    }

    /**

     * 如果是授权码的流程,可能客户端申请了多个权限,比如:获取用户信息,修改用户信息,此Service处理的是用户给这个客户端哪些权限,比如只给获取用户信息的权限

     */

    @Bean

    public OAuth2AuthorizationConsentService authorizationConsentService(JdbcTemplate jdbcTemplate, RegisteredClientRepository registeredClientRepository) {

        return new JdbcOAuth2AuthorizationConsentService(jdbcTemplate, registeredClientRepository);

    }

    /**

     * 对JWT进行签名的 加解密密钥

     */

    @Bean

    public JWKSource<SecurityContext> jwkSource() throws NoSuchAlgorithmException {

        KeyPairGenerator keyPairGenerator = KeyPairGenerator.getInstance("RSA");

        keyPairGenerator.initialize(2048);

        KeyPair keyPair = keyPairGenerator.generateKeyPair();

        RSAPublicKey publicKey = (RSAPublicKey) keyPair.getPublic();

        RSAPrivateKey privateKey = (RSAPrivateKey) keyPair.getPrivate();

        RSAKey rsaKey = new RSAKey.Builder(publicKey)

                .privateKey(privateKey)

                .keyID(UUID.randomUUID().toString())

                .build();

        JWKSet jwkSet = new JWKSet(rsaKey);

        return (jwkSelector, securityContext) -> jwkSelector.select(jwkSet);

    }

    /**

     * jwt 解码

     */

    @Bean

    public JwtDecoder jwtDecoder(JWKSource<SecurityContext> jwkSource) {

        return OAuth2AuthorizationServerConfiguration.jwtDecoder(jwkSource);

    }

    /**

     * 配置一些断点的路径,比如:获取token、授权端点 等

     */

    @Bean

    public ProviderSettings providerSettings() {

        return new ProviderSettings()

                // 配置获取token的端点路径

                .tokenEndpoint("/oauth2/token")

                // 发布者的url地址,一般是本系统访问的根路径

                // 此处的 qq.com 需要修改我们系统的 host 文件

                .issuer("http://qq.com:8080");

    }

}
注意️:
1、需要将 qq.com 在系统的 host 文件中与 127.0.0.1 映射起来。
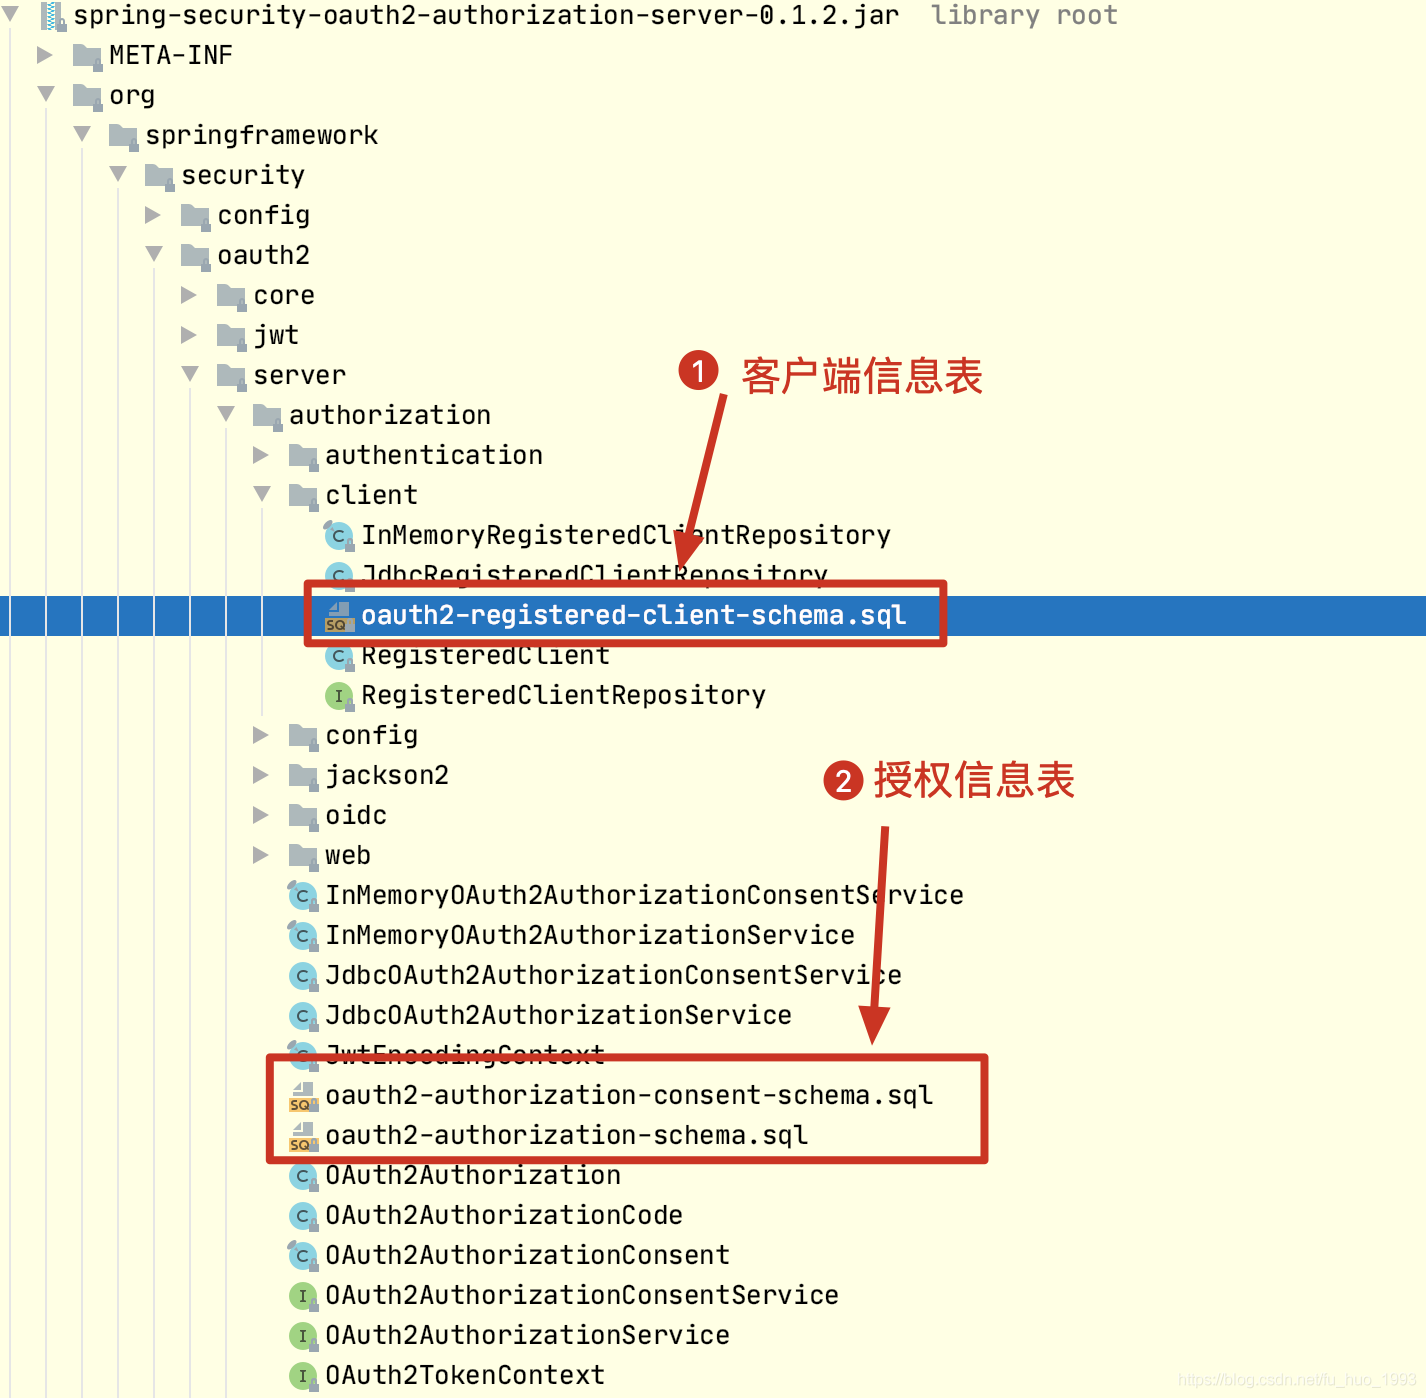
2、因为客户端信息、授权信息(token信息等)保存到数据库,因此需要将表建好。
3、详细信息看上方代码的注释
五、测试
从上方的代码中可知:
资源所有者:张三 用户名和密码为:zhangsan/zhangsan123
客户端信息:CSDN clientId和clientSecret:csdn/csdn123
授权服务器地址: qq.com
clientSecret 的值不可泄漏给客户端,必须保存在服务器端。
1、授权码流程
1、获取授权码
http://qq.com:8080/oauth2/authorize?client_id=csdn&response_type=code&redirect_uri=https://www.baidu.com&scope=user.userInfo user.userInfo
client_id=csdn:表示客户端是谁
response_type=code:表示返回授权码
scope=user.userInfo user.userInfo:获取多个权限以空格分开
redirect_uri=https://www.baidu.com:跳转请求,用户同意或拒绝后
2、根据授权码获取token
 curl -i -X POST \

   -H "Authorization:Basic Y3Nkbjpjc2RuMTIz" \

 'http://qq.com:8080/oauth2/token?grant_type=authorization_code&code=tDrZ-LcQDG0julJBcGY5mjtXpE04mpmXjWr9vr0-rQFP7UuNFIP6kFArcYwYo4U-iZXFiDcK4p0wihS_iUv4CBnlYRt79QDoBBXMmQBBBm9jCblEJFHZS-WalCoob6aQ&redirect_uri=https%3A%2F%2Fwww.baidu.com'
Authorization: 携带具体的 clientId 和 clientSecret 的base64的值
grant_type=authorization_code 表示采用的方式是授权码
code=xxx:上一步获取到的授权码
3、流程演示

2、根据刷新令牌获取token
curl -i -X POST \

   -H "Authorization:Basic Y3Nkbjpjc2RuMTIz" \

 'http://qq.com:8080/oauth2/token?grant_type=refresh_token&refresh_token=Wpu3ruj8FhI-T1pFmnRKfadOrhsHiH1JLkVg2CCFFYd7bYPN-jICwNtPgZIXi3jcWqR6FOOBYWo56W44B5vm374nvM8FcMzTZaywu-pz3EcHvFdFmLJrqAixtTQZvMzx'
3、客户端模式
此模式下,没有用户的参与,只有客户端和授权服务器之间的参与。
curl -i -X POST \

   -H "Authorization:Basic Y3Nkbjpjc2RuMTIz" \

 'http://qq.com:8080/oauth2/token?grant_type=client_credentials'
4、撤销令牌
curl -i -X POST \

 'http://qq.com:8080/oauth2/revoke?token=令牌'
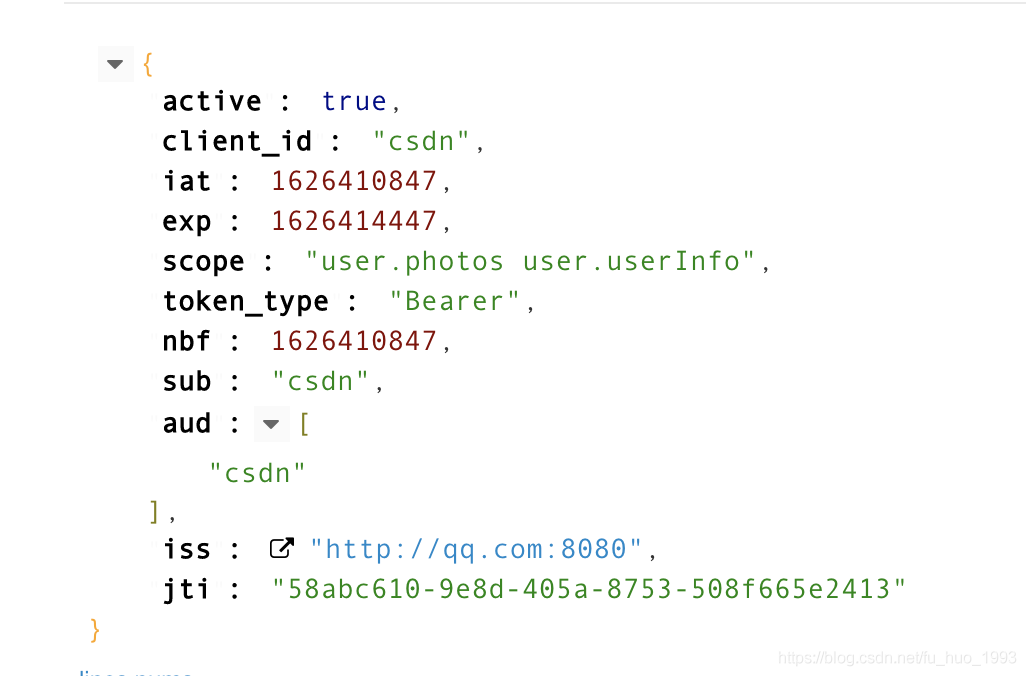
5、查看token 的信息
curl -i -X POST \

   -H "Authorization:Basic Y3Nkbjpjc2RuMTIz" \

 'http://qq.com:8080/oauth2/introspect?token=XXX'
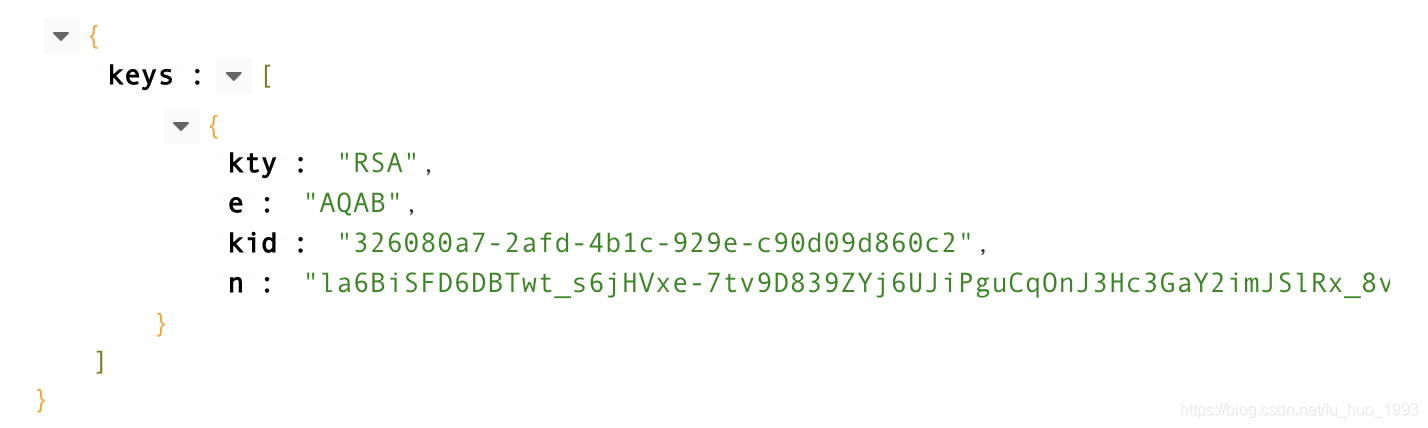
6、查看JWK信息
curl -i -X GET \

 'http://qq.com:8080/oauth2/jwks'
六、完整代码
https://gitee.com/huan1993/spring-cloud-parent/tree/master/security/authorization-server
七、参考地址
1、https://github.com/spring-projects-experimental/spring-authorization-server
Spring Authorization Server的使用的更多相关文章
- Spring Authorization Server 全新授权服务器整合使用
前言 Spring Authorization Server 是 Spring 团队最新开发适配 OAuth 协议的授权服务器项目,旨在替代原有的 Spring Security OAuth 经过半年 ...
- Spring Authorization Server 0.2.3发布,放出联合身份DEMO
很快啊Spring Authorization Server又发新版本了,现在的版本是0.2.3.本次都有什么改动呢?我们来了解一下. 0.2.3版本特性 本次更新的新特性不少. 为公开客户端提供默认 ...
- Spring Authorization Server授权服务器入门
11月8日Spring官方已经强烈建议使用Spring Authorization Server替换已经过时的Spring Security OAuth2.0,距离Spring Security OA ...
- Spring Authorization Server 实现授权中心
Spring Authorization Server 实现授权中心 源码地址 当前,Spring Security 对 OAuth 2.0 框架提供了全面的支持.Spring Authorizati ...
- Spring Authorization Server 0.3.0 发布,官方文档正式上线
基于OAuth2.1的授权服务器Spring Authorization Server 0.3.0今天正式发布,在本次更新中有几大亮点. 文档正式上线 Spring Authorization Ser ...
- Spring Authorization Server(AS)从 Mysql 中读取客户端、用户
Spring AS 持久化 jdk version: 17 spring boot version: 2.7.0 spring authorization server:0.3.0 mysql ver ...
- Spring Cloud(6.1):搭建OAuth2 Authorization Server
配置web.xml 添加spring-cloud-starter-security和spring-security-oauth2-autoconfigure两个依赖. </dependency& ...
- 使用Identity Server 4建立Authorization Server (1)
预备知识: http://www.cnblogs.com/cgzl/p/7746496.html 本文内容基本完全来自于Identity Server 4官方文档: https://identitys ...
- 使用Identity Server 4建立Authorization Server (2)
第一部分: http://www.cnblogs.com/cgzl/p/7780559.html 第一部分主要是建立了一个简单的Identity Server. 接下来继续: 建立Web Api项目 ...
随机推荐
- AntDesign VUE:上传组件图片/视频宽高、文件大小、image/video/pdf文件类型等限制(Promise、Boolean)
文件大小限制 - Promise checkFileSize(file, rules) { return new Promise((resolve, reject) => { file.size ...
- ESP8266- 使用AT指令获取网络时间
前言:很早就考虑过用 ESP8266 获取网络时间,以前都是用 ESP8266 刷机智云的 Gagent 固件,但无奈现在手头的 ESP-01 的 Flash 只有 1M,实在无法胜任.经过在网络上的 ...
- mac php安装扩展 如 seoole apcu
//下载 --安装 --复制扩展文件到对应目录 wget https://pecl.php.net/get/apcu-5.1.7.tgz tar -zvcf pcu-5.1.7.tgz cd 到解压目 ...
- Python测试框架对比----unittest, pytest, nose, robot framework对比
什么是框架? 框架(Framework)是整个或部分系统的可重用设计, 框架是用来解决代码的组织及运行控制问题的. 在我们编写自动化脚本的时候,经常需要读取配置文件,读取数据文件,发送请求,记录日志, ...
- linux 下 svn配置;以及多仓库配置
http://www.linuxidc.com/Linux/2016-01/127679.htm https://blog.csdn.net/mrwu9902/article/details/7869 ...
- 鸿蒙内核源码分析(管道文件篇) | 如何降低数据流动成本 | 百篇博客分析OpenHarmony源码 | v70.01
百篇博客系列篇.本篇为: v70.xx 鸿蒙内核源码分析(管道文件篇) | 如何降低数据流动成本 | 51.c.h.o 文件系统相关篇为: v62.xx 鸿蒙内核源码分析(文件概念篇) | 为什么说一 ...
- 鸿蒙内核源码分析(事件控制篇) | 任务间多对多的同步方案 | 百篇博客分析OpenHarmony源码 | v30.02
百篇博客系列篇.本篇为: v30.xx 鸿蒙内核源码分析(事件控制篇) | 任务间多对多的同步方案 | 51.c.h .o 进程通讯相关篇为: v26.xx 鸿蒙内核源码分析(自旋锁篇) | 自旋锁当 ...
- P6177-Count on a tree II/[模板]树分块
正题 题目链接:https://www.luogu.com.cn/problem/P6177 题目大意 \(n\)个点的一棵树\(m\)次询问树上颜色. 强制在线 \(1\leq n\leq 4\ti ...
- IE浏览器设置兼容性
因为IE浏览器不兼容高版本的Jquery.Bootstrap等JS框架,导致页面在Google浏览器和在IE的显示完全不一样,所以需要对页面进行兼容性设置 <!--设置兼容性--> < ...
- 【Spring技术原理】Aspectj和LoadTimeWeaving的动态代理技术实现指南
前提介绍 当我们聊到Spring框架的项目实际开发中,用的强大的功能之一就是(面向切面编程)的这门AOP技术.如果使用得当,它的最大的作用就是侵入性比较少并且简化我们的工作任务(节省大量的重复性编码) ...