MRCTF My secret
My secret
知识点:wireshark基本操作,shadowsocks3.0源码利用,拼图(os脚本编写能力),
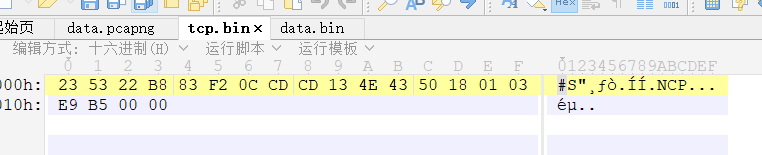
根据这里的信息可以知道,tcp所传输的源数据是在target address后面的数据。那么我们现在去寻找target address(即wireshark中的Destination)
那么我们已经找到了,即第一张图中的2f 5e ca a8。我们取走后面的数据存储为文件。
通过导出字节流文件可以得到一下两个文件
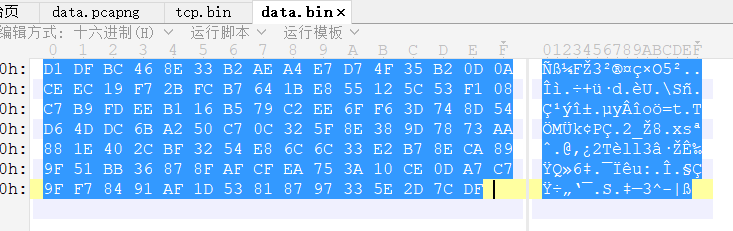
通过010拿走16进制编码数然后进行解密。
D1 DF BC 46 8E 33 B2 AE A4 E7 D7 4F 35 B2 0D 0A

CE EC 19 F7 2B FC B7 64 1B E8 55 12 5C 53 F1 08

C7 B9 FD EE B1 16 B5 79 C2 EE 6F F6 3D 74 8D 54

D6 4D DC 6B A2 50 C7 0C 32 5F 8E 38 9D 78 73 AA

88 1E 40 2C BF 32 54 E8 6C 6C 33 E2 B7 8E CA 89

9F 51 BB 36 87 8F AF CF EA 75 3A 10 CE 0D A7 C7

9F F7 84 91 AF 1D 53 81 87 97 33 5E 2D 7C DF
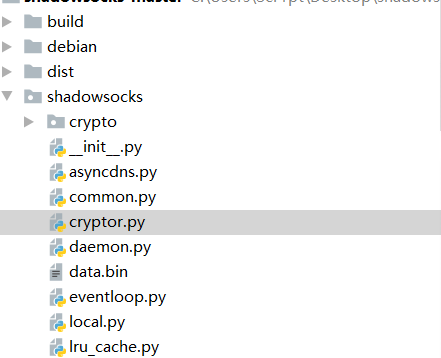
那么我的思路在这里就停滞了。经过师傅的提醒和帮助下,我下载了shadowsocks3.0版本的源码(python版),然后很容易找到一个显眼的cryptor.py文件。(这里有一个误区,如果你下载到的源码中没有题目所示的aes-256-gcm加密方法,后续是无法进行解密的。因此需要下载到相应的版本的shadowsocks3.0)
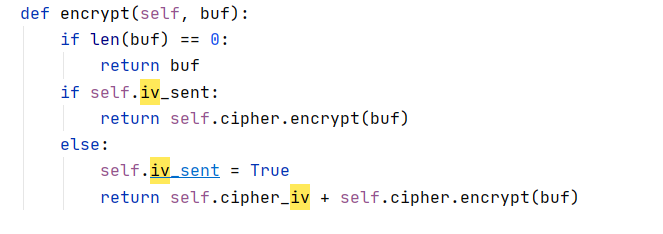
我们仔细看一下这个加密的算法。
加密算法如下。当设置了iv_sent时进行iv的设置,false时不设置iv
然后发现这里是自带decrypt函数的。那么数据包解密就简单多了。
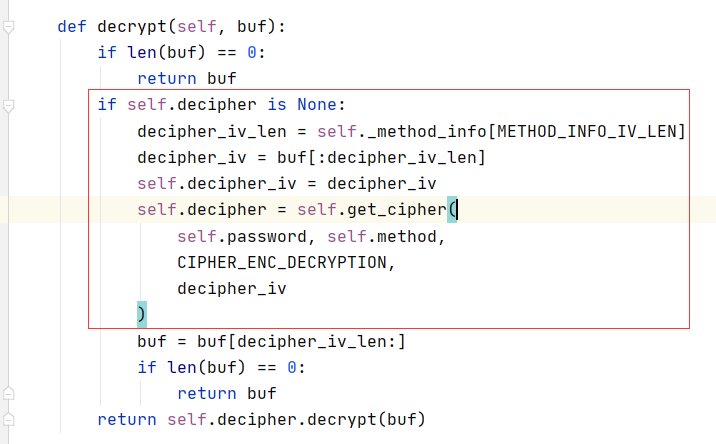
这个函数对数据进行了iv的判断和提取。我们只需要传入完整的数据包进行解密就可以了。
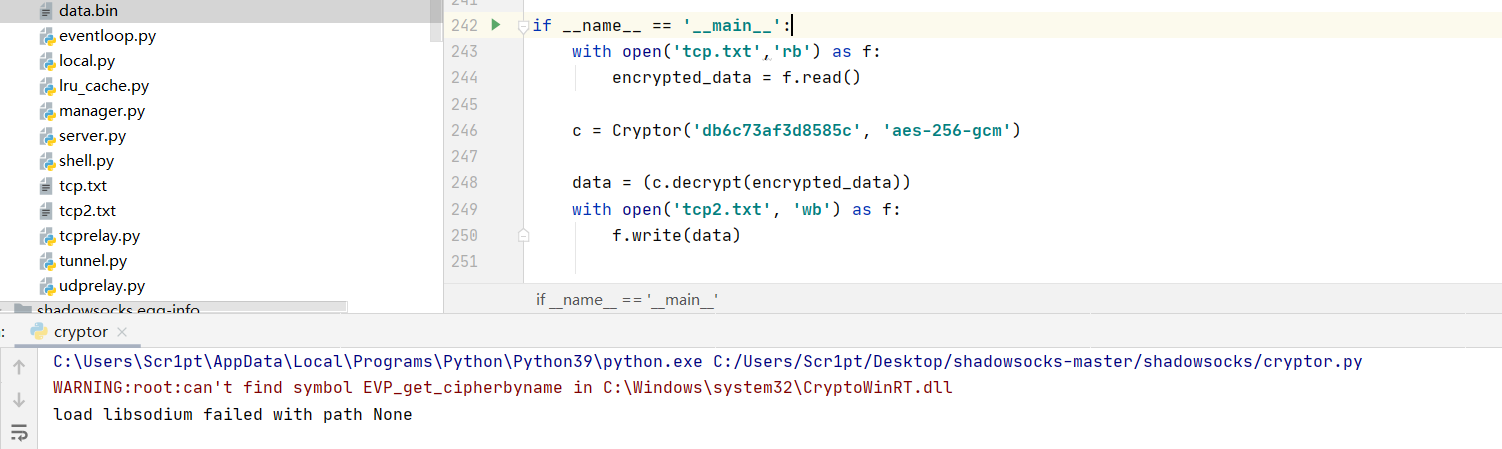
with open('tcp.txt','rb') as f:

    encrypted_data = f.read()

c = Cryptor('db6c73af3d8585c', 'aes-256-gcm')

data = (c.decrypt(encrypted_data))

with open('tcp2.txt', 'wb') as f:

    f.write(data)
对数据进行解密,然后就可以在tcp2.txt中看到我们想要看到的数据包了!
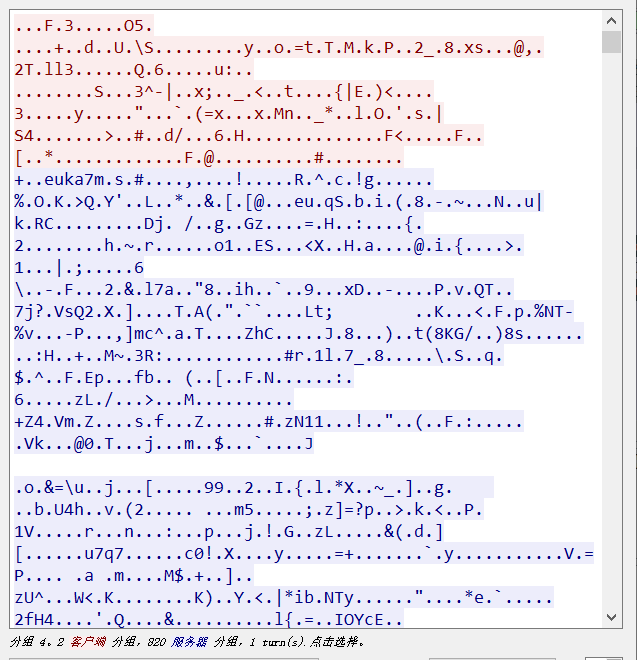
那么数据该提取哪一部分呢?红色部分或者蓝色部分。也就是请求部分和响应部分。
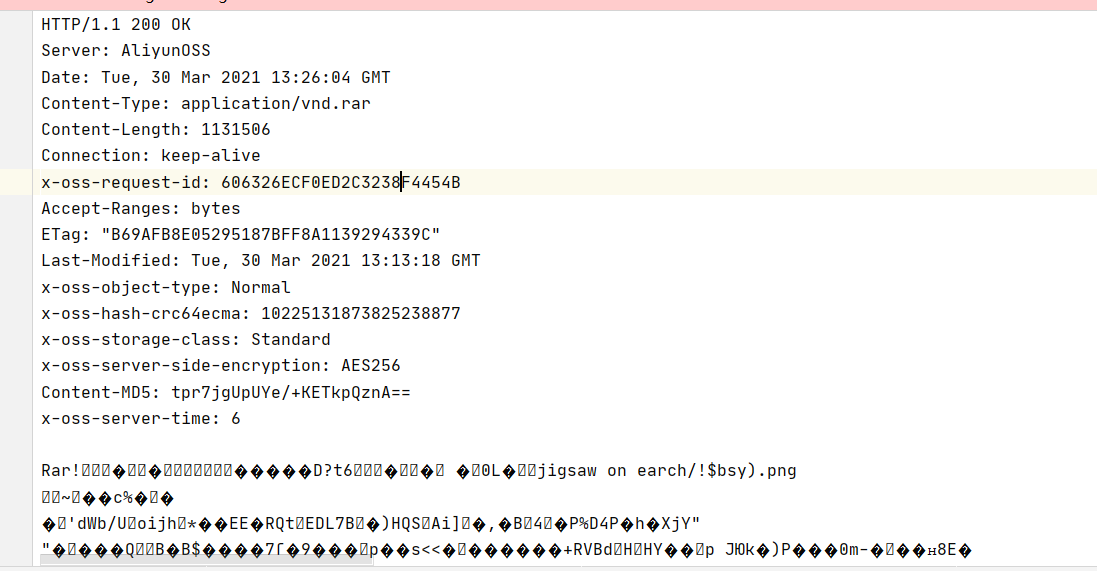
拿到压缩包后就是一个2500个图片的拼图题。hint为gps。
我们在exiftool中可以找到图片的gps值。编写脚本进行提取并修改名字。(我写的脚本)
import os

import re

path = r"/root/Desktop/jigsaw on earch"  # 文件夹目录

files = os.listdir(path)  # 得到文件夹下的所有文件名称

for file in files:  # 遍历文件夹

	cmd=r"exiftool {0} | grep GPS\ Position".format(re.escape(file))

	#print(cmd)

	#print(file)

	gpsTemp = os.popen(cmd).read()

	for i in range(len(gpsTemp)):

		if gpsTemp[i]==':':

			num1 = int(gpsTemp[i+2:i+4].strip())

		if gpsTemp[i] == ',':

			num2 = int(gpsTemp[i+2:i+4].strip())

	fileName = num1*50+num2

	cmdNext = "mv {0} {1}\.png".format(re.escape(file),fileName)

	#print(cmdNext)

	os.system(cmdNext)

	#print(num1*50+num2)

	#print(gpsTemp)
后面拼图脚本不会写了。
师傅放了wp出来。看了一下,真复杂。看不懂。先进行rename
import os

import piexif

from PIL import Image

file = os.listdir('jigsaw')

def calc_file(x, y):

    num = str(y * 50 + x).zfill(4)

    return f'jigsaw/{num}.png'

for i in file:

    img = Image.open(f'jigsaw/{i}')

    exif_dict = piexif.load(img.info['exif'])

    img.close()

    latitude = exif_dict['GPS'][piexif.GPSIFD.GPSLatitude]

    longtitude = exif_dict['GPS'][piexif.GPSIFD.GPSLongitude]

    y = latitude[0][0]

    x = longtitude[0][0]

    file = calc_file(x, y)

    os.rename(f'jigsaw/{i}', file)
然后利用拼图脚本进行拼图
from PIL import Image

from tqdm import tqdm

x_sum = 50

y_sum = 50

ori_width = 60

ori_height = 60

jigsaw_width = 20

width = ori_width + jigsaw_width * 2

height = ori_height + jigsaw_width * 2

def calc_file(x, y):

    num = str(y * x_sum + x).zfill(4)

    return f'jigsaw/{num}.png'

def check_info(file):

    img_info = [0, 0, 0, 0]

    img = Image.open(file)

    pix_out1 = img.getpixel((width // 2, 0))[3]

    pix_out2 = img.getpixel((width - 1, height // 2))[3]

    pix_out3 = img.getpixel((width // 2, height - 1))[3]

    pix_out4 = img.getpixel((0, height // 2))[3]

    pix_out = [pix_out1, pix_out2, pix_out3, pix_out4]

    pix_in1 = img.getpixel((width // 2, jigsaw_width))[3]

    pix_in2 = img.getpixel((width - jigsaw_width - 1, height // 2))[3]

    pix_in3 = img.getpixel((width // 2, height - jigsaw_width - 1))[3]

    pix_in4 = img.getpixel((jigsaw_width, height // 2))[3]

    pix_in = [pix_in1, pix_in2, pix_in3, pix_in4]

    for i in range(4):

        if pix_out[i] == 0 and pix_in[i] == 0:

            img_info[i] = -1

        elif pix_out[i] != 0 and pix_in[i] != 0:

            img_info[i] = 1

        elif pix_out[i] == 0 and pix_in[i] != 0:

            img_info[i] = 0

        else:

            raise Exception("Invalid jigsaw!", file)

    return img_info

def init_table():

    info_table = []

    for y in range(y_sum):

        row_info = []

        for x in range(x_sum):

            file = calc_file(x, y)

            img_info = check_info(file)

            row_info.append(img_info)

        info_table.append(row_info)

    return info_table

def cut(direction, file):

    if direction == 0:

        left_top_x = (ori_width - jigsaw_width) // 2 + jigsaw_width

        left_top_y = 0

    elif direction == 1:

        left_top_x = ori_width + jigsaw_width

        left_top_y = (ori_height - jigsaw_width) // 2 + jigsaw_width

    elif direction == 2:

        left_top_x = (ori_width - jigsaw_width) // 2 + jigsaw_width

        left_top_y = ori_height + jigsaw_width

    elif direction == 3:

        left_top_x = 0

        left_top_y = (ori_height - jigsaw_width) // 2 + jigsaw_width

    right_bottom_x = left_top_x + jigsaw_width

    right_bottom_y = left_top_y + jigsaw_width

    img = Image.open(file)

    cut_img = img.crop((left_top_x, left_top_y, right_bottom_x, right_bottom_y))

    blank_img = Image.new('RGBA', (jigsaw_width, jigsaw_width), (0, 0, 0, 0))

    img.paste(blank_img, (left_top_x, left_top_y))

    img.save(file)

    return cut_img

def paste(direction, file, cut_img):

    if direction == 0:

        left_top_x = (ori_width - jigsaw_width) // 2 + jigsaw_width

        left_top_y = jigsaw_width

    elif direction == 1:

        left_top_x = ori_width

        left_top_y = (ori_height - jigsaw_width) // 2 + jigsaw_width

    elif direction == 2:

        left_top_x = (ori_width - jigsaw_width) // 2 + jigsaw_width

        left_top_y = ori_height

    elif direction == 3:

        left_top_x = jigsaw_width

        left_top_y = (ori_height - jigsaw_width) // 2 + jigsaw_width

    img = Image.open(file)

    img.paste(cut_img, (left_top_x, left_top_y))

    img.save(file)

def recover_jigsaw(info_table):

    for y in tqdm(range(y_sum)):

        for x in range(x_sum):

            img_info = info_table[y][x]

            for direction in range(4):

                if img_info[direction] != 'free':

                    file = calc_file(x, y)

                    if direction == 0:

                        x2 = x

                        y2 = y - 1

                        file2 = calc_file(x2, y2)

                        direction2 = 2

                    elif direction == 1:

                        x2 = x + 1

                        y2 = y

                        file2 = calc_file(x2, y2)

                        direction2 = 3

                    elif direction == 2:

                        x2 = x

                        y2 = y + 1

                        file2 = calc_file(x2, y2)

                        direction2 = 0

                    elif direction == 3:

                        x2 = x - 1

                        y2 = y

                        file2 = calc_file(x2, y2)

                        direction2 = 1

                    if img_info[direction] == 1:

                        cut_img = cut(direction, file)

                        paste(direction2, file2, cut_img)

                    elif img_info[direction] == -1:

                        cut_img = cut(direction2, file2)

                        paste(direction, file, cut_img)

                    info_table[y2][x2][direction2] = 'free'

                    img_info[direction] = 'free'

def remove_border(file):

    img = Image.open(file)

    new_img = img.crop((jigsaw_width, jigsaw_width, width - jigsaw_width, height - jigsaw_width))

    new_img.save(file)

if __name__ == '__main__':

    info_table = init_table()

    recover_jigsaw(info_table)

    for i in range(x_sum * y_sum):

        file = 'jigsaw/' + str(i).zfill(4) + '.png'

        remove_border(file)

扫描后得到flag
MRCTF{795c666e-6244-4768-981d-3b******2c}
MRCTF My secret的更多相关文章
- Android Secret Code
我们很多人应该都做过这样的操作,打开拨号键盘输入*#*#4636#*#*等字符就会弹出一个界面显示手机相关的一些信息,这个功能在Android中被称为android secret code,除了这些系 ...
- ASP.NET OAuth:access token的加密解密,client secret与refresh token的生成
在 ASP.NET OWIN OAuth(Microsoft.Owin.Security.OAuth)中,access token 的默认加密方法是: 1) System.Security.Crypt ...
- Lucky 2048 - The secret of being lucky
Lucky 2048 uses a normal distribution to create "lucky" start. Generally speaking, it prov ...
- Secret Codes
Secret Codes This is a list of codes that can be entered into the dialer to output the listed info ...
- 微信企业号开发之-如何获取secret 序列号
最近有项目基于微信企业号开发,简单记录下如何查看企业号secert 工具/原料 微信企业号 方法/步骤 用管理员的帐号登录后,选择[设置]-[权限管理]进入管理组设置界面 在左边点击[ ...
- hdu.1111.Secret Code(dfs + 秦九韶算法)
Secret Code Time Limit: 2000/1000 MS (Java/Others) Memory Limit: 65536/32768 K (Java/Others) Tota ...
- 2078 Problem H Secret Message 中石油-未提交-->已提交
题目描述 Jack and Jill developed a special encryption method, so they can enjoy conversations without wo ...
- Rails4 中 因为secret key 引起在production环境下无法运行
错误信息 Missing `secret_key_base` for 'production' environment, set this value in `config/secrets.yml` ...
- URAL 1932 The Secret of Identifier 题解
http://acm.timus.ru/problem.aspx?space=1&num=1932 B - The Secret of Identifier Time Limit:1000MS ...
随机推荐
- array group by key javascript
array group by key javascript calendar Array.reduce https://developer.mozilla.org/en-US/docs/Web/Jav ...
- taro external-class
taro external-class https://nervjs.github.io/taro/docs/component-style.html externalClasses child co ...
- 文件I/O的内核缓冲
本文转载自文件 I/O 的内核缓冲 导语 从最粗略的角度理解 Linux 文件 I/O 内核缓冲(buffer cache),啰嗦且不严谨.只为了直观理解. 当我们说一个程序读写磁盘上的文件时,通常指 ...
- javascript初体验(一)
数据类型 数字 (Number),整数或浮点数,例如42或3.14159 字符串 (String) 布尔值 (Boolean) null (js大小写敏感,因此null和NULL不一样) undefi ...
- sql where 1=1 的详细解释
原文来自:https://blog.csdn.net/zc474235918/article/details/50544484 看一下这两个句子: select * from user select ...
- Excel小技巧之VLOOKUP()使用简单说明
前两天人事的小姐姐需要处理一个表格,需要在一张新表中的匹配旧表的数据,由于数据量较大不知如何处理. 我告诉她使用VLOOKUP()函数,然后她不知道怎么使用.其实我也不大用,因为数据库用的多很少使用表 ...
- zabbix Python3管理
import requests import json import os # user config here ip = '192.168.52.130' user = "root&quo ...
- Django Static与Media
关于Django中Static和Media的设置问题(尤其是css和js静态文件加载的问题),网上有很多回答,但是发现有相当一部分回答并不能解决问题.有的可能是Django版本问题,有的是把media ...
- 微信小程序切换标签改变样式
微信小程序切换标签改变样式 wxml <!--顶部导航栏--> <view class="swiper-tab"> <view class=" ...
- nc替代ping
linux nc介绍: 语 法:nc [-hlnruz][-g<网关...>][-G<指向器数目>][-i<延迟秒数>][-o<输出文件>][-p< ...