
python操作三大主流数据库(7)python操作mongodb数据库①mongodb的安装和简单使用
python操作mongodb数据库①mongodb的安装和简单使用
参考文档:
中文版:http://www.mongoing.com/docs/crud.html
英文版:https://docs.mongodb.com/
环境准备:
1.下载mongodb for windows 2008r2版本,进行安装,建议安装在盘的根目录
比如安装在d:/mongodbserver目录下
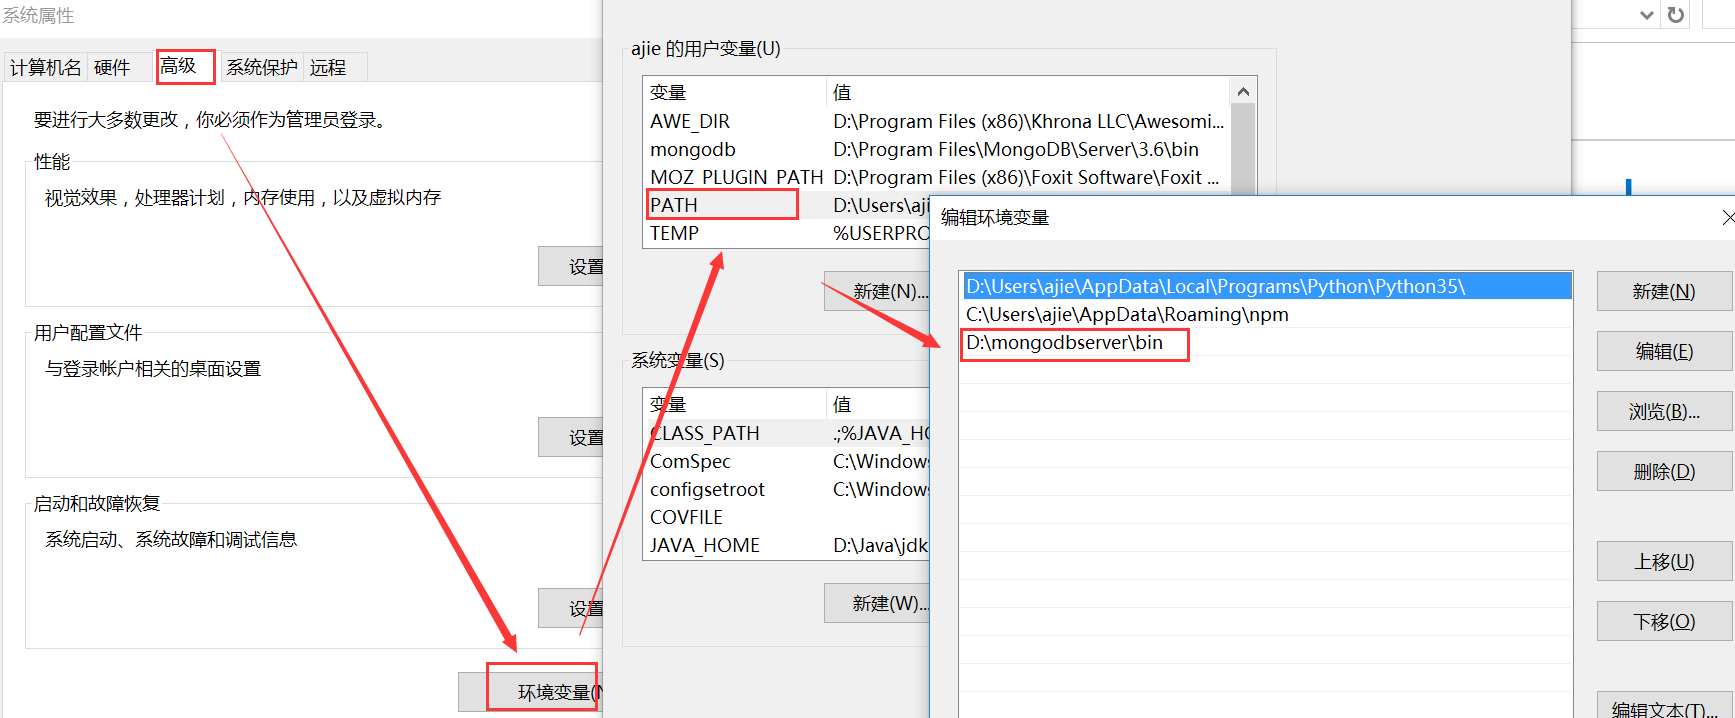
安装完数据库以后可以设置环境变量,这样直接就可以在cmd命令行进行操作了
2.创建数据目录
D:\mongodbserver\data
3.cmd命令行下启动mongodb程序
D:\mongodbserver\bin>mongod --dbpath D:\mongodbserver\data

基本概念:
文档:区分大小写、key唯一不可重复、文档可嵌套、键值对是有序的
集合:集合就是一组文档,文档类似关系数据库里的行,集合类似于关系数据库里的表,集合中的文档无需固定的结构(与关系型数据库的区别)
集合的命名规范:
1.不能是空字符串("")
2.不能包含\0字符(空字符)
3.不能使用system.的前缀(系统保留)
4.建议不包含保留字"$"
5.用.分割不同命名空间的子集合(如:blog.users, blog.posts)
重点:
1.多个文档组成集合,多个集合组成数据库
2.一个实例可以承载多个数据库
3.每个数据库都有独立的权限
4.保留的数据库名称(admin,local,config)
基本操作:
cmd窗口敲入mongo回车进入命令行
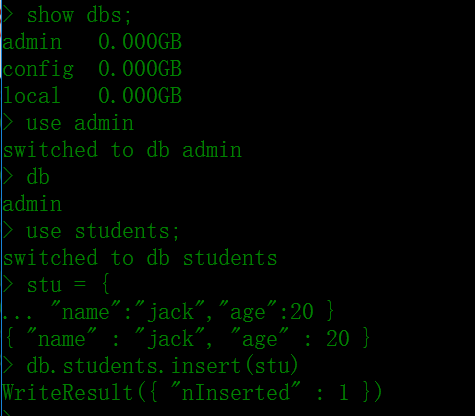
1.函数的定义和使用
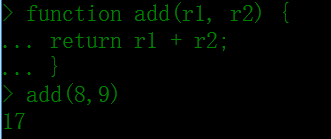
2.新增数据
> use students;

switched to db students

> stu = {"name":"jack","age": }

{ "name" : "jack", "age" :  }

> db.students.insert(stu)

WriteResult({ "nInserted" :  })
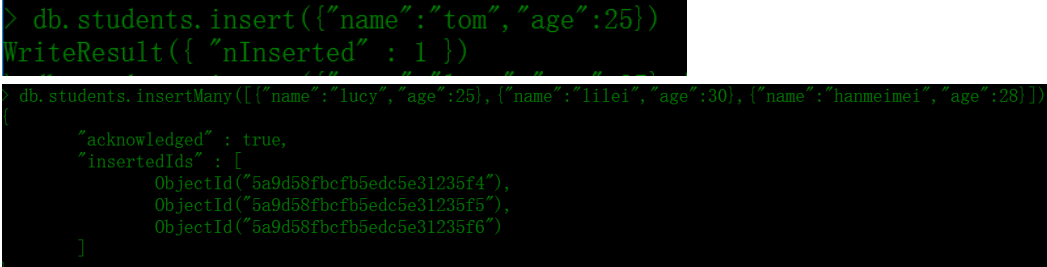
插入单条、多条数据
>db.students.insertMany([{"name":"lucy","age":},{"name":"lilei","age":},{"name":"hanmeimei","age":}])

{

        "acknowledged" : true,

        "insertedIds" : [

                ObjectId("5a9d58fbcfb5edc5e31235f4"),

                ObjectId("5a9d58fbcfb5edc5e31235f5"),

                ObjectId("5a9d58fbcfb5edc5e31235f6")

        ]

}

> db.students.find()

{ "_id" : ObjectId("5a9d5822cfb5edc5e31235f0"), "name" : "jack", "age" :  }

{ "_id" : ObjectId("5a9d5892cfb5edc5e31235f1"), "name" : "lily", "age" :  }

{ "_id" : ObjectId("5a9d58a3cfb5edc5e31235f2"), "name" : "tom", "age" :  }

{ "_id" : ObjectId("5a9d58cdcfb5edc5e31235f3"), "name" : "lucy", "age" :  }

{ "_id" : ObjectId("5a9d58fbcfb5edc5e31235f4"), "name" : "lucy", "age" :  }

{ "_id" : ObjectId("5a9d58fbcfb5edc5e31235f5"), "name" : "lilei", "age" :  }

{ "_id" : ObjectId("5a9d58fbcfb5edc5e31235f6"), "name" : "hanmeimei", "age" :  }
2.数据的查询
查询所有数据
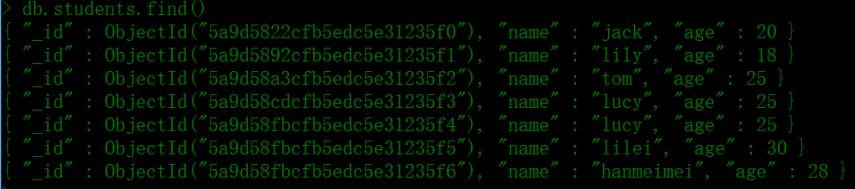
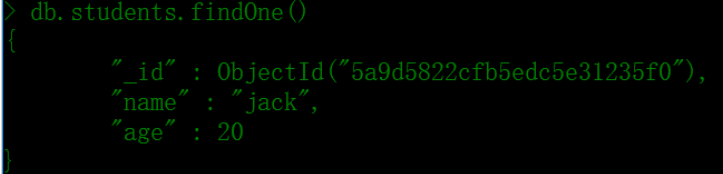
3.查询单条数据
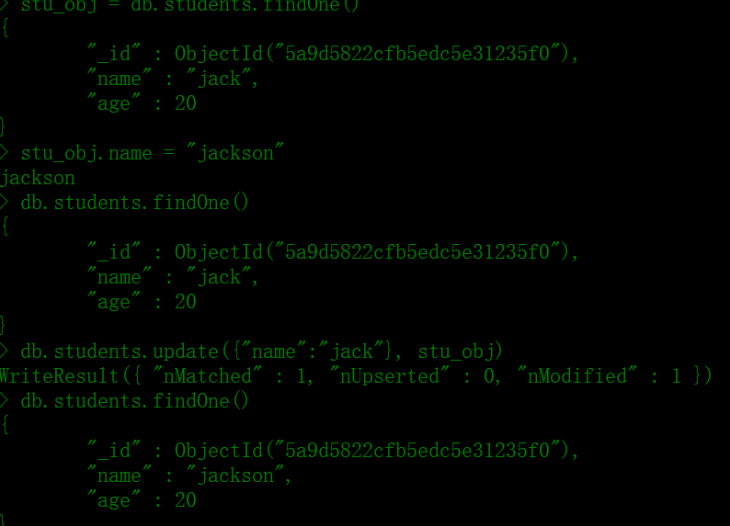
4.修改数据
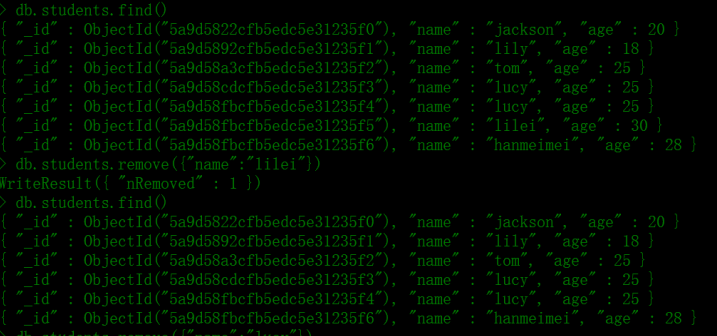
5.删除数据
6.删除所有数据
> db.students.deleteMany({})

{ "acknowledged" : true, "deletedCount" :  }

> db.students.find()

练习任务:
1.创建一个学生信息表(至少包含:姓名、性别、成绩、年龄)
2.写入15条不同的数据
db.students.insertMany(

[

    {name: "bob", age:, gender:"male", grade:},

    {name: "ana", age:, gender:"female", grade:},

    {name: "xi", age:, gender:"male", grade:},

    {name: "bob1", age:, gender:"male", grade:},

    {name: "ana1", age:, gender:"female", grade:},

    {name: "jack", age:, gender:"male", grade:},

    {name: "tom", age:, gender:"male", grade:},

    {name: "lily", age:, gender:"female", grade:},

    {name: "lucy", age:, gender:"female", grade:},

    {name: "lilei", age:, gender:"female", grade:},

    {name: "hanmeimei", age:, gender:"female", grade:},

    {name: "harry", age:, gender:"male", grade:},

    {name: "json", age:, gender:"male", grade:},

    {name: "jim", age:, gender:"male", grade:},

    {name: "rose", age:, gender:"female", grade:},

    {name: "moli", age:, gender:"female", grade:},

    {name: "linda", age:, gender:"female", grade:}

]

)
3.查询所有的男生数据(只需要学生的姓名和年龄)
> db.students.find({gender:"male"},{age:true,name:1,_id:0})
{ "name" : "bob", "age" : 16 }
{ "name" : "xi", "age" : 15 }
{ "name" : "bob1", "age" : 16 }
{ "name" : "jack", "age" : 18 }
{ "name" : "tom", "age" : 19 }
{ "name" : "harry", "age" : 16 }
{ "name" : "json", "age" : 16 }
{ "name" : "jim", "age" : 16 }
4.查询成绩几个的学生信息(学生成绩大于或等于60分)
> db.students.find({grade :{$gte:60}})
5.查询所有18岁的男生和16岁女生的数据
> db.students.find({$or :[{gender:"female",age:16},{gender:"male",age:18}]})
{ "_id" : ObjectId("5a9df2e48a86b467d4a2c44e"), "name" : "jack", "age" : 18, "gender" : "male", "grade" : 85 }
{ "_id" : ObjectId("5a9df2e48a86b467d4a2c450"), "name" : "lily", "age" : 16, "gender" : "female", "grade" : 59 }
{ "_id" : ObjectId("5a9df2e48a86b467d4a2c453"), "name" : "hanmeimei", "age" : 16, "gender" : "female", "grade" : 90 }
{ "_id" : ObjectId("5a9df2e48a86b467d4a2c457"), "name" : "rose", "age" : 16, "gender" : "female", "grade" : 91 }
{ "_id" : ObjectId("5a9df2e48a86b467d4a2c458"), "name" : "moli", "age" : 16, "gender" : "female", "grade" : 93 }
{ "_id" : ObjectId("5a9df2e48a86b467d4a2c459"), "name" : "linda", "age" : 16, "gender" : "female", "grade" : 96 }
6.按照学生的分数进行排序
从小到大
> db.students.find().sort({grade:1})
从大到小,倒序
> db.students.find().sort({grade:-1})
7.将所有女生年龄增加一岁
> db.students.update({gender:"female"}, {$inc:{age:1}}, {multi:true})
WriteResult({ "nMatched" : 9, "nUpserted" : 0, "nModified" : 9 })
python操作三大主流数据库(7)python操作mongodb数据库①mongodb的安装和简单使用的更多相关文章
- python操作三大主流数据库(14)python操作redis之新闻项目实战②新闻数据的展示及修改、删除操作
python操作三大主流数据库(14)python操作redis之新闻项目实战②新闻数据的展示及修改.删除操作 项目目录: ├── flask_redis_news.py ├── forms.py ├ ...
- python操作三大主流数据库(12)python操作redis的api框架redis-py简单使用
python操作三大主流数据库(12)python操作redis的api框架redis-py简单使用 redispy安装安装及简单使用:https://github.com/andymccurdy/r ...
- Python操作三大主流数据库☝☝☝
Python操作三大主流数据库☝☝☝ Python 标准数据库接口为 Python DB-API,Python DB-API为开发人员提供了数据库应用编程接口. Python 数据库接口支持非常多的数 ...
- Python操作三大主流数据库✍✍✍
Python操作三大主流数据库 Python 标准数据库接口为 Python DB-API,Python DB-API为开发人员提供了数据库应用编程接口. Python 数据库接口支持非常多的数据库, ...
- python操作三大主流数据库(10)python操作mongodb数据库④mongodb新闻项目实战
python操作mongodb数据库④mongodb新闻项目实战 参考文档:http://flask-mongoengine.readthedocs.io/en/latest/ 目录: [root@n ...
- python操作三大主流数据库(9)python操作mongodb数据库③mongodb odm模型mongoengine的使用
python操作mongodb数据库③mongodb odm模型mongoengine的使用 文档:http://mongoengine-odm.readthedocs.io/guide/ 安装pip ...
- python操作三大主流数据库(8)python操作mongodb数据库②python使用pymongo操作mongodb的增删改查
python操作mongodb数据库②python使用pymongo操作mongodb的增删改查 文档http://api.mongodb.com/python/current/api/index.h ...
- Python操作三大主流数据库
Python 标准数据库接口为 Python DB-API,Python DB-API为开发人员提供了数据库应用编程接口. Python 数据库接口支持非常多的数据库,你可以选择适合你项目的数据库: ...
- python操作三大主流数据库(6)python操作mysql⑥新闻管理后台功能的完善(增、ajax异步删除新闻、改、查)
python操作mysql⑥新闻管理后台功能的完善(增.删.改.查)安装表单验证D:\python\python_mysql_redis_mongodb\version02>pip instal ...
随机推荐
- windows10下TensorFlow安装记录
1.安装anaconda 安装最新版:https://repo.anaconda.com/archive/Anaconda3-5.3.0-Windows-x86_64.exe 加入环境变量: path ...
- 贝叶斯推断之最大后验概率(MAP)
贝叶斯推断之最大后验概率(MAP) 本文详细记录贝叶斯后验概率分布的数学原理,基于贝叶斯后验概率实现一个二分类问题,谈谈我对贝叶斯推断的理解. 1. 二分类问题 给定N个样本的数据集,用\(X\)来表 ...
- Spring boot 工具类静态属性注入及多环境配置
由于需要访问MongoDB,但是本地开发环境不能直接连接MongoDB,需要通过SecureCRT使用127.0.0.2本地IP代理.但是程序部署到线上生产环境后,是可以直接访问MongoDB的,因此 ...
- C# using 的用法
Ø 前言 说起 C# using 语句,想必大家都不陌生,它是 C# 中关键字之一.我们基本每天写代码都会使用到,其实也非常简单. 1. 首先,说说 using 有哪些用途 1) 用于引用其 ...
- udp_client函数
#include <netdb.h> #include <stdlib.h> #include <string.h> #include <sys/socket ...
- jQuery two way bindings(双向数据绑定插件)
jQuery two way bindings https://github.com/petersirka/jquery.bindings 这是一个简单的jQuery双向绑定库. 此插件将HTML元素 ...
- luogu 3045 优先队列反悔/bzoj 2590
N头奶牛,价格Pi,K张优惠券,优惠券购买降为Ci,不超过M的钱最多可买多少奶牛 先将c值k小的加入,将它们省下的钱加入优先队列(省下的钱由少到多),在将k+1-n用p排序,再逐个与优先队列中弹出的比 ...
- mysql数值运算符和函数
mysql> |+------------+1 row in set (0.00 sec) mysql> SELECT FLOOR(3.99); # 舍1取整+------------- ...
- 第21月第6天 zhihu如何用3个月零基础入门机器学习
1. 我们应该记住,既成的事实一定有它的道理,如果我们不能理解它,恐怕得从自身找原因.如果你交易股票,请记住,如果预测和市场不一致,错的是预测,而不是市场 https://www.cnblogs.co ...
- Leetcode#169. Majority Element(求众数)
题目描述 给定一个大小为 n 的数组,找到其中的众数.众数是指在数组中出现次数大于 ⌊ n/2 ⌋ 的元素. 你可以假设数组是非空的,并且给定的数组总是存在众数. 示例 1: 输入: [3,2,3] ...