
ngnix入门配置
文件1.首先到ngnix下载页面下载你操作系统对应的ngnix压缩包 http://nginx.org/en/download.html
博主我是window10操作系统 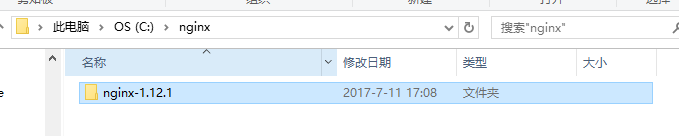
上面是我解压之后放的路径。
2.下载之后呢,需要配置一下你的nginx的文件了,找到conf目录下的nginx.conf文件打开编辑
因为本文只是入门,最终目标是能在本地浏览器以服务器打开方式查看我们的静态文件。(localhost:90/index.html,而不是file://C:path/index.html)
配置文件主要是二个地方需要修改一下
#user  nobody;

#指定nginx进程数

worker_processes  ;

#全局错误日志以及pid文件

#error_log  logs/error.log;

#error_log  logs/error.log  notice;

#error_log  logs/error.log  info;

#pid        logs/nginx.pid;

events {

    #连接数上限

    worker_connections  ;

}

#设定http服务器,利用他的反向代理功能提供负载均衡支持

http {

    #设定mime类型,类型由mime.type文件定义

    include       mime.types;

    default_type  application/octet-stream;

    #设定日志格式

    #log_format  main  '$remote_addr - $remote_user [$time_local] "$request" '

    #                  '$status $body_bytes_sent "$http_referer" '

    #                  '"$http_user_agent" "$http_x_forwarded_for"';

    #使用哪种格式的日志

    #access_log  logs/access.log  main;

    #sendfile 指令指定 nginx 是否调用 sendfile 函数(zero copy 方式)来输出文件,对于普通应用,

    sendfile        on;

    #tcp_nopush     on;

    #连接超时时间

    #keepalive_timeout  ;

    keepalive_timeout  ;

    #开启gzip压缩

    #gzip  on;

    server {

        listen       90;

        server_name  xc.elianweb.com;

        #charset koi8-r;

        #access_log  logs/host.access.log  main;

        location / {

            root   C:/elianWebSvn/elianWeb/elianWeb/webNewLTE;

            index  index.html;

        }

        #error_page                /.html;

        # redirect server error pages to the static page /50x.html

        #

        #error_page        /50x.html;

        #location = /50x.html {

        #    root   html;

        #}

        # proxy the PHP scripts to Apache listening on 127.0.0.1:

        #

        #location ~ \.php$ {

        #    proxy_pass   http://127.0.0.1;

        #}

        # pass the PHP scripts to FastCGI server listening on 127.0.0.1:

        #

        #location ~ \.php$ {

        #    root           html;

        #    fastcgi_pass   127.0.0.1:;

        #    fastcgi_index  index.php;

        #    fastcgi_param  SCRIPT_FILENAME  /scripts$fastcgi_script_name;

        #    include        fastcgi_params;

        #}

        # deny access to .htaccess files, if Apache's document root

        # concurs with nginx's one

        #

        #location ~ /\.ht {

        #    deny  all;

        #}

    }

    # another virtual host using mix of IP-, name-, and port-based configuration

    #

    #server {

    #    listen       ;

    #    listen       somename:;

    #    server_name  somename  alias  another.alias;

    #    location / {

    #        root   html;

    #        index  index.html index.htm;

    #    }

    #}

    # HTTPS server

    #

    #server {

    #    listen        ssl;

    #    server_name  localhost;

    #    ssl_certificate      cert.pem;

    #    ssl_certificate_key  cert.key;

    #    ssl_session_cache    shared:SSL:1m;

    #    ssl_session_timeout  5m;

    #    ssl_ciphers  HIGH:!aNULL:!MD5;

    #    ssl_prefer_server_ciphers  on;

    #    location / {

    #        root   html;

    #        index  index.html index.htm;

    #    }

    #}

}
上面需要修改的是listen 和 location /{ root }
listen修改原因是怕和你本地的iis服务器端口冲突,所以建议你改一下
location /{ root } 修改的是你的项目所在的路径,然后浏览器查看的路径是以你这个root 的路径为基础的,比如: 我上面写的路径
C:/elianWebSvn/elianWeb/elianWeb/webNewLTE
,然后我的项目主页文件是
C:/elianWebSvn/elianWeb/elianWeb/webNewLTE/pages/index.html
那么我在浏览器就可以这样打开 localhost:90/pages/index.html
3.配置文件写完后,就是需要运行这个nginx了。
博主在运行这个nginx时,卡在一个坑上面很久很久,就是一个报错
2017/09/15 11:08:29 [error] 21684#18308: CreateFile() "C:\nginx\nginx-1.12.1/logs/nginx.pid" failed (2: The system cannot find the file specified)
这个坑主要原因就是没有没有nginx.pid这个文件,看了网上很多方案是 需要创建nginx.pid文件,也就是要指定nginx.conf这个配置文件,然后博主很傻的这样写 nginx -c conf/nginx.conf
还是直接说正解吧 : 打开你的cmd(命令行) 然后你需要以你nginx.exe所在路径的绝对路径来写 比如博主的路径在 C:\nginx\nginx-1.12.1
那么命令行就需要这样写 /nginx/nginx-1.12.1/nginx -c /nginx/nginx-1.12.1/conf/nginx.conf

然后就会创建nginx.pid文件啦!!!汗!
如果有小伙伴遇到类似这样的报错 2017/09/15 10:43:49 [emerg] 20960#4268: bind() to 0.0.0.0:80 failed (10013: An attempt was made to access a socket in a way forbidden by its access permissions)
原因是你的端口号80与你本地其他服务器的端口号冲突啦,所以建议你们去改配置文件的listen
4.nginx.pid文件创建好,就可以写命令行
在你nginx.exe所在的目录空白处,按下shift+右键,选择 在此处打开命令行窗口(w)
打开之后 输入第一个命令 start nginx
第二步,需要把nginx的配置文件生效
nginx -s reload
ps:推出nginx命令行 nginx -s quit
5.在命令行能够顺利输入nginx后,就可以到浏览器去查看我们的静态文件了
博主的端口是90
本地首页路径是 C:/elianWebSvn/elianWeb/elianWeb/webNewLTE/pages/index.html
nginx.conf的配置中 root 是 C:/elianWebSvn/elianWeb/elianWeb/webNewLTE
所以博主我在浏览器输入的路径是 localhost:90/pages/index.html
按照我的这个顺序去配置运行,我相信你也可以入坑nginx啦~~
希望可以帮助更多前端小伙伴入坑nginx~金木·晨 2017-09-15
ngnix入门配置的更多相关文章
- Spring-MVC开发步骤(入门配置)
Spring-MVC开发步骤(入门配置) Step1.导包 spring-webmvc Step2.添加spring配置文件 Step3.配置DispatcherServlet 在web.xml中: ...
- CEPH集群操作入门--配置
参考文档:CEPH官网集群操作文档 概述 Ceph存储集群是所有Ceph部署的基础. 基于RADOS,Ceph存储集群由两种类型的守护进程组成:Ceph OSD守护进程(OSD)将数据作为对象 ...
- mybatis入门配置和调试
欢迎转载http://www.cnblogs.com/jianshuai520/p/8669177.html大家一起努力,如果看的时候有图片半边遮挡起来的话,右键查看图片,就可以观看完整的图片,具体怎 ...
- webpack4入门配置
下面是抄过来的,方便自己翻越 webpack4.x入门配置 1.首先npm install webpack webpack-cli webpack-dev-server -g (mac电脑用超级管 ...
- webpack快速入门——配置JS压缩,打包
1 .首先在webpack.config.js中引入 const uglify = require('uglifyjs-webpack-plugin'); 2.然后在plugins配置里 plugin ...
- 01-项目简介Springboot简介入门配置项目准备
总体课程主要分为4个阶段课程: ------------------------课程介绍------------------------ 01-项目简介Springboot简介入门配置项目准备02-M ...
- webpack入门配置
webpack入门配置 根据该篇文章进行配置: 入门 Webpack,看这篇就够了 其中由于版本更新的问题会出现几个问题: 1.Would you like to install webpack-cl ...
- springMVC的一些入门配置
1.springMVC的描述 1.1.SpringMVC是Spring框架内置的MVC的实现.SpringMVC就是一个Spring内置的MVC子框架. 1.2.SpringMVC的作用是实现页面和后 ...
- SpringMVC框架入门配置 IDEA下搭建Maven项目(zz)
SpringMVC框架入门配置 IDEA下搭建Maven项目 这个不错哦 http://www.cnblogs.com/qixiaoyizhan/p/5819392.html
随机推荐
- 第五篇 elasticsearch express插入数据
1.后端 在elasticsearch.js文件夹下添加: function addDocument(document) { return elasticClient.index({ index: i ...
- URL中#符号的作用
转自http://blog.sina.com.cn/s/blog_6f9eb2dd0100sk97.html 一.#的涵义 #代表网页中的一个位置.其右面的字符,就是该位置的标识符.比如, ...
- storm启动nimbus源码分析-nimbus.clj
nimbus是storm集群的"控制器",是storm集群的重要组成部分.我们可以通用执行bin/storm nimbus >/dev/null 2>&1 &a ...
- CodeForces 279B Books (滑动窗口)
题意:给定n本书的阅读时间,然后你从第 i 本开始阅读,问你最多能看多少本书在给定时间内. 析:就是一个滑动窗口的水题. 代码如下: #pragma comment(linker, "/ST ...
- 滴水穿石 C#中多线程 委托的使用
什么是多线程?我们在建立以个C#项目时,往往会在Form1上添加控件,然后写代码,初 学者都是在重复这个过程,其实这个过程是单线程的,可以理解为只有“main”主线程,有 的时候往往需要同时测量多个东 ...
- Mathematics Base - 期望、方差、协方差、相关系数总结
参考:<深度学习500问> 期望 在概率论和统计学中,数学期望(或均值,亦简称期望)是试验中每次可能结果的概率乘以其结果的总和.它反映随机变量平均取值的大小. 线性运算: \(E(ax+ ...
- ProtoBuf练习
环境设置 项目地址 https://github.com/silvermagic/ProtoBufDev.git 操作系统 64位 Fedora 24 安装protobuf $ git clone h ...
- Syslog+Fluentd+InfluxDB日志收集系统搭建
环境配置 节点 配置 类型 操作系统 Sched 2G 2CPU 50GB ens3=>192.168.200.11 KVM虚拟机 CentOS 7 Nova 4G 2CPU 50GB ens3 ...
- [CentOS7] 使用磁盘分割建立swap
声明:本文主要总结自:鸟哥的Linux私房菜-第七章.Linux 磁碟與檔案系統管理,如有侵权,请通知博主 通过 vim /etc/fstab 使该新建的swap分区每次开机都自己挂载 至此,已经完成 ...
- “Enterprise Architect”和数据库的不解之缘
前言 在这个大数据盛行的时代,和数据打交道变的必不可少了,所有如果有工具来规范我们的数据库会更加方便我们的生活.这次机房,我们利用EA(Enterprise Architect)自动生成SQL语句来达 ...