二、springboot项目使用seata实现分布式事务
所有文章
https://www.cnblogs.com/lay2017/p/12078232.html
正文
在上一篇文章中,我们简单地了解了一下什么是seata。它是来自阿里巴巴的内部项目不断地发展出来的。2019年以fescar命名开源于apache开源协议,同年改名为seata。
本文将入手seata,官方的文档和demo主要以dubbo和springcloud体系的接入为主。本文选取springboot作为项目构建框架,快速构建示例。
环境说明
seata的发展还是比较快的,而版本的更新带来的使用变化可能会导致文档的过时。本文在阅读官方提供的quickStart基础上完成。为了过程顺利最好保持环境版本一致,否则你可能得自己debug问题所在。
- jdk1.8
- mysql8.0.18
- springboot 2.2.5.RELEASE
- spring-cloud-alibaba-dependencies 2.2.0.RELEASE
- seata-server v1.1.0
当然,版本并不一定需要完全一样。比如你可以使用mysql5+,但是就得强制指定对应的mysql-connector-java.jar的版本。
步骤说明
要完成这个示例项目,需要不少的步骤。这里提前罗列一下,比较心里有数
- 搭建springboot项目
- 引入seata依赖
- 配置
- 添加并修改file.conf和registry.conf配置
- 添加数据源配置
- 数据源添加undo_log表
- 测试
- 数据源添加业务表和数据
- 编写业务代码
- 全局回滚测试
搭建springboot项目
搭建springboot项目比较简单,本文采用idea构建了两个项目
1)user-service
application.properties配置为:
server.port=8080

server.servlet.context-path=/user-service

spring.application.name=user-service
2) good-service
server.port=8081

server.servlet.context-path=/good-service

spring.application.name=good-service
继承自
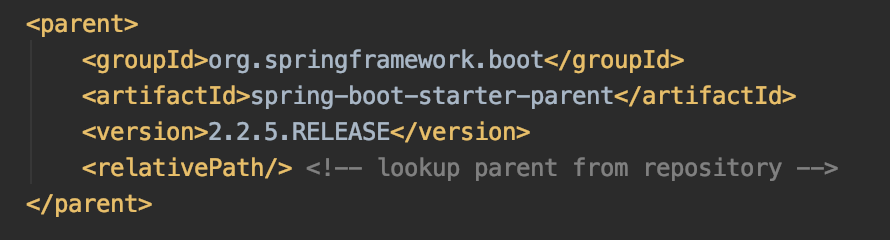
基础依赖为
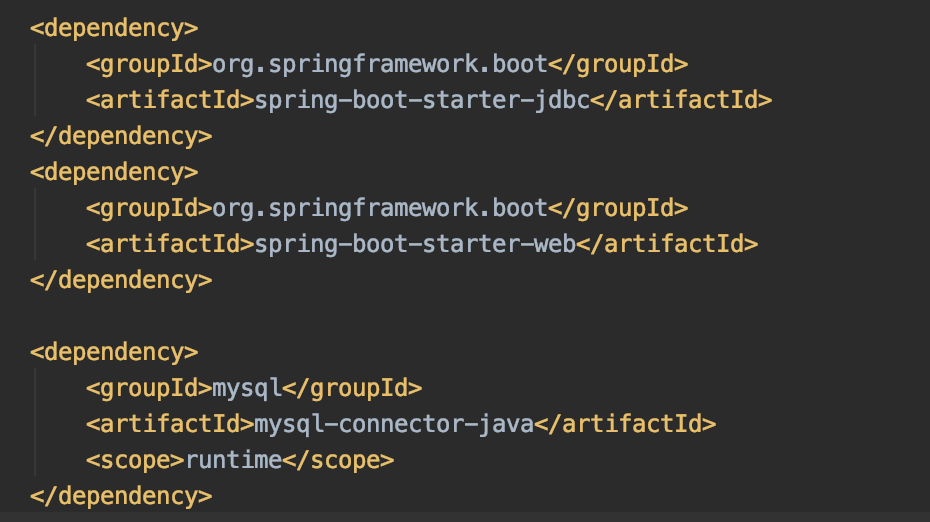
引入seata依赖
首先Import一下dependencies,注意:groupId和官方文档写的不一样,版本是2.2.0.RELEASE
<dependencyManagement>

    <dependencies>

        <dependency>

            <groupId>com.alibaba.cloud</groupId>

            <artifactId>spring-cloud-alibaba-dependencies</artifactId>

            <version>2.2.0.RELEASE</version>

            <type>pom</type>

            <scope>import</scope>

        </dependency>

    </dependencies>

</dependencyManagement>
接着引入seata的依赖
<dependency>

    <groupId>com.alibaba.cloud</groupId>

    <artifactId>spring-cloud-starter-alibaba-seata</artifactId>

</dependency>
配置
添加并修改file.conf和registry.conf
我们需要在resources目录下,创建file.conf和registry.conf这两个文件。

registry.conf文件不需要修改,直接拷贝即可
registry {

  # file 、nacos 、eureka、redis、zk、consul、etcd3、sofa

  type = "file"

  nacos {

    serverAddr = "localhost"

    namespace = "public"

    cluster = "default"

  }

  eureka {

    serviceUrl = "http://localhost:8761/eureka"

    application = "default"

    weight = "1"

  }

  redis {

    serverAddr = "localhost:6379"

    db = "0"

  }

  zk {

    cluster = "default"

    serverAddr = "127.0.0.1:2181"

    session.timeout = 6000

    connect.timeout = 2000

  }

  consul {

    cluster = "default"

    serverAddr = "127.0.0.1:8500"

  }

  etcd3 {

    cluster = "default"

    serverAddr = "http://localhost:2379"

  }

  sofa {

    serverAddr = "127.0.0.1:9603"

    application = "default"

    region = "DEFAULT_ZONE"

    datacenter = "DefaultDataCenter"

    cluster = "default"

    group = "SEATA_GROUP"

    addressWaitTime = "3000"

  }

  file {

    name = "file.conf"

  }

}

config {

  # file、nacos 、apollo、zk、consul、etcd3

  type = "file"

  nacos {

    serverAddr = "localhost"

    namespace = "public"

    cluster = "default"

  }

  consul {

    serverAddr = "127.0.0.1:8500"

  }

  apollo {

    app.id = "seata-server"

    apollo.meta = "http://192.168.1.204:8801"

  }

  zk {

    serverAddr = "127.0.0.1:2181"

    session.timeout = 6000

    connect.timeout = 2000

  }

  etcd3 {

    serverAddr = "http://localhost:2379"

  }

  file {

    name = "file.conf"

  }

}
file.conf内容如下,但是要service节点下的一个配置。我们示例项目是user-service和good-service,分别在对应的项目中要做修改。
transport {

  # tcp udt unix-domain-socket

  type = "TCP"

  #NIO NATIVE

  server = "NIO"

  #enable heartbeat

  heartbeat = true

  #thread factory for netty

  thread-factory {

    boss-thread-prefix = "NettyBoss"

    worker-thread-prefix = "NettyServerNIOWorker"

    server-executor-thread-prefix = "NettyServerBizHandler"

    share-boss-worker = false

    client-selector-thread-prefix = "NettyClientSelector"

    client-selector-thread-size = 1

    client-worker-thread-prefix = "NettyClientWorkerThread"

    # netty boss thread size,will not be used for UDT

    boss-thread-size = 1

    #auto default pin or 8

    worker-thread-size = 8

  }

  shutdown {

    # when destroy server, wait seconds

    wait = 3

  }

  serialization = "seata"

  compressor = "none"

}

service {

  #vgroup->rgroup

  vgroup_mapping.取spring.application.name的值-seata-service-group = "default"

  #only support single node

  default.grouplist = "127.0.0.1:8091"

  #degrade current not support

  enableDegrade = false

  #disable

  disable = false

  #unit ms,s,m,h,d represents milliseconds, seconds, minutes, hours, days, default permanent

  max.commit.retry.timeout = "-1"

  max.rollback.retry.timeout = "-1"

}

client {

  async.commit.buffer.limit = 10000

  lock {

    retry.internal = 10

    retry.times = 30

  }

  report.retry.count = 5

}

## transaction log store

store {

  ## store mode: file、db

  mode = "file"

  ## file store

  file {

    dir = "sessionStore"

    # branch session size , if exceeded first try compress lockkey, still exceeded throws exceptions

    max-branch-session-size = 16384

    # globe session size , if exceeded throws exceptions

    max-global-session-size = 512

    # file buffer size , if exceeded allocate new buffer

    file-write-buffer-cache-size = 16384

    # when recover batch read size

    session.reload.read_size = 100

    # async, sync

    flush-disk-mode = async

  }

  ## database store

  db {

    ## the implement of javax.sql.DataSource, such as DruidDataSource(druid)/BasicDataSource(dbcp) etc.

    datasource = "dbcp"

    ## mysql/oracle/h2/oceanbase etc.

    db-type = "mysql"

    url = "jdbc:mysql://127.0.0.1:3306/seata"

    user = "mysql"

    password = "mysql"

    min-conn = 1

    max-conn = 3

    global.table = "global_table"

    branch.table = "branch_table"

    lock-table = "lock_table"

    query-limit = 100

  }

}

lock {

  ## the lock store mode: local、remote

  mode = "remote"

  local {

    ## store locks in user's database

  }

  remote {

    ## store locks in the seata's server

  }

}

recovery {

  committing-retry-delay = 30

  asyn-committing-retry-delay = 30

  rollbacking-retry-delay = 30

  timeout-retry-delay = 30

}

transaction {

  undo.data.validation = true

  undo.log.serialization = "jackson"

}

## metrics settings

metrics {

  enabled = false

  registry-type = "compact"

  # multi exporters use comma divided

  exporter-list = "prometheus"

  exporter-prometheus-port = 9898

}
添加数据源配置
分布式事务的实现,数据源代理是很重要的方式。在2.2.0.RELEASE中,数据源代理自动实现了,不需要我们去配置一个代理类。但是我们还是需要配置一下数据源的。
首先在application.properties中添加配置
user-service的配置
spring.datasource.driverClassName=com.mysql.cj.jdbc.Driver

spring.datasource.url=jdbc:mysql://localhost:3306/db_user?useUnicode=true&characterEncoding=utf8&allowMultiQueries=true&useSSL=false

spring.datasource.username=root

spring.datasource.password=
good-service的配置
spring.datasource.driverClassName=com.mysql.cj.jdbc.Driver

spring.datasource.url=jdbc:mysql://localhost:3306/db_good?useUnicode=true&characterEncoding=utf8&allowMultiQueries=true&useSSL=false

spring.datasource.username=root

spring.datasource.password=
注意:你可能选择了与本文不同的MySQL版本,那么driverClassName或许并不是com.mysql.cj.jdbc.Driver而是早期的com.mysql.jdbc.Driver 。否则会报驱动类找不到的问题
然后我们添加一个配置类,这里以druid数据源为例。
@Configuration

public class DataSourceProxyConf {

    @Bean

    @ConfigurationProperties(prefix = "spring.datasource")

    public DataSource dataSource() {

        return new DruidDataSource();

    }

}
这样,数据源就配置好了。后面的测试中,我们将会使用JdbcTemplate进行数据源操作,以及resttemplate作为服务调用。所以这里也顺便配置两个Bean吧
@Configuration

public class DataSourceProxyConf {

    @Bean

    @ConfigurationProperties(prefix = "spring.datasource")

    public DataSource dataSource() {

        return new DruidDataSource();

    }

    @Bean

    public JdbcTemplate jdbcTemplate(DataSource dataSource) {

        return new JdbcTemplate(dataSource);

    }

    @Bean

    public RestTemplate restTemplate() {

        return new RestTemplate();

    }

}
这里要注意,jdbcTemplate注入的dataSource不是纯粹的DruidDataSource,而是DataSourceProxy。前面我们说过,seata在2.2.0版本进行了自动代理,不需要像2.1.0那种配置代理对象了。
添加undo_log表
配置的最后一个项目,就是在两个数据源中添加undo_log表。我们将两个db分别命名为db_user和db_good吧。
undo_log表用于保存回滚数据,直接将以下sql在db里面执行一下即可。
CREATE TABLE `undo_log`

(

    `id`            BIGINT(20)   NOT NULL AUTO_INCREMENT,

    `branch_id`     BIGINT(20)   NOT NULL,

    `xid`           VARCHAR(100) NOT NULL,

    `context`       VARCHAR(128) NOT NULL,

    `rollback_info` LONGBLOB     NOT NULL,

    `log_status`    INT(11)      NOT NULL,

    `log_created`   DATETIME     NOT NULL,

    `log_modified`  DATETIME     NOT NULL,

    `ext`           VARCHAR(100) DEFAULT NULL,

    PRIMARY KEY (`id`),

    UNIQUE KEY `ux_undo_log` (`xid`, `branch_id`)

) ENGINE = InnoDB

  AUTO_INCREMENT = 1

  DEFAULT CHARSET = utf8
到这里,配置的部分就结束了,后续进入测试的部分
测试
数据源添加业务表和业务数据
在db_user和db_good分别添加表t_user和t_good
CREATE TABLE `t_good` (

  `id` bigint(20) NOT NULL AUTO_INCREMENT,

  `amount` int(255) DEFAULT NULL,

  PRIMARY KEY (`id`)

) ENGINE=InnoDB AUTO_INCREMENT=1 DEFAULT CHARSET=utf8 COLLATE=utf8_bin;
CREATE TABLE `t_user` (

  `id` bigint(20) NOT NULL AUTO_INCREMENT,

  `account` decimal(10,2) DEFAULT NULL,

  PRIMARY KEY (`id`)

) ENGINE=InnoDB AUTO_INCREMENT=1 DEFAULT CHARSET=utf8 COLLATE=utf8_bin;
并添加数据如下
t_user

t_good

编写业务代码
数据准备好了,我们简单编写一下controller
GoodController对t_good表的amount字段-1操作,再1/0发生算术异常
@RestController

@RequestMapping("good")

public class GoodController {

    @Autowired

    private JdbcTemplate jdbcTemplate;

    @GetMapping("amount/reduce")

    public String reduceAmount() {

        jdbcTemplate.update("update t_good set amount = amount - 1 where id = 1");

        int i = 1/0;

        return "success";

    }

}
UserController先对t_user表的account字段-1操作,然后调用GoodController。
这里我们注意到@GlobalTransactional这个注解,表示开启分布式事务。
@RestController

@RequestMapping("user")

public class UserController {

    @Autowired

    private JdbcTemplate jdbcTemplate;

    @Autowired

    private RestTemplate restTemplate;

    @GetMapping("account/reduce")

    @GlobalTransactional(rollbackFor = Exception.class)

    public String reduceAccount() {

        jdbcTemplate.update("update t_user set account = account - 1 where id = 1");

        restTemplate.getForEntity("http://localhost:8081/good-service/good/amount/reduce", String.class);

        return "success";

    }

}
全局回滚测试
1、我们先启动seata-server,直接执行.seata-server.sh(mac或linux) 或者 seata-server.bat(windows)。seata-server下载地址为:https://github.com/seata/seata/releases/download/v1.1.0/seata-server-1.1.0.zip
2、接着启动user-service和good-service
3、当调用接口:http://localhost:8080/user-service/user/account/reduce的时候会爆出500内部错误。这时候检查一下数据源或者seata-server的console你会发现数据没有变化,console出现了两个branchId对应的doRollback输出。再看看undo_log表,自增ID从1变成了2.
总结
本文到此结束了,简单搭建并测试了一下commit和rollback。虽然阿里已经尽量把使用变得很简单了,但是明显的是搭建一个示例项目还是经历了不少步骤。可见分布式项目带来的成本降低,但是复杂度上升的困难是很难逾越的。
后续的文章中将从源码角度了解seata的实现,虽然很麻烦,但是...莫名地其乐无穷吧~
二、springboot项目使用seata实现分布式事务的更多相关文章
- 微服务痛点-基于Dubbo + Seata的分布式事务(AT)模式
前言 Seata 是一款开源的分布式事务解决方案,致力于提供高性能和简单易用的分布式事务服务.Seata 将为用户提供了 AT.TCC.SAGA 和 XA 事务模式,为用户打造一站式的分布式解决方案. ...
- 微服务痛点-基于Dubbo + Seata的分布式事务(TCC模式)
前言 Seata 是一款开源的分布式事务解决方案,致力于提供高性能和简单易用的分布式事务服务.Seata 将为用户提供了 AT.TCC.SAGA 和 XA 事务模式,为用户打造一站式的分布式解决方案. ...
- springboot整合多数据源解决分布式事务
一.前言 springboot整合多数据源解决分布式事务. 1.多数据源采用分包策略 2.全局分布式事务管理:jta-atomikos. ...
- 3分钟搞定SpringBoot+Mybatis+druid多数据源和分布式事务
文章来自: https://blog.csdn.net/qq_29242877/article/details/79033287 在一些复杂的应用开发中,一个应用可能会涉及到连接多个数据源,所谓多数据 ...
- springboot学习笔记:10.springboot+atomikos+mysql+mybatis+druid+分布式事务
前言 上一篇文章我们整合了springboot+druid+mybatis+mysql+多数据源: 本篇文章大家主要跟随你们涛兄在上一届基础上配置一下多数据源情况下的分布式事务: 首先,到底啥是分布式 ...
- Spring Cloud Alibaba 使用Seata解决分布式事务
为什么会产生分布式事务? 随着业务的快速发展,网站系统往往由单体架构逐渐演变为分布式.微服务架构,而对于数据库则由单机数据库架构向分布式数据库架构转变.此时,我们会将一个大的应用系统拆分为多个可以独立 ...
- SpringBoot统一异常处理后TX-LCN分布式事务无法捕获异常进行回滚
通常我们使用SpringBoot都会进行统一异常处理,例如写一个BaseController,在BaseController里进行统一异常处理,然后其他的Controller都继承BaseContro ...
- Spring Boot 集成 Seata 解决分布式事务问题
seata 简介 Seata 是 阿里巴巴2019年开源的分布式事务解决方案,致力于在微服务架构下提供高性能和简单易用的分布式事务服务.在 Seata 开源之前,Seata 对应的内部版本在阿里内部一 ...
- SpringBoot多数据源中的分布式事务
虽然现在微服务越来越流行,我们的系统随之也拆分出来好多的模块功能.这样做的目的其实就是为了弥补单体架构中存在的不足.随着微服务的拆分,肯定设计到分库分表,但这之中肯定设计到分布式事务.最典型的例子就是 ...
随机推荐
- RabbitMQ相关概念的理解
1.什么是消息? 消息就是程序(服务)之间传递的数据(图/文/声/像). 2.MQ是什么? MQ(MessageQueue)是指消息队列亦或消息总线.是消息的容器,这个容器的策略是FIFO(先进先出) ...
- 再探快速傅里叶变换(FFT)学习笔记(其三)(循环卷积的Bluestein算法+分治FFT+FFT的优化+任意模数NTT)
再探快速傅里叶变换(FFT)学习笔记(其三)(循环卷积的Bluestein算法+分治FFT+FFT的优化+任意模数NTT) 目录 再探快速傅里叶变换(FFT)学习笔记(其三)(循环卷积的Blueste ...
- leetcode72:combinations
题目描述 给出两个整数n和k,返回从1到n中取k个数字的所有可能的组合 例如: 如果n=4,k=2,结果为 [↵ [2,4],↵ [3,4],↵ [2,3],↵ [1,2],↵ [1,3],↵ [1, ...
- STM32最小系统板OLED贪吃蛇
上次用STM32F103最小系统板做了一个简单的OLED贪吃蛇小游戏,以下为游戏效果动图: 主要实现内容包括:贪吃蛇移动.方向控制.食物生成.分数处理.死亡判定. 这次想把自己的制作思路分享给大家,不 ...
- 初次使用flask
以写的一个小的例子来记录第一次使用: from flask import Flask, render_template import json # 实例化,可视为固定格式 app = Flask(__ ...
- 1.流程控制--if
流程控制--if -*- coding:utf-8 -*- #定义字符编码 1.判断条件if age = input("输入年龄:") #将交互式输入内容赋值给age,默认内容为字 ...
- 论文阅读:Learning Attention-based Embeddings for Relation Prediction in Knowledge Graphs(2019 ACL)
基于Attention的知识图谱关系预测 论文地址 Abstract 关于知识库完成的研究(也称为关系预测)的任务越来越受关注.多项最新研究表明,基于卷积神经网络(CNN)的模型会生成更丰富,更具表达 ...
- 经典c程序100例==11--20
[程序11] 题目:古典问题:有一对兔子,从出生后第3个月起每个月都生一对兔子,小兔子长到第三个月 后每个月又生一对兔子,假如兔子都不死,问每个月的兔子总数为多少? 1.程序分析: 兔子的规律为数列1 ...
- 回流与重绘:CSS性能让JavaScript变慢?
参考张鑫旭博客: http://www.zhangxinxu.com/wordpress/2010/01/%E5%9B%9E%E6%B5%81%E4%B8%8E%E9%87%8D%E7%BB%98%E ...
- GC 的认识(转) https://github.com/qcrao/Go-Questions/blob/master/GC/GC.md#1-什么是-gc有什么作用
1. 什么是 GC,有什么作用? GC,全称 Garbage Collection,即垃圾回收,是一种自动内存管理的机制. 当程序向操作系统申请的内存不再需要时,垃圾回收主动将其回收并供其他代码进行内 ...