
Python爬虫学习笔记(三)
Cookies:
以抓取https://www.yaozh.com/为例
Test1(不使用cookies):
代码:


import urllib.request

# 1.添加URL

url = "https://www.yaozh.com/"

# 2.添加请求头

headers = {

    "User-Agent": "Mozilla/5.0 (Windows NT 10.0; Win64; x64) AppleWebKit/537.36 (KHTML, like Gecko) Chrome/88.0.4324.104 Safari/537.36"

}

# 3.构建请求对象

request = urllib.request.Request(url, headers=headers)

# 4.发送请求对象

response = urllib.request.urlopen(request)

# 5.读取数据

data = response.read()

#保存到文件中,验证数据

with open('01cookies.html', 'wb')as f:

    f.write(data)
返回:

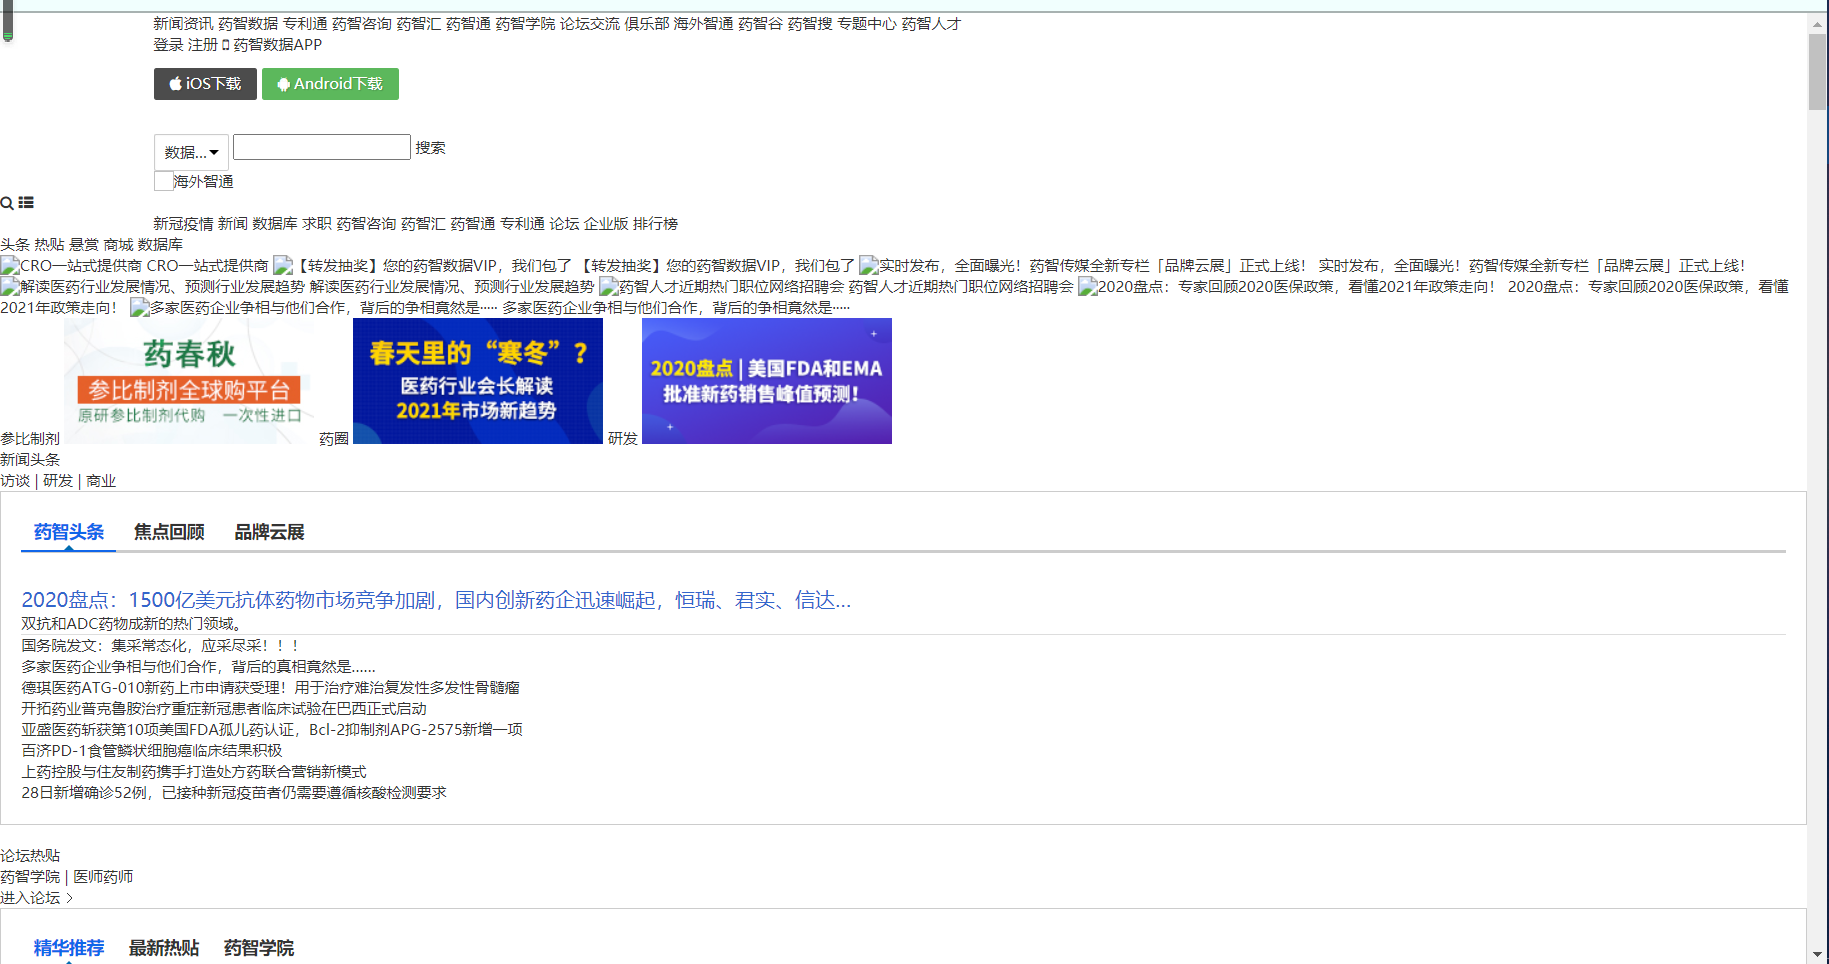
此时进入页面显示为游客模式,即未登录状态。
Test2(使用cookies:手动登录):
在network中查找cookies部分
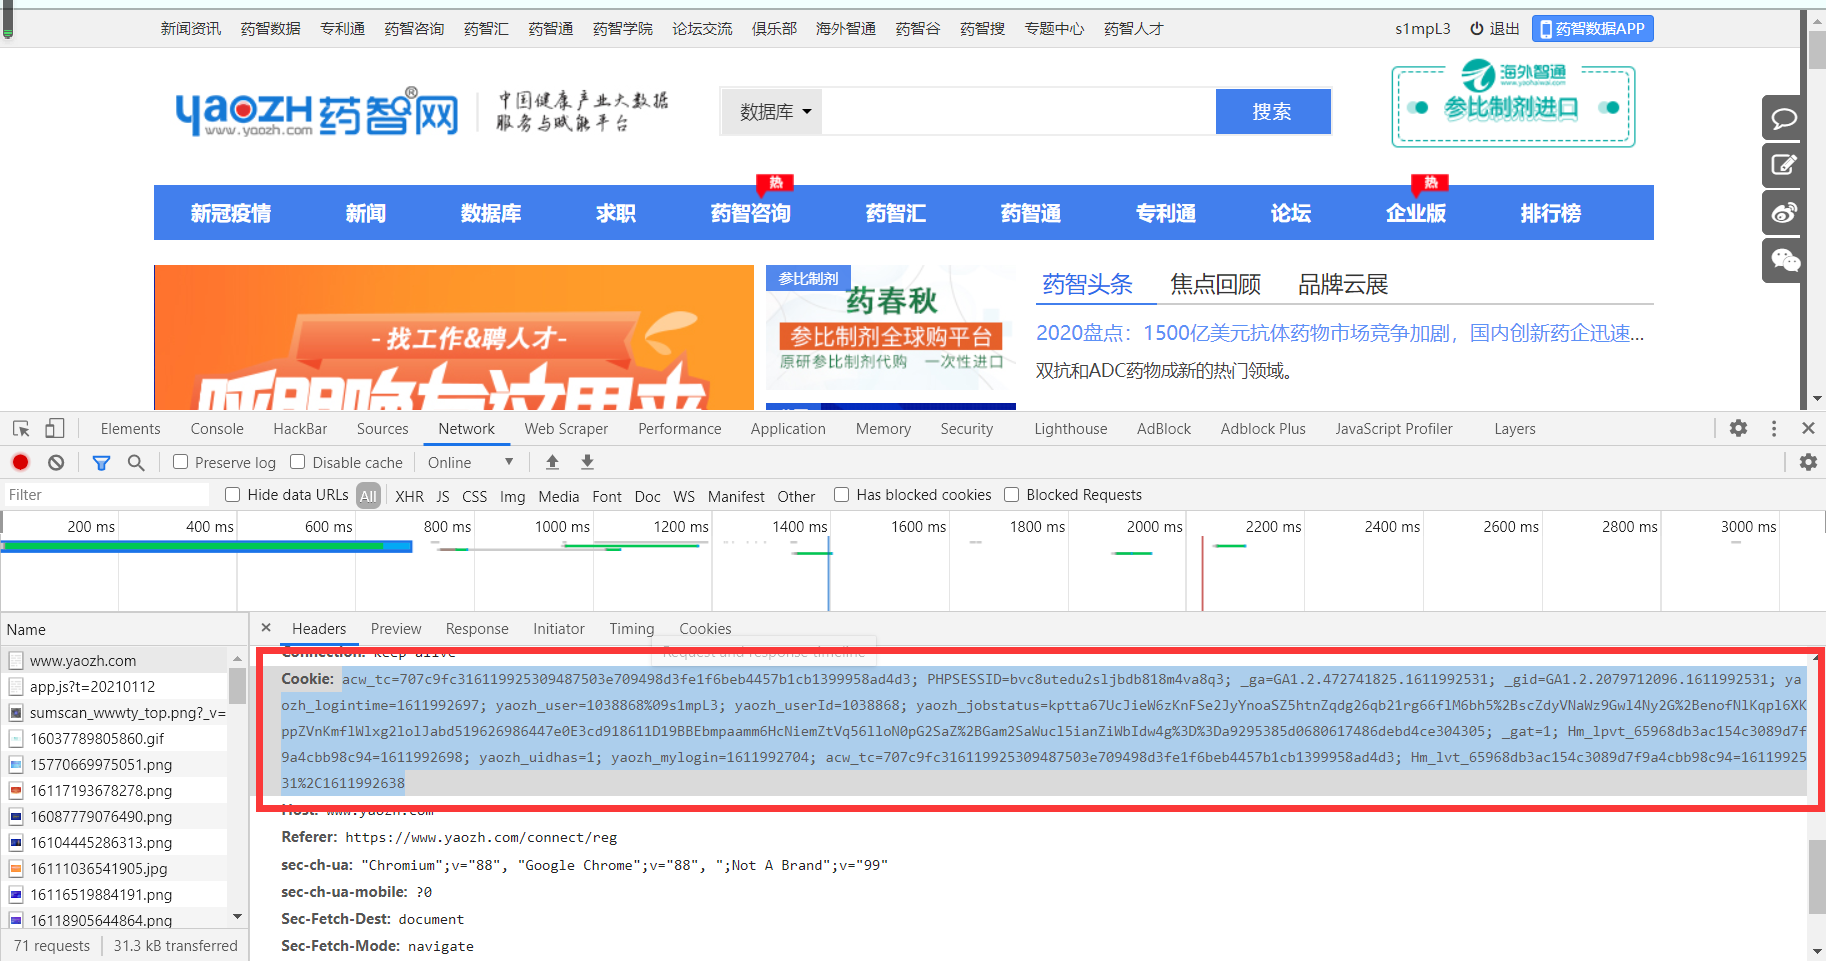
代码(先登录在抓取):
"""

    直接获取个人中心的页面

    手动粘贴,复制抓包的cookies

    放在 request请求对象的请求头里面

"""

import urllib.request

# 1.添加URL

url = "https://www.yaozh.com/"

# 2.添加请求头

headers = {

    "User-Agent": "Mozilla/5.0 (Windows NT 10.0; Win64; x64) AppleWebKit/537.36 (KHTML, like Gecko) Chrome/88.0.4324.104 Safari/537.36",

    "Cookie": "acw_tc=707c9fc316119925309487503e709498d3fe1f6beb4457b1cb1399958ad4d3; PHPSESSID=bvc8utedu2sljbdb818m4va8q3; _ga=GA1.2.472741825.1611992531; _gid=GA1.2.2079712096.1611992531; yaozh_logintime=1611992697; yaozh_user=1038868%09s1mpL3; yaozh_userId=1038868; yaozh_jobstatus=kptta67UcJieW6zKnFSe2JyYnoaSZ5htnZqdg26qb21rg66flM6bh5%2BscZdyVNaWz9Gwl4Ny2G%2BenofNlKqpl6XKppZVnKmflWlxg2lolJabd519626986447e0E3cd918611D19BBEbmpaamm6HcNiemZtVq56lloN0pG2SaZ%2BGam2SaWucl5ianZiWbIdw4g%3D%3Da9295385d0680617486debd4ce304305; _gat=1; Hm_lpvt_65968db3ac154c3089d7f9a4cbb98c94=1611992698; yaozh_uidhas=1; yaozh_mylogin=1611992704; acw_tc=707c9fc316119925309487503e709498d3fe1f6beb4457b1cb1399958ad4d3; Hm_lvt_65968db3ac154c3089d7f9a4cbb98c94=1611992531%2C1611992638",

}

# 3.构建请求对象

request = urllib.request.Request(url, headers=headers)

# 4.发送请求对象

response = urllib.request.urlopen(request)

# 5.读取数据

data = response.read()

#保存到文件中,验证数据

with open('01cookies2.html', 'wb')as f:

    f.write(data)
先登录再抓取
返回:

此时为登录状态s1mpL3。
Test3(使用cookies:代码登录):
准备:
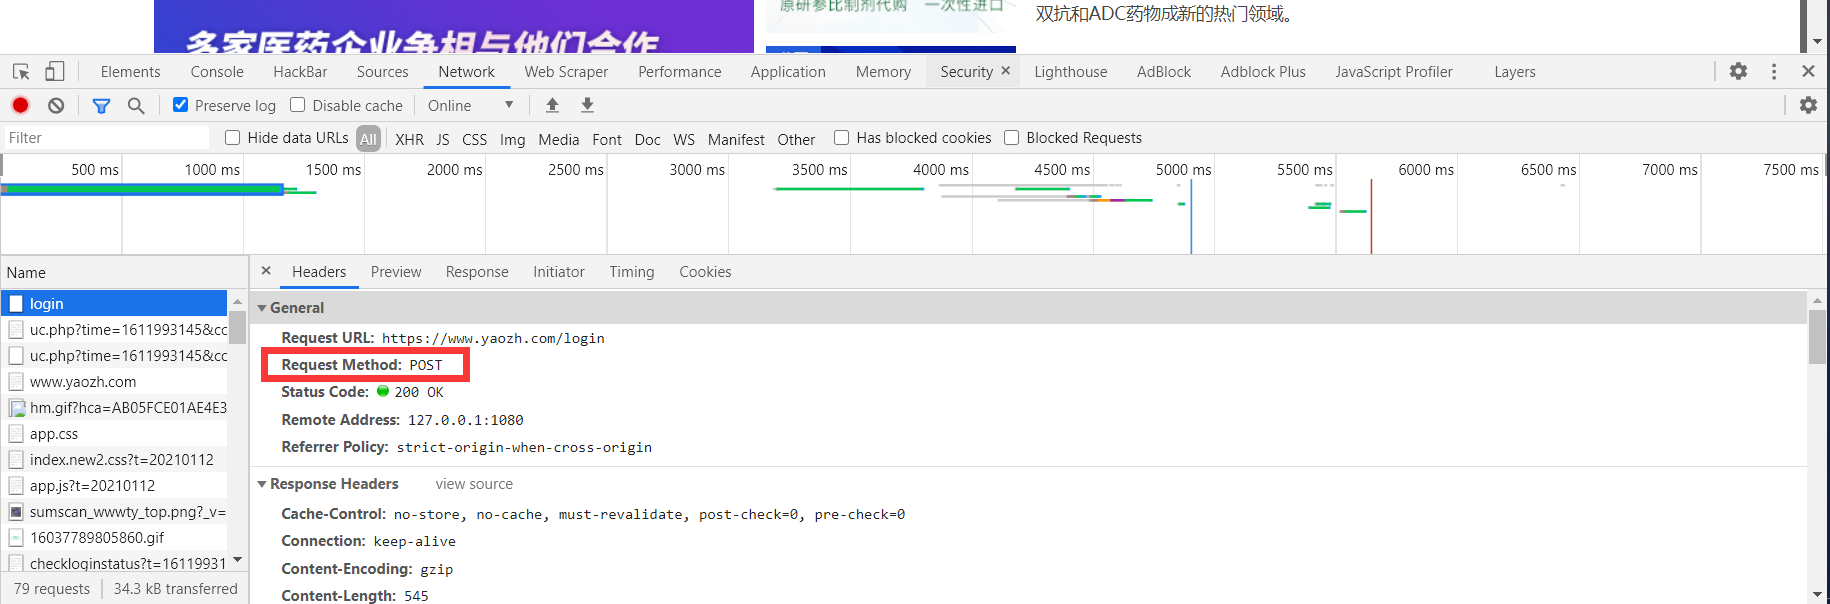
1.勾选Preserve Log,用于记录上一次登录
2.根据登录时的数据报,发现发送POST请求
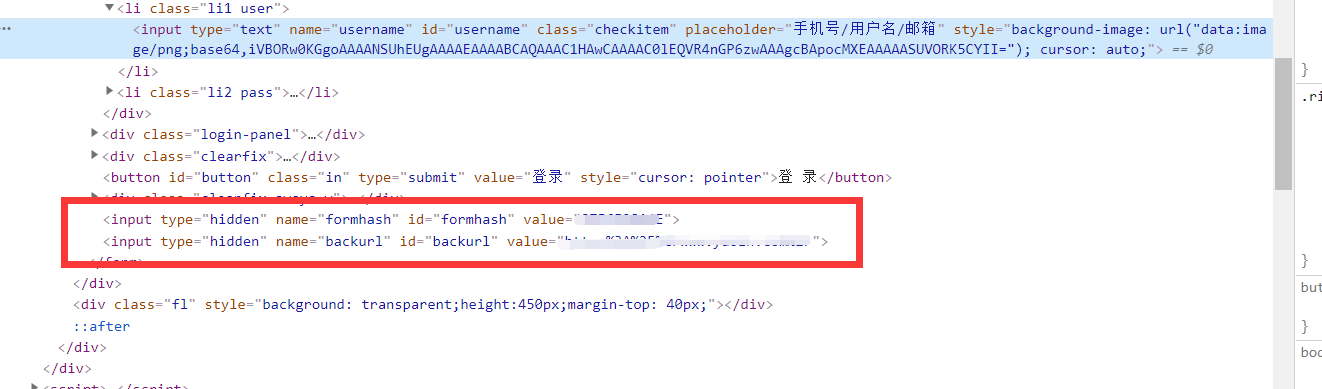
3.登陆之后退出,进入登录页面,检察元素,查找表单各项数据,
代码:
"""

    获取个人页面

    1.代码登录  登陆成功    cookie有效

    2.自动带着cookie 去请求个人中心

    cookiejar:自动保存cookie

"""

import urllib.request

from http import cookiejar

from urllib import parse

# 登陆之前,登录页的网址,https://www.yaozh.com/login,找登录参数

# 后台,根据发送的请求方式来判断,如果是GET,返回登录页面,如果是POST,返回登录结果

#   1.代码登录

# 1.1 登陆的网址

login_url = "https://www.yaozh.com/login"

# 1.2 登陆的参数

login_form_data = {

" username": "s1mpL3",

"pwd": "***************",#个人隐私,代码不予显示

"formhash": "87F6F28A4*",#个人隐私,代码不予显示

"backurl": "https%3A%2F%2Fwww.yaozh.com%2F",

}

# 参数需要转码;POST请求的data要求是bytes乐行

login_str = urllib.parse.urlencode(login_form_data).encode('utf-8')

# 1.3 发送POST登录请求

cookie_jar = cookiejar.CookieJar()

# 定义有添加cookie功能的处理器

cook_handler = urllib.request.HTTPCookieProcessor(cookie_jar)

# 根据处理器 生成openner

openner = urllib.request.build_opener(cook_handler)

# 带着参数,发送POST请求

# 添加请求头

headers = {

"User-Agent": "Mozilla/5.0 (Windows NT 10.0; Win64; x64) AppleWebKit/537.36 (KHTML, like Gecko) Chrome/88.0.4324.104 Safari/537.36"

}

login_request = urllib.request.Request(login_url, headers=headers, data=login_str)

# 如果登陆成功,cookiejar自动保存cookie

openner.open(login_request)

#   2. 代码带着cookie去访问个人中心

center_url = "https://www.yaozh.com/member/"

center_request = urllib.request.Request(center_url, headers=headers)

response = openner.open(center_url)

# bytes --> str

data = response.read().decode()

with open('02cookies.html', 'w', encoding="utf-8")as f:

    f.write(data)
代码登录
返回:
以s1mpL3用户返回
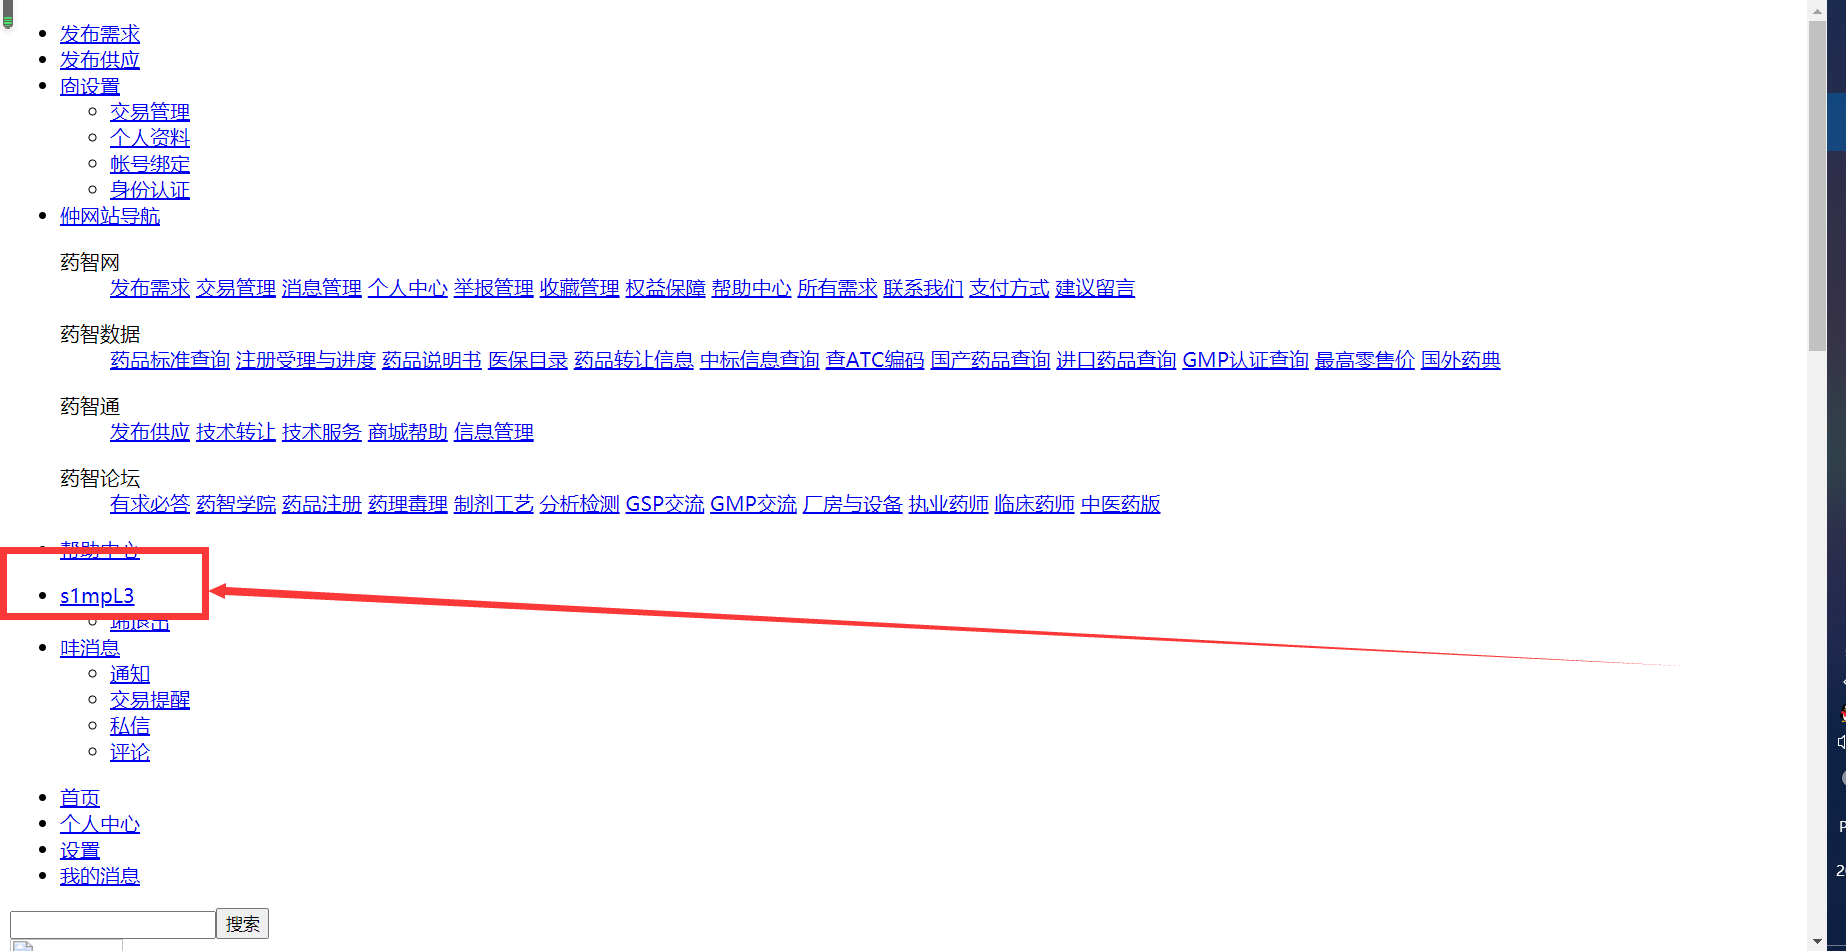
注:
1.cookiejar库的使用
from http import cookiejar

cookiejar.CookieJar()
2.HTTPCookieProcessor():有cookie功能的处理器
3.代码登录:只需修改用户名和密码
URLError:
urllib.request 提示错误
分为URLError HTTPError
其中HTTPError为URLError的子类
Test:
代码1:
import urllib.request

url = 'http://www.xiaojian.cn' # 假设

response = urllib.request.urlopen(url)
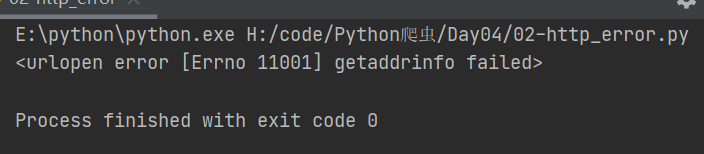
返回1:
部分报错:
raise URLError(err)

urllib.error.URLError: <urlopen error [Errno 11001] getaddrinfo failed>
代码2:
import urllib.request

url = 'https://blog.csdn.net/dQCFKyQDXYm3F8rB0/article/details/1111'

response = urllib.request.urlopen(url)
返回2:
部分报错:
raise HTTPError(req.full_url, code, msg, hdrs, fp)

urllib.error.HTTPError: HTTP Error 404: Not Found
代码3:
import urllib.request

url = 'https://blog.csdn.net/dQCFKyQDXYm3F8rB0/article/details/1111'

try:

    response = urllib.request.urlopen(url)

except urllib.request.HTTPError as error:

    print(error.code)

except urllib.request.URLError as error:

    print(error)
返回3:

代码4:
import urllib.request

url = 'https://blog.cs1'

try:

    response = urllib.request.urlopen(url)

except urllib.request.HTTPError as error:

    print(error.code)

except urllib.request.URLError as error:

    print(error)
返回4:
Requsets:
准备:
安装第三方模块:
pip install requests
Test1(基本属性:GET):
代码1(不带请求头):
import requests

url = "http://www.baidu.com"

response = requests.get(url)

# content属性:返回类型是bytes

data = response.content

print(data)

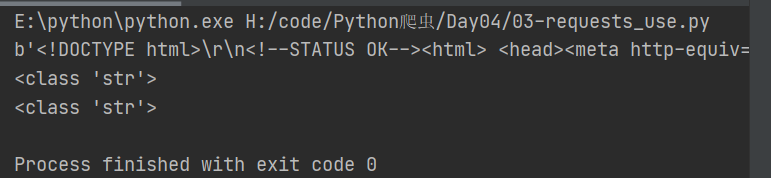
data1 = response.content.decode('utf-8')

print(type(data1))

# text属性:返回类型是文本str(如果响应内容没有编码,将自行编码,可能出错。因此优先使用content)

data2 = response.text

print(type(data2))
返回1:
代码2(带请求头):
import requests

class RequestSpider(object):

    def __init__(self):

        url = "https://www.baidu.com/"

        headers = {

            "User-Agent": "Mozilla/5.0 (Windows NT 10.0; Win64; x64) AppleWebKit/537.36 (KHTML, like Gecko) Chrome/88.0.4324.104 Safari/537.36"

        }

        self.response = requests.get(url, headers=headers)

    def run(self):

        data = self.response.content

        # 1.获取请求头

        request_headers1 = self.response.request.headers

        print(request_headers1)

        # 2.获取响应头

        request_headers2 = self.response.headers

        print(request_headers2)

        # 3.获取响应状态码

        code = self.response.status_code

        print(code)

        # 4.获取请求的cookie

        request_cookie = self.response.request._cookies

        print(request_cookie)

        #注:用浏览器进入百度时,可能会有很多cookie,这是浏览器自动添加的,不是服务器给的

        # 5.获取响应的cookie

        response_cookie = self.response.cookies

        print(response_cookie)

RequestSpider().run()
返回:
E:\python\python.exe H:/code/Python爬虫/Day04/03-requests_use2.py


{'User-Agent': 'Mozilla/5.0 (Windows NT 10.0; Win64; x64) AppleWebKit/537.36 (KHTML, like Gecko) Chrome/88.0.4324.104 Safari/537.36', 'Accept-Encoding': 'gzip, deflate', 'Accept': '*/*', 'Connection': 'keep-alive'}

{'Bdpagetype': '1', 'Bdqid': '0xe0b22322001a2c4a', 'Cache-Control': 'private', 'Connection': 'keep-alive', 'Content-Encoding': 'gzip', 'Content-Type': 'text/html;charset=utf-8', 'Date': 'Sat, 30 Jan 2021 09:27:06 GMT', 'Expires': 'Sat, 30 Jan 2021 09:26:56 GMT', 'P3p': 'CP=" OTI DSP COR IVA OUR IND COM ", CP=" OTI DSP COR IVA OUR IND COM "', 'Server': 'BWS/1.1', 'Set-Cookie': 'BAIDUID=E577CD647F2B1CA6A7C0F4112781CAF9:FG=1; expires=Thu, 31-Dec-37 23:55:55 GMT; max-age=2147483647; path=/; domain=.baidu.com, BIDUPSID=E577CD647F2B1CA6A7C0F4112781CAF9; expires=Thu, 31-Dec-37 23:55:55 GMT; max-age=2147483647; path=/; domain=.baidu.com, PSTM=1611998826; expires=Thu, 31-Dec-37 23:55:55 GMT; max-age=2147483647; path=/; domain=.baidu.com, BAIDUID=E577CD647F2B1CA65749857950B007E4:FG=1; max-age=31536000; expires=Sun, 30-Jan-22 09:27:06 GMT; domain=.baidu.com; path=/; version=1; comment=bd, BDSVRTM=0; path=/, BD_HOME=1; path=/, H_PS_PSSID=33423_33516_33402_33273_33590_26350_33568; path=/; domain=.baidu.com, BAIDUID_BFESS=E577CD647F2B1CA6A7C0F4112781CAF9:FG=1; Path=/; Domain=baidu.com; Expires=Thu, 31 Dec 2037 23:55:55 GMT; Max-Age=2147483647; Secure; SameSite=None', 'Strict-Transport-Security': 'max-age=172800', 'Traceid': '1611998826055672090616191042239287929930', 'X-Ua-Compatible': 'IE=Edge,chrome=1', 'Transfer-Encoding': 'chunked'}

200

<RequestsCookieJar[]>

<RequestsCookieJar[<Cookie BAIDUID=E577CD647F2B1CA65749857950B007E4:FG=1 for .baidu.com/>, <Cookie BAIDUID_BFESS=E577CD647F2B1CA6A7C0F4112781CAF9:FG=1 for .baidu.com/>, <Cookie BIDUPSID=E577CD647F2B1CA6A7C0F4112781CAF9 for .baidu.com/>, <Cookie H_PS_PSSID=33423_33516_33402_33273_33590_26350_33568 for .baidu.com/>, <Cookie PSTM=1611998826 for .baidu.com/>, <Cookie BDSVRTM=0 for www.baidu.com/>, <Cookie BD_HOME=1 for www.baidu.com/>]>

Process finished with exit code 0
Test2(URL自动转译):
代码1:
# https://www.baidu.com/s?ie=utf-8&f=8&rsv_bp=1&tn=baidu&wd=%E7%88%AC%E8%99%AB&oq=%2526lt%253BcH0%2520-%2520Nu1L&rsv_pq=d38dc072002f5aef&rsv_t=62dcS%2BcocFsilJnL%2FcjmqGeUvo6S6XMFTiyfxi22AnqTbscZBf6K%2F13WW%2Bo&rqlang=cn&rsv_enter=1&rsv_dl=tb&rsv_sug3=4&rsv_sug1=3&rsv_sug7=100&rsv_sug2=0&rsv_btype=t&inputT=875&rsv_sug4=875

# https://www.baidu.com/s?wd=%E7%88%AC%E8%99%AB

import requests

# 参数自动转译

url = "http://www.baidu.com/s?wd=爬虫"

headers = {

    "User-Agent": "Mozilla/5.0 (Windows NT 10.0; Win64; x64) AppleWebKit/537.36 (KHTML, like Gecko) Chrome/88.0.4324.104 Safari/537.36"

}

response = requests.get(url, headers=headers)

data = response.content.decode()

with open('baidu.html', 'w', encoding="utf-8")as f:

    f.write(data)
汉字参数自动转译
返回:
成功返回并生成文件,此时汉字作为参数实现了自动转译。

代码2:
# https://www.baidu.com/s?ie=utf-8&f=8&rsv_bp=1&tn=baidu&wd=%E7%88%AC%E8%99%AB&oq=%2526lt%253BcH0%2520-%2520Nu1L&rsv_pq=d38dc072002f5aef&rsv_t=62dcS%2BcocFsilJnL%2FcjmqGeUvo6S6XMFTiyfxi22AnqTbscZBf6K%2F13WW%2Bo&rqlang=cn&rsv_enter=1&rsv_dl=tb&rsv_sug3=4&rsv_sug1=3&rsv_sug7=100&rsv_sug2=0&rsv_btype=t&inputT=875&rsv_sug4=875

# https://www.baidu.com/s?wd=%E7%88%AC%E8%99%AB

import requests

# 参数自动转译

url = "http://www.baidu.com/s"

parmas = {

    'wd': '爬虫',

}

headers = {

    "User-Agent": "Mozilla/5.0 (Windows NT 10.0; Win64; x64) AppleWebKit/537.36 (KHTML, like Gecko) Chrome/88.0.4324.104 Safari/537.36"

}

response = requests.get(url, headers=headers, params=parmas)

data = response.content.decode()

with open('baidu1.html', 'w', encoding="utf-8")as f:

    f.write(data)
字典自动转译
返回:
成功返回并生成文件,此时字典作为参数实现了自动转译。

注:
发送POST请求和添加参数
requests.post(url, data=(参数{}), json=(参数))
Test3(json):
代码:
# https://www.baidu.com/s?ie=utf-8&f=8&rsv_bp=1&tn=baidu&wd=%E7%88%AC%E8%99%AB&oq=%2526lt%253BcH0%2520-%2520Nu1L&rsv_pq=d38dc072002f5aef&rsv_t=62dcS%2BcocFsilJnL%2FcjmqGeUvo6S6XMFTiyfxi22AnqTbscZBf6K%2F13WW%2Bo&rqlang=cn&rsv_enter=1&rsv_dl=tb&rsv_sug3=4&rsv_sug1=3&rsv_sug7=100&rsv_sug2=0&rsv_btype=t&inputT=875&rsv_sug4=875

# https://www.baidu.com/s?wd=%E7%88%AC%E8%99%AB

import requests

import json

url = "https://api.github.com/user"

#这个网址返回的内容不是HTML,而是标准的json

headers = {

"User-Agent": "Mozilla/5.0 (Windows NT 10.0; Win64; x64) AppleWebKit/537.36 (KHTML, like Gecko) Chrome/88.0.4324.104 Safari/537.36"

}

response = requests.get(url, headers=headers)

# str

data = response.content.decode()

print(data)

# str --> dict

data_dict = json.loads(data)

print(data_dict["message"])

# json()会自动将json字符串转换成Python dict list

data1 = response.json()

print(data1)

print(type(data1))

print(data1["message"])
返回:
E:\python\python.exe H:/code/Python爬虫/Day04/03-requests_use3.py

{

  "message": "Requires authentication",

  "documentation_url": "https://docs.github.com/rest/reference/users#get-the-authenticated-user"

}

Requires authentication

{'message': 'Requires authentication', 'documentation_url': 'https://docs.github.com/rest/reference/users#get-the-authenticated-user'}

<class 'dict'>

Requires authentication

Process finished with exit code 0
Python爬虫学习笔记(三)的更多相关文章
- Python爬虫学习:三、爬虫的基本操作流程
本文是博主原创随笔,转载时请注明出处Maple2cat|Python爬虫学习:三.爬虫的基本操作与流程 一般我们使用Python爬虫都是希望实现一套完整的功能,如下: 1.爬虫目标数据.信息: 2.将 ...
- 【原】Learning Spark (Python版) 学习笔记(三)----工作原理、调优与Spark SQL
周末的任务是更新Learning Spark系列第三篇,以为自己写不完了,但为了改正拖延症,还是得完成给自己定的任务啊 = =.这三章主要讲Spark的运行过程(本地+集群),性能调优以及Spark ...
- python爬虫学习笔记(一)——环境配置(windows系统)
在进行python爬虫学习前,需要进行如下准备工作: python3+pip官方配置 1.Anaconda(推荐,包括python和相关库) [推荐地址:清华镜像] https://mirrors ...
- Python爬虫学习笔记——豆瓣登陆(三)
之前是不会想到登陆一个豆瓣会需要写三次博客,修改三次代码的. 本来昨天上午之前的代码用的挺好的,下午时候,我重新注册了一个号,怕豆瓣大号被封,想用小号爬,然后就开始出问题了,发现无法模拟登陆豆瓣了,开 ...
- python爬虫学习笔记
爬虫的分类 1.通用爬虫:通用爬虫是搜索引擎(Baidu.Google.Yahoo等)“抓取系统”的重要组成部分.主要目的是将互联网上的网页下载到本地,形成一个互联网内容的镜像备份. 简单来讲就是尽可 ...
- 一入爬虫深似海,从此游戏是路人!总结我的python爬虫学习笔记!
前言 还记得是大学2年级的时候,偶然之间看到了学长在学习python:我就坐在旁边看他敲着代码,感觉很好奇.感觉很酷,从那之后,我就想和学长一样的厉害,就想让学长教我,请他吃了一周的饭,他答应了.从此 ...
- Python、pip和scrapy的安装——Python爬虫学习笔记1
Python作为爬虫语言非常受欢迎,近期项目需要,很是学习了一番Python,在此记录学习过程:首先因为是初学,而且当时要求很快速的出demo,所以首先想到的是框架,一番查找选用了Python界大名鼎 ...
- 【Python爬虫学习笔记(3)】Beautiful Soup库相关知识点总结
1. Beautiful Soup简介 Beautiful Soup是将数据从HTML和XML文件中解析出来的一个python库,它能够提供一种符合习惯的方法去遍历搜索和修改解析树,这将大大减 ...
- Python爬虫学习笔记——豆瓣登陆(一)
#-*- coding:utf-8 -*- import requests from bs4 import BeautifulSoup import html5lib import re import ...
随机推荐
- Cannot assign requested address 和 SO_REUSEADDR 参数
1. 错误 今天项目中出现了大量的java.net.ConnectException: Cannot assign requested address (connect failed) 错误. 刚开始 ...
- 表单序列化json字符串和js时间格式化
js时间格式化 new Date().format("时间格式") Date.prototype.format = function(fmt) { var o = { ...
- cmd命令符大全
cmd命令大全(第一部分) winver---------检查Windows版本 wmimgmt.msc----打开windows管理体系结构(WMI) wupdmgr--------windows更 ...
- SSM框架实现多张图片和其他数据一起上传
一.SSM+Form 多张图片和其他数据一起上传, 1.导包: commons-fileupload-1.3.3.jar commons-io-2.4.jar 2.springmvc.xml 文件配置 ...
- Docker容器技术--自定义网桥后的默认网卡名称
新建docker虚拟网络命令 这里以172.18.0.1为例,名字为clusterdocker network create --subnet=172.18.0.0/16 cluster 当我们想新建 ...
- Beta冲刺——第七天
这个作业属于哪个课程 https://edu.cnblogs.com/campus/fzzcxy/2018SE1 这个作业要求在哪里 https://edu.cnblogs.com/campus/fz ...
- node中 path.join 和 path.resovle 区别
console.log(__dirname) console.log('----') console.log(path.resolve(__dirname, '/a/b', '../')) conso ...
- C#数组的 Length 和 Count()
C#数组的 Length 和 Count() C# 数组中 Length 表示数组项的个数,是个属性.而 Count() 也是表示项的个数,是个方法,它的值和 Length 一样.但实际上严格地说, ...
- ctfhub技能树—密码口令—弱口令
什么是弱口令? "弱口令(weak password) 没有严格和准确的定义,通常认为容易被别人(他们有可能对你很了解)猜测到或被破解工具破解的口令均为弱口令. 弱口令指的是仅包含简单数字和 ...
- 15V转5V转3.3V转3V芯片,DC-DC和LDO
15V电压是属于一般电压,降压转成5V电压,3.3V电压和3V电压,适用于这个电压的DC-DC很多,LDO也是有可以选择的.LDO芯片如PW6206,PW8600等.DC-DC芯片如:PW2162,P ...