底部菜单栏(一) TabHost实现
需求:使用TabHost实现底部菜单栏;
效果图:

实现分析:
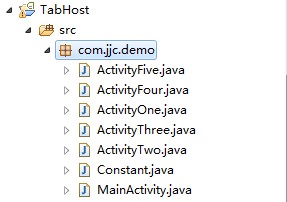
1.目录结构:


代码实现:
1.activity_main.xml
<?xml version="1.0" encoding="utf-8"?>

<TabHost xmlns:android="http://schemas.android.com/apk/res/android"

    android:id="@android:id/tabhost"

    android:layout_width="match_parent"

    android:layout_height="match_parent" >

    <LinearLayout

        android:layout_width="match_parent"

        android:layout_height="match_parent"

        android:orientation="vertical" >

        <FrameLayout

            android:id="@android:id/tabcontent"

            android:layout_width="match_parent"

            android:layout_height="0dp"

            android:layout_weight="1" />

        <TabWidget

            android:id="@android:id/tabs"

            android:layout_width="match_parent"

            android:layout_height="wrap_content"

            android:padding="2dp"

            android:layout_weight="0"

            android:background="@drawable/tab_widget_background" />

    </LinearLayout>

</TabHost>
2 activity_one.xml
<?xml version="1.0" encoding="utf-8"?>

<FrameLayout xmlns:android="http://schemas.android.com/apk/res/android"

    android:layout_width="match_parent"

    android:layout_height="match_parent"

    android:background="@drawable/image_01" >

</FrameLayout>
3 item_tab_view.xml
<?xml version="1.0" encoding="utf-8"?>

<LinearLayout xmlns:android="http://schemas.android.com/apk/res/android"

    android:layout_width="wrap_content"

    android:layout_height="wrap_content"

    android:gravity="center"

    android:orientation="vertical" >

    <ImageView

        android:id="@+id/image_icon"

        android:layout_width="wrap_content"

        android:layout_height="wrap_content"

        android:padding="3dp" />

    <TextView

        android:id="@+id/text_name"

        style="@style/item_tab_text_style"

        android:layout_width="wrap_content"

        android:layout_height="wrap_content" />

</LinearLayout>
4 tab_background_selector.xml
<?xml version="1.0" encoding="utf-8"?>

<selector xmlns:android="http://schemas.android.com/apk/res/android">

    <item android:drawable="@drawable/tab_item_p" android:state_pressed="true"/>

    <item android:drawable="@drawable/tab_item_d" android:state_selected="true"/>

</selector>
5 style.xml
    <style name="item_tab_text_style">

        <item name="android:textSize">10.0dip</item>

        <item name="android:textColor">#ffffffff</item>

        <item name="android:ellipsize">marquee</item>

        <item name="android:singleLine">true</item>

    </style>
6 Constant.java
package com.jjc.demo;

/**

 * @author ThinkPad

 *    功能描述:常量工具类

 */

public class Constant {

    public static final class ConValue{

        /**

         * Tab选项卡的图标

         */

        public static int mImageViewArray[] = {

            R.drawable.tab_icon1,

            R.drawable.tab_icon2,

            R.drawable.tab_icon3,

            R.drawable.tab_icon4,

            R.drawable.tab_icon5

        };

        /**

         * Tab选项卡的文字

         */

        public static String mTextViewArray[] = {"主页", "关于", "设置", "搜索", "更多"};

        /**

         * 每一个Tab界面

         */

        public static Class<?> mTabClassArray[] = {

            ActivityOne.class,

            ActivityTwo.class,

            ActivityThree.class,

            ActivityFour.class,

            ActivityFive.class

        };

    }

}
7 ActivityOne.java
package com.jjc.demo;

import android.app.Activity;

import android.os.Bundle;

public class ActivityOne extends Activity{

    @Override

    protected void onCreate(Bundle savedInstanceState) {

        super.onCreate(savedInstanceState);

        setContentView(R.layout.activity_one);

    }

}
8 MainActivity.java
package com.jjc.demo;

import com.jjc.demo.Constant.ConValue;

import android.app.TabActivity;

import android.content.Intent;

import android.os.Bundle;

import android.view.LayoutInflater;

import android.view.View;

import android.widget.ImageView;

import android.widget.TabHost;

import android.widget.TabHost.TabSpec;

import android.widget.TextView;

public class MainActivity extends TabActivity {

    private TabHost mTabHost;

    private LayoutInflater mInflater;

    @Override

    protected void onCreate(Bundle savedInstanceState) {

        super.onCreate(savedInstanceState);

        setContentView(R.layout.activity_main);

        initView();

    }

    /**

     * 初始化组件

     */

    private void initView() {

        // 实例化TabHost对象,得到TabHost

        mTabHost = getTabHost();

        // 实例化布局对象

        mInflater = LayoutInflater.from(this);

        // 得到Activity的个数

        int count = ConValue.mTabClassArray.length;

        for (int i = 0; i < count; i++) {

            // 为每一个Tab按钮设置图标、文字和内容

            TabSpec tabSpec = mTabHost.newTabSpec(ConValue.mTextViewArray[i])

                    .setIndicator(getTabItemView(i))

                    .setContent(getTabItemIntent(i));

            // 将Tab按钮添加进Tab选项卡中

            mTabHost.addTab(tabSpec);

            // 设置Tab按钮的背景

            mTabHost.getTabWidget().getChildAt(i)

                    .setBackgroundResource(R.drawable.tab_background_selector);

        }

    }

    /**

     * 给Tab按钮设置图标和文字

     */

    private View getTabItemView(int index) {

        View view = mInflater.inflate(R.layout.item_tab_view, null);

        ImageView imageView = (ImageView) view.findViewById(R.id.image_icon);

        if (imageView != null) {

            imageView.setImageResource(ConValue.mImageViewArray[index]);

        }

        TextView textView = (TextView) view.findViewById(R.id.text_name);

        textView.setText(ConValue.mTextViewArray[index]);

        return view;

    }

    /**

     * 给Tab选项卡设置内容(每个内容是一个Activity)

     */

    private Intent getTabItemIntent(int index) {

        Intent intent = new Intent(this, ConValue.mTabClassArray[index]);

        return intent;

    }

}
代码:http://pan.baidu.com/s/1lLFx8
底部菜单栏(一) TabHost实现的更多相关文章
- 完美逆向百度手机助手5.0底部菜单栏 - Android Tabhost 点击动画
先看看百度手机助手5.0的样子: 发现他是用一个CustomTabHost.java来实现底部TabHost点击效果的,很漂亮,点击Tab的时候文字会上跑,图片会从底部跑出来的一个小动画. 下面我用自 ...
- 底部菜单栏(二) TabHost & RadioGroup 实现
需求:使用TabHost & RadioGroup实现底部菜单栏: 效果图: 实现分析: 1.目录结构: 代码实现: 1. activity_main.xml <?xml version ...
- 【Android UI设计与开发】5.底部菜单栏(二)使用Fragment实现底部菜单栏
既然 Fragment 取代了TabActivity,当然 TabActivity 的能实现的菜单栏,Fragment 当然也能实现.主要其实就是通过菜单栏的点击事件切换 Fragment 的显示和隐 ...
- FragmentTabHost+FrameLayout实现底部菜单栏
现在一般的app都使用底部菜单栏,那具体怎么实现的呢!我们就来看看 首先给大家展示一下布局文件 1 <LinearLayout xmlns:android="http://schema ...
- 【Android开发笔记】底部菜单栏 FragmentTabHost
公司项目,需求本来是按照谷歌官方指南写的,菜单栏设计成在导航栏下方 结果呢,审评时,BOSS为了和iOS统一,改成了底部菜单栏(标准结局),我只能呵呵呵呵呵呵呵 查了查资料发现实现底部菜单栏用的是Fr ...
- 我的Android之路——底部菜单栏的实现
底部菜单栏的实现 底部菜单栏两种实现方法:ViewPager:可滑动的界面:Fragment:固定的界面. 首先,页面布局,在除去顶部toolbar之后,将主界面分为两部分,一部分为界面显示区,另一部 ...
- Android底部菜单栏+顶部菜单
底部菜单栏+顶部菜单(wechat)demo http://blog.csdn.net/evankaka/article/details/44121457 底部菜单demo http://blog.c ...
- android 底部菜单栏实现(转)
1.Android学习之BottomNavigationBar实现Android特色底部导航栏 2.Android底部导航栏的四种实现 3.Android BottomNavigationBar底部导 ...
- 【Android UI设计与开发】7.底部菜单栏(四)PopupWindow 实现显示仿腾讯新闻底部弹出菜单
前一篇文章中有用到 PopupWindow 来实现弹窗的功能.简单介绍以下吧. 官方文档是这样解释的:这就是一个弹出窗口,可以用来显示一个任意视图.出现的弹出窗口是一个浮动容器的当前活动. 1.首先来 ...
随机推荐
- DelayedOperationPurgatory之purgatory的实现
purgatory的超时检测 当一个DelayedOpeartion超时(timeout)时,它需要被检测出来,然后调用它的回调方法.这个事情看起来很简单,但做好也并不容易. 0.8.x的Kafka的 ...
- hdoj 2202 最大三角形
题目大意:给定n(3<=n<=50000)个点,求其中任意三个点组成的三角形面积最大,输出该面积. 题目传送:http://acm.hdu.edu.cn/showproblem.php?p ...
- Codeforces 337D Book of evil
一道树形dp,写出来是因为最近也做了道类似的.这题是看了分析的思路才做出来的,但感觉很多这样的dp都是利用类似的性质.像这题的话distDown很好想,但distUp的时候就很难想了,其实只要抓住di ...
- POJ 2528 Mayor's posters (线段树,染色问题,离散化要注意)
做这题建议看一下该题的discuss. #include <iostream> #include <stdio.h> #include <string.h> #in ...
- VisualSvn Server介绍
1 .VisualSvn Server VisualSvn Server是免费的,而VisualSvn是收费的.VisualSvn是Svn的客户端,和Visual Studio集成在一起,但是不免费 ...
- POJ2151Check the difficulty of problems
题意 : 举办一次比赛不容易,为了不让题目太难,举办方往往希望能够讲出的题目满足两点,1是所有的队伍都至少能够解出一个题目,2是冠军队至少能解出确定数量的题目,最后让你求的是每个队伍至少解出一道题并且 ...
- django如何用orm增加manytomany关系字段(自定义表名)
不自定义表名的,网上有现成的,但如果自定义之后,则要变通一下了. app_insert = App.objects.get(name=app_name) site_insert = Site.obje ...
- 【Linux常识篇(1)】所谓的正向代理与反向代理
正向代理的概念 正向代理,也就是传说中的代理,他的工作原理就像一个跳板,简单的说,我是一个用户,我访问不了某网站,但是我能访问一个代理服务器,这个代理服务器呢,他能访问那个我不能访问的网站,于是我先连 ...
- 我30天在Stack Overflow问答网站上回答问题的感受
想法的萌芽 如果非要总结下我多年来是如何使用Stack Overflow的话,我的答案就是:打开网页,搜索问题,查看Stack Overflow的搜索结果,参考答案,最后再关掉网页. 我的生活已经离不 ...
- scanf()函数用法小结
scanf()函数是格式化输入函数,它从标准输入设备(键盘) 读取输入的信息. 其调用格式为: scanf("<格式化字符串>",<地址表>); ...
