【Android-ListView控件】显示信息
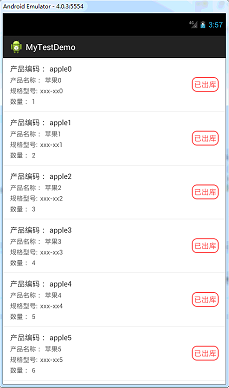
效果图
布局文件
layout - activity_main.xml
在主布局添加一个listview控件
<?xml version="1.0" encoding="utf-8"?>

<LinearLayout xmlns:android="http://schemas.android.com/apk/res/android"

    android:layout_width="match_parent"

    android:layout_height="match_parent"

    android:orientation="vertical" >

    <ListView

        android:id="@+id/lv_list"

        android:layout_width="match_parent"

        android:layout_height="wrap_content" >

    </ListView>

</LinearLayout>
layout - list_item.xml
<?xml version="1.0" encoding="utf-8"?>

<LinearLayout xmlns:android="http://schemas.android.com/apk/res/android"

    android:layout_width="fill_parent"

    android:layout_height="wrap_content"

    android:background="@drawable/app_click_white_grey"

    android:orientation="horizontal" >

    <LinearLayout

        android:layout_width="0dp"

        android:layout_height="wrap_content"

        android:layout_marginBottom="12.0dip"

        android:layout_marginLeft="15.0dip"

        android:layout_marginTop="12.0dip"

        android:layout_weight="1.0"

        android:orientation="vertical" >

        <LinearLayout

            android:layout_width="fill_parent"

            android:layout_height="wrap_content"

            android:orientation="horizontal" >

            <TextView

                android:layout_width="wrap_content"

                android:layout_height="wrap_content"

                android:text="产品编码:"

                android:textColor="#ff333333"

                android:textSize="16.0sp" />

            <TextView

                android:id="@+id/tv_code"

                android:layout_width="wrap_content"

                android:layout_height="wrap_content"

                android:layout_marginLeft="5.0dip"

                android:textColor="#ff333333"

                android:textSize="16.0sp" />

        </LinearLayout>

        <LinearLayout

            android:layout_width="fill_parent"

            android:layout_height="wrap_content"

            android:layout_marginTop="4.0dip"

            android:orientation="horizontal" >

            <TextView

                android:layout_width="wrap_content"

                android:layout_height="wrap_content"

                android:text="产品名称:"

                android:textColor="#ff666666"

                android:textSize="14.0sp" />

            <TextView

                android:id="@+id/tv_name"

                android:layout_width="wrap_content"

                android:layout_height="wrap_content"

                android:layout_marginLeft="5.0dip"

                android:textColor="#ff666666"

                android:textSize="14.0sp" />

        </LinearLayout>

        <LinearLayout

            android:layout_width="fill_parent"

            android:layout_height="wrap_content"

            android:layout_marginTop="4.0dip"

            android:orientation="horizontal" >

            <TextView

                android:layout_width="wrap_content"

                android:layout_height="wrap_content"

                android:text="规格型号:"

                android:textColor="#ff666666"

                android:textSize="14.0sp" />

            <TextView

                android:id="@+id/tv_spec"

                android:layout_width="wrap_content"

                android:layout_height="wrap_content"

                android:layout_marginLeft="5.0dip"

                android:textColor="#ff666666"

                android:textSize="14.0sp" />

        </LinearLayout>

        <LinearLayout

            android:layout_width="fill_parent"

            android:layout_height="wrap_content"

            android:layout_marginTop="4.0dip"

            android:orientation="horizontal" >

            <TextView

                android:layout_width="wrap_content"

                android:layout_height="wrap_content"

                android:text="数量:"

                android:textColor="#ff666666"

                android:textSize="14.0sp" />

            <TextView

                android:id="@+id/tv_qty"

                android:layout_width="wrap_content"

                android:layout_height="wrap_content"

                android:layout_marginLeft="5.0dip"

                android:textColor="#ff666666"

                android:textSize="14.0sp" />

        </LinearLayout>

    </LinearLayout>

    <TextView

        android:id="@+id/tv_status"

        android:layout_width="wrap_content"

        android:layout_height="wrap_content"

        android:layout_gravity="center_vertical"

        android:layout_marginRight="15.0dip"

        android:background="@drawable/shape22_rad_frame"

        android:gravity="center"

        android:padding="5.0dip"

        android:text="已出库"

        android:textColor="#ffff5757"

        android:textSize="16.0sp" />

</LinearLayout>
drawable - app_click_white_grey.xml
点击ListView的item ,按下变灰
<?xml version="1.0" encoding="utf-8"?>

<selector

  xmlns:android="http://schemas.android.com/apk/res/android">

    <item android:state_pressed="true" android:drawable="@color/click_grey" />

    <item android:state_pressed="false" android:drawable="@color/white" />

</selector>
drawable - shape22_rad_frame.xml
给textview 加上圆角边框 如:

<?xml version="1.0" encoding="utf-8"?>

<shape android:shape="rectangle"

  xmlns:android="http://schemas.android.com/apk/res/android">

    <corners android:radius="10.0px" />

    <stroke android:width="2.0px" android:color="#ffff5757" />

    <solid android:color="@color/white" />

</shape>
values - color.xml
用到的颜色
<?xml version="1.0" encoding="utf-8"?>

<resources>

    <color name="white">#ffffffff</color>

    <color name="click_grey">#ffd9d9d9</color>

</resources>
Java代码 MainActivity.xml
把数据填充到ListView显示,并实现ListView点击事件,ListView长点击事件
import java.util.ArrayList;

import java.util.HashMap;

import android.app.Activity;

import android.os.Bundle;

import android.view.View;

import android.widget.AdapterView;

import android.widget.AdapterView.OnItemClickListener;

import android.widget.AdapterView.OnItemLongClickListener;

import android.widget.ListView;

import android.widget.SimpleAdapter;

public class MainActivity extends Activity {

    ListView lv_list;

    ArrayList<HashMap<String, Object>> data = new ArrayList<HashMap<String, Object>>();

    @Override

    protected void onCreate(Bundle savedInstanceState) {

        super.onCreate(savedInstanceState);

        setContentView(R.layout.activity_main);

        lv_list = (ListView) findViewById(R.id.lv_list);

        initData();// 初始化数据

        // listview行点击事件

        lv_list.setOnItemClickListener(new OnItemClickListener() {

            @Override

            public void onItemClick(AdapterView<?> parent, View view, int position, long id) {

                HashMap<String, Object> map = (HashMap<String, Object>) parent.getItemAtPosition(position);// 根据item位置获取数据

                // TODO:具体操作

            }

        });

        // listview行长点击事件

        lv_list.setOnItemLongClickListener(new OnItemLongClickListener() {

            @Override

            public boolean onItemLongClick(AdapterView<?> parent, View view, int position, long id) {

                // TODO:具体操作

                return false;

            }

        });

    }

    private void initData() {

        // 添加10条演示数据

        data.clear();

        for (int i = 0; i < 10; i++) {

            HashMap<String, Object> map = new HashMap<String, Object>();

            map.put("code", "apple" + i);

            map.put("name", "苹果" + i);

            map.put("spec", "xxx-xx" + i);

            map.put("qty", 1 + i);

            map.put("status", "已出库");

            data.add(map);

        }

        //数据填充到适配器

        SimpleAdapter adapter = new SimpleAdapter(MainActivity.this, data, R.layout.list_item, new String[] { "code", "name", "spec", "qty", "status" },

                new int[] { R.id.tv_code, R.id.tv_name, R.id.tv_spec, R.id.tv_qty, R.id.tv_status });

        //数据填充到listview

        lv_list.setAdapter(adapter);

    }

}
【Android-ListView控件】显示信息的更多相关文章
- 使用Listview控件显示数据
1.图像列表控件 ImageList是含有图像对象的集合,可以通过索引或关键字引用该集合中的每个对象. ImageList空间的属性 属性 说明 Images 存储在图像列表中的所有图像 ImageS ...
- Xamarin Android ListView 控件使用
在项目中通常用到了ListView控件,示例如下: create the listitem class ,eg; public class ColorItem { public string Colo ...
- Android Visibility控件显示和隐藏
Android控件显示和隐藏 visibility 可见(visible) XML文件:android:visibility="visible" Java代码:view.setVi ...
- android WebView控件显示网页
有时需要app里面显示网页,而不调用其他浏览器浏览网页,那么这时就需要WebView控件.这个控件也是很强大的,放大,缩小,前进,后退网页都可以. 1.部分方法 //支持javascriptweb.g ...
- C# 解决ListView控件显示数据出现闪屏的问题
一.发现问题 如果发送数据过快的情况下,ListVies滚屏显示数据时会显示闪屏,如下所示现象: 二.解决问题 根据出现闪屏的情况,在网上查了资料要使用双缓存的办法来处理.其原理是数据在缓存区中进行处 ...
- 如何清空android ListView控件的内容
第一种方法: listView.setAdapter(null); 第二种方法: listAdapter.clear(); listAdapter.notifyDataSetChanged() ; 满 ...
- winform利用ImageList控件和ListView控件组合制作图片文件浏览器
winform利用ImageList控件和ListView控件组合制作图片文件浏览器,见图,比较简单,实现LISTVIEW显示文件夹图片功能. 1.选择文件夹功能代码: folderBrowserDi ...
- 【Android基础】listview控件的使用(3)------Map与SimpleAdapter组成的多显示条目的Listview
前面介绍的两种listview的使用都是最基础的,所以有很大的局限性,比如只能在一个item(即每一行的条目)中显示一个文本信息,这一篇我将介绍Map与SimpleAdapter组成的多显示条目的Li ...
- Android中ListView 控件与 Adapter 适配器如何使用?
一个android应用的成功与否,其界面设计至关重要.为了更好的进行android ui设计,我们常常需要借助一些控件和适配器.今天小编在android培训网站上搜罗了一些有关ListView 控件与 ...
- 【Android基础】listview控件的使用(4)-----自定义布局的listview的使用
前面我介绍了listview控件的不同用法,但是这些用法在实际的开发项目中是不足以满足需求的,因为前面的几种用法只能简单的显示文本信息,而且布局都比较单一,很难做出复杂的结果,在实际的开发项目中,90 ...
随机推荐
- 对JSON.parse()中存在转义字符的解决以及js中替换函数replace()的认识
在工作中,遇到对页面数据进行转存json格式数据后存储在数据库中.然而在显示数据时遇到无法显示json中的数据,产生的bug 问题抛出: 1.首先认识下,在JSON.parse()将后台传过来的字符串 ...
- Java网络编程面试总结
转载. https://blog.csdn.net/qq_39470733/article/details/84635274 1.GET 和 POST 的区别? GET 请求可被缓存 GET 请求保留 ...
- mysql数据库的 varchar 和 char 的区别
char是存储字符(无论字母还是汉字都最多存255个) char(20)表示这个字段最多存20个字符 如果存了16个字符 那么也会占用20个字符的空间 varchar是存储字节(1个字母1个字节 ...
- 在windows系统下打包linux平台运行的go程序
在windows系统下打包linux平台运行的go程序 1.先在main.go下打包成.exe可执行程序测试代码是否正确 //cd到main.go目录 go build //打包命令 如果打包成功则表 ...
- urllib的简单使用
首先需要导包 Import urllib.request 这是一个简单的网站例如:发起请求Response = urlib.request.urlopen("http://www.baidu ...
- 列表推导:python2和python3中作用域的问题
python2中: x = 'my love' dummy = [x for x in 'ABC'] print x 此时x打印为:'C' python3中: x = 'my love' dummy ...
- 【GCN】图卷积网络初探——基于图(Graph)的傅里叶变换和卷积
[GCN]图卷积网络初探——基于图(Graph)的傅里叶变换和卷积 2018年11月29日 11:50:38 夏至夏至520 阅读数 5980更多 分类专栏: # MachineLearning ...
- css鼠标悬浮控制元素隐藏与显示
在网页开发中经常有需求是鼠标移动到一个元素A身上时,另外一个元素B显示. 如下图 当鼠标移到图片上时,相关的描述从下方显示出来. css实现原理与情景: A 是 B 的父元素 B 默认隐藏 B{opa ...
- 【原创】大叔问题定位分享(36)openresty(nginx+lua)中获取不到post数据,ngx.req.get_body_data返回nil
openresty(nginx+lua)中获取不到post数据,ngx.req.get_body_data返回nil This function returns nil if the request ...
- 解决 VS Code「Code Runner」插件运行 python 时的中文乱码问题
描述 这里整理了两种 VS Code「Code Runner」插件运行 python 时乱码的解决方案.至于设置「Auto Guess Encoding」为 true 的操作这里就不多描述了. 乱码截 ...