【转载】使用appium遇到的坑
问题
1. error: Failed to start an Appium session, err was: Error: Requested a new session but one was in progress
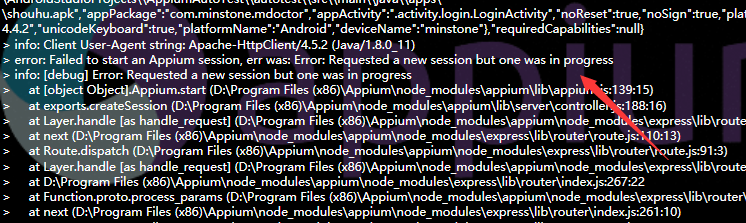
之前的会话没有关闭,然后你又运行了测试实例,也没有设置覆盖.
解决:
1. 重新停止appium服务,开启Appium服务
2. 在Genarel Setting那里设置覆盖Session,重启Appium
测试结束在AfterClass加driver.quit()
2. error: Failed to start an Appium session, err was: Error: Command failed: C:\Windows\system32\cmd.exe /s /c "D:\android-sdk-windows\platform-tools\adb.exe -s adb server version (32) doesn't match this client (36); killing…
wait-for-device"
error: could not install smartsocket listener: cannot bind to 127.0.0.1:5037:
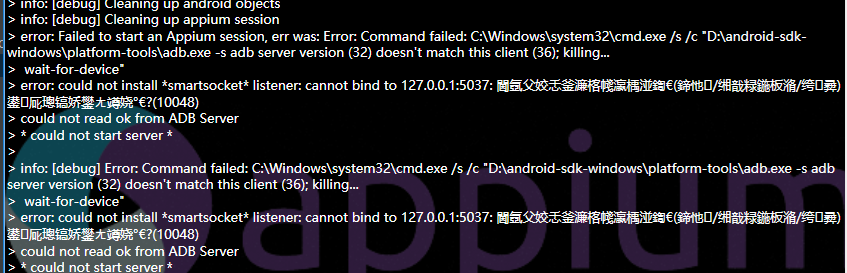
没有链接上手机或者模拟器,请确认已经连接成功,重新链接
3. error: Android devices must be of API level 17 or higher. Please change your device to Selendroid or upgrade Android on your device.
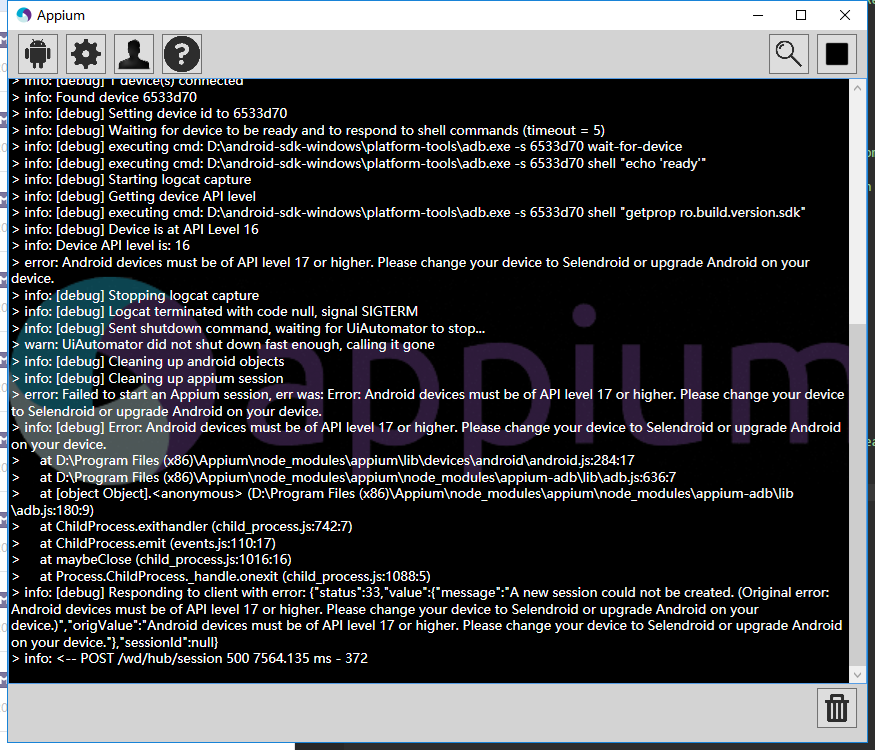
手机系统低于4.2,appium不支持4.2.2以下的系统,请换一个手机或者模拟器来测试。
4. Error: Permission to start activity denied.
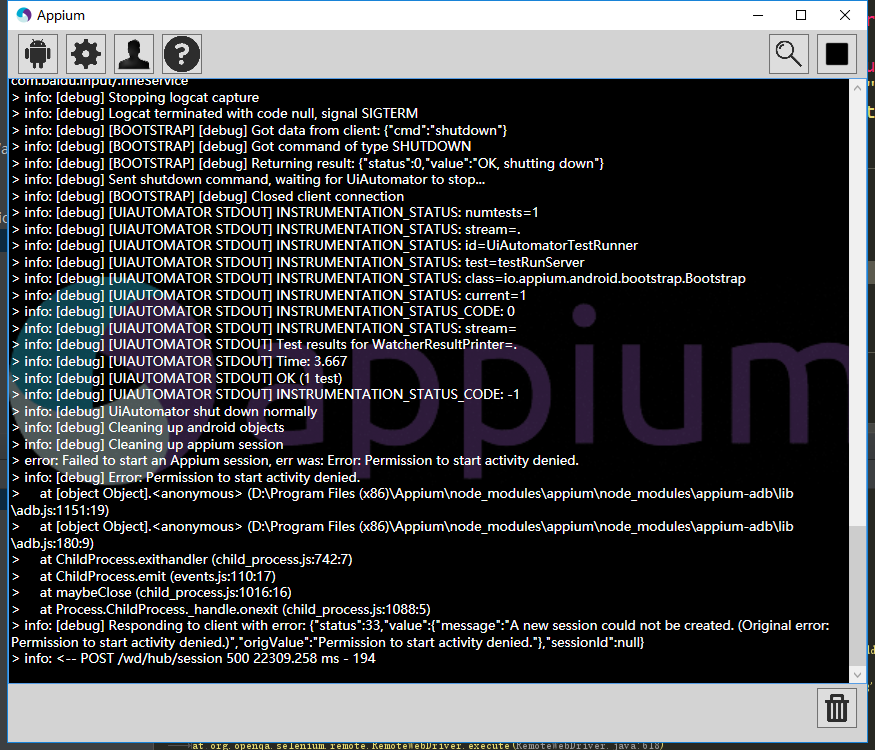
**activity在清单文件里面没添加Android:exported="true"的话,你不能直接打开对应的activity,需要从启动页activity打开。
exported属性就是设置是否允许activity被其它程序调用**
5. error: Failed to start an Appium session, err was: Error: Activity used to start app doesn't exist or cannot ve launched! Make usre it exists and is launchable activity
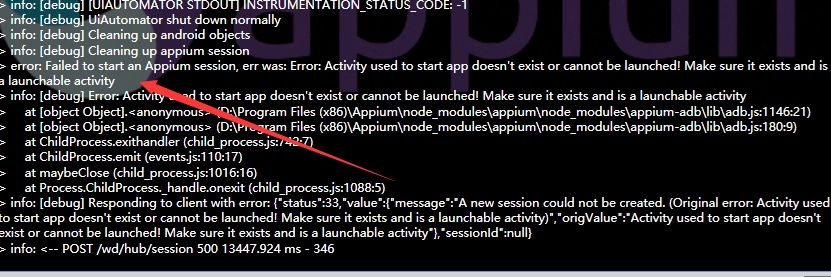
要打开的activity不存在,activity路径错误,改为完整正确的activity路径
6. error: Failed to start an Appium session, err was: Error: 'java - version' failed. Error: Command failed: C:\Windows\system32\cmd.exe /s /c "java -version"
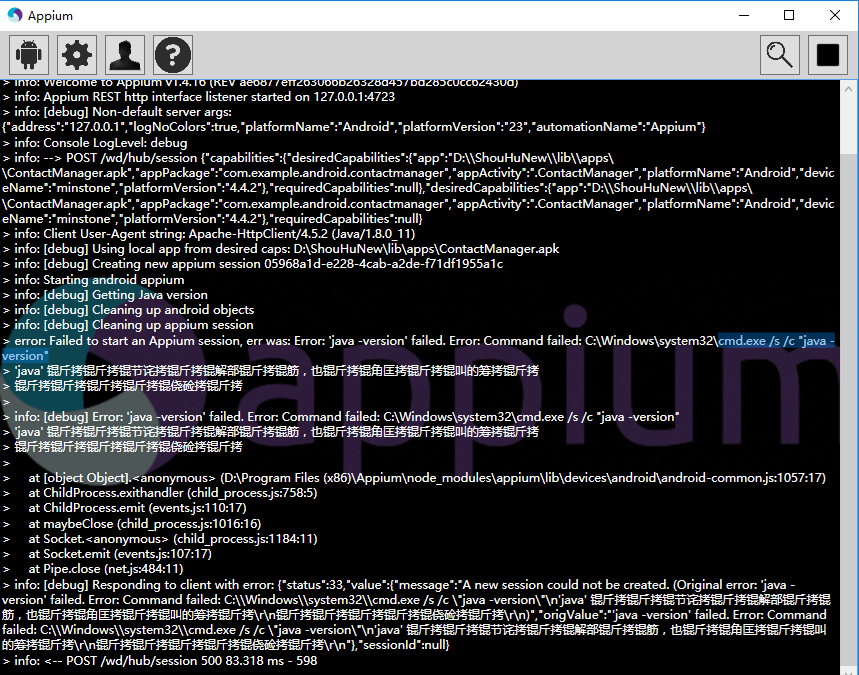
Java版本错误,请安装最新的版本。
7.> info: [debug] Error: Command failed: C:\Windows\system32\cmd.exe /s /c "D:\android-sdk-windows\platform-tools\adb.exe -s 8806a0b0 shell "echo 'ready'"error: unknown host service
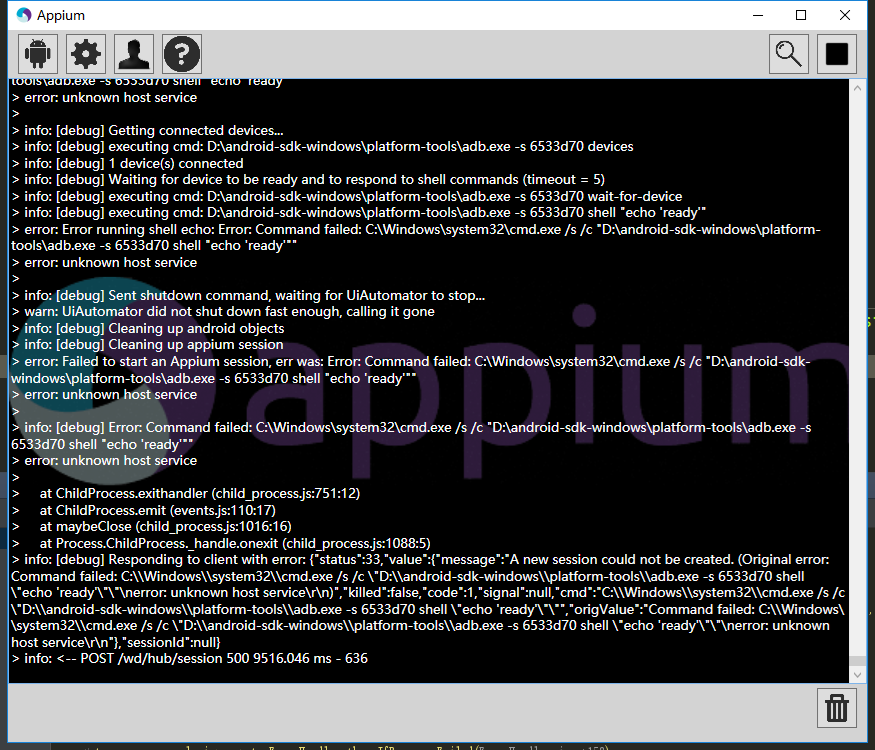
链接手机失败,重新链接手机即可,我就是重新拔插了一下usb
Error: Command failed: C:\Windows\system32\cmd.exe /s /c "D:\android-sdk-windows\platform-tools\adb.exe -s 8806a0b0 shell "echo 'ping'""
error: unknown host service
adb被突然占用导致,例如你在运行用例的时候运行了模拟器。
8. UIAutomatorViewer提示: Unable to connect to adb. Check if adb is installed correctly
解决,sdk升级到了25产生的问题。
解决方法:
1.将adb.exe 复制一份到uiautomatorviewer.bat 目录下
2.修改uiautomatorviewer.bat文件最后一行(改binddir=%prog_dir%为自己的platform-tools本地路径)

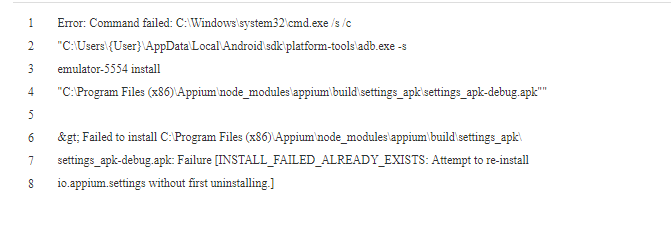
9 error: Failed to start an Appium session, err was:INSTALL_FAILED_ALREADY_EXISTS: Attempt to re-install io.appium.settings without first uninstalling
When you are at final step to execute test automation script for mobile app testing on a mobile emulator or a virtual device or a real device, you might observe that script execution fails with different kinds of errors, In context to current article you will look at the error and solutions for: INSTALL_FAILED_ALREADY_EXISTS: Attempt to re-install io.appium.settings without first uninstalling.
Error in Appium Server:
Error in Android studio run console:
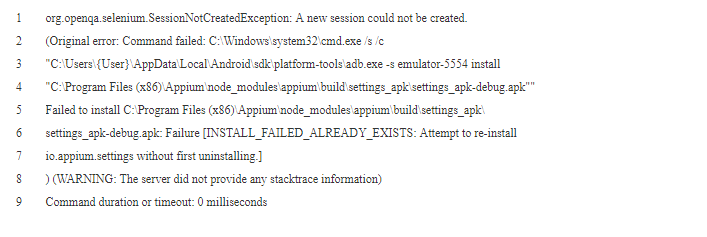
For the first time when you execute the script it might pass, but it will fail with above error when you try to execute the same or any other script multiple times. Or when your test script execution fails on the first attempt for some other reason, and when you fix it and execute it again, you might encounter this new issue.
原因:
The reason for this error is that Appium installs 2 mobile applications before executing the script.
1. io.appium.settings
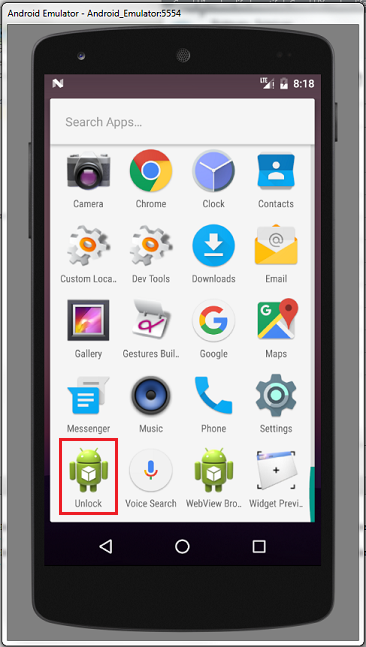
2. io.appium.unlock
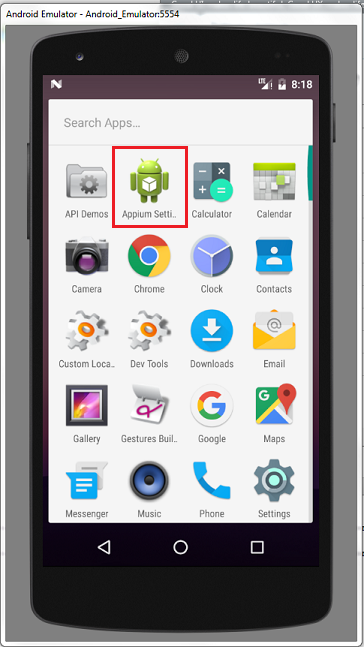
These are the supportive mobile applications appium utilizes to execute the test automation script in Mobile Emulator or virtual device or a real mobile device.
Ideally Appium should remove these files every time at the end of the script execution or termination, if it is intends to install them every time a script is executed, or it should conditionally install these apps / apks to the mobile emulator or mobile device.
In your mobile emulator / Virtual Device / Real device, the 2 mobile applications appear as below:
There are multiple ways to troubleshoot this error and go ahead for a successful test script execution.
解决办法
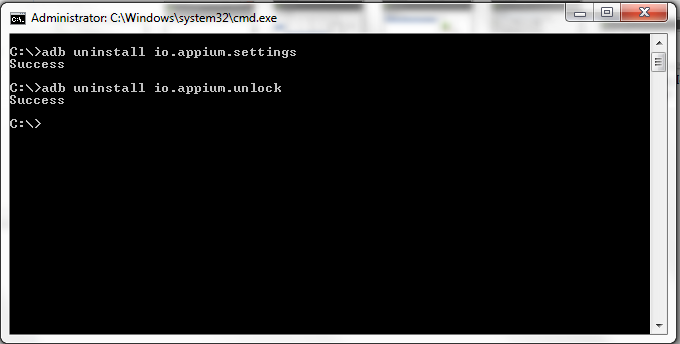
Solution 1: ADB's uninstall command to remove the files.
You can open command prompt, assuming that you already had set the environment variables for ANDROID_HOME and Path variables for sdk tools and platform tools.
And execute commands as shown below:
Solution 2: Uninstall manually
You can open the mobile emulator / virtual device / real device and go to apps and uninstall them.
Solution 3: Write code as part of your test automation script.
As part of your selenium test automation script, you could write instructions to execute the commands provided in solution 1 above, so that this issue would not arise.
Hope this article has been helpful and you are able to proceed further with script execution.
Request to kindly share any of your queries in form of comments, we would try our best to provide any solution for you.
10. 出错信息里含有"ps 'uiautomator',具体信息未 A new session could not be created. (Original error: Command failed: C:\Windows\system32\cmd.exe /s /c "C:\Users\sxie\AppData\Local\Android\sdk\platform-tools\adb.exe -s emulator-5554 shell "ps 'uiautomator'""
android-appium: A new session could not be created
junitexceptionandroidappium自动化
detail log:
org.openqa.selenium.SessionNotCreatedException: A new session could not be created. (Original error: Command failed: C:\Windows\system32\cmd.exe /s /c "C:\Users\sxie\AppData\Local\Android\sdk\platform-tools\adb.exe -s emulator-5554 shell "ps 'uiautomator'""
) (WARNING: The server did not provide any stacktrace information)
Command duration or timeout: 0 milliseconds
Build info: version: '3.4.0', revision: 'unknown', time: 'unknown'
System info: host: 'WL00070299', ip: '10.110.12.39', os.name: 'Windows 8.1', os.arch: 'x86', os.version: '6.3', java.version: '1.8.0_40'
Driver info: driver.version: AndroidDriver
at sun.reflect.NativeConstructorAccessorImpl.newInstance0(Native Method)
at sun.reflect.NativeConstructorAccessorImpl.newInstance(Unknown Source)
at sun.reflect.DelegatingConstructorAccessorImpl.newInstance(Unknown Source)
at java.lang.reflect.Constructor.newInstance(Unknown Source)
at org.openqa.selenium.remote.ErrorHandler.createThrowable(ErrorHandler.java:215)
at org.openqa.selenium.remote.ErrorHandler.throwIfResponseFailed(ErrorHandler.java:167)
at io.appium.java_client.remote.AppiumProtocolHandShake.createSession(AppiumProtocolHandShake.java:161)
at io.appium.java_client.remote.AppiumProtocolHandShake.createSession(AppiumProtocolHandShake.java:76)
at io.appium.java_client.remote.AppiumCommandExecutor.doExecute(AppiumCommandExecutor.java:111)
at io.appium.java_client.remote.AppiumCommandExecutor.execute(AppiumCommandExecutor.java:162)
at org.openqa.selenium.remote.RemoteWebDriver.execute(RemoteWebDriver.java:637)
at io.appium.java_client.DefaultGenericMobileDriver.execute(DefaultGenericMobileDriver.java:42)
at io.appium.java_client.AppiumDriver.execute(AppiumDriver.java:1)
at io.appium.java_client.android.AndroidDriver.execute(AndroidDriver.java:1)
at org.openqa.selenium.remote.RemoteWebDriver.startSession(RemoteWebDriver.java:250)
at org.openqa.selenium.remote.RemoteWebDriver.startSession(RemoteWebDriver.java:236)
at org.openqa.selenium.remote.RemoteWebDriver.(RemoteWebDriver.java:137)
at io.appium.java_client.DefaultGenericMobileDriver.(DefaultGenericMobileDriver.java:38)
at io.appium.java_client.AppiumDriver.(AppiumDriver.java:88)
at io.appium.java_client.AppiumDriver.(AppiumDriver.java:112)
at io.appium.java_client.android.AndroidDriver.(AndroidDriver.java:73)
at com.sky.demo.ContactTest.setUp(ContactTest.java:44)
at sun.reflect.NativeMethodAccessorImpl.invoke0(Native Method)
at sun.reflect.NativeMethodAccessorImpl.invoke(Unknown Source)
at sun.reflect.DelegatingMethodAccessorImpl.invoke(Unknown Source)
at java.lang.reflect.Method.invoke(Unknown Source)
at org.junit.runners.model.FrameworkMethod$1.runReflectiveCall(FrameworkMethod.java:50)
at org.junit.internal.runners.model.ReflectiveCallable.run(ReflectiveCallable.java:12)
at org.junit.runners.model.FrameworkMethod.invokeExplosively(FrameworkMethod.java:47)
at org.junit.internal.runners.statements.RunBefores.evaluate(RunBefores.java:24)
at org.junit.internal.runners.statements.RunAfters.evaluate(RunAfters.java:27)
at org.junit.runners.ParentRunner.runLeaf(ParentRunner.java:325)
at org.junit.runners.BlockJUnit4ClassRunner.runChild(BlockJUnit4ClassRunner.java:78)
at org.junit.runners.BlockJUnit4ClassRunner.runChild(BlockJUnit4ClassRunner.java:57)
at org.junit.runners.ParentRunner$3.run(ParentRunner.java:290)
at org.junit.runners.ParentRunner$1.schedule(ParentRunner.java:71)
at org.junit.runners.ParentRunner.runChildren(ParentRunner.java:288)
at org.junit.runners.ParentRunner.access$000(ParentRunner.java:58)
at org.junit.runners.ParentRunner$2.evaluate(ParentRunner.java:268)
at org.junit.runners.ParentRunner.run(ParentRunner.java:363)
at org.eclipse.jdt.internal.junit4.runner.JUnit4TestReference.run(JUnit4TestReference.java:50)
at org.eclipse.jdt.internal.junit.runner.TestExecution.run(TestExecution.java:38)
at org.eclipse.jdt.internal.junit.runner.RemoteTestRunner.runTests(RemoteTestRunner.java:459)
at org.eclipse.jdt.internal.junit.runner.RemoteTestRunner.runTests(RemoteTestRunner.java:675)
at org.eclipse.jdt.internal.junit.runner.RemoteTestRunner.run(RemoteTestRunner.java:382)
at org.eclipse.jdt.internal.junit.runner.RemoteTestRunner.main(RemoteTestRunner.java:192)
==========================================
直接在cmd中执行"C:\Windows\system32\cmd.exe /s /c "C:\Users\sxie\AppData\Local\Android\sdk\platform-tools\adb.exe -s emulator-5554 shell "ps 'uiautomator'""
bad pid 'uiautomator'", 报错: bad pid 'uiautomator'
代码内容为
public class ContactTest {
private AndroidDriver driver;
@Before
public void setUp() throws Exception {
//设置apk的路径
File classpathRoot = new File(System.getProperty("user.dir"));
File appDir = new File(classpathRoot, "apps");
File app = new File(appDir, "ContactManager.apk");
//设置自动化相关参数
DesiredCapabilities capabilities = new DesiredCapabilities();
capabilities.setCapability(CapabilityType.BROWSER_NAME, "");
capabilities.setCapability("automationName","Appium");
capabilities.setCapability("platformName", "Android");
capabilities.setCapability("deviceName", "Pixel_XL_API_25");// Galaxy_Nexus_API_25
capabilities.setCapability("noReset", true);
capabilities.setCapability("avdReadyTimeout", 300000);
capabilities.setCapability("sessionOverride", true);
//设置安卓系统版本
capabilities.setCapability("platformVersion", "7.1.1");
//设置apk路径
capabilities.setCapability("app", app.getAbsolutePath());
//设置app的主包名和主类名
capabilities.setCapability("appPackage", "com.example.android.contactmanager");
capabilities.setCapability("appActivity", ".ContactManager");
//初始化
driver = new AndroidDriver(new URL("http://127.0.0.1:4723/wd/hub"), capabilities);
driver.manage().timeouts().implicitlyWait(10,TimeUnit.SECONDS);
}
@Test
public void addContact(){
WebElement el = driver.findElement(By.name("Add Contact"));
el.click();
List<WebElement> textFieldsList = driver.findElementsByClassName("android.widget.EditText");
textFieldsList.get(0).sendKeys("feimaoyuzhubaobao");
textFieldsList.get(2).sendKeys("forever together");
driver.swipe(100, 500, 100, 100, 2);
driver.findElementByName("Save").click();
}
@After
public void tearDown() throws Exception {
driver.quit();
}
}
解决办法:
resolved by this way:
adb.js(C:\Program Files (x86)\Appium\node_modules\appium\node_modules\appium-adb\lib\adb.js) 中1035 行this.shell("ps '" + name + "'", function (err, stdout) {
对应执行的指令是ps 'uiautomator', Android7不支持这个指令格式,所以执行结果是bad pid 'uiautomator'
目前Appium未对此进行处理,所以需要修改此指令的执行方式
即将
this.shell("ps '" + name + "'", function (err, stdout) {
if (err) return cb(err);
替换成
this.shell_grep("ps", name, function (err, stdout) {
if (err) {
logger.debug("No matching processes found");
return cb(null, []);
}
并增加上面用到的shell_grep函数:
ADB.prototype.shell_grep = function (cmd, grep, cb) {
if (cmd.indexOf('"') === -1) {
cmd = '"' + cmd + '"';
}
var execCmd = 'shell ' + cmd + '| grep ' + grep;
this.exec(execCmd, cb);
};
11.Android 7.0系统的手机无法执行appium脚本的问题
Appium Appium 版本 1.4.16,Android 设备固件 7.x,执行脚本时,报错使用语言:python报错如下:
WebDriverException: Message: A new session could not be created. (Original error: Could not extract PIDs from ps output. PIDS: [], Procs: ["bad pid 'uiautomator'"])
这个是因为appium版本1.4.16 使用的 uiatumator1.0不支持的原因导致?如果不升级appium版本,是否有解决方案?
解决办法
uiautomator1.0应该是不支持7.0,不升版本就换用uiautomator2.0吧,或者用下面的改脚本的方法使用。
解决Android 7.0系统的手机无法执行appium脚本的问题,改问题的具体解决方法如下:
找到appium的安装目录下的adb.js文件,windows版本的目录如下:Appium\node_modules\appium\node_modules\appium-adb\lib
2、 打开adb.js,手动修改该文件下的内容,此方法我已经试验成功。
adb.js 中1035 行this.shell("ps '" + name + "'", function (err, stdout) {
对应执行的指令是ps 'uiautomator', Android7不支持这个指令格式,所以执行结果是bad pid 'uiautomator'
目前Appium未对此进行处理,所以需要修改此指令的执行方式
即将
this.shell("ps '" + name + "'", function (err, stdout) {
if (err) return cb(err);
替换成
this.shell_grep("ps", name, function (err, stdout) {
if (err) {
logger.debug("No matching processes found");
return cb(null, []);
}
并增加上面用到的shell_grep函数:
ADB.prototype.shell_grep = function (cmd, grep, cb) {
if (cmd.indexOf('"') === -1) {
cmd = '"' + cmd + '"';
}
var execCmd = 'shell ' + cmd + '| grep ' + grep;
this.exec(execCmd, cb);
};
网上还有如下的修改解决办法:以下我未试验。
ADB.prototype.getPIDsByName = function (name, cb) {
logger.debug("Getting all processes with '" + name + "'");
this.shell("ps '" + name + "'", function (err, stdout) {
if (err) return cb(err);
stdout = stdout.trim();
var procs = [];
var outlines = stdout.split("\n");
outlines.shift(); //在该处添加此行代码
3、重启appium
技巧
1. 每次测试都重新安装app
为capabilities色设置noReset为true
capabilities.setCapability("noReset", true);
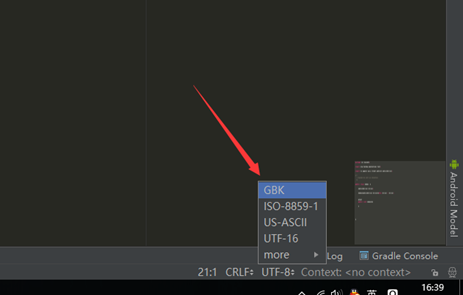
2. 中文乱码
这都是编码问题:
1.方法1:
Android Studio修改文件编码的方法,最底部的UTf-8,点击选GBK就可以了,reload文件。(ps: 先把文件内容全选复制一下再转换编码,再粘贴,不然文件内容就变乱码了)
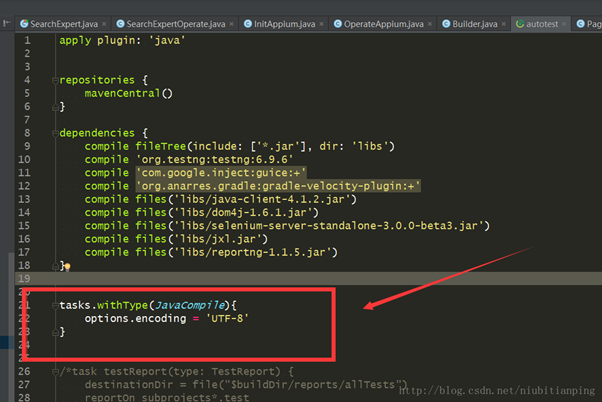
2.方法2:
用的是原来的UTF-8编码,然后在测试module的build.gradle里面添加三行代码
tasks.withType(JavaCompile){
options.encoding = 'UTF-8'
}
3. 清除编辑框EditText内容
这个问题好像是看手机系统的,我之前的手机就会出现sendKeys的时候没有全选去掉本来的内容,现在都会自动全选覆盖了,这个也不算问题了。
/**
* 逐字删除编辑框中的文字
* @param element 文本框架控件
*/
public void clearText(AndroidElement element){
String className = element.getClass().getSimpleName();
if (className.equals("EditText")){
String text = element.getText();
//跳到最后
driver.pressKeyCode(KEYCODE_MOVE_END);
for (int i = 0; i < text.length(); i ++){
//循环后退删除
driver.pressKeyCode(BACKSPACE);
}
}else {
print("不是文本输入框架,无法删除文字");
}
}
1
4. 点击输入法键盘的回车搜索
方法1: 切换输入法
利用adb命令先切换为自己的输入法,按了搜索再切换为appium的输入法
查看当前手机的输入法
cmd执行下面的的代码
adb shell ime list -s
可以看到类似下面的结果,
C:\Users\LITP>adb shell ime list -s
com.baidu.input_mi/.ImeService
com.sohu.inputmethod.sogou.xiaomi/.SogouIME
io.appium.android.ime/.UnicodeIME
C:\Users\LITP>
执行adb命令
先写好一个执行cmd的方法
/**
* 执行adb命令
* @param s 要执行的命令
*/
private void excuteAdbShell(String s) {
Runtime runtime=Runtime.getRuntime();
try{
runtime.exec(s);
}catch(Exception e){
print("执行命令:"+s+"出错");
}
}
在需要搜索的时候执行下面的代码,切换的输入法用自己查看列表的输入法内容,我这里是搜狗输入法
//使用adb shell 切换输入法-更改为搜狗拼音,这个看你本来用的什么输入法
excuteAdbShell("adb shell ime set com.sohu.inputmethod.sogou.xiaomi/.SogouIME");
//再次点击输入框,调取键盘,软键盘被成功调出
clickView(page.getSearch());
//点击右下角的搜索,即ENTER键
pressKeyCode(AndroidKeyCode.ENTER);
//再次切回 输入法键盘为Appium unicodeKeyboard
excuteAdbShell("adb shell ime set io.appium.android.ime/.UnicodeIME");
---------------------
作者:花米徐
来源:CSDN
原文:https://blog.csdn.net/xl_lx/article/details/78717898
版权声明:本文为博主原创文章,转载请附上博文链接!
【转载】使用appium遇到的坑的更多相关文章
- 转载:appium踩过的坑
原文地址:http://blog.csdn.net/wirelessqa/article/details/29188665 自己的操作:由于在window上安装appium时,报各种错误:所以选择在u ...
- 【转载】appium自动化环境搭建
1.java开发环境JDK 2.android SDK(platform/platform tools/tools/build tools) 3.python下载安装(pip) 4.appium下载安 ...
- 运行Appium碰到的坑们
运行Appium的时候,碰到的那些坑 1. java命令会出现error:could not open ...jvm.cfg 出现这种情况大多是因为电脑上之前安装过JDK,卸载重装之后,运行java命 ...
- [转载][翻译]Go的50坑:新Golang开发者要注意的陷阱、技巧和常见错误[2]
Golang作为一个略古怪而新的语言,有自己一套特色和哲学.从其他语言转来的开发者在刚接触到的时候往往大吃苦头,我也不例外.这篇文章很细致地介绍了Golang的一些常见坑点,读完全篇中枪好多次.故将其 ...
- 基于python的Appium自动化测试的坑
真的感谢@虫师 这位来自互联网的老师,让我这个原本对代码胆怯且迷惑的人开始学习自动化测试. 一开始搜索自动化测试的时候,虫师的博客园教程都是在百度的前几位的,我就跟着虫师博客园里面的教程学习.后来学s ...
- 那些年安装Appium遇到的坑
安装appium以及相关的总体记录 1 主要流程是参照这个来 https://www.cnblogs.com/wangyinghao/p/5780151.html 细节参考虫师的博客 http ...
- 【转载】appium 操作汇总
'''.appium api第二弹 锋利的python,这是初稿,2015/1/5 如有错误的地方,请同学们进行留言,我会及时予以修改,尽量整合一份ok的api 作者:Mads Spiral QQ:7 ...
- appium输入法踩坑解决方案-----中文乱码及输入法搜索无法点击
一.appium1.7.1 遇到的坑: 1. 在写安卓的搜索用例脚本时,发现输入内容后,搜索出现在输入法键盘原来的确认位置,定位不到手机自带输入法的"搜索"键: 2. 传入中文搜索 ...
- Appium 滑动踩坑记
前言 对于不同java-client版本,很多的API已经产生大的变化,所以一些API大家会发现已经失效或者使用方式发生了变化,滑动就是其中一项,这篇文章对滑动在不同的java-client版本以及不 ...
随机推荐
- SQL优化 | 避免全表扫描
1. 对返回的行无任何限定条件,即没有where 子句 2. 未对数据表与任何索引主列相对应的行限定条件 例如:在City-State-Zip列创建了三列复合索引,那么仅对State列限定条件不能使用 ...
- 等待 Redis 应答
https://zhuanlan.zhihu.com/p/58608323 mq消息合并:由于mq请求发出到响应的时间,即往返时间, RTT(Round Time Trip),每次提交都要消耗RTT, ...
- Python 中的 -> 是什么意思
函数标注通常用于 类型提示:例如以下函数预期接受两个 int 参数并预期返回一个 int 值:```def sum_two_numbers(a: int, b: int) -> int:retu ...
- 【精华】PHP网站验证码不显示的终结解决方案
PHP网站验证码不显示,这个是个很基础的PHP问题了,不过有点时候会比较让开发者比较头疼了.很多解决方案仅仅考虑到gd2,却忽略了另外一个很重要的因素了,相信在了解本教程之后,验证码不显示基本上就不算 ...
- 阶段5 3.微服务项目【学成在线】_day18 用户授权_13-细粒度授权-细粒度授权介绍
3 细粒度授权 3.1 需求分析 什么是细粒度授权? 细粒度授权也叫数据范围授权,即不同的用户所拥有的操作权限相同,但是能够操作的数据范围是不一样的.一个 例子:用户A和用户B都是教学机构,他们都拥有 ...
- python中的列表推导式——轻量级循环
列表推导式(list comprehension)是利用其他列表创建新列表(类似于数学术语中的集合推导式)的一种方法.它的工作方式类似于for循环,也很简单. 列表推导式书写形式: [表达式 for ...
- python基础之线程、进程、协程
线程 线程基础知识 一个应用程序,可以多进程.也可以多线程. 一个python脚本,默认是单进程,单线程的. I/O操作(音频.视频.显卡操作),不占用CPU,所以: 对于I/O密集型操作,不会占用C ...
- 微信小程序--TabBar不出现
今天打算开始实战一个微信小程序项目,一开始就踩坑了,正确设置了TabBar,但是TabBar就是不能显示出来,后面才找到原因,这里记录下: app.json正确代码: { "pages&qu ...
- MFC BASE64加解密 算法
unsigned char * base64 = (unsigned char *)"ABCDEFGHIJKLMNOPQRSTUVWXYZabcdefghijklmnopqrstuvwxyz ...
- CentOS安装文件共享samba
参考:https://jingyan.baidu.com/article/03b2f78cdf811c5ea237aebc.html https://www.linuxidc.com/Linux/20 ...