tomcat集群搭建集成nginx负载均衡
软件基础+版本:
1、3台centos7系统,其中都已经配置完成了jdk环境,jdk的版本为
[root@node03 bin]# java -version

java version "1.8.0_144"

Java(TM) SE Runtime Environment (build 1.8.0_144-b01)

Java HotSpot(TM) -Bit Server VM (build 25.144-b01, mixed mode)
具体的linux的jdk配置方式可见其他文章
2、解压版的linux的tomcat,版本如下:
[root@node02 soft]# ll

总用量

-rw-r--r--  1 root root  10291220 11月 26 15:44 apache-tomcat-8.5.49.tar.gz
3、
[root@node02 soft]# ll
总用量

drwxr-xr-x.                7月    jdk1..0_144

-rw-r--r--.  root  root   9月    : jdk-8u144-linux-x64.tar.gz

drwxr-xr-x   nginx nginx        11月  : nginx-1.10.

-rw-r--r--  1 root  root     910812 10月 18 2016 nginx-1.10.2.tar.gz
三台centos的别名和ip为:下面是三台虚拟机
192.168.27.202 node02
192.168.27.203 node03
192.168.27.204 node04
其中的node02和node03是安装两个tomcat,搭建tomcat集群用
node04是搭建nginx做负载均衡服务器
1、配置搭建tomcat集群的两台服务器的jdk环境
步骤:
2、node02上面安装tomcat:
[root@node02 soft]# tar zxfapache-tomcat-8.5.49.tar.gz
解压完毕之后
在tomcat的解压目录下面的webapps的ROOT下面创建一个jsp页面用于测试tomcat是否安装成功
具体的创建jsp和验证的过程如下:
在tomcat的ROOT目录下执行命令:
[root@node03 ROOT]# vim test.jsp 写一个测试页
[root@node03 ROOT]# cat test.jsp
[root@node03 ROOT]# more test.jsp
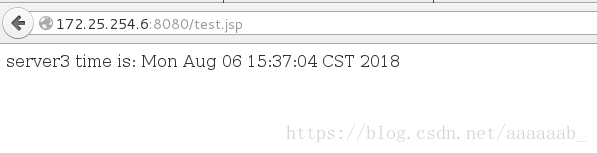
server03:the time is: <%=new java.util.Date()%>
[root@node03 ROOT]#
[root@node03 ROOT]# ll

总用量

-rw-r-----  root root  11月  : asf-logo-wide.svg

-rw-r-----  root root    11月  : bg-button.png

-rw-r-----  root root   11月  : bg-middle.png

-rw-r-----  root root   11月  : bg-nav.png

-rw-r-----  root root   11月  : bg-upper.png

-rw-r-----  root root  11月  : favicon.ico

-rw-r-----  root root  11月  : index.jsp

-rw-r-----  root root   11月  : RELEASE-NOTES.txt

-rw-r--r-- 1 root root    48 11月 26 16:24 test.jsp

-rw-r-----  root root   11月  : tomcat.css

-rw-r-----  root root   11月  : tomcat.gif

-rw-r-----  root root   11月  : tomcat.png

-rw-r-----  root root   11月  : tomcat-power.gif

-rw-r-----  root root  11月  : tomcat.svg

drwxr-x---  root root     11月  : WEB-INF

[root@node03 ROOT]# pwd

/opt/soft/apache-tomcat-8.5.49/webapps/ROOT

[root@node03 ROOT]#
之后在自己的本地机子上,浏览器中进行测试,
输入安装tomcat的那台机子的ip:8080/test.jsp如果能够进入页面,则代表配置成功
test.jsp页面测试效果如下:
同样的node03也进行同样的配置和检测
2、node04服务器的nginx环境搭建:
编译nginx进行负载均衡的配置:
[root@node04]# tar zxf nginx-1.10..tar.gz
解压完毕之后:
我配置的并没有sticky模块,这个是借助于网上的一个人的图片,哈哈,自己忘截图了

安装完毕之后进行下面的配置更改
[root@node04 nginx-1.10.2] # vim auto/cc/gcc

 #CFLAGS="$CFLAGS -g"      ##注释掉这行,忽略编译信息,安装的容量会变小。
[root@node04 nginx-1.10.2] # yum install gcc pcre-devel openssl-devel -y

[root@node04 nginx-1.10.2] # ./configure  #注意这个后面可以见参数:比如prefix等参数,具体的参数的含义:见链接:https://blog.csdn.net/qq_32907349/article/details/53814194
再进行
[root@node04 nginx-1.10.2]# yum install gcc pcre-devel openssl-devel -y

[root@node04 nginx-1.10.2] # ./configure

#也可以指定参数:
[root@server6 nginx-1.10.1]# ./configure --prefix=/usr/local/lnmp/nginx --with-http_ssl_module --with-http_stub_status_module --with-file-aio --with-threads --user=nginx --group=nginx --add-module=/root/nginx-sticky-module-ng
但我没有指定:
[root@node04 nginx-1.10.2] #make && make install 编译三部曲
[root@node04 nginx-1.10.] #useradd nginx 建立用户

 [root@node04 sbin]# cd /usr/local/nginx/sbin/nginx下面的sbin目录下面有nginx命令,通过./nginx即可启动nginx,
###############特别需要注意的是上面安装nginx的过程中:配置
之后在本机的浏览器中输入地址http://192.168.27:80/
如果见到下面的页面,即是安装成功
nginx的欢迎也即是成功

之后需要配置的是nginx集成tomcat集群:
配置如下
注意nginx.conf是/usr/local/nginx/conf的nginx.conf,而不是nginx安装目录下的那个conf下的,安装目录下的conf下面没有nginx.conf文件
[root@node04 nginx]# ll
总用量 4
drwx------ 2 nobody root 6 11月 26 17:14 client_body_temp
drwxr-xr-x 2 root root 4096 11月 26 17:42 conf
drwx------ 2 nobody root 6 11月 26 17:14 fastcgi_temp
drwxr-xr-x 2 root root 40 11月 26 17:03 html
drwxr-xr-x 2 root root 58 11月 26 17:14 logs
drwx------ 2 nobody root 6 11月 26 17:14 proxy_temp
drwxr-xr-x 2 root root 19 11月 26 17:03 sbin
drwx------ 2 nobody root 6 11月 26 17:14 scgi_temp
drwx------ 2 nobody root 6 11月 26 17:14 uwsgi_temp
[root@node04 nginx]# cd conf
[root@node04 conf]# pwd
/usr/local/nginx/conf
[root@node04 conf]#
具体的配置如下:
[root@node04 conf]# ll

总用量

-rw-r--r--  root root  11月  : fastcgi.conf

-rw-r--r--  root root  11月  : fastcgi.conf.default

-rw-r--r--  root root  11月  : fastcgi_params

-rw-r--r--  root root  11月  : fastcgi_params.default

-rw-r--r--  root root  11月  : koi-utf

-rw-r--r--  root root  11月  : koi-win

-rw-r--r--  root root  11月  : mime.types

-rw-r--r--  root root  11月  : mime.types.default

-rw-r--r--  root root  11月  : nginx.conf

-rw-r--r--  root root  11月  : nginx.conf.bak

-rw-r--r--  root root  11月  : nginx.conf.default

-rw-r--r--  root root   11月  : scgi_params

-rw-r--r--  root root   11月  : scgi_params.default

-rw-r--r--  root root   11月  : uwsgi_params

-rw-r--r--  root root   11月  : uwsgi_params.default

-rw-r--r--  root root  11月  : win-utf

[root@node04 conf]# vim nginx.conf

        listen       ;

        server_name  tomcat;

        #charset koi8-r;

        #access_log  logs/host.access.log  main;

        location / {

            root   html;

            index  index.html index.htm;

        }

        error_page                /.html;

        # redirect server error pages to the static page /50x.html

        #

        error_page        /50x.html;

        location = /50x.html {

            root   html;

        }

       # proxy the PHP scripts to Apache listening on 127.0.0.1:

        location ~ \.jsp$ {

            proxy_pass   http://tomcat;

        }

        # pass the PHP scripts to FastCGI server listening on 127.0.0.1:

        #

        #location ~ \.php$ {

        #    root           html;

        #    fastcgi_pass   127.0.0.1:;

        #    fastcgi_index  index.php;

        #    fastcgi_param  SCRIPT_FILENAME  /scripts$fastcgi_script_name;

        #    include        fastcgi_params;

        #}

        # deny access to .htaccess files, if Apache's document root

        # concurs with nginx's one

        #

        #location ~ /\.ht {

        #    deny  all;

        #}

    }

    # another virtual host using mix of IP-, name-, and port-based configuration

    #

    #server {

    #    listen       ;

    #    listen       somename:;

    #    server_name  somename  alias  another.alias;

    #    location / {

    #        root   html;

    #        index  index.html index.htm;

    #    }

    #}

    # HTTPS server

    #

    #server {

    #    listen        ssl;

    #    server_name  localhost;

    #    ssl_certificate      cert.pem;

    #    ssl_certificate_key  cert.key;

    #    ssl_session_cache    shared:SSL:1m;

    #    ssl_session_timeout  5m;

    #    ssl_ciphers  HIGH:!aNULL:!MD5;

    #    ssl_prefer_server_ciphers  on;

    #    location / {

    #        root   html;

    #        index  index.html index.htm;

    #    }

    #}

}
配置完毕之后:
在本机中的浏览器中输入nginx服务器的地址:+80端口+test.jsp见到 下面的界面则是成功了
第一次刷新和第二次,就会进入不同的tomcat服务器了
完毕!
tomcat集群搭建集成nginx负载均衡的更多相关文章
- Linux 集群概念 , wsgi , Nginx负载均衡实验 , 部署CRM(Django+uwsgi+nginx), 部署学城项目(vue+uwsgi+nginx)
Linux 集群概念 , wsgi , Nginx负载均衡实验 , 部署CRM(Django+uwsgi+nginx), 部署学城项目(vue+uwsgi+nginx) 一丶集群和Nginx反向代理 ...
- rabbitmq3.6.5镜像集群搭建以及haproxy负载均衡
一.集群架构 后端75.103.69分别是3台rabbitmq节点做镜像集群,前端103用haproxy作为负载均衡器 二.安装rabbitmq节点 参照 https://www.cnblogs.co ...
- Tomcat集群搭建
关于如何搭建Tomcat集群网上还是能搜到很多相关的教程,这里结合我自己在实际应用中的操作做下备忘. 案例说明: 这里以在本机部署的2个tomcat来做集群.当然,tomcat集群可以是分布式的,而差 ...
- haproxy+tomcat集群搭建
web1和web2的部署可参考我之前的文章<Tomcat集群搭建>,这里就省去该过程了. #安装haproxy- .tar.gz cd haproxy-/ make TARGET=linu ...
- LVS集群中的IP负载均衡技术
LVS集群中的IP负载均衡技术 章文嵩 (wensong@linux-vs.org) 转自LVS官方参考资料 2002 年 4 月 本文在分析服务器集群实现虚拟网络服务的相关技术上,详细描述了LVS集 ...
- windows下Nacos集群搭建与nginx集成
前言: nacos集群至少需要三个(一般为奇数个)nacos实 例,其前面顶nginx,外界入口从nginx入 一.windows下Nacos集群搭建 将Nacos的解压包复制分成3份,分别是: na ...
- Centos下Apache+Tomcat集群--搭建记录
一.目的 利用apache的mod_jk模块,实现tomcat集群服务器的负载均衡以及会话复制,这里用到了<Cluster>. 二.环境 1.基础:3台主机,系统Centos6.5,4G内 ...
- Tomcat集群搭建超详细(apache+mod_jk+tomcat)
TOMCAT集群 目录 TOMCAT集群 1 1 集群 1 1.1 什么是集群 1 1.2 集群的特性 1 1.3 集群的分类 1 1.4 TOMCAT集群配置的优缺点 2 1.5 APACHE+TO ...
- 转载-lvs官方文档-LVS集群中的IP负载均衡技术
章文嵩(wensong@linux-vs.org) 2002 年 4 月 本文在分析服务器集群实现虚拟网络服务的相关技术上,详细描述了LVS集群中实现的三种IP负载均衡技术(VS/NAT.VS/TUN ...
随机推荐
- DC-8靶机渗透实战
前言: 本文将讲述通过信息收集,再web站点的sql注入漏洞加john爆破登录后台,然后找到远程代码执行漏洞getshell,最后用exim4命令提权漏洞进行权限提升拿到最终的flag. 0x00 环 ...
- WIN10开启FTP(完整版)
1.控制面板 --> 程序--> 启用或关闭windows功能 2.左下角搜索栏搜索IIS(iis) 3.右键添加FTP站点 4.创建站点名字和目录 5.绑定本机IP地址,SSL勾选无SS ...
- cocos studio 中交互性
cocos studio 属性->常规->交互性,勾选之后相当于代码中的setTouchEnabled(true)
- 【巨杉数据库SequoiaDB】巨杉数据库无人值守智能自动化测试实践
刚刚过去的春节,新型冠状病毒疫情突如其来地横扫大江南北.为了响应国家号召,许多软件公司和互联网公司也将在较长一段时间内建议员工采取远程办公的方式,同时也存在骨干工程师无法及时返岗的问题,使得生产力大受 ...
- JavaDay10(上)
Java learning_Day10(上) 本人学习视频用的是马士兵的,也在这里献上 <链接:https://pan.baidu.com/s/1qKNGJNh0GgvlJnitTJGqgA&g ...
- LeetCode 160. 相交链表 (找出两个链表的公共结点)
题目链接:https://leetcode-cn.com/problems/intersection-of-two-linked-lists/ 编写一个程序,找到两个单链表相交的起始节点. 如下面的两 ...
- Codeforces Round #622 (Div. 2) C2 - Skyscrapers (hard version) 单调栈
从左往右扫,找到比第i个小的第一个数字,l[i] = l[last] + (i - last) * m[i],用单调栈O(n)维护这个过程,再从右往左扫,同理可以算出r数组,注意一下long long ...
- 1级搭建类108-Oracle 11gR2 SI FS(Windows Server 2019)公开
Oracle 11gR2 单实例文件系统在Windows Server 2019上的安装 在线查看
- GYCTF Node game
考点: NodeJS 代码审计 SSRF 请求夹带 复现: 不太懂js,先留着吧,学懂了再记录
- Flask之RESTFul API前后端分离
Flask之RESTFul API前后端分离 一:虚拟环境搭建的两种方式 1 pipenv的使用 pip install --user pipenv安装pipenv在用户目录下 py -m site ...