React Native初探
前言
很久之前就想研究React Native了,但是一直没有落地的机会,我一直认为一个技术要有落地的场景才有研究的意义,刚好最近迎来了新的APP,在可控的范围内,我们可以在上面做任何想做的事情。
PS:任何新技术的尝鲜都一定要控制在自己能控制的范围内,失败了会有可替换方案,不要引起不可逆的问题,这样会给团队造成灾难性的后果。
事实上,RN经过一段时间发展,已经有充分数量的人尝试过了,就我身边就有几批,褒贬也不一:
① 做UI快
② 还是有很多限制,不如原生Native
③ 入门简单,能让前端快速开发App
④ iOS&Android大部分代码通用
⑤ code-push能做热更新,但是用不好依旧坑
......
在得到一些信息后,可以看出,要用RN高效率的做出比较不错的App是有可能的,单看投入度与最初设计是否合理,而且现在关于React Native的各种文档是相当丰富的,所以这个阶段想切入RN可能是一个不错的选择。
带着试试不吃亏的想法,我们开始今天的学习,这里是一些比较优质的学习资料:
https://github.com/reactnativecn/react-native-guide
准备阶段
搭建开发环境
http://reactnative.cn/docs/0.36/getting-started.html
官方的例子其实写的很好了,我照着官方的例子能很好的跑起来,大家自己去看看吧
这里在运行时候要注意一下,我因为开启了翻墙工具,一运行就crash,这里猜测是翻(科学上网法)墙工具对localhost造成了影响,导致不能读取文件,这个可能涉及到RN底层实现,我们后面深入了再去做研究,这里关闭翻墙工具即可。
然后第二个问题,是http的图片展示不出来,这里折腾了很久,却发现后面的章节有了说明,app默认只支持https的链接,这里大家改下配置即可:
https://segmentfault.com/a/1190000002933776
RN中的js使用的是比较新的语法,这里也需要大家进行学习,我学习的感受是ES6提供了很多语法糖,但是有几个东西也要注意。
Class
JavaScript之前的继承全部是复写原型链模拟实现的,作为大型应用框架,继承是必不可少的,所以ES6直接将这块API化了,我这里写一个简单的demo:
 class Animal {

     constructor(name) {

         this.name = name;

     }

     say() {

         console.log('我是' + this.name);

     }

 }

 class Person extends Animal {

     say() {

         console.log('我是人类');

         super.say();

     }

 }

 var p = new Person('叶小钗')

 p.say();
 /*

  我是人类

  我是叶小钗

  */
Module
我们一般使用requireJS解决模块化的问题,在ES6里面提出了Module功能在官方解决了模块化的问题,这里优缺点不是我们考虑的重点,简单了解下语法,两个核心为:
① export
② import
ES6以一个文件为单位,一个文件可以多个输出,这里以RN的一个引用为例:
 import React, { Component } from 'react';

 import {

   AppRegistry,

   StyleSheet,

   Text,

   View

 } from 'react-native';

 import styles from './static/style/styles.js';
可以假想,这里一定会有一个react文件,并且里面可能是这个样式的:
export default class React......

expoet class Component ......
PS:一个文件只能有一个default
输出的default一定会出现,不使用大括号包裹,其余部分随意输出,这里与我们使用require或有不同,需要注意。
应该说ES6提供了很多语法糖,有人喜欢,有人不喜欢,这个看爱好使用吧,比如=>箭头函数。了解了以上关系,再配合ES6的一些文档,基本可以写RN的代码了。
城市列表
拆分目录
这里,我们做一个城市列表,真实的访问接口获取数据,然后渲染页面,看看做出来效果如何。
首先,我们初始化一个RN项目:
react-native init Citylist
然后使用Xcode打开iOS中的项目,编译运行:
 import React, { Component } from 'react';

 import {

   AppRegistry,

   StyleSheet,

   Text,

   View

 } from 'react-native';

 export default class Citylist extends Component {

   render() {

     return (

       <View style={styles.container}>

         <Text style={styles.welcome}>

           Welcome to React Native!

         </Text>

         <Text style={styles.instructions}>

           To get started, edit index.ios.js

         </Text>

         <Text style={styles.instructions}>

           Press Cmd+R to reload,{'\n'}

           Cmd+D or shake for dev menu

         </Text>

       </View>

     );

   }

 }

 const styles = StyleSheet.create({

   container: {

     flex: 1,

     justifyContent: 'center',

     alignItems: 'center',

     backgroundColor: '#F5FCFF',

   },

   welcome: {

     fontSize: 20,

     textAlign: 'center',

     margin: 10,

   },

   instructions: {

     textAlign: 'center',

     color: '#333333',

     marginBottom: 5,

   },

 });

 AppRegistry.registerComponent('Citylist', () => Citylist);

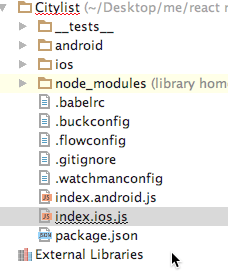
这里除了index.io.js,其他文件我们不必理睬,我们做的第一件事情是,将样式文件剥离出去,新建static文件夹,加入images和style,将样式文件移入style文件,新建style.js:
 import {

     StyleSheet

 } from 'react-native';

 export let styles = StyleSheet.create({

     container: {

         flex: 1,

         justifyContent: 'center',

         alignItems: 'center',

         backgroundColor: '#F5FCFF',

     },

     welcome: {

         fontSize: 20,

         textAlign: 'center',

         margin: 10,

     },

     instructions: {

         textAlign: 'center',

         color: '#333333',

         marginBottom: 5,

     },

 });
然后首页代码再做一些改动:
 import React, { Component } from 'react';

 import {

   AppRegistry,

   Text,

   View

 } from 'react-native';

 import {styles} from './static/style/style';

 export default class Citylist extends Component {

   render() {

     return (

       <View style={styles.container}>

         <Text style={styles.welcome}>

           Welcome to React Native!

         </Text>

         <Text style={styles.instructions}>

           To get started, edit index.ios.js

         </Text>

         <Text style={styles.instructions}>

           Press Cmd+R to reload,{'\n'}

           Cmd+D or shake for dev menu

         </Text>

       </View>

     );

   }

 }

 AppRegistry.registerComponent('Citylist', () => Citylist);
PS:这里有一个箭头函数
 () => Citylist

 //===>

 function () {

   return Citylist;

 }
静态资源剥离后,我们先不处理其它的,我们来做数据请求。
数据请求
RN虽然内置了ajax库,但是一般推荐使用RN自带的Fetch,最简单的使用是:
fetch('https://mywebsite.com/mydata.json')
PS:我们在学习RN的时候,也是在学习神马方式是适合的,或者说熟悉使用合适的组件
请求一个接口是这样写的(使用promise):
 fetch('https://apikuai.baidu.com/city/getstartcitys')

 .then((response) => response.json())

 .then((jsonData) => {

   console.log(jsonData);

 })

 .catch((e) => {

   console.log(e)

 })
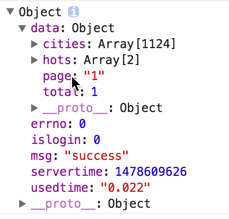
这里打开调试环境一看,输出了我们要的数据:
一般来说,我们需要对数据请求应该封装为一个底层库,这里只做一些简单改造,真实项目不会这样做:
 export default class Citylist extends Component {

   getdata(url, suc, err) {

     return fetch(url)

       .then((response) => response.json())

       .then((data) => {

         if(data.errno == 0) {

           suc && suc(data.data)

         }

       })

       .catch((e) => {

           console.log(e)

       });

   }

   render() {

     this.getdata('https://apikuai.baidu.com/city/getstartcitys', function(data) {

       s = ''

     });

     return (

       <View style={styles.container}>

         <Text style={styles.welcome}>

           Welcome to React Native!

         </Text>

         <Text style={styles.instructions}>

           To get started, edit index.ios.js

         </Text>

         <Text style={styles.instructions}>

           Press Cmd+R to reload,{'\n'}

           Cmd+D or shake for dev menu

         </Text>

       </View>

     );

   }

 }
PS:这里的使用不一定正确,先完成功能再改进吧
我们取所有的城市cities,这个数据量很大,有1000多条记录,也可以测试下拖动效率了,这里为类加入构造函数,因为列表是可变的,暂时把列表数据归为state(react也不是太熟,如果有问题后续优化,先完成功能):
 constructor(props) {

   super(props);

   this.state = {

     cities: []

   };

 }
 var scope = this;

 //本来想使用箭头函数的,但是了解不太清楚,demo时候暂时这样吧

 this.getdata('https://apikuai.baidu.com/city/getstartcitys', function(data) {

   scope.state.citys = data.cities;

 });
列表渲染
处理了数据问题后,我们开始做列表渲染,这里使用ListView组件,这个组件用以显示一个垂直滚动列表,适合长列表,两个必须的属性是datasource和renderRow:
dataSource:列表数据源
renderRow:逐个解析数据源中的数据,然后返回一个设定好的格式来渲染
简单书写代码:
 export default class Citylist extends Component {

   constructor(props) {

     super(props);

     this.ds = new ListView.DataSource({rowHasChanged: (r1, r2) => r1 !== r2});

     this.state = {

       cities: this.ds.cloneWithRows([

           {cnname

               :

               "文山壮族苗族自治州",

               enname

                   :

                   "wszzmzzzz",

               extflag

                   :

                   "1",

               flag

                   :

                   "0",

               name

                   :

                   "wenshanzhuangzumiaozuzizhizhou",

               parentid

                   :

                   "28",

               regionid

                   :

                   "177",

               shortname

                   :

                   "文山",

               shownname

                   :

                   "文山",

               type

                   :

                   "2"},{cnname

               :

               "文山壮族苗族自治州",

               enname

                   :

                   "wszzmzzzz",

               extflag

                   :

                   "1",

               flag

                   :

                   "0",

               name

                   :

                   "wenshanzhuangzumiaozuzizhizhou",

               parentid

                   :

                   "28",

               regionid

                   :

                   "177",

               shortname

                   :

                   "文山",

               shownname

                   :

                   "文山",

               type

                   :

                   "2"}

       ])

     };

   }

   getdata(url, suc, err) {

     return fetch(url)

     .then((response) => response.json())

     .then((data) => {

       if(data.errno == 0) {

         suc && suc(data.data)

       }

     })

     .catch((e) => {

         console.log(e)

     });

   }

   componentDidMount(){

     var scope = this;

     this.getdata('https://apikuai.baidu.com/city/getstartcitys', function(data) {

         console.log(data)

         scope.setState({

             cities: scope.ds.cloneWithRows(data.cities)

         });

         //scope.state.citys = data.cities;

         //this.getdata('https://apikuai.baidu.com/city/getstartcitys', (data) => {

         //  this.state.citys = data.cities;

         //});

     });

   }

   render() {

     return (

       <View style={styles.container}>

           <ListView

               dataSource={this.state.cities}

               renderRow={(rowData) => <Text>{rowData.cnname}</Text>}

           />

       </View>

     );

   }

 }
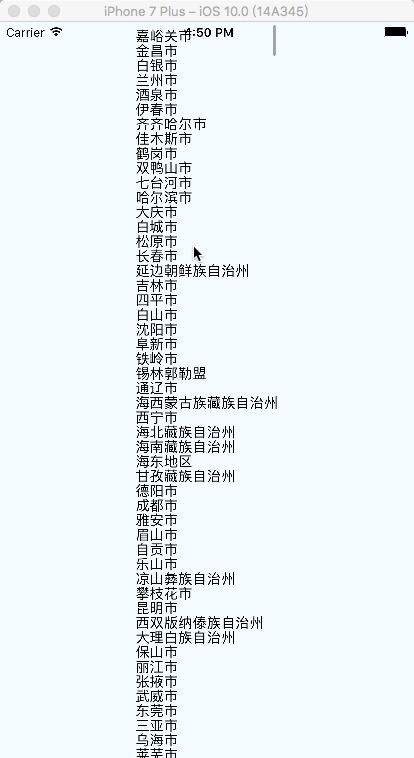
然后就这样了,虽然丑是丑点,但是还能看嘛,这里我们先不去理睬城市的排序,也不做搜索功能,我们先把布局处理下,他的丑陋我已经受不了了
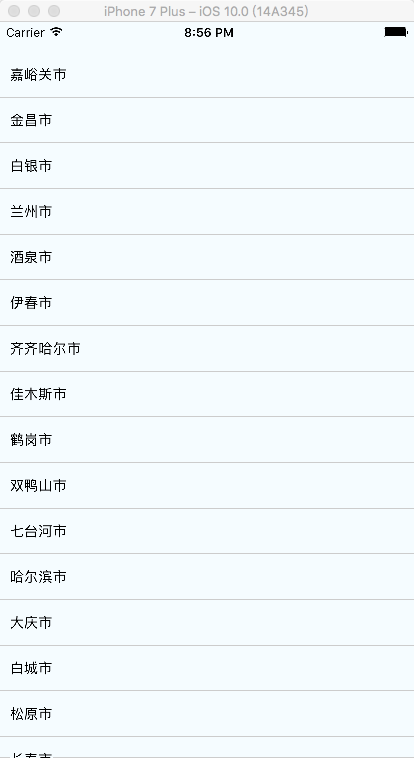
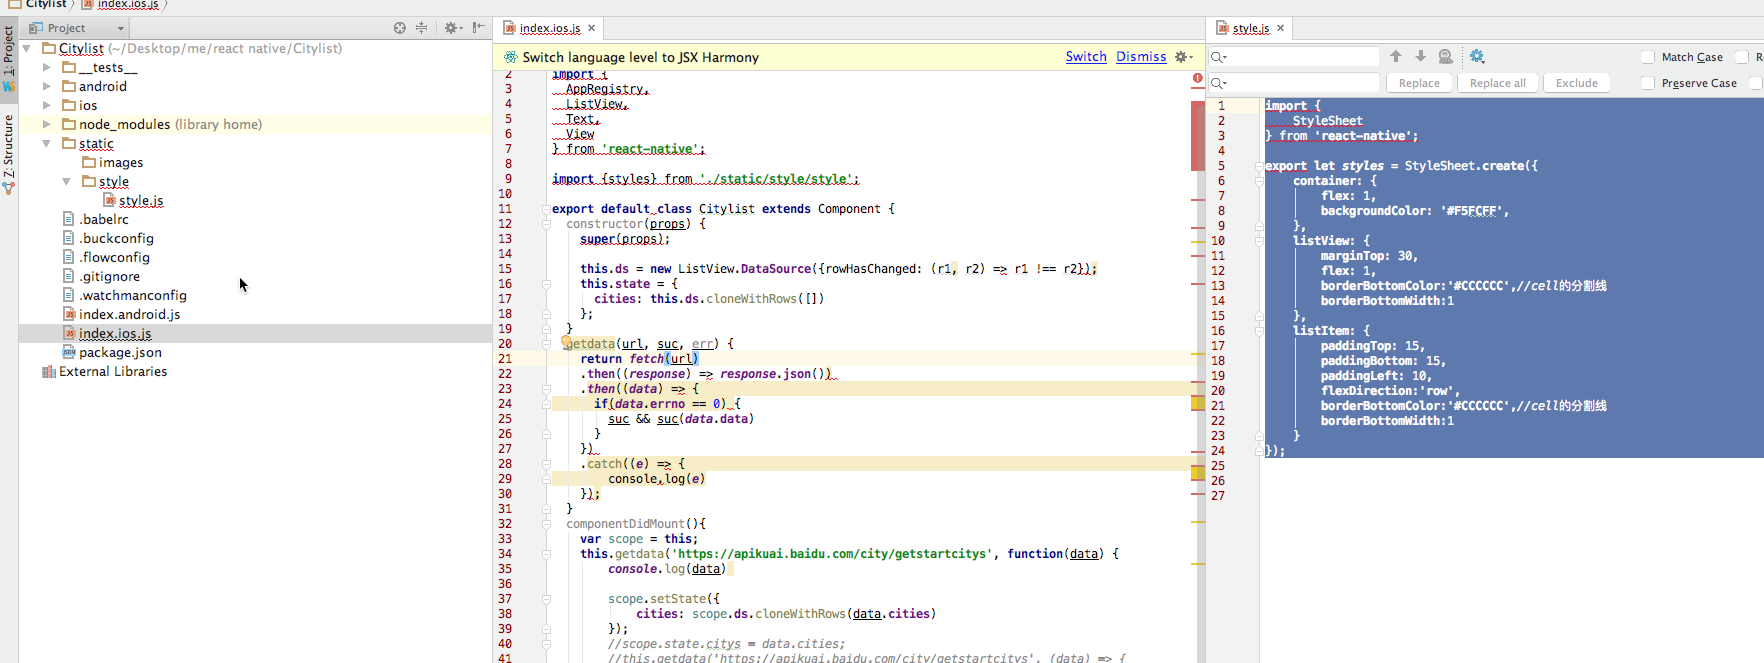
样式处理
现在我们开始处理这段样式:
 import React, { Component } from 'react';

 import {

   AppRegistry,

   ListView,

   Text,

   View

 } from 'react-native';

 import {styles} from './static/style/style';

 export default class Citylist extends Component {

   constructor(props) {

     super(props);

     this.ds = new ListView.DataSource({rowHasChanged: (r1, r2) => r1 !== r2});

     this.state = {

       cities: this.ds.cloneWithRows([])

     };

   }

   getdata(url, suc, err) {

     return fetch(url)

     .then((response) => response.json())

     .then((data) => {

       if(data.errno == 0) {

         suc && suc(data.data)

       }

     })

     .catch((e) => {

         console.log(e)

     });

   }

   componentDidMount(){

     var scope = this;

     this.getdata('https://apikuai.baidu.com/city/getstartcitys', function(data) {

         console.log(data)

         scope.setState({

             cities: scope.ds.cloneWithRows(data.cities)

         });

         //scope.state.citys = data.cities;

         //this.getdata('https://apikuai.baidu.com/city/getstartcitys', (data) => {

         //  this.state.citys = data.cities;

         //});

     });

   }

   render() {

     return (

       <View style={styles.container}>

           <ListView style={styles.listView} enableEmptySections={true}

               dataSource={this.state.cities}

               renderRow={(rowData) =>

               <View style={styles.listItem} >

                   <Text>{rowData.cnname}</Text>

               </View>

               }

           />

       </View>

     );

   }

 }

 AppRegistry.registerComponent('Citylist', () => Citylist);
 import {

     StyleSheet

 } from 'react-native';

 export let styles = StyleSheet.create({

     container: {

         flex: 1,

         backgroundColor: '#F5FCFF',

     },

     listView: {

         marginTop: 30,

         flex: 1,

         borderBottomColor:'#CCCCCC',//cell的分割线

         borderBottomWidth:1

     },

     listItem: {

         paddingTop: 15,

         paddingBottom: 15,

         paddingLeft: 10,

         flexDirection:'row',

         borderBottomColor:'#CCCCCC',//cell的分割线

         borderBottomWidth:1

     }

 });
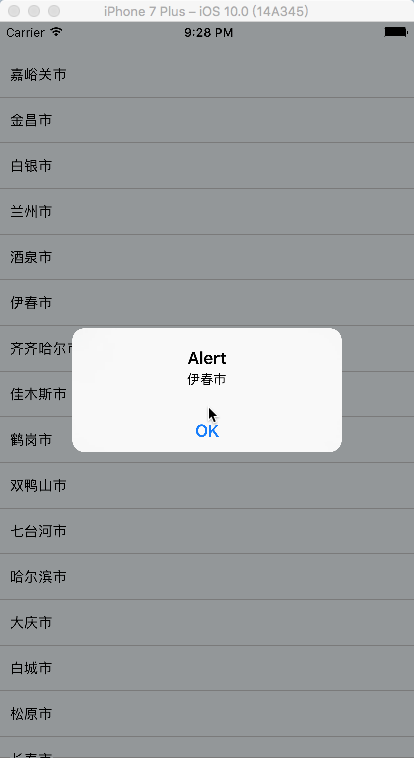
事件绑定
然后,我们再为每行数据加上点击事件,这里也做简单一点,打印出当前行的值即可:
   onPressAction(data){

     alert(data.cnname)

   }

   render() {

     return (

       <View style={styles.container}>

           <ListView style={styles.listView} enableEmptySections={true}

               dataSource={this.state.cities}

               renderRow={(rowData) =>

               <View style={styles.listItem}  >

                   <Text onPress={() => this.onPressAction(rowData)}>{rowData.cnname}</Text>

               </View>

               }

           />

       </View>

     );

   }
PS:我尼玛,这个RN的学习,很大程度就是一个个API或者组件的熟悉,这块不熟悉的话,做起来恼火的很
我这里开始想给Text设置边框,怎么都不能成功,后面就加了一层View就好了,这种小细节需要多摸索,这个是最终的结构:
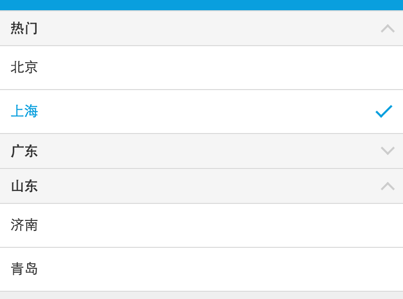
结语
作为一个demo的话,这个例子基本可以说明一些问题的,虽然我本意是想做成这个样子的:)
通过这个例子,我们简单的学习了下RN的开发模式,做出来的感受是Facebook很强大,做了一个体系性的东西,举个例子来说(个人感受)
之前我们做Hybrid的时候Header是Native提供的,大概做法是这样的:
 //Native以及前端框架会对特殊tagname的标识做默认回调,如果未注册callback,或者点击回调callback无返回则执行默认方法

 //back前端默认执行History.back,如果不可后退则回到指定URL,Native如果检测到不可后退则返回Naive大首页

 //home前端默认返回指定URL,Native默认返回大首页

 this.header.set({

     left: [

         {

             //如果出现value字段,则默认不使用icon

             tagname: 'back',

             value: '回退',

             //如果设置了lefticon或者righticon,则显示icon

             //native会提供常用图标icon映射,如果找不到,便会去当前业务频道专用目录获取图标

             lefticon: 'back',

             callback: function () { }

         }

     ],

     right: [

         {

             //默认icon为tagname,这里为icon

             tagname: 'search',

             callback: function () { }

         },

     //自定义图标

         {

             tagname: 'me',

             //会去hotel频道存储静态header图标资源目录搜寻该图标,没有便使用默认图标

             icon: 'hotel/me.png',

             callback: function () { }

         }

     ],

     title: 'title',

     //显示主标题,子标题的场景

     title: ['title', 'subtitle'],

     //定制化title

     title: {

         value: 'title',

         //标题右边图标

         righticon: 'down', //也可以设置lefticon

         //标题类型,默认为空,设置的话需要特殊处理

         //type: 'tabs',

         //点击标题时的回调,默认为空

         callback: function () { }

     }

 });
通过这个约定,我们的Native就会生成一系列headerUI:

而RN做了什么呢,他可能是实现了一个这样的标签(或者说是语法糖):
<Header title="" right="[]" ></Header>
然后RN会自己去解析这个标签,生成上述的对象,然后生成Native的UI,这个我们其实也能做到,但是我们一个能做到,10个就不一定做得到了,RN牛的地方就牛在他提供了这么大一坨东西:
然后还有他一整套的样式体系,非常之大手笔,而通过RN的完善约定,生成了一套NativeUI,应该说来体验是非常高的,开发效率因为可以做到大部分iOS Android通用,虽然整体开发效率无法与Hybrid比肩,但绝对有其应用场景。
我们也有一些同事说了一些RN的问题,但是框架在发展,容器在优化,这些问题在某个时间点应该能解决的,总的说来,RN还是很有学习的价值,后面我可能会花很多功夫去进行落地!!!
为了汇集资源,这里引用这里的学习资源:https://github.com/reactnativecn/react-native-guide
React Native
构建 Facebook F8 2016 App / React Native 开发指南 http://f8-app.liaohuqiu.net/
React-Native入门指南 https://github.com/vczero/react-native-lesson
30天学习React Native教程 https://github.com/fangwei716/30-days-of-react-native
React-Native视频教程(部分免费) https://egghead.io/technologies/react
React Native 开发培训视频教程(中文|免费) https://www.gitbook.com/book/unbug/react-native-training/details
react-native 官方api文档 http://facebook.github.io/react-native/docs/getting-started.html
react-native中文文档(极客学院) http://wiki.jikexueyuan.com/project/react-native/
react-native中文文档(react native中文网,人工翻译,官网完全同步) http://react-native.cn/docs/getting-started.html
react-native第一课 http://html-js.com/article/2783
深入浅出 React Native:使用 JavaScript 构建原生应用 http://zhuanlan.zhihu.com/FrontendMagazine/19996445
React Native通信机制详解 http://blog.cnbang.net/tech/2698/
React Native布局篇 https://segmentfault.com/a/1190000002658374
React Native 基础练习指北(一) https://segmentfault.com/a/1190000002645929
React Native 基础练习指北(二) https://segmentfault.com/a/1190000002647733
Diary of Building an iOS App with React Native http://herman.asia/building-a-flashcard-app-with-react-native
React Native For Beginners – The Next Big Thing? https://devdactic.com/react-native-for-beginners/
How To Implement A Tab Bar With React Native https://devdactic.com/react-native-tab-bar/
tcomb-form-native使用视频教程(需翻墙) https://react.rocks/example/tcomb-form-native
React Native分享记录 https://segmentfault.com/a/1190000002678782
React Native构建本地视图组件 https://www.dobest.me/article/11
react-native-android-lession(安卓系列教程) https://github.com/yipengmu/react-native-android-lession
React Native模块桥接详解 https://www.dobest.me/article/14
React Native: 配置和起步 http://www.liaohuqiu.net/cn/posts/react-native-1/
React Native: Android 的打包 http://www.liaohuqiu.net/cn/posts/react-native-android-package/
ReactNative之原生模块开发并发布——iOS篇 http://www.liuchungui.com/blog/2016/05/02/reactnativezhi-yuan-sheng-mo-kuai-kai-fa-bing-fa-bu-iospian/
ReactNative之原生模块开发并发布——android篇 http://www.liuchungui.com/blog/2016/05/08/reactnativezhi-yuan-sheng-mo-kuai-kai-fa-bing-fa-bu-androidpian/
react-native的第一课 https://github.com/coderyi/blog/blob/master/articles/2016/0122_react-native_first_lesson.md
React-Native专题系列文章 http://www.lcode.org/react-native/
React.js
react.js中文文档 http://reactjs.cn/
react.js入门教程(gitbook) https://hulufei.gitbooks.io/react-tutorial/content/introduction.html
react.js快速入门教程 - 阮一峰 http://www.ruanyifeng.com/blog/2015/03/react.html
react.js视频教程 http://react-china.org/t/reactjs/584
React Native之React速学教程https://github.com/crazycodeboy/RNStudyNotes/tree/master/React%20Native%E4%B9%8BReact%E9%80%9F%E5%AD%A6%E6%95%99%E7%A8%8B
ES6
深入浅出ES6(一):ES6是什么 http://www.infoq.com/cn/articles/es6-in-depth-an-introduction
深入浅出ES6(二):迭代器和for-of循环 http://www.infoq.com/cn/articles/es6-in-depth-iterators-and-the-for-of-loop
深入浅出ES6(三):生成器 Generators http://www.infoq.com/cn/articles/es6-in-depth-generators
深入浅出ES6(四):模板字符串 http://www.infoq.com/cn/articles/es6-in-depth-template-string
深入浅出ES6(五):不定参数和默认参数 http://www.infoq.com/cn/articles/es6-in-depth-rest-parameters-and-defaults
系列教程
深入浅出React(一):React的设计哲学 - 简单之美 http://www.infoq.com/cn/articles/react-art-of-simplity
深入浅出React(二):React开发神器Webpack http://www.infoq.com/cn/articles/react-and-webpack
深入浅出React(三):理解JSX和组件 http://www.infoq.com/cn/articles/react-jsx-and-component
深入浅出React(四):虚拟DOM Diff算法解析 http://www.infoq.com/cn/articles/react-dom-diff
深入浅出React(五):使用Flux搭建React应用程序架构 http://www.infoq.com/cn/articles/react-flux
react-webpack-cookbook中文版 http://fakefish.github.io/react-webpack-cookbook/
Flex 布局语法教程 http://www.ruanyifeng.com/blog/2015/07/flex-grammar.html
React虚拟DOM浅析 http://www.alloyteam.com/2015/10/react-virtual-analysis-of-the-dom/
react组件间通信 http://www.alloyteam.com/2015/07/react-zu-jian-jian-tong-xin/
React 数据流管理架构之 Redux 介绍 http://www.alloyteam.com/2015/09/react-redux/
React服务器端渲染实践小结 http://www.alloyteam.com/2015/10/8783/
React Native Android 踩坑之旅 http://www.alloyteam.com/2015/10/react-native-android-steps-on-tour/
React Native 之 JSBridge http://www.alloyteam.com/2015/05/react-native-zhi-jsbridge/
React Native 研究与实践教程 https://github.com/crazycodeboy/RNStudyNotes
React Native探索系列教程
React Native探索(一):背景、规划和风险 http://www.infoq.com/cn/articles/react-native-overview
React Native探索(二):布局篇 http://www.infoq.com/cn/articles/react-native-layout
React Native探索(三):与 react-web 的融合 http://www.infoq.com/cn/articles/react-native-web
开源APP
研究源码也是一个很好的学习方式
官方演示App https://github.com/facebook/react-native/tree/master/Examples
Facebook F8 App https://github.com/fbsamples/f8app
GitHub Popular(一个用来查看GitHub最受欢迎与最热项目的App)已上架https://github.com/crazycodeboy/GitHubPopular
奇舞周刊 iOS 版(上架应用) https://github.com/fakefish/Weekly75
react-native-dribbble-app https://github.com/catalinmiron/react-native-dribbble-app
Gank.io客户端 https://github.com/Bob1993/React-Native-Gank
Mdcc客户端(优质) https://github.com/Bob1993/mdcc-client
Leanote for iOS(云笔记) https://github.com/leanote/leanote-ios-rn
ReactNativeRubyChina https://github.com/henter/ReactNativeRubyChina
HackerNews-React-Native https://github.com/iSimar/HackerNews-React-Native
React-Native新闻客户端 https://github.com/tabalt/ReactNativeNews
newswatch(新闻客户端) https://github.com/bradoyler/newswatch-react-native
buyscreen(购买页面) https://github.com/appintheair/react-native-buyscreen
react-native-todo https://github.com/joemaddalone/react-native-todo
react-native-beer https://github.com/muratsu/react-native-beer
react-native-stars https://github.com/86/react-native-stars
模仿天猫首页的app https://github.com/hugohua/react-native-demo
ReactNativeChess https://github.com/csarsam/ReactNativeChess
react native 编写的音乐软件 https://github.com/Johnqing/miumiu
react-native-pokedex https://github.com/ababol/react-native-pokedex
CNode-React-Native https://github.com/SFantasy/CNode-React-Native
8tracks电台客户端 https://github.com/voronianski/EightTracksReactNative
React-Native实现的计算器 https://github.com/yoxisem544/Calculator-using-React-Native
房产搜索app https://github.com/jawee/react-native-PropertyFinder
ForeignExchangeApp https://github.com/peralmq/ForeignExchangeApp
Segmentfault 客户端 https://github.com/fakefish/sf-react-native
Den - 房屋销售app* https://github.com/asamiller/den
Noder-cnodejs客户端 https://github.com/soliury/noder-react-native
知乎日报Android版 https://github.com/race604/ZhiHuDaily-React-Native
ziliun-react-native https://github.com/sonnylazuardi/ziliun-react-native
react-native-weather-app https://github.com/shevawen/react-native-weather-app
React Native Sample App(Navigation,Flux) https://github.com/taskrabbit/ReactNativeSampleApp
TesterHome社区app https://github.com/qddegtya/A-ReactNative-TesterHome
Finance - 股票报价app https://github.com/7kfpun/FinanceReactNative
shopping - 购物app https://github.com/bigsui/shopping-react-native
zhuiyuan - 追源cms app https://github.com/kazaff/ZhuiYuanDemo
uestc-bbs-react-native - UESTC清水河畔RN客户端(with Redux) https://github.com/just4fun/uestc-bbs-react-native
react-native-nw-react-calculator(iOS/Android、Web、桌面多端) https://github.com/benoitvallon/react-native-nw-react-calculator
react-native-nba-app https://github.com/wwayne/react-native-nba-app
开源中国的Git@OSC客户端 http://git.oschina.net/rplees/react-native-gitosc
rn_bycloud 帮瀛律师端app https://github.com/liuchungui/rn_bycloud
ReactNativeRollingExamples - react-native的一些example https://github.com/joggerplus/ReactNativeRollingExamples
Reading App Write In React-Native(Studying and Programing https://github.com/attentiveness/reading
数独 - 重拾纯粹数独的乐趣 https://github.com/nihgwu/react-native-sudoku
Shop-React-Native https://github.com/EleTeam/Shop-React-Native
图书
《React Native入门与实战》 http://item.jd.com/11844102.html
《React Native开发指南》 http://www.ituring.com.cn/book/1846
《React Native跨平台移动应用开发》 http://item.jd.com/10372998311.html
《React Native:用JavaScript开发移动应用》 http://item.jd.com/11785195.html
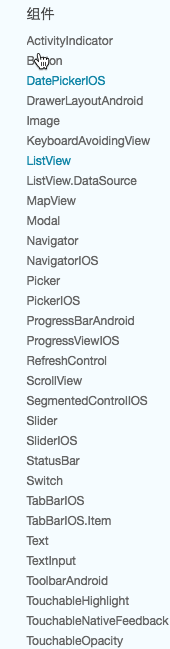
组件
由于已经有较好的组件库网站,这里就不做总结。可以直接查看如下网站,过后可能精选一部分优质组件出来 :P
React-native组件库(比较全的组件库) https://js.coach/
React Native Modules http://reactnativemodules.com/
react-native-simple-router https://github.com/react-native-simple-router-community/react-native-simple-router
react-native-router-flux https://github.com/aksonov/react-native-router-flux
下拉刷新组件 https://github.com/jsdf/react-native-refreshable-listview
react-native-navbar https://github.com/react-native-fellowship/react-native-navbar
滚动轮播组件 https://github.com/appintheair/react-native-looped-carousel
Material React Native (MRN) - Material Design组件库 https://github.com/binggg/mrn
react-native-gitfeed - GitHub客户端(iOS/Android) https://github.com/xiekw2010/react-native-gitfeed
React-Native-Elements - React Native样式组件库 https://github.com/react-native-community/React-Native-Elements
Shoutem UI - React Native样式组件库 https://github.com/shoutem/ui
工具
react-native-snippets(代码提示) https://github.com/Shrugs/react-native-snippets
react-native-babel(使用ES6+) https://github.com/roman01la/react-native-babel
sqlite for react-native https://github.com/almost/react-native-sqlite
gulp-react-native-css(就像写css一样写React Style) https://github.com/soliury/gulp-react-native-css
rnpm(React Native Package Manager) https://github.com/rnpm/rnpm
Pepperoni - React Native项目初始化套件 https://github.com/futurice/pepperoni-app-kit
Deco IDE - React Native IDE https://www.decosoftware.com/
ignite - React Native CLI项目生成器 https://github.com/infinitered/ignite
资源网站
React-native官网 http://facebook.github.io/react-native/
React-China社区 http://react-china.org/
React Native中文社区 http://bbs.react-native.cn/
React-native组件库(比较全的组件库) http://react.parts/
React Native Modules http://reactnativemodules.com/
Use React Native 资讯站(使用技巧及新闻) http://www.reactnative.com/
11款React Native开源移动 UI 组件 http://www.oschina.net/news/61214/11-react-native-ui-components
稀土掘金的 React 标签 http://gold.xitu.io/#/tag/React.js http://gold.xitu.io/#/tag/React%20Native
业界讨论
跨平台开发时代的 (再次) 到来?( Xamarin,NativeScript 和 React Native 对比)http://onevcat.com/2015/03/cross-platform/
谈谈 React Native - 唐巧 http://blog.devtang.com/blog/2015/02/01/talk-about-react-native/
如何评价React-Native? https://www.zhihu.com/question/27852694/answer/43990708
React Native概述:背景、规划和风险 http://div.io/topic/938
Native与Web的融合 - Qcon中React-Native演讲 http://www.infoq.com/cn/presentations/the-fusion-of-native-and-web
使用React Native一年后的感受http://www.dobest.me/blog/2016/06/12/%E4%BD%BF%E7%94%A8React%20Native%E4%B8%80%E5%B9%B4%E5%90%8E%E7%9A%84%E6%84%9F%E5%8F%97/
Weex & ReactNative & JSPatch大对比 http://awhisper.github.io/2016/07/22/Weex-ReactNative-JSPatch/
- weex&ReactNative对比 https://zhuanlan.zhihu.com/p/21677103
React Native初探的更多相关文章
- React Native 初探
推荐文章 React Native 简介:用 JavaScript 搭建 iOS 应用 (1) React Native 简介:用 JavaScript 搭建 iOS 应用 (2) React Nat ...
- React Native IOS源码初探
原文链接 http://www.open-open.com/lib/view/open1465637638193.html 每个项目都有一个入口,然后进行初始化操作,React Native 也不例外 ...
- React Native For Android 架构初探
版权声明:本文由王少鸣原创文章,转载请注明出处: 文章原文链接:https://www.qcloud.com/community/article/171 来源:腾云阁 https://www.qclo ...
- React Native桥接器初探
本文假设你已经有一定的React Native基础,并且想要了解React Native的JS和原生代码之间是如何交互的. React Native的工作线程 shadow queue:布局在这个线程 ...
- react native 学习资料整理
入门教程 深入浅出 React Native:使用 JavaScript 构建原生应用 http://www.appcoda.com/react-native-introduction/ 中文版 h ...
- 移动应用跨平台框架江湖将现终结者?速来参拜来自Facebook的React Native
React Native使用初探 February 06 2015 Facebook让所有React Conf的参与人员都可以初尝React Native的源码---一个编写原生移动应用的方法.该方法 ...
- 最火移动端跨平台方案盘点:React Native、weex、Flutter
1.前言 跨平台一直是老生常谈的话题,cordova.ionic.react-native.weex.kotlin-native.flutter等跨平台框架的百花齐放,颇有一股推倒原生开发者的势头. ...
- React Native指南汇集了各类react-native学习资源、开源App和组件
来自:https://github.com/ele828/react-native-guide React Native指南汇集了各类react-native学习资源.开源App和组件 React-N ...
- React Native 常用学习链接地址
Android Studio下载http://www.android-studio.org/ 第二章:Android Studio概述(一)http://ask.android-studio.org/ ...
随机推荐
- Linux LVM逻辑卷配置过程详解
许多Linux使用者安装操作系统时都会遇到这样的困境:如何精确评估和分配各个硬盘分区的容量,如果当初评估不准确,一旦系统分区不够用时可能不得不备份.删除相关数据,甚至被迫重新规划分区并重装操作系统,以 ...
- IOS开发之—— 在AFN基础上进行的网络请求的封装
网络请求的思路:如果请求成功的话AFN的responseObject就是解析好的. 1发送网络请求:get/post/或者别的 带上URL,需要传的参数 2判断后台网络状态码有没有请求成功: 3 请求 ...
- ASP.NET Aries 4.0 开源发布:已完成基础功能优化重写
主要更新: 1:增加AR.Global.GetUser() 方法返回当前登陆者的用户信息. 2:重写AR.Combobox 支持下拉树. 3:调整及扩展Input下拉的配置参数. 4:优化及新增AR. ...
- asp.net pipeline完整图
- Html5 Json应用
本文主要说明Json的基本概念,和一个在Html中使用Json给元素赋值的小例子,属于基础性信息 什么是 JSON ? JSON 指的是 JavaScript 对象表示法(JavaScript Obj ...
- PHP安全之Web攻击
一.SQL注入攻击(SQL Injection) 攻击者把SQL命令插入到Web表单的输入域或页面请求的字符串,欺骗服务器执行恶意的SQL命令.在某些表单中,用户输入的内容直接用来构造(或者影响)动态 ...
- 阿里云ECS安装lnmp环境-转载自:http://ninghao.net/blog/1368
远程控制你的服务器 远程控制 Linux 类型的系统的服务器,比如 CentOS 系统的服务器,一般不像 Windows 服务器那样,使用图形界面的远程控制.我们需要使用命令行工具,远程连接到服务器, ...
- JavaScript随笔8
正则表达式: search(a);//查询a的位置 substring(2,5)//获取到2到4位 chartAt(3);//获取到第3位 split('-');//以-切分 (1) RegExp对象 ...
- 在Windows上安装Elasticsearch 5.0
在windows上安装Elasticsearch Elasticsearch可以使用.zip软件包安装在Windows上. elasticsearch-service.bat命令,它将设置Elasti ...
- 无限循环轮播图之JS部分(原生JS)
JS逻辑与框架调用, <script type="text/javascript"> var oBox = document.getElementById('box') ...