(3)安装elastic6.1.3及插件kibana,x-pack,essql,head,bigdesk,cerebro,ik
- 6安装nginx
6.1安装nginx
安装 pcre,zlib,openssl,nginx
6.2生成web访问用户密码
htpasswd –c –b /usr/local/nginx/conf/passwd/kibana.passwd user pass123
6.3 配置代理转发
vim /usr/local/nginx/conf/nginx.conf

#在配置文件末尾追加如下配置

#kibana

server {

    listen       ;

    root         /usr/local/nginx/html;

    auth_basic "Kibana Auth";

    auth_basic_user_file /usr/local/nginx/conf/passwd/kibana.passwd;

    location / {

        proxy_pass http://192.168.1.1:5601;

        proxy_redirect off;

    }

    error_page  /.html;

        location = /40x.html {

    }

    error_page     /50x.html;

        location = /50x.html {

    }

}

#cerebro

server {

    listen       ;

    root         /usr/local/nginx/html;

    auth_basic "Kibana Auth";

    auth_basic_user_file /usr/local/nginx/conf/passwd/kibana.passwd;

    location / {

        proxy_pass http://192.168.1.1:9109;

        proxy_redirect off;

    }

    error_page  /.html;

        location = /40x.html {

    }

    error_page     /50x.html;

        location = /50x.html {

    }

}

#bigdesk

server {

    listen

    root         /usr/local/nginx/html;

    auth_basic "Kibana Auth";

    auth_basic_user_file /usr/local/nginx/conf/passwd/kibana.passwd;

    location / {

        proxy_pass http://192.168.1.1:9106;

        proxy_redirect off;

    }

    error_page  /.html;

        location = /40x.html {

    }

    error_page     /50x.html;

        location = /50x.html {

    }

}

#head

server {

    listen       ;

    root         /usr/local/nginx/html;

    auth_basic "Kibana Auth";

    auth_basic_user_file /usr/local/nginx/conf/passwd/kibana.passwd;

    location / {

        proxy_pass http://192.168.1.1:9107;

        proxy_redirect off;

    }

    error_page  /.html;

        location = /40x.html {

    }

    error_page     /50x.html;

        location = /50x.html {

    }

}

#es-sql

server {

    listen       ;

    root         /usr/local/nginx/html;

    auth_basic "Kibana Auth";

    auth_basic_user_file /usr/local/nginx/conf/passwd/kibana.passwd;

    location / {

        proxy_pass http://192.168.1.1:9108;

        proxy_redirect off;

    }

    error_page  /.html;

        location = /40x.html {

    }

    error_page     /50x.html;

        location = /50x.html {

    }

}
6.4配置首页
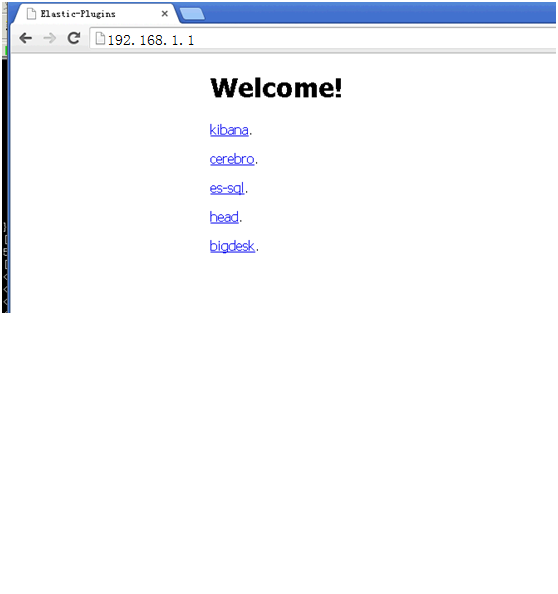
由于每个插件的端口都不同,不方便访问。自己做了一个首页来访问插件。
修改index.html
vim /usr/local/nginx/html/index.html
<!DOCTYPE html>

<html>

<head>

<title>Elastic-Plugins</title>

<style>

    body {

        width: 35em;

        margin:  auto;

        font-family: Tahoma, Verdana, Arial, sans-serif;

    }

</style>

</head>

<body>

<h1>Welcome!</h1>

<p>

<a href="http://10.16.29.202:8890">kibana</a>.<br/>

<p>

<a href="http://10.16.29.202:8889">cerebro</a>.<br/>

<p>

<a href="http://10.16.29.202:8888">es-sql</a>.<br/>

<p>

<a href="http://10.16.29.202:8887">head</a>.<br/>

<p>

<a href="http://10.16.29.202:8886">bigdesk</a>.<br/>

<p>

<a href="http://10.16.29.202:8885">HQ</a>.<br/>

</body>

</html>
6.5启动nginx
/usr/local/nginx/sbin/nginx -c /usr/local/nginx/conf/nginx.conf
6.6访问nginx主页,使用插件。密码验证:用户user密码pass123
6.7安装遇到问题:
Nginx: error while loading shared libraries: libpcre.so.1解决
解决办法:
http://blog.csdn.net/ystyaoshengting/article/details/50504746
问题分析:
在redhat 64位机器上, nginx可能读取的pcre文件为/lib64/libpcre.so.1文件.
所以需要在/lib64/下建立软连接:
ln -s /usr/local/lib/libpcre.so. /lib64/
- 7x-pack破解
7.1创建LicenseVerifier.java文件
package org.elasticsearch.license;

    import java.nio.*;

    import java.util.*;

    import java.security.*;

    import org.elasticsearch.common.xcontent.*;

    import org.apache.lucene.util.*;

    import org.elasticsearch.common.io.*;

    import java.io.*;

    public class LicenseVerifier

    {

    public static boolean verifyLicense(final License license, final byte[] encryptedPublicKeyData) {

        return true;

        }

    public static boolean verifyLicense(final License license) {

        return true;

        }

    }
7.2编译LicenseVerifier.class
javac -cp "/home/ilog/elasticsearch-6.1.3/lib/elasticsearch-6.1.3.jar:/home/ilog/elasticsearch-6.1.3/lib/lucene-core-7.1.0.jar:/home/ilog/elasticsearch-6.1.3/plugins/x-pack/x-pack-6.1.3.jar" LicenseVerifier.java
7.3重新打包x-pack- 6.1.3.jar
解压x-pack/x-pack-6.1.3.jar包,替换jar包中的LicenseVerifier.class文件,重新打包
#创建temp-dir临时目录,解压jar包到临时目录
mkdir temp-jar

cp /home/ilog/elasticsearch-6.1./plugins/x-pack/x-pack-6.1..jar temp-jar

cd temp-jar

jar -xvf x-pack-6.1..jar

rm -rf x-pack-6.1..jar

#拷贝自己创建的class文件到org/elasticsearch/license/目录

cp LicenseVerifier.class org/elasticsearch/license/

#重新打包

jar -cvf x-pack-6.1..jar ./*

#将jar包覆盖到原目录

cp x-pack-6.1.3.jar /home/ilog/elasticsearch-6.1.3/plugins/x-pack/x-pack-6.1.3.jar
7.4重启elastic和kibana
bin/elasticsearch -d

bin/kibana &
7.5创建license文件,并上传(白金版,license到2050年)
vim platimum.json

{"license":{"uid":"e77971c5-c37e-42c8-b622-c22a9f9ee51c","type":"platinum","issue_date_in_millis":,"expiry_date_in_millis":,"max_nodes":,"issued_to":"user123","issuer":"Web Form","signature":"abcdef","start_date_in_millis":}}
7.6登录kibana上传license页面,上传license文件。
license上传地址:http://192.168.1.1:5601/app/kibana#/management/elasticsearch/license_management/upload_license
- 8生产环境没有互联网如何安装elastic插件
遇到的问题:安装npm,grunt需要联网,x-pack安装需要联网。其他都可以离线安装。
解决问题前提条件:有可以上网的测试机器。在测试环境上按以上步骤安装完所有插件
解决办法:
8.1在测试环境安装x-pack后,打包安装x-pack后的elastic目录,放到生产环境使用即可
8.2在测试环境安装node后,打包整个node目录,拷贝到生产环境,配置环境变量,即可使用node和grunt来启动essql和head
(3)安装elastic6.1.3及插件kibana,x-pack,essql,head,bigdesk,cerebro,ik的更多相关文章
- (1)安装elastic6.1.3及插件kibana,x-pack,essql,head,bigdesk,cerebro,ik
1.安装环境及程序版本 操作系统: centos6.7 jdk: 1.8.0_102 elastic: 1.6.3 kibana: 1.6.3 x-pack: 1.6.3 es-sql: 1.6.3 ...
- (2)安装elastic6.1.3及插件kibana,x-pack,essql,head,bigdesk,cerebro,ik
5.2kibana安装 5.2.1解压kibana安装包,修改config/kibana.yml中端口,服务器地址,elastic连接地址 -linux-x86_64.tar.gz cd kibana ...
- aws ec2 安装Elastic search 7.2.0 kibana 并配置 hanlp 分词插件
文章大纲 Elastic search & kibana & 分词器 安装 版本控制 下载地址 Elastic search安装 kibana 安装 分词器配置 Elastic sea ...
- ELK安装和配置及常用插件安装
环境 CentOS 7.3 root 用户 JDK 版本:1.8(最低要求),主推:JDK 1.8.0_121 以上 关闭 firewall systemctl stop firewalld.serv ...
- Sublime Text 2安装汉化破解、插件包安装教程
原文地址: Sublime Text 2安装汉化破解.插件包安装教程_百度经验 http://jingyan.baidu.com/article/ff4116259b057c12e48237b8.ht ...
- eclipse安装Veloeclipse(Velocity编辑插件)
eclipse安装Veloeclipse(Velocity编辑插件) Help-->install new software-->Add 增加 Name:Veloeclipse Value ...
- Windows 10环境安装VIM代码补全插件YouCompleteMe
Windows 10环境安装VIM代码补全插件YouCompleteMe 折腾一周也没搞定Windows下安装VIM代码补全插件YouCompleteMe,今天在家折腾一天总算搞定了.关键问题是在于P ...
- 安装freemarker模板的ftl插件
安装freemarker模板的ftl插件 同意协议 等待运行完成 重新启动eclipse 查看是否生效
- 【工具篇】Sublime Text 2 安装汉化破解、插件包安装教程详解
Sublime Text概述: Sublime Text是一个代码编辑器,也是HTML和散文先进的文本编辑器. 漂亮的用户界面和非凡的功能,例如:迷你地图,多选择,Python插件,代码段等等. 完全 ...
随机推荐
- poj3415_Common Substrings
题意 给定两个字符串,求长度大于等于k的公共子串数. 分析 将两个字符串中间加个特殊字符拼接,跑后缀数组. 将题目转化为对每一个后缀求\(\sum_{j=1}^{i-1}lcp(i,j)\),且后缀\ ...
- DNS域名解析服务及其配置
一.背景 到 20 世纪 70 年代末,ARPAnet 是一个拥有几百台主机的很小很友好的网络.仅需要一个名为 HOSTS.TXT 的文件就能容纳所有需要了解的主机信息:它包含了所有连接到 ARPAn ...
- 第一个基于ArcGIS的Android应用
使用Android Studio创建第一个工程 打开Android Studio,新建工程.在Application name处填写项目名称,company domain是公司地址,将来作为包名,点 ...
- python 32 操作系统与进程
目录 1. 操作系统 1.1 作用 1.2 操作系统的发展 2. 进程的理论 2.1 相关名词 2.2 进程的创建 2.3 进程的状态: 1. 操作系统 管理.控制.协调计算机硬件与软件资源的计算 ...
- cookies和sessionstorage和localstorage区别
相同点:客户端都会存储 不同点 不同点 存储大小 有效时间 数据与服务器交互方式 cookies <=4K 在设置cookie过期之前一直有效(无论窗口浏览器是否关闭) 正常情况下,cookie ...
- 解决ionic 中 $ionicHistory.goBack()无法返回
这种解决方法目前只适合用了 <ion-side-menus>这一组件的<ion-view> 解决方法: 在<ion-view>下一级中包一个div,如下图: 搞了几 ...
- JSP学习笔记(1)——Jsp指令、动作元素和内置对象
简单来说,javaweb技术就是让服务器端能够执行Java代码,之后返回数据给客户端(浏览器)让客户端显示数据 jsp页面中可以嵌套java代码(java小脚本)和嵌套Web前端(html,css,j ...
- 使用ansible对思科交换机备份
先决条件 - 了解ansible基本操作 - 了解网络设备相关操作 - 了解linux相关操作 安装 安装EPEL yum install https://dl.fedoraproject.org/p ...
- Python数据类型详解——列表
Python数据类型详解--列表 在"Python之基本数据类型概览"一节中,大概介绍了列表的基本用法,本节我们详细学一下列表. 如何定义列表:在[]内以英文里输入法的逗号,,按照 ...
- ElementUI使用v-if控制tab标签显示遇到的Duplicate keys detected: 'xxx'问题
今天工作遇到一个问题: 需求背景:页面中有几个tab,需要根据登录用户的权限控制tab标签的显示与隐藏 . <el-tabs @tab-click="handleClick" ...