微信二维码引擎OpenCV开源研究
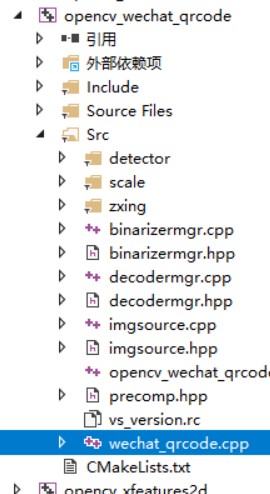
一、编译和Test测试
vector<float> WeChatQRCode::Impl::getScaleList(const int width, const int height) {
    if (width < 320 || height < 320) return {1.0, 2.0, 0.5};
    if (width < 640 && height < 640) return {1.0, 0.5};
    return {0.5, 1.0};
}
Mat SuperScale::processImageScale(const Mat &src, float scale, const bool &use_sr,
                                  int sr_max_size) {
    Mat dst = src;
    if (scale == 1.0) {  // src
        return dst;
    }
    int width = src.cols;
    int height = src.rows;
    if (scale == 2.0) {  // upsample
        int SR_TH = sr_max_size;
        if (use_sr && (int)sqrt(width * height * 1.0) < SR_TH && net_loaded_) {
            int ret = superResoutionScale(src, dst);
            if (ret == 0) return dst;
        }
        { resize(src, dst, Size(), scale, scale, INTER_CUBIC); }
    } else if (scale < 1.0) {  // downsample
        resize(src, dst, Size(), scale, scale, INTER_AREA);
    }
    return dst;
}
int SuperScale::superResoutionScale(const Mat &src, Mat &dst) {
    Mat blob;
    dnn::blobFromImage(src, blob, 1.0 / 255, Size(src.cols, src.rows), {0.0f}, false, false);
    srnet_.setInput(blob);
    auto prob = srnet_.forward();
    dst = Mat(prob.size[2], prob.size[3], CV_8UC1);
    for (int row = 0; row < prob.size[2]; row++) {
        const float *prob_score = prob.ptr<float>(0, 0, row);
        for (int col = 0; col < prob.size[3]; col++) {
            float pixel = prob_score[col] * 255.0;
            dst.at<uint8_t>(row, col) = static_cast<uint8_t>(CLIP(pixel, 0.0f, 255.0f));
        }
    }
    return 0;
}
int DecoderMgr::decodeImage(cv::Mat src, bool use_nn_detector, string& result) {
    int width = src.cols;
    int height = src.rows;
    if (width <= 20 || height <= 20)
        return -1;  // image data is not enough for providing reliable results
    std::vector<uint8_t> scaled_img_data(src.data, src.data + width * height);
    zxing::ArrayRef<uint8_t> scaled_img_zx =
        zxing::ArrayRef<uint8_t>(new zxing::Array<uint8_t>(scaled_img_data));
    zxing::Ref<zxing::Result> zx_result    ;
    decode_hints_.setUseNNDetector(use_nn_detector);
    Ref<ImgSource> source;
    qbarUicomBlock_ = new UnicomBlock(width, height);
    // Four Binarizers
    int tryBinarizeTime = 4;
    for (int tb = 0; tb < tryBinarizeTime; tb++) {
        if (source == NULL || height * width > source->getMaxSize()) {
            source = ImgSource::create(scaled_img_zx.data(), width, height);
        } else {
            source->reset(scaled_img_zx.data(), width, height);
        }
        int ret = TryDecode(source, zx_result);
        if (!ret) {
            result = zx_result->getText()->getText();
            return ret;
        }
        // try different binarizers
        binarizer_mgr_.SwitchBinarizer();
    }
    return -1;
}
int DecoderMgr::TryDecode(Ref<LuminanceSource> source, Ref<Result>& result) {
    int res = -1;
    string cell_result;
    // get binarizer
    zxing::Ref<zxing::Binarizer> binarizer = binarizer_mgr_.Binarize(source);
    zxing::Ref<zxing::BinaryBitmap> binary_bitmap(new BinaryBitmap(binarizer));
    binary_bitmap->m_poUnicomBlock = qbarUicomBlock_;
    result = Decode(binary_bitmap, decode_hints_);
    res = (result == NULL) ? 1 : 0;
    if (res == 0) {
        result->setBinaryMethod(int(binarizer_mgr_.GetCurBinarizer()));
    }
    return res;
}
zxing::Ref<zxing::qrcode::QRCodeReader> reader_;
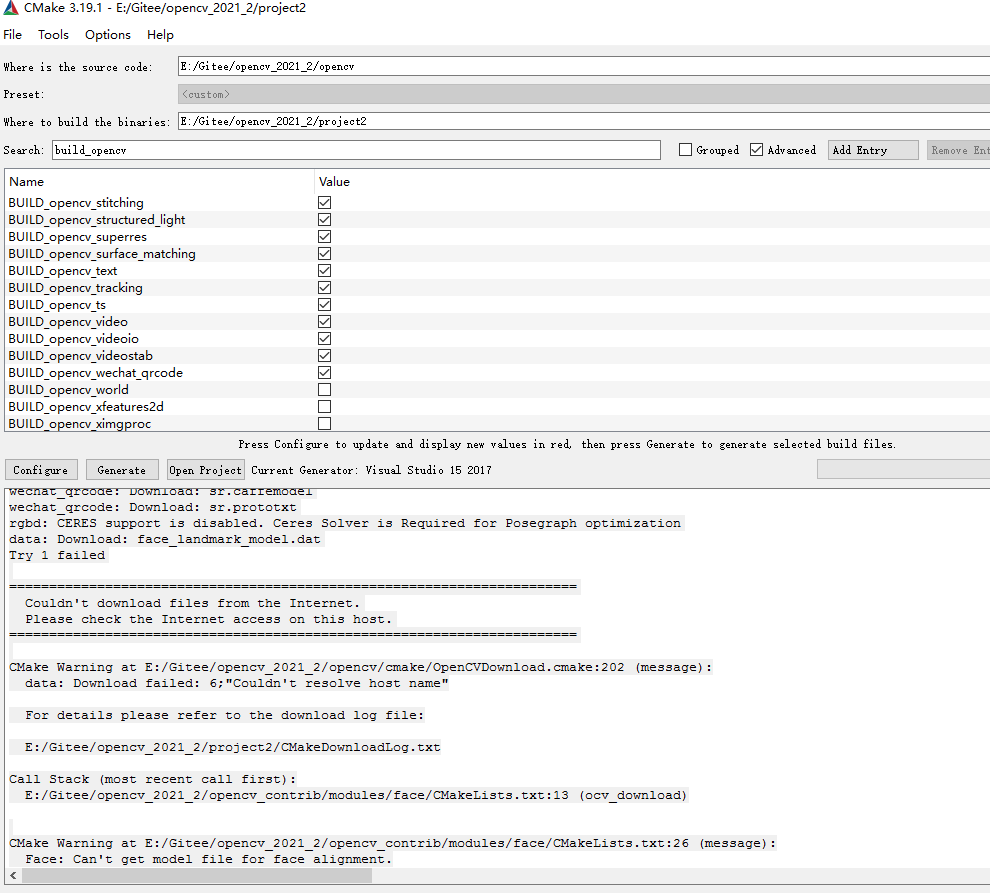
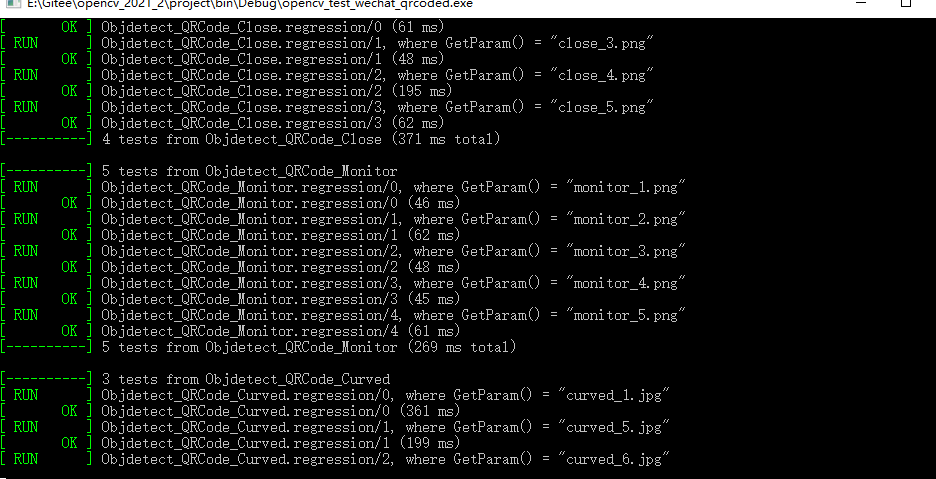
[  PASSED  ] 30 tests.
[  FAILED  ] 3 tests, listed below:
[  FAILED  ] Objdetect_QRCode.regression/0, where GetParam() = "version_1_down.jpg"
[  FAILED  ] Objdetect_QRCode.regression/10, where GetParam() = "version_4_left.jpg"
[  FAILED  ] Objdetect_QRCode.regression/19, where GetParam() = "link_ocv.jpg"
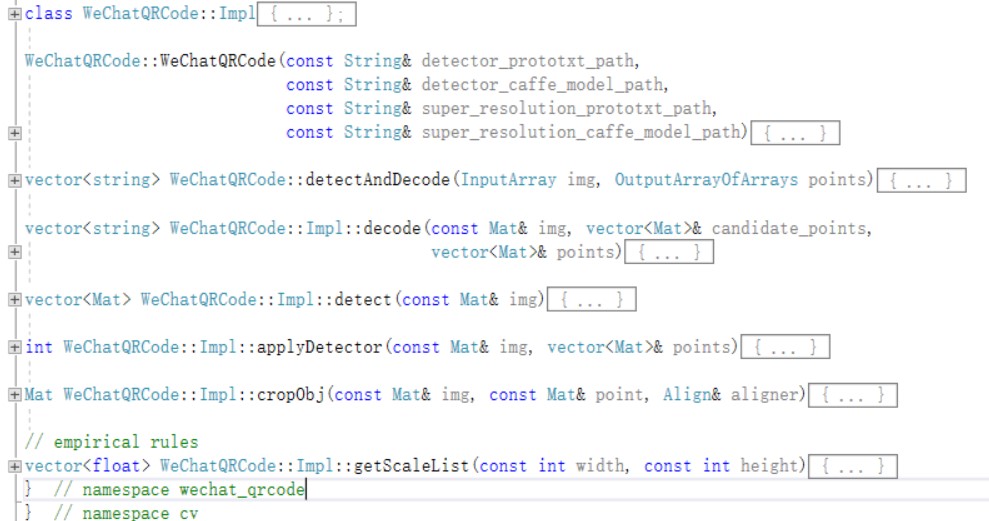
    p = makePtr<WeChatQRCode::Impl>();
    if (!detector_caffe_model_path.empty() && !detector_prototxt_path.empty()) {
        // initialize detector model (caffe)
        p->use_nn_detector_ = true;
        CV_Assert(utils::fs::exists(detector_prototxt_path));
        CV_Assert(utils::fs::exists(detector_caffe_model_path));
        p->detector_ = make_shared<SSDDetector>();
        auto ret = p->detector_->init(detector_prototxt_path, detector_caffe_model_path);
        CV_Assert(ret == 0);
    } else {
        p->use_nn_detector_ = false;
        p->detector_ = NULL;
    }
微信二维码引擎OpenCV开源研究的更多相关文章
- 微信二维码支付-模式一(PC端,解决中文乱码问题)
近期公司调完银联,调支付宝,调完支付宝调微信.说实话微信的帮助文档确实是烂,而且有没有技术支持,害的我头发都掉了一桌.不说废话了,看代码. 首先登陆微信的公众平台(微信的服务号不是订阅号),然后选择微 ...
- HTML5 微信二维码提示框
这是一个js的小案例,主要效果是显示一个微信二维码的提示框,非常简单实用. 源码如下: JS部分 <script src="js/jquery-1.8.3.min.js"&g ...
- CSS实现鼠标经过网页图标弹出微信二维码
特点 1.纯CSS实现二维码展示功能,减少加载JS: 2.使用CSS3 transform 属性: ## 第一步 在需要展示二维码的地方添加如下代码,其中<a>标签内容可以根据需要修改成 ...
- C#获取微信二维码显示到wpf
微信的api开放的二维码是一个链接地址,而我们要将这个二维码显示到客户端.方式很多,今天我们讲其中一种. /// <summary> /// 获取图片路径 /// </summary ...
- php 人人商城 生成 临时微信二维码,并保存成海报图片 有效期一个月
public function getPoster(){ global $_W; global $_GPC; $mm = pdo_fetch('select nickname,codetime fro ...
- CSDN的个人主页如何添加微信二维码
-–零-– 对于CSDN,这里是技术的交流的地方,有些大神,隐于此.各有各的技能,各有各的魅力. 在这里,如果有自己的能力,你想推广你个人.我想,你将你的微信二维码或者你的微信公众号的二维码放在这里, ...
- react页面内嵌微信二维码 和 自定义样式 以及 微信网页共用unionId问题
在react页面内嵌“微信二维码”,实现PC端通过微信扫码进行登录.首先去微信开放平台注册一个账号,创建一个网站应用,提交网站备案审核,获取appid和appsecret:其他开发流程根据微信文档来进 ...
- 为微信二维码添加gif动态背景
环境准备 来源: https://github.com/sylnsfar/qrcode/blob/master/README-cn.md#%E5%8A%A8%E6%80%81gif%E4%BA%8C% ...
- Android仿微信二维码扫描
转载:http://blog.csdn.net/xiaanming/article/details/10163203 了解二维码这个东西还是从微信中,当时微信推出二维码扫描功能,自己感觉挺新颖的,从一 ...
随机推荐
- Fullscreen API All In One
Fullscreen API All In One 全屏显示 https://developer.mozilla.org/en-US/docs/Web/API/Fullscreen_API https ...
- React Query & SWR
React Query & SWR HTTP request all in one solution React Query Hooks for fetching, caching and u ...
- Array.fill & array padding
Array.fill & array padding arr.fill(value[, start[, end]]) https://developer.mozilla.org/en-US/d ...
- auto switch HTTP protocol Chrome Extension
auto switch HTTP protocol Chrome Extension HTTPS auto switch to HTTP VPN https://chrome.google.com/w ...
- NGK每日快讯」2021.1.27日NGK公链第85期官方快讯!
- 与程序员相关的CPU缓存知识
本文转载自与程序员相关的CPU缓存知识 基础知识 首先,我们都知道现在的CPU多核技术,都会有几级缓存,老的CPU会有两级内存(L1和L2),新的CPU会有三级内存(L1,L2,L3 ),如下图所示: ...
- JS广度优先遍历
自己用JS实现了 广度优先遍历 第一种用了数组的高阶函数,看起来有些复杂.然后思索着从可读性上优化了一下,孰优孰劣以后分析. var list = [{ id: "ab", chi ...
- 在 2021 年你需要掌握的 7 种关于 JavaScript 的数组方法
在新的一年我们学习这些有用的方法 JavaScript 为我们提供了许多处理数组的不同方法.我们将在几分钟内为您介绍 7 个基本且常用的数据方法,以提高您的 JS 开发技能. 1. Array.map ...
- Oracle RMAN scripts to delete archivelog
vi del_arch.shexport ORACLE_SID=pdcsdbrman target / cmdfile=/home/oracle/scripts/del_arch.sql log=/h ...
- 开工大吉:TcaplusDB将持续为您提供可靠的数据服务
开工大吉 新的一年 新的开始 我们也带着新的心意 向您奔赴而来 在此,TcaplusDB祝广大客户朋友,开工大吉,2021,我们将一如既往地守护您的数据,继续做您最坚实的后盾. 作为专为游 ...