vue2.0路由
现在用vue-cli搭建的环境里面vue-router是下载好的
vue2.0路由方式和以前也有些不同
没了了map和start方法
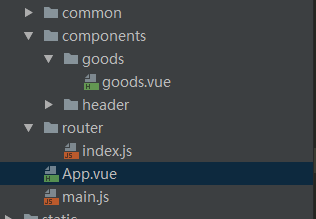
目录结构如上图
这里有三个文件,app.vue显示,main.js控制路由,goods.vue为跳转页面
app.vue
template>

  <div id="app">

    <v-header></v-header>

    <div class="tab">

      <div class="tab-item">

        <router-link to="/goods">商品</router-link>

      </div>

      <div class="tab-item">评论</div>

      <div class="tab-item">商家</div>

    </div>

    <router-view></router-view>

  </div>

</template>

<script>

  import header from './components/header/header.vue';

  export default{

      components:{

          'v-header':header

      }

  };

</script>

<style lang="stylus" rel="stylesheet/stylus">

  #app

     .tab

        display:flex

        width:100%

        height:40px

        line-height:40px

        .tab-item

          flex:1

          text-align center

</style>
main.js
// The Vue build version to load with the `import` command

// (runtime-only or standalone) has been set in webpack.base.conf with an alias.

import Vue from 'vue'

import VueRouter from 'vue-router'

import App from './App'

import goods from './components/goods/goods.vue';

import ratings from './components/ratings/ratings.vue';

import seller from './components/seller/seller.vue';

import "./common/stylus/index.styl";

Vue.use(VueRouter);

Vue.config.productionTip = false;

const routers=[

  {path:'/goods',component:goods},

  {path:'/ratings',component:ratings},

  {path:'/seller',component:seller}

]

const router=new VueRouter({

  linkActiveClass:"active",

  mode:"history",

  routes:routers

});

const app = new Vue({

  router

}).$mount('#app')

new Vue({

  template: '<App/>',

  components: { App },

  router: router

}).$mount('#app');

router.push('/goods')
vue2.0路由的更多相关文章
- vue2.0路由写法、传参和嵌套
前置知识请戳这里 vue-routerCDN地址:https://unpkg.com/vue-router@3.0.1/dist/vue-router.js vue-router下载地址:https: ...
- vue2.0路由变化1
路由的步骤 1.定义组件 var Home={ template:'<h3>我是主页</h3>' }; var News={ template:'<h3>我是新闻& ...
- vue2.0路由进阶
一.路由的模式 第一种用history方式实现,HTML5使用window.history.pushState()实现路由的切换而不刷新页面. 第二种使用hash值的方式来实现. vue2.0两种都可 ...
- vue2.0路由-路由嵌套
vue一个重要的方面就是路由,下面是自己写的一个路由的例子: 1.引入依赖库就不必再说 2.创建组件 两种写法 第一种:间接 <template id="home"> ...
- vue2.0 路由学习笔记
昨天温故了一下vue2.0的路由 做个笔记简单记录一下! 1.首相和vue1.0一样 要使用vuejs的路由功能需要先引入vue-router.js 2.然后修改原有a标签处代码 这里以一个ul li ...
- 解决vue2.0路由 TypeError: Cannot read property 'matched' of undefined 的错误问题
刚开始使用vue-router2.0,虽然也用了vux,用起来却发现一个问题--具体如下: 正常情况下使用脚手架跑完之后,然后修改源项目,首先在main.js入口里把该import进去的vuex,vu ...
- vue2.0路由切换后页面滚动位置不变BUG
最近项目中遇到这样一个问题,vue切换路由,页面到顶端的滚动距离仍会保持不变. 方法一: 监听路由 // app.vue export default { watch:{ '$route':func ...
- vue2.0路由写法
// 0. 如果使用模块化机制编程,導入Vue和VueRouter,要调用 Vue.use(VueRouter) // 1. 定义(路由)组件. // 可以从其他文件 import 进来 var Fo ...
- vue2.0 路由传参(router-link传过去)
<!DOCTYPE html> <html> <head> <meta charset="UTF-8"> <title> ...
随机推荐
- ThinkPHP 3.2公共类库、应用类库ThinkPHP/Library讲解
一.ThinkPHP的类库主要包括公共类库和应用类库,都是基于命名空间进行定义和扩展的.只要按照规范定义,都可以实现自动加载. 公共类库 公共类库通常是指ThinkPHP/Library ...
- [译]Quartz.NET 框架 教程(中文版)2.2.x 之第七课 触发监听器和作业任务监听器
第七课:触发监听器和作业任务监听器 监听器是在调度器中基于事件机制执行操作的对象.你大概可以猜到,触发监听器接收响应跟触发器有关的事件,作业任务监听器接收响应跟作业任务有关的事件. 跟触发器有关的事件 ...
- ELF文件解析(一):Segment和Section
ELF 是Executable and Linking Format的缩写,即可执行和可链接的格式,是Unix/Linux系统ABI (Application Binary Interface)规范的 ...
- CSS之清除浮动(span/clearfix)
一.问题描述 web网页设计中,在div元素中有时候常伴有图文结合的post组件.为了使得文本在图像周围环绕,那么需要对图像区域使用float浮动.如果不做清除浮动,则会出现如下结果: 图像比文本高, ...
- luogu P1979 [NOIP2013] 华容道
传送门 这道题中,棋子的移动是要移动到空格上去,所以空格要在棋子旁边才能移动棋子;而棋子移动的方向由空格决定 所以我们可以记三维状态\(di_{i,j,k}\),表示状态为棋子在\((i,j)\),空 ...
- jquery 学习(三) - 遍历操作
HTML代码 <p>1111</p> <p>1111</p> <p>1111</p> <p>1111</p&g ...
- Mask RCNN 学习笔记
下面会介绍基于ResNet50的Mask RCNN网络,其中会涉及到RPN.FPN.ROIAlign以及分类.回归使用的损失函数等 介绍时所采用的MaskRCNN源码(python版本)来源于GitH ...
- Shiro后台实现验证权限
今天发现一个问题:使用shiro的时候,虽然隐藏掉了一些菜单,但是当我们通过get请求直接访问菜单的时候还是会访问到,也就是shiro可以在界面实现隐藏一些信息,但是没有真正的根据权限码验证请求,于是 ...
- java 多线程三
java 多线程一 java 多线程二 java 多线程三 java 多线程四 注意到 java 多线程一 中 MyThread2 运行结果出现0.-1,那是因为在操作共享数据时没有加锁导致. 加锁的 ...
- C 语言 register 关键字
register:这个关键字请求编译器尽可能的将变量存在CPU内部寄存器中,而不是通过内存寻址访问,以提高效率.注意是尽可能,不是绝对.你想想,一个CPU 的寄存器也就那么几个或几十个,你要是定义了很 ...