css+jquery 实现图片局部放大预览
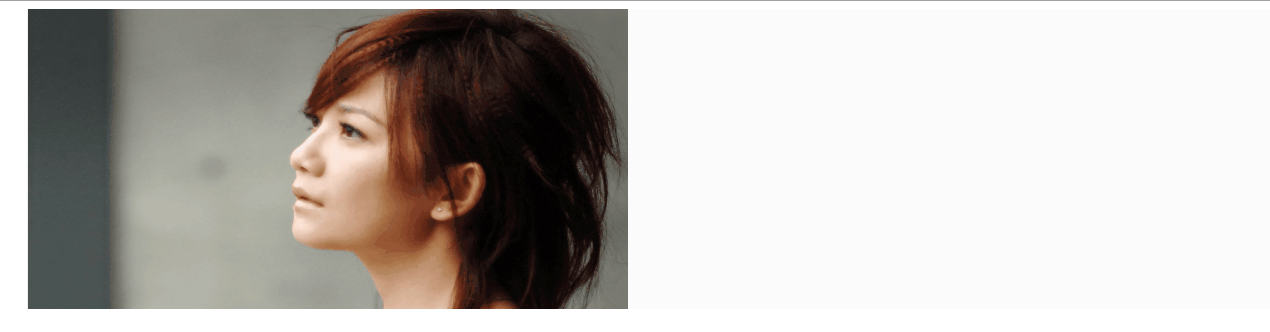
今天有时间开始动手,使用css+jquery实现了图片局部放大的组件,首先看看效果图:
界面设计思路如下:
   1.两个div,左边放图片的缩略图
   2.在左边缩略图鼠标移动的时候,区域(效果图中的网格)
   3.右边放大图div,背景为缩略图的大图,在鼠标移入缩略图中,通过获取鼠标的坐标,将右侧背景图片移动到跟鼠标坐标对应的位置
   4.设计时尽量,获取原大图的尺寸,和缩略图视窗计算比例,更大精度的做到左侧缩略图上表示的区域,和右侧放大部分匹配
本示例大部分编码在javascript脚本,以下列出各部分的源码:
<div class="all-region">

    <div class="image-wrap">
       <!--缩略图div-->

        <div class="little-img">

            <img src="./images/show-window/timg.jpg">

        </div>
       <!--图片放大div-->

        <div class="large-img">

        </div>
        <!--缩略图上展示被放大的区域,网格区域-->

        <div class="relative-region"></div>

    </div>

</div>
css:
    .all-region {

        width: 100%;

        height: auto;

    }

    .all-region .image-wrap {

        width: 1300px;

        margin: 0px auto;

        height: 300px;

        line-height: 300px;

        overflow: hidden;

        vertical-align: center;

        background: #FBFBFB;

        border-left: 1px solid #ebebeb;

        position: relative;

    }

    .image-wrap .little-img img {

        width: 600px;

        height: 300px;

    }

    .image-wrap .large-img {

        width: 600px;

        height: 300px;

        background-image: url("./images/show-window/timg.jpg");

        border: 1px solid transparent;

        background-size: inherit;

        background-repeat: no-repeat;

        background-position-x: 0px;

        background-position-y: 0px;

        position: relative;

        top: -301px;

        left: 605px;

        float: left;

        z-index:;

        opacity:;

        display: none;

        transition: opacity 2s linear;

        overflow: hidden;

    }

    .relative-region {

        background: linear-gradient(45deg, rgba(46, 46, 46, 0.5) 50%, transparent 0),

        linear-gradient(135deg, rgba(200, 200, 200, .5) 70%, transparent 0);

        display: none;

        position: relative;

        z-index:;

        background-size: 5px 5px;

    }
Javascript:
class Elements {

        constructor() {

            //缩略图区域

            this.sourceImage = $(".little-img");

            //放大区域

            this.aimImage = $(".large-img");

            //视图图片,与图片实际尺寸比例

            this.sourceToAimRate = 0.01;

            //原图高度

            this.sourceHeight = 0;

            //原图宽度

            this.sourceWidth = 0;

            //视图高度,div的高度,本例是300px

            this.containerHeight = this.sourceImage.children().height();

            this.containerWidth = this.sourceImage.children().width();

            //鼠标在缩略图上的坐标 offsetX

            this.cursor_x = 0;

            this.cursor_y = 0;

            //标志被放大的区域

            this.region = $(".relative-region");

            this.mouseMove = this.mouseMove.bind(this);

            this.regionPosition = this.regionPosition.bind(this);

            this.regionMove = this.regionMove.bind(this);

            this.caculatorRate = this.caculatorRate.bind(this);

        }

        //计算原图尺寸,思路是内存加载原图,获得尺寸,并计算容器视图和原图的比例

        caculatorRate() {

            console.log(this.sourceImage.children().attr("src"));

            $("<img/>").attr("src", this.sourceImage.children().attr("src")).load((e) => {

                //let sourceImageWidth=e.target.width;

                this.sourceWidth = e.target.width;

                this.sourceHeight = e.target.height;

                //计算图片和容器的像素比例

                this.sourceToAimRate = this.sourceWidth / this.containerWidth;

            });

        }

        //鼠标在缩略图上移动时计算,放大图的背景位置,并且定位标识被放大的区域

        mouseMove(e) {

            //console.log(`x:${e.offsetX},y:${e.offsetY}`);

            //偏离region的位置

            //由于鼠标实际上是在标识被放大区域(网格区域)的div里面,所以通过e获取的实际上是缩略图内,网格标识的offsetX 要用网格区域的offsetX+offsetLeft-缩略图的offsetleft才是鼠标对应到缩略图上的位置

            let r_x = e.offsetX;

            let r_y = e.offsetY;

            let s_t = this.sourceImage.offset().top;

            let s_l = this.sourceImage.offset().left;

            let r_t = this.region.offset().top;

            let r_l = this.region.offset().left;

            let x = r_l - s_l + r_x;

            let y = r_t - s_t + r_y;

            //在原图上显示,被放大的区域

            let w = this.region.width();

            let h = this.region.height();

             //由于鼠标在网格区域的中心,所以在计算放大图的top和left的时候,实际是从网格的左上角位置

            this.cursor_x = (x - w / 2) * this.sourceToAimRate;

            this.cursor_y = (y - h / 2) * this.sourceToAimRate;

            if (this.cursor_x + this.containerWidth > this.sourceWidth) {

                this.cursor_x = this.sourceWidth - this.containerWidth;

            }

            if (this.cursor_y + this.containerHeight > this.sourceHeight) {

                this.cursor_y = this.sourceHeight - this.containerHeight;

            }

            if (this.cursor_y < 0) {

                this.cursor_y = 0;

            }

            if (this.cursor_x < 0) {

                this.cursor_x = 0;

            }

            this.aimImage.css({

                "background-position-x": -this.cursor_x + "px",

                "background-position-y": -this.cursor_y + "px"

            });

            this.regionMove(w, h, x, y);

}

        regionPosition(r_w, r_h, e) {

            let left = e.offsetX - r_w / 2;

            let top = e.offsetY - r_h / 2;

            if (left < 0) {

                left = 0;

            }

            if (left + r_w > this.containerWidth) {

                left = this.containerWidth - r_w;

            }

            if (top < 0) {

                top = 0;

            }

            if (top + r_h > this.containerHeight) {

                top = this.containerHeight - r_h;

            }

            this.region.css({

                "top": (top - this.containerHeight) + "px",

                "left": left+ "px",

                "cursor": "crosshair"

            });

        }

        regionMove(r_w, r_h, x, y) {

            let left = x - r_w / 2;

            let top = y - r_h / 2;

            if (left < 0) {

                left = 0;

            }

            if (left + r_w > this.containerWidth) {

                left = this.containerWidth - r_w;

            }

            if (top < 0) {

                top = 0;

            }

            if (top + r_h > this.containerHeight) {

                top = this.containerHeight - r_h;

            }

            this.region.css({"top": (top - this.containerHeight) + "px", "left": left + "px"});

        }

        init() {

            this.caculatorRate();

            //鼠标移入缩略图区域,由缩略图区域的hover事件初始化,将鼠标放入网格区域的中心

            this.sourceImage.children().mouseover((e) => {

                this.aimImage.css({"display": "block", "opacity": "1"});

                let r_w = this.containerWidth / this.sourceToAimRate;

                let r_h = this.containerHeight / this.sourceToAimRate;

                let x = e.offsetX;

                let y = e.offsetY;

                this.regionPosition(r_w, r_h, e);

                this.region.css({"display": "block", "height": r_h + "px", "width": r_w + "px"});

            });

            //修复鼠标在region上,右侧放大区域闪动

            this.region.mousemove(this.mouseMove);

            this.region.mouseleave(() => {

                this.aimImage.css({"display": "none", "opacity": "0"});

                this.region.css({"display": "none"});

            });

        }

    }

    $(function () {

        var e = new Elements();

        e.init();

    })
由于原图是1920*1080不是缩略视窗严格的2:1,计算中有小数等原因,使网格标识的区域,和放大区域展示的完全匹配
在下一篇将尝试,放大镜逆应用为缩小镜,实现图片裁剪的时候,标识裁剪的部分位于原图的位置和区域.
css+jquery 实现图片局部放大预览的更多相关文章
- jQuery Lightbox图片放大预览
简介:jQuery Lightbox图片放大预览代码是一款可以在用户点击页面中的小图片时,将该图片的高清版本以Lightbox的方式放大显示在页面的中间,提高用户的体验度. 效果展示 http://h ...
- jQuery+Ajax实现图片的预览和上传
jQuery+Ajax实现图片的预览和上传 1.配置Spring-web.xml <!-- springmvc上传图片 --> <bean id="multipartRes ...
- node.js平台下,cropper.js实现图片裁剪预览并转换为base64发送至服务端。
一 .准备工作 1.首先需要先下载cropper,常规使用npm,进入项目路径后执行以下命令: npm install cropper 2. cropper基于jquery,在此不要忘记引入jq,同时 ...
- cropper.js实现图片裁剪预览并转换为base64发送至服务端。
一 .准备工作 1.首先需要先下载cropper,常规使用npm,进入项目路径后执行以下命令: npm install cropper 2. cropper基于jquery,在此不要忘记引入jq,同时 ...
- js实现FileUpload选择图片后预览功能
当asp.net的FileUpload选择一个图片后不需要上传就能显示出图片的预览功能, 代码: <%@ Page Language="C#" AutoEventWireup ...
- Android 举例说明自己的定义Camera图片和预览,以及前后摄像头切换
如何调用本地图片,并调用系统拍摄的图像上一博文解释(http://blog.csdn.net/a123demi/article/details/40003695)的功能. 而本博文将通过实例实现自己定 ...
- 图片本地预览 flash html5
dataURI 一种能够在页面嵌入外部资源的URI方案.能够降低图片或者样式表的http请求数量,提高效率. ie8把dataURI 的属性值限制在32k以内. 图片本地预览: 由于安全原因,通过fi ...
- 巧用weui.gallery(),点击图片后预览图片
要在页面需要加载的JS文件: <script src="../js/libs/weui.min.js"></script> 可以去weui的文档中下载,这是 ...
- 微信小程序图片放大预览
需求:当点击图片时,当前图片放大预览,且可以左右滑动 实现方式:使用微信小程序图片预览接口 我们可以看到api需要两个参数,分别通过下面的data-list和data-src来传到js中 wxml代码 ...
随机推荐
- Envoy 源码分析--event
目录 Envoy 源码分析--event libevent Timer SignalEvent FileEvent RealTimeSystem 任务队列 延迟析构 dispacth_thread E ...
- mac系统 安装pip,用python读写excel(xlrd、xlwt)安装
1: 先安装python, 下载地址:https://www.python.org/downloads/release/python-372/ 2: 安装pip 下载一个get-pip.py的文件 ...
- Oracle单机Rman笔记[5]---脱机异地还原
脱机异地还原(安装一个原环境相同的linux,并安装数据库,注意不要配置安装实例) .检查/home/oracle下的.bashrc .bash_profile内容是否与原环境一致(具体看情况而定), ...
- 语音识别ASR - HTK(HResults)计算字错率WER、句错率SER
HResults计算字错率(WER).句错率(SER) 前言 好久没发文,看到仍有这么多关注的小伙伴,觉得不发篇文对不住.确实好久没有输出经验总结相关的文档,抽了个时间,整理了下笔记,发一篇关于ASR ...
- Spring Boot:如何优雅的使用 Mybatis
mybatis-spring-boot-starter 官方说明:MyBatis Spring-Boot-Starter will help you use MyBatis with Spring B ...
- JS数组映射详解
现在这里占个坑位,免的忘了,需要整理一下最近的内容: 1.数组映射的使用 2.微信分享功能详解 3.jq自己封装 4.HTML的富文本应用
- flask 第三章 特殊装饰器 CBV Flask-Session WTForms
1.flask中的特殊装饰器 前面我们讲过的装饰器函数中,用来登录验证,这次我们来介绍几个flask中的特殊装饰器 1). @app.before_request 具体的用途是: 在请求进入视图函数之 ...
- Shadow Properties之美(一)【Microsoft Entity Framework Core随笔】
最近在做公司的项目的时候,开始把部分程序迁移到EF Core,然后有了一些感触,趁着还没忘却,还是先记录下来. EF Core还在成长中,我写这个的时候,版本是2.2.如果对着已有的EF 5/6来说, ...
- 获取.properties后缀的数据
在MyPro.properties中的数据如下: Name=ABC 测试类中: Properties properties = new Properties(); String configFile ...
- Javase系列之面向对象(一)
作为一个Java程序员,我们每天做的事情就是OOP(面向对象),可以说万物皆对象,Java是一门面向对象的程序语言,鉴于基本的面向对象知识也是一个较为庞杂的模块,所以博主我准备用多篇文章去介绍Java ...