Android的四大组件学习
一、Linearlayout : 线性布局
1. android:orientation="vertical" //控件的方向控制,vertical : 垂直布局 , horizontal : 水平布局
2. android:gravity="right" //对控件或者文字进行对齐方式
(1). 放在Linearlayout中,控制的是布局中的控件
(2). 放在控件中,控制的是空间中的文字
3.android:layout_gravity="right" //对控件操作才有效,相对于包含这个控件的布局而言
4.android:layout_weight="3" //对控件进行操作才有效,它是对整个视图进行比例进行分割
5.所有layout的类都是ViewGroup的子类
6.我们避免不了需要使用到LayoutInflater类中的inflate()方法。对于LayoutInflater对象的获取,有三种方式:
LayoutInflater inflater = (LayoutInflater) context.getSystemService(Context.LAYOUT_INFLATER_SERVICE);// 第一种方式
LayoutInflater inflater = LayoutInflater.from(context);// 第二种方式
LayoutInflater inflater = activity.getLayoutInflater();// 第三种方式
6. View view = inflater.inflate(R.layout.linearlayout,root:null,attachToRoot false); //参数进行讲解:
(1). 三个参数的讲解:当root有参数时候看第三个参数是否关联
    LinearLayout ll = (LinearLayout) findViewById(R.id.ll);
    LayoutInflater inflater = MainActivity.this.getLayoutInflater();
    View view = inflater.inflate(R.layout.linearlayout,ll,ture);

    (a).attachToRoot为ture的时候,说明R.layout.linearlayout创建的布局已经绑定到ll这个布局
    (b).attachToRoot为false的时候,说明R.layout.linearlayout创建的布局没有绑定到ll这个布局
      需要执行ll.addView(view)来手动向ll这个布局中添加R.layout.linearlayout。

  (2). 当root参数为null的时候,第三个参数传入任何输入已经没有意义了,相当于只传入两个参数
总结:无论三个参数还是两个参数,只要第二个参数为空null时候,一定手动执行LinearoutInflater.addView(),来实现向
LinearoutInflater中添加其他View的布局。第二个参数不为空null时候,通过观察第三个参数来判定,如果为ture,则不用
通过手动执行LinearoutInflater.addView(),否则会抛出异常(原因:因为已经和父类绑定了,再绑定就多余操作).如果
为flase,则需要通过手动执行LinearoutInflater.addView()向父类添加绑定.
  LinearLayout ll = (LinearLayout) findViewById(R.id.ll);
  LayoutInflater inflater = MainActivity.this.getLayoutInflater();
  View view = inflater.inflate(R.layout.linearlayout,ll);

  这代码已经已经向父类添加R.layout.linearlayout布局,不需要手动添加LinearoutInflater.addView(),第三个参数也不需要添加

  7.LinearLayout.addView(View view) : 可以向LinearLayout动态添加视图

二、RelativeLayout : 相对布局
1.按照组件相对位置布局
android:layout_below="@id/button1" : 在button1元素的下面
android:layout_above="@id/button1" : 在button1元素的上面
android:layout_toLeftOf="@id/button1" : 在button1元素的左边
android:layout_toRightOf="@+id/button2" : 在button1元素的右边
2.按照边缘布局 (四大布局里面也可以使用,它是相对于包含那个控件的布局而言)
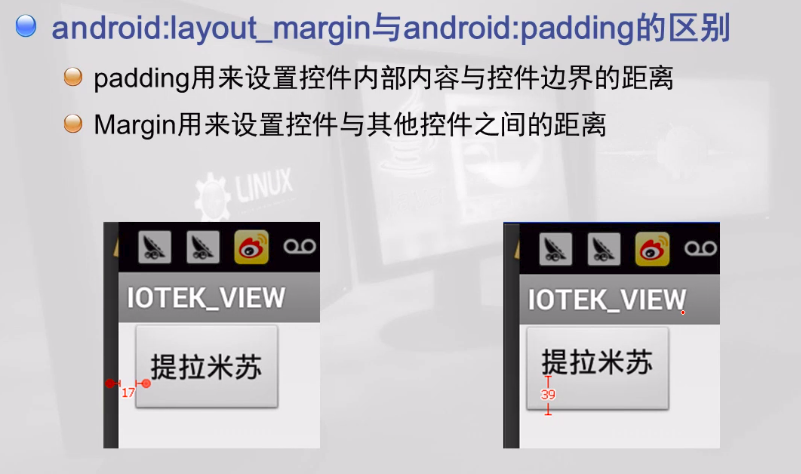
android:layout_marginLeft="100dp" : 离某元素左边缘的距离
android:layout_marginBottom="100dp" : 离某元素底边缘的距离
android:layout_marginTop="100dp" : 离某元素顶边缘的距离
android:layout_marginRight="100dp" : 离某元素右边缘的距离
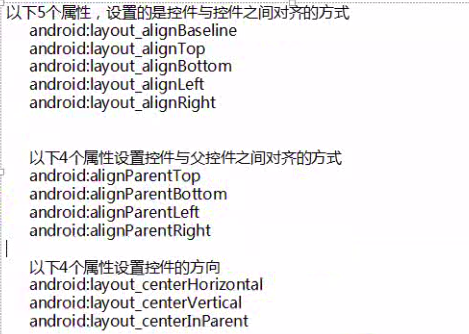
3.控件与控件之间的对齐
android:layout_alignTop="@+id/button1" :和button1顶部对齐
android:layout_alignBaseline="@id/button1" :和button1基准线对齐
android:layout_alignBottom="@id/button1" :和button1底部对齐
android:layout_alignLeft="@id/button1" :和button1左边对齐
android:layout_alignRight="@id/button1" :和button1右边对齐
三、FrameLayout : 帧布局
它是从屏幕的左下角(0,0)坐标开始布局,多个组件层叠排序,后面的组件会覆盖前面的组件。
Android的四大组件学习的更多相关文章
- Android深入四大组件(八)广播的注册、发送和接收过程
前言 我们接着来学习Android四大组件中的BroadcastReceiver,广播主要就是分为注册.接收和发送过程.建议阅读此文前请先阅读Android深入理解四大组件系列的文章,知识重复的部分, ...
- Android深入四大组件(五)Android8.0 根Activity启动过程(后篇)
前言 在几个月前我写了Android深入四大组件(一)应用程序启动过程(前篇)和Android深入四大组件(一)应用程序启动过程(后篇)这两篇文章,它们都是基于Android 7.0,当我开始阅读An ...
- Android深入四大组件(四)Android8.0 根Activity启动过程(前篇)
前言 在几个月前我写了Android深入四大组件(一)应用程序启动过程(前篇)和Android深入四大组件(一)应用程序启动过程(后篇)这两篇文章,它们都是基于Android 7.0,当我开始阅读An ...
- Android的四大组件之Activity
Android的四大组件之Activity Activity:是Android组件中最基本也是最为常见用的四大组件(Activity,Service服务,Content Provider内容提供者,B ...
- android中四大组件之间相互通信
好久没有写有关android有关的博客了,今天主要来谈一谈android中四大组件.首先,接触android的人,都应该知道android中有四大组件,activity,service,broadca ...
- Android的四大组件
Android的四大组件:Activity.Service.BroadcastReceiver.Content Provider. Content Provider 属于Android应用程序的组件之 ...
- Android开发四大组件概述
这个文章主要是讲Android开发的四大组件,本文主要分为 一.Activity具体解释 二.Service具体解释 三.Broadcast Receiver具体解释 四.Content Provid ...
- Java乔晓松-android的四大组件之一Service(服务的绑定)
android的四大组件之一Service(服务的绑定) 怎么绑定服务,又怎么解除服务,代码如下: MainActivity.java源码: package com.example.lesson14_ ...
- Android的四大组件及应用安装安全问题(4)
Android的四大组件及组件间通信 如果想对四大组件有深入的了解,那永远不要停留在一些条条干干的SDK API的认识,需要了解他的通讯,他的复用,他的边界问题,这样才会对四大组件有透明的认识. 四大 ...
随机推荐
- 遍历XML文件
#encoding=utf-8 from xml.etree import ElementTree as ET #要找出所有人的年龄 per=ET.parse('d:\\1.xml') p=per.f ...
- java的PDF纵横向打印
PDF默认是纵向打印的,通过rotate()来让其改变为横向打印,一般在打印A4 12*21纸以及发票的时候会用横向打印.横向打印时页面会出现行转列以及列转行的情况,因此在设置页面大小的时候一定要宽度 ...
- 部署maven的一些要点、遇到的问题
一. maven环境的搭建 . 下载并配置maven(可做可不做) ()到http://maven.apache.org下载maven的最新版本,并解压到某一目录(假设是d:\develop\apac ...
- PAT 1065 单身狗(25)(STL-map+思路+测试点分析)
1065 单身狗(25 分) "单身狗"是中文对于单身人士的一种爱称.本题请你从上万人的大型派对中找出落单的客人,以便给予特殊关爱. 输入格式: 输入第一行给出一个正整数 N(≤ ...
- iOS.Compiler
1. 在Xcode4.6下创建的工程, 在Xcode5下build&run, 然后提示以下error. 难不成要在Xcode5下重新创建工程? Xcode cannot run using t ...
- 设置powershell ExecutionPolicy
Get-ExecutionPolicy -List Set-ExecutionPolicy -Scope CurrentUser AllSigned Policies: Restricted/AllS ...
- LNMP 网站搭建
https://lnmp.org/ lnmp这个一键安装:https://lnmp.org/install.html wget -c http://soft.vpser.net/lnmp/lnmp1. ...
- centos7 rabbitmq安装以及应用
安装单机rabbitmq 1.安装erlang cd /usr.local yum install wget yum install net-tools wget http://erlang.or ...
- Part 2 - Fundamentals(4-10)
https://simpleisbetterthancomplex.com/series/2017/09/11/a-complete-beginners-guide-to-django-part-2. ...
- BeanUtils.populate的方法的作用
BeanUtils位于org.apache.commons.beanutils.BeanUtils下面,其方法populate的作用解释如下: 完整方法: BeanUtils.populate( Ob ...