PHP批量生成底部带编号二维码(二维码生成+文字生成图片+图片拼接合并)
PHP批量生成带底部编号二维码(二维码生成+文字生成图片+图片拼接合并)
需求:
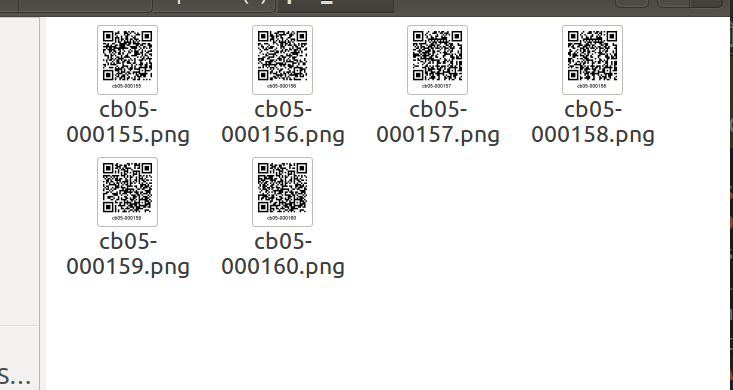
输入编号如 : cb05-0000001 至 cb05-0000500 批量生成 以编号为名称的下图二维码,然后压缩并下载

思路: phpqrcode 生成 二维码 --> 编号字符串生成图片 ---> 二维码与编号图片拼接---->压缩 下载
1 PHP生成二维码
下载并加载phpqrcode.php,本次需批量生成二维码,多次调用此函数,注意 include_once
    //生成二维码图片

    public function makeCodeImg($url, $product_sn = '2018**82019')

    {$path = 'upload/product_qr_code';

        if (!is_dir($path)) {

            mkdir($path, 0777, true);

        }

        include_once 'phpqrcode/phpqrcode.php';

        $value = $url;                  //二维码内容

        $errorCorrectionLevel = 'L';    //容错级别

        $matrixPointSize = 12;           //生成图片大小

        $filename = $path . '/' . $product_sn . '.jpg';

        QRcode::png($value, $filename, $errorCorrectionLevel, $matrixPointSize, 2);

        $QR = $filename;                //已经生成的原始二维码图片文件

        $QR = imagecreatefromstring(file_get_contents($QR));

        imagejpeg($QR, $product_sn . 'jpg');

    }
2 编号字符串生成图片 文字居中(注意字体文件下载与选择)
若 文字为中文 字体选择不当会出现 小方框替代了文字
//文字生成图片

    public function makeImgWithStr($filename, $text, $font_size=20,$font = 'font/Arial/Arial.ttf')

    {

        //图片尺寸

        $im = imagecreatetruecolor(444, 70);

        //背景色

        $white = imagecolorallocate($im, 255, 255, 255);

        //字体颜色

        $black = imagecolorallocate($im, 0, 0, 0);

        imagefilledrectangle($im, 0, 0, 444, 300, $white);

        $txt_max_width = intval(0.8 * 444);

        $content = "";

        for ($i = 0; $i < mb_strlen($text); $i++) {

            $letter[] = mb_substr($text, $i, 1);

        }

        foreach ($letter as $l) {

            $test_str = $content . " " . $l;

            $test_box = imagettfbbox($font_size, 0, $font, $test_str);

            // 判断拼接后的字符串是否超过预设的宽度。超出宽度添加换行

            if (($test_box[2] > $txt_max_width) && ($content !== "")) {

                $content .= "\n";

            }

            $content .= $l;

        }

        $txt_width = $test_box[2] - $test_box[0];

        $y = 70 * 0.5; // 文字从何处的高度开始

        $x = (444 - $txt_width) / 2; //文字居中

        // echo $x;die;

        //文字写入

        imagettftext($im, $font_size, 0, $x, $y, $black, $font, $content); //写 TTF 文字到图中

        //图片保存

        imagejpeg($im, $filename);

    }
3 合并拼接二维码与文字图片(竖直拼接保证等宽,横向拼接保证等高)
  /**

     * 合并图片,拼接合并

     * @param array $image_path 需要合成的图片数组

     * @param $save_path 合成后图片保存路径

     * @param string $axis 合成方向

     * @param string $save_type 合成后图片保存类型

     * @return bool|array

     */

    public function CompositeImage(array $image_path, $save_path, $axis = 'y', $save_type = 'png')

    {

        if (count($image_path) < 2) {

            return false;

        }

        //定义一个图片对象数组

        $image_obj = [];

        //获取图片信息

        $width = 0;

        $height = 0;

        foreach ($image_path as $k => $v) {

            $pic_info = getimagesize($v);

            list($mime, $type) = explode('/', $pic_info['mime']);

            //获取宽高度

            $width += $pic_info[0];

            $height += $pic_info[1];

            if ($type == 'jpeg') {

                $image_obj[] = imagecreatefromjpeg($v);

            } elseif ($type == 'png') {

                $image_obj[] = imagecreatefrompng($v);

            } else {

                $image_obj[] = imagecreatefromgif($v);

            }

        }

        //按轴生成画布方向

        if ($axis == 'x') {

            //TODO X轴无缝合成时请保证所有图片高度相同

            $img = imageCreatetruecolor($width, imagesy($image_obj[0]));

        } else {

            //TODO Y轴无缝合成时请保证所有图片宽度相同

            $img = imageCreatetruecolor(imagesx($image_obj[0]), $height);

        }

        //创建画布颜色

        $color = imagecolorallocate($img, 255, 255, 255);

        imagefill($image_obj[0], 0, 0, $color);

        //创建画布

        imageColorTransparent($img, $color);

        imagecopyresampled($img, $image_obj[0], 0, 0, 0, 0, imagesx($image_obj[0]), imagesy($image_obj[0]), imagesx($image_obj[0]), imagesy($image_obj[0]));

        $yx = imagesx($image_obj[0]);

        $x = 0;

        $yy = imagesy($image_obj[0]);

        $y = 0;

        //循环生成图片

        for ($i = 1; $i <= count($image_obj) - 1; $i++) {

            if ($axis == 'x') {

                $x = $x + $yx;

                imagecopymerge($img, $image_obj[$i], $x, 0, 0, 0, imagesx($image_obj[$i]), imagesy($image_obj[$i]), 100);

            } else {

                $y = $y + $yy;

                imagecopymerge($img, $image_obj[$i], 0, $y, 0, 0, imagesx($image_obj[$i]), imagesy($image_obj[$i]), 100);

            }

        }

        //设置合成后图片保存类型

        if ($save_type == 'png') {

            imagepng($img, $save_path);

        } elseif ($save_type == 'jpg' || $save_type == 'jpeg') {

            imagejpeg($img, $save_path);

        } else {

            imagegif($img, $save_path);

        }

        return true;

    }
图片等宽处理参考(等高处理类似)
public function ImgCompress($src, $out_with = 150)

    {

        // 获取图片基本信息

        list($width, $height, $type, $attr) = getimagesize($src);

        // 获取图片后缀名

        $pic_type = image_type_to_extension($type, false);

        // 拼接方法

        $imagecreatefrom = "imagecreatefrom" . $pic_type;

        // 打开传入的图片

        $in_pic = $imagecreatefrom($src);

        // 压缩后的图片长宽

        $new_width = $out_with;

        $new_height = $out_with / $width * $height;

        // 生成中间图片

        $temp = imagecreatetruecolor($new_width, $new_height);

        // 图片按比例合并在一起。

        imagecopyresampled($temp, $in_pic, 0, 0, 0, 0, $new_width, $new_height, $width, $height);

        // 销毁输入图片

        imagejpeg($temp, 'upload/merge' . time() . ".jpg");

        imagedestroy($in_pic);

        return array($temp, $new_width, $new_height);

    }
5 压缩合并与下载
//生成带编号说明的二维码 (生成二维码  文字生成图片 图片合并拼接)

    public function makeMergerImg($sn_product){

        $this->makeCodeImg('dev2.lystrong.cn',$sn_product);

        $this->makeImgWithStr('upload/sn_str_img/'.$sn_product.'.jpg',$sn_product,30);

        $this->CompositeImage(['upload/product_qr_code/'.$sn_product.'.jpg','upload/sn_str_img/'.$sn_product.'.jpg'],'upload/pin_code/'.$sn_product.'.png');

        unlink('upload/sn_str_img/'.$sn_product.'.jpg');

        unlink('upload/product_qr_code/'.$sn_product.'.jpg');

    }

  //生成压缩zip文件 $file_name 最终生成的文件名,包含路径   $file_list,用来生成file_name的文件数组

  public function makeZip($file_name, $file_list)

    {

        if (file_exists($file_name)) {

            unlink($file_name);

        }

        //重新生成文件

        $zip = new ZipArchive();

        if ($zip->open($file_name, ZIPARCHIVE::CREATE) !== TRUE) {

            exit('无法打开文件,或者文件创建失败');

        }

        foreach ($file_list as $val) {

            if (file_exists($val)) {

                $zip->addFile($val);

            }

        }

        $zip->close();//关闭

        if (!file_exists($file_name)) {

            exit('无法找到文件'); //即使创建,仍有可能失败

        }

    }

  //下载

    public function download($file){

        if ( file_exists ( $file )) {

            header ( 'Content-Description: File Transfer' );

            header ( 'Content-Type: application/octet-stream' );

            header ( 'Content-Disposition: attachment; filename=' . basename ( $file ));

            header ( 'Content-Transfer-Encoding: binary' );

            header ( 'Expires: 0' );

            header ( 'Cache-Control: must-revalidate' );

            header ( 'Pragma: public' );

            header ( 'Content-Length: ' . filesize ( $file ));

            ob_clean ();

            flush ();

            readfile ( $file );

            exit;

        }

    }
验证调用:
$product_str_start = 'cb05-00000155'; $product_str_end = 'cb05-00000160';

$press = explode('-',$product_str_start)[0];

$product_sn_start = explode('-',$product_str_start)[1];

$product_sn_end = explode('-',$product_str_end)[1];

$count = $product_sn_end - $product_sn_start;

for ($i=0;$i<=$count;$i++){

    $product_sn = $press.'-'.substr($product_sn_start+$i+1000000,1,7);

    $Img->makeMergerImg($product_sn);

    $img_arr[$i] = 'upload/pin_code/'.$product_sn.'.png';

}

$Img->makeZip('upload/pin_code-0007.zip',$img_arr);

$Img->download('upload/pin_code-0007.zip');

完整代码:https://github.com/wanggang826/php-do-image
PHP批量生成底部带编号二维码(二维码生成+文字生成图片+图片拼接合并)的更多相关文章
- .NET ORM框架HiSql实战-第三章-使用自定义编号生成【申请编号】
一.引言 上一篇.NET ORM框架HiSql实战-第二章-使用Hisql实现菜单管理(增删改查) 中菜单编号采用的是雪花ID,生成的编号无法自定义.比如本系统的一个申请业务,需要按前缀+日期+流水号 ...
- (转)ZXing生成二维码和带logo的二维码,模仿微信生成二维码效果
场景:移动支付需要对二维码的生成与部署有所了解,掌握目前主流的二维码生成技术. 1 ZXing 生成二维码 首先说下,QRCode是日本人开发的,ZXing是google开发,barcode4j也是老 ...
- zxing解析生成一维码二维码
@web界面实现扫一扫 二维码工具类 package util; import java.awt.BasicStroke; import java.awt.Graphics; import java. ...
- 你只要5行代码,拥有你的个性二维码,用Python生成动态二维码
如果想了解更多关于python的应用,可以私信我,或者点击下方链接自行获取,里面到资料都是免费的(http://t.cn/A6Zvjdun) 二维码满天飞,但是有没有想过Python也能制作出专属于自 ...
- Swift开发小技巧--扫描二维码,二维码的描边与锁定,设置扫描范围,二维码的生成(高清,无码,你懂得!)
二维码的扫描,二维码的锁定与描边,二维码的扫描范围,二维码的生成(高清,无码,你懂得!),识别相册中的二维码 扫描二维码用到的三个重要对象的关系,如图: 1.懒加载各种类 // MARK: - 懒加载 ...
- java二维码生成-谷歌(Google.zxing)开源二维码生成学习及实例
java二维码生成-谷歌(Google.zxing)开源二维码生成的实例及介绍 我们使用比特矩阵(位矩阵)的QR码编码在缓冲图片上画出二维码 实例有以下一个传入参数 OutputStream ou ...
- Android高级控件(三)—— 使用Google ZXing实现二维码的扫描和生成相关功能体系
Android高级控件(三)-- 使用Google ZXing实现二维码的扫描和生成相关功能体系 摘要 现在的二维码可谓是烂大街了,到处都是二维码,什么都是二维码,扫一扫似乎已经流行到习以为常了,今天 ...
- C# 中使用 ThoughtWorks.QRCode.dll 生成指定尺寸和边框宽度的二维码
本文介绍在 C# 中使用 ThoughtWorks.QRCode.dll 生成指定尺寸和边框宽度的二维码.网上文章大多只是简单介绍内置参数的设置,根据我的使用目的,增加了自定义目标二维码图片尺寸和白边 ...
- 【转】C# 中使用 ThoughtWorks.QRCode.dll 生成指定尺寸和边框宽度的二维码
本文介绍在 C# 中使用 ThoughtWorks.QRCode.dll 生成指定尺寸和边框宽度的二维码.网上文章大多只是简单介绍内置参数的设置,根据我的使用目的,增加了自定义目标二维码图片尺寸和白边 ...
随机推荐
- Codeforces 979D (STL set)(不用Trie简单AC)
题面: 传送门 题目大意: 给定一个空集合,有两种操作: 一种是往集合中插入一个元素x,一种是给三个数x,k,s,问集合中是否存在v,使得gcd(x,v)%k==0,且x+v<=s若存在多个满足 ...
- java 注解 Annontation
什么是注解? 对于很多初次接触的开发者来说应该都有这个疑问?Annontation是Java5开始引入的新特征,中文名称叫注解.它提供了一种安全的类似注释的机制,用来将任何的信息或元数据(metada ...
- gevent简介
gevent是基于协程的Python网络库. 协程存在的意义:对于多线程应用,CPU通过切片的方式来切换线程间的执行,线程切换时需要耗时(保存状态,下次继续).协程,则只使用一个线程,在一个线程中规定 ...
- VPS Linux修改root密码
hosteons VPS 没有提供在网页控制面板里修改root密码的选项,但是可以通过Rescue模式吃查看root密码以及 有重置root密码为随机值的选项. 在重置root密码为随机值后,进入系统 ...
- 【rabbitmq】解决SimpleAmqpClient创建连接时阻塞的问题
https://blog.csdn.net/panxianzhan/article/details/50755409 https://blog.csdn.net/csm201314/article/d ...
- Python---基础---dict和set2
2019-05-21 写一个程序来管理用户登陆系统的用户信息:登陆名字和密码,登陆用户账号建立后,已存在用户可以用登陆名字和密码重返系统,新用户不能用别人的用户名建立用户账号 ------------ ...
- TPS、QPS和系统吞吐量的区别和理解
参考:https://blog.csdn.net/u010889616/article/details/83245695 一.QPS/TPSQPS:Queries Per Second意思是“每秒查询 ...
- 在Mac电脑上安装linux系统
1.首页需要下载VMware fusion (百度一下) 2.Ubuntu 镜像文件(.iso) 连接:http://www.jb51.net/LINUXjishu/239493.html 3.打开 ...
- FastDFS整合普通Maven项目(四)
1.下载官方的源代码:https://codeload.github.com/happyfish100/fastdfs-client-java/zip/master 2.采用maven命令编译成jar ...
- GIS矢量大数据采集
1.使用什么工具采集 2.在哪个网站采集 3.采集哪一种数据 >>地理大数据公众号 >>大数据公众号 >>智能数据湖公众号 点.线.面.体 可视化 >> ...