
Ansible playbooks常用模块案例操作
打开git bash 连接ansible服务器,然后进入deploy用户
#ssh root@192.168.96.188
进入python3.6虚拟环境
#su - deploy
#source .py3-a2.5-env/bin/activate
加载ansible 2.5版本
#source .py3-a2.5-env/ansible/hacking/env-setup -q
验证ansible加载效果
#ansible-playbook --version
1、File模块
登录到目标主机进行预配置工作
#ssh root@test.example.com
创建两个系统用户
# useradd foo
# useradd deploy
登出,回到ansible的主机,进入到test_playbooks目录。编辑主任务文件,添加测试任务。保存退出
# vi roles/testbox/tasks/main.yml
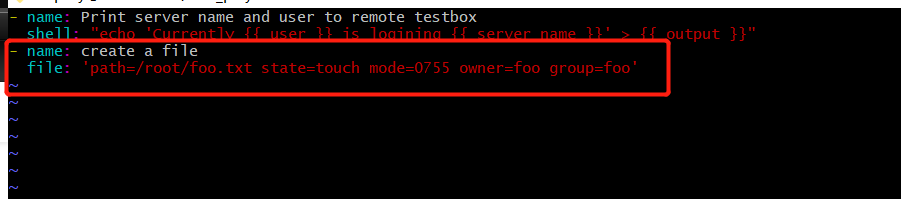

- name: create a file            # 创建文件file

  file: 'path=/root/foo.txt state=touch mode=0755 owner=foo group=foo'

#path为文件路径 #state为所用命令 #mode 为文件权限 #owner 为设置的系统用户名称 #group 为宿主
执行测试任务
# ansible-playbook -i inventory/testenv ./deploy.yml
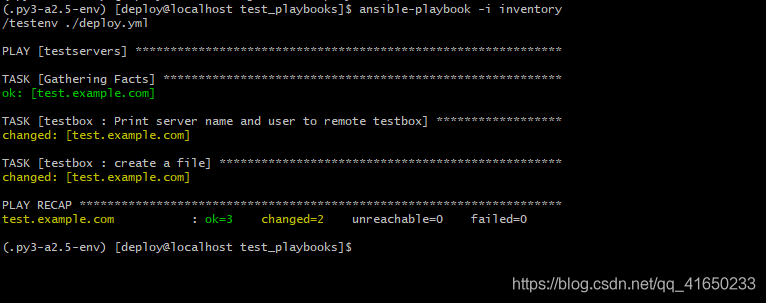
查看文件是否创建成功
# ssh root@test.example.com ls -l /root/foo.txt
创建安装nginx需要的文件,复制下面的脚本,进行保存
# vi roles/testbox/files/nginx.repo
[nginx-stable]

name=nginx stable repo

baseurl=http://nginx.org/packages/centos/$releasever/$basearch/

gpgcheck=1

enabled=1

gpgkey=https://nginx.org/keys/nginx_signing.key

module_hotfixes=true

[nginx-mainline]

name=nginx mainline repo

baseurl=http://nginx.org/packages/mainline/centos/$releasever/$basearch/

gpgcheck=1

enabled=0

gpgkey=https://nginx.org/keys/nginx_signing.key

module_hotfixes=true
2、Copy模块
先创建一个files目录,在目录下创建一个脚本文件,添加一下内容,保存退出
# mkdir roles/testbox/files
# vi roles/testbox/files/foo.sh
echo "This is a test script"
编辑主任务配置文件,保存退出。
# vi roles/testbox/tasks/main.yml

- name: copy a file

  copy: 'remote_src=no src=roles/testbox/files/foo.sh dest=/root/foo.sh mode=0644 force=yes'

#remote_src 定义当前拷贝任务是将ansible本地server文件传送到目标主机中

#src 本地文件 传送  #dest 目标主机文件

#mode 设置文件权限  #force 定义拷贝任务强制执行
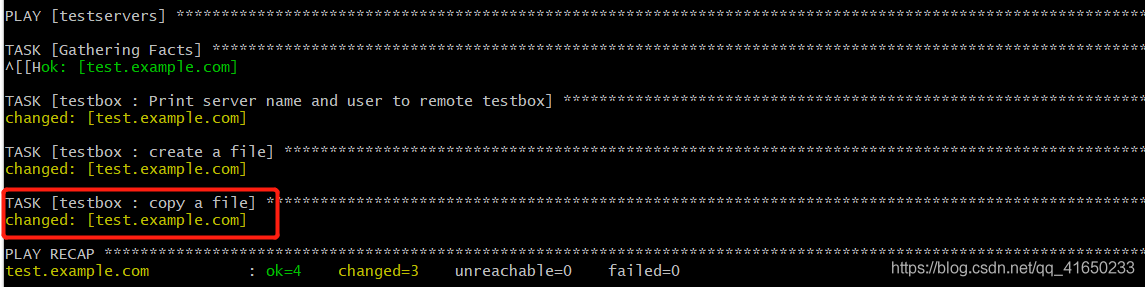
编辑好文件之后,执行任务
# ansible-playbook -i inventory/testenv ./deploy.yml
3、Stat模块、Debug模块
编辑主任务配置文件,添加以下内容
# vi roles/testbox/tasks/main.yml
# 获取远程foo.sh的文件状态信息

- name: check if foo.sh exists

  stat: 'path=/root/foo.sh'

  register: script_stat

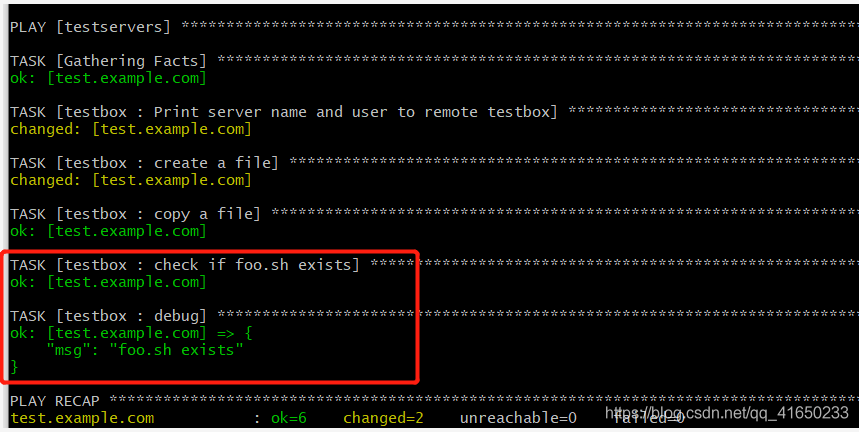
# 将stat文件信息,放到when的判断语句中,如果判断成功,dubug输出foo.sh exists

- debug: msg="foo.sh exists"

  when: script_stat.stat.exists
编辑好文件之后,执行任务
# ansible-playbook -i inventory/testenv ./deploy.yml
4、Command/Shell模块
编辑主任务配置文件,添加以下内容
# vi roles/testbox/tasks/main.yml
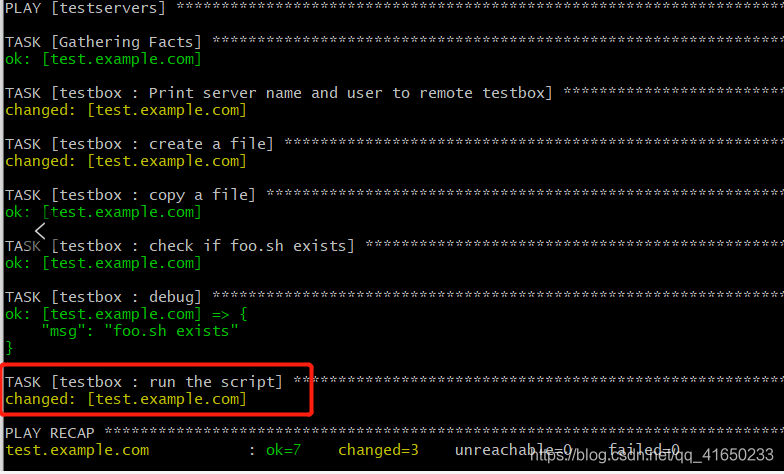
# 远程执行foo.sh脚本

- name: run the script

  command: 'sh /root/foo.sh'
编辑好文件之后,执行任务
# ansible-playbook -i inventory/testenv ./deploy.yml
5、Template模块、Packaging模块、Service模块
添加一些参数到testenv的文件当中,添加如下参数
# vi vi inventory/testenv
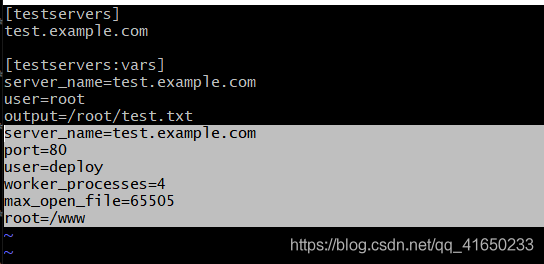
server_name=test.example.com

port=80

user=deploy

worker_processes=4

max_open_file=65505

root=/www
创建templates目录,然后创建一个nginx.conf.j2的模块文件,添加配置信息
# mkdir roles/testbox/templates
# vi roles/testbox/templates/nginx.conf.j2
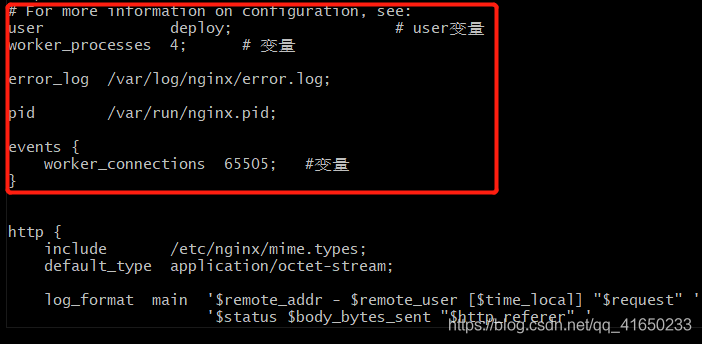
# For more information on configuration, see:

user              {{ user }};                  # user变量

worker_processes  {{ worker_processes }};      # 变量

error_log  /var/log/nginx/error.log;

pid        /var/run/nginx.pid;

events {

    worker_connections  {{ max_open_file }};   #变量

}

http {

    include       /etc/nginx/mime.types;

    default_type  application/octet-stream;

    log_format  main  '$remote_addr - $remote_user [$time_local] "$request" '

                      '$status $body_bytes_sent "$http_referer" '

                      '"$http_user_agent" "$http_x_forwarded_for"';

    access_log  /var/log/nginx/access.log  main;

    sendfile        on;

    #tcp_nopush     on;

    #keepalive_timeout  0;

    keepalive_timeout  65;

    #gzip  on;

    # Load config files from the /etc/nginx/conf.d directory

    # The default server is in conf.d/default.conf

    #include /etc/nginx/conf.d/*.conf;

    server {

        listen       {{ port }} default_server;      # 端口变量

        server_name  {{ server_name }};          #服务器名称变量

        #charset koi8-r;

        #access_log  logs/host.access.log  main;

        location / {

            root   {{ root }};          # root变量

            index  index.html index.htm;

        }

        error_page  404              /404.html;

        location = /404.html {

            root   /usr/share/nginx/html;

        }

        # redirect server error pages to the static page /50x.html

        #

        error_page   500 502 503 504  /50x.html;

        location = /50x.html {

            root   /usr/share/nginx/html;

        }

    }

}
编辑主任务配置文件,添加以下下内容
# vi roles/testbox/tasks/main.yml
# 将模板写入目标主机配置文件

- name: write the nginx config file

  template: src=roles/testbox/templates/nginx.conf.j2 dest=/etc/nginx/conf.d/default.conf

# yum安装nginx

- name: ensure nginx is at the latest version

  yum: pkg=nginx state=latest

# 启动nginx服务

- name: start nginx service

  service: name=nginx state=started
编辑好文件之后,执行任务
# ansible-playbook -i inventory/testenv ./deploy.yml

检查nginx.conf.j2文件的参数变量,是否写入nginx主配置文件
# ssh root@test.example.com cat /etc/nginx/conf.d/default.conf
检查远程主机nginx是否启动
# ssh root@test.example.com ps -ef | grep nginx

main.yml文件
- name: Print server name and user to remote testbox

  shell: "echo 'Currently {{ user }} is logining {{ server_name }}' > {{ output }}"

- name: create a file

  file: 'path=/root/foo.txt state=touch mode=0755 owner=foo group=foo'

- name: copy a file

  copy: 'remote_src=no src=roles/testbox/files/foo.sh dest=/root/foo.sh mode=0644 force=yes'

- name: check if foo.sh exists

  stat: 'path=/root/foo.sh'

  register: script_stat

- debug: msg="foo.sh exists"

  when: script_stat.stat.exists

- name: run the script

  command: 'sh /root/foo.sh'

- name: Create a directory if it does not exist

  file: 'path=/etc/nginx state=directory mode=0755'

- name: write the nginx config file

  template: src=roles/testbox/templates/nginx.conf.j2 dest=/etc/nginx/nginx.conf

- name: copy a file

  copy: 'remote_src=no src=roles/testbox/files/nginx.repo dest=/etc/yum.repos.d/nginx.repo mode=0644 force=yes'

- name: ensure nginx is at the latest version

  yum: pkg=nginx state=latest

- name: start nginx service

  service: name=nginx state=started
- name: Print server name and user to remote testbox

  shell: "echo 'Currently {{ user }} is logining {{ server_name }}' > {{ output }}"

  # 远程创建文件

- name: create a files

  file: 'path=/root/foo.txt state=touch mode=0755 owner=foo group=foo'

  # 将本地的文件拷贝到远程主机

- name: copy a files

  copy: 'remote_src=no src=roles/testbox/files/foo.sh dest=/root/foo.sh mode=0644 force=yes'

  # 获取文件状态

- name: check if foo.sh exists

  stat: 'path=/root/foo.sh'

  register: script_stat

  # 判断文件是否存在

- debug: msg="foo.sh exists"

  when: script_stat.stat.exists

  # 远程执行脚本文件

- name: run the script

  command: 'sh /root/foo.sh'

  # 创建一个nginx的目录

- name: Create a directory if it does not exist

  file: 'path=/etc/nginx state=directory mode=0755'

  # 从本地模板中写入nginx.conf文件

- name: write the nginx config file

  template: src=roles/testbox/templates/nginx.conf.j2 dest=/etc/nginx/nginx.conf

  # 拷贝本地nginx安装需要的脚本

- name: copy a file

  copy: 'remote_src=no src=roles/testbox/files/nginx.repo dest=/etc/yum.repos.d/nginx.repo mode=0644 force=yes'

  # yum安装nginx

- name: ensure nginx is at the latest version

  yum: pkg=nginx state=latest

  # 启动nginx

- name: start nginx service

  service: name=nginx state=started
Ansible playbooks常用模块案例操作的更多相关文章
- Ansible Playbooks 常用模块
官网链接:https://docs.ansible.com/ansible/latest/modules/list_of_all_modules.html ansible python module ...
- Ansible Playbooks常用模块
File模块 在目标主机创建文件或目录,并赋予其系统权限 - name: create a file file:'path=/oot/foo.txt state=touch mode=0755 own ...
- ansible api常用模块与参数
###ansibleAPI 常用模块 用于读取yaml,json格式的文件 from ansible.parsing.dataloader import DataLoader #用于管理变量的类,包括 ...
- ansible中常用模块详解
ansible中常用的模块详解: file模块 ansible内置的可以查看模块用法的命令如下: [root@docker5 ~]# ansible-doc -s file - name: Sets ...
- Ansible之常用模块(一)
ansible之所以功能强大,不是ansible本身,是因为它有众多的模块,前文我们介绍了ansible的基础介绍,系列命令的用法以及选项的说明,通过前文的学习我们知道了ansible是基于pytho ...
- ansible API 常用模块
常用模块 用于读取yaml,json格式的文件 from ansible.parsing.dataloader import DataLoader #用于管理变量的类,包括主机,组,扩展等变量 fro ...
- ansible 四常用模块
常用模块 Ansible默认提供了很多模块来供我们使用.在Linux中,我们可以通过 ansible-doc -l 命令查看到当前Ansible支持哪些模块,通过 ansible-doc -s [模块 ...
- ansible 003 常用模块
常用模块 file 模块 管理被控端文件 回显为绿色则,未变更,符合要求 黄色则改变 红色则报错 因为默认值为file,那么文件不存在,报错 改为touch则创建 将state改为directory变 ...
- ansible小结常用模块
根据官方的分类,将模块按功能分类为:云模块.命令模块.数据库模块.文件模块.资产模块.消息模块.监控模块.网络模块.通知模块.包管理模块.源码控制模块.系统模块.单元模块.web设施模块.window ...
随机推荐
- Django入门4--admin
python3选择__str__(self),python2选择__unicode__(self):
- 【u221】分数
Time Limit: 1 second Memory Limit: 128 MB [问题描述] 高考分数刚刚公布.共有n人参加考试,为了便于填报志愿,教育部把所有考生的成绩平均分为m档.保证n是m的 ...
- 程序员必备神器(FastStoneCapture)
工欲善其事,必先利其器. 作为程序员,如果我们不知道如何制作动态图或者快捷录屏.录视频等,会给人一种身怀不技的感觉:好!屁话少说,接下来我会废话连篇的介绍一款神器--------那就是FastSton ...
- linux 在 1 MB 之下的 ISA 内存
一个最著名的 I/O 内存区是在个人计算机上的 ISA 范围. 这是在 640 KB(0xA0000)和 1 MB(0x100000)之间的内存范围. 因此, 它正好出现于常规内存 RAM 中间. 这 ...
- ZR1158
ZR1158 http://www.zhengruioi.com/contest/446/problem/1158 给定限制的问题大多数都是容斥或者二分,或者二分之后容斥 首先,这个问题的第一步我们还 ...
- JQ绑定事件的叠加和解决,index()方法的坑
JQ绑定事件的叠加和解决,index()方法的坑 前言 在做过几个不大不小的项目后,发现技术这种东西,必须要多多实践,才能发现各种问题,理论的知识掌握的再好终究是纸上谈兵. 因此目前感觉有两点是必须要 ...
- gradle 打包后第三方登录不上
使用 gradlew clean assembleReleaseChannels 生成不用的渠道包后 第三方登录不上 原因:打包未设置好APP的 .keystore
- 我们基于kaldi开发的嵌入式语音识别系统升级成深度学习啦
先前的文章<三个小白是如何在三个月内搭一个基于kaldi的嵌入式在线语音识别系统的>说我们花了不到三个月的时间搭了一个基于kaldi的嵌入式语音识别系统,不过它是基于传统的GMM-HMM的 ...
- 泛圈科技Yottachain区块链云存储打破传统云迎来价值数据存储
随着物联网时代的发展,更多的数据随之产生.从智能设备到电脑再到视频游戏机,各种各样的信息从不同的电子产品源源不断地涌入.通常,人们将数据存储在本地驱动器中.但是,由于产生的数据量是无限的,超过了本地存 ...
- Spring Boot + Docker + K8S 简单示例
前言 最近看了看k8s,感觉用这个管理docker确实比自己写一坨脚本进步太多了,简直不是一个次原的东西. 看着k8s的官方文档随手写了个小Demo,一个基于k8s的spring boot服务. 代码 ...