SpringCloud-OAuth2(二):实战篇
如果不了解Oauth2 是什么、工作流程的可以看我上一篇文章:
SpringCloud-OAuth2(一):基础篇
这篇讲的内容是:Oauth2在SpringBoot/SpringCloud中的实战。
SpringBoot版本:2.2.5.Release
SpringCloud版本:Hoxton.SR9
JDK版本:1.8
1:POM配置
    <dependencies>

        <!-- https://mvnrepository.com/artifact/org.springframework.security.oauth/spring-security-oauth2 -->

        <dependency>

            <artifactId>spring-cloud-starter-oauth2</artifactId>

            <groupId>org.springframework.cloud</groupId>

        </dependency>

        <!--使用redis存放token-->

        <dependency>

            <groupId>org.springframework.boot</groupId>

            <artifactId>spring-boot-starter-data-redis</artifactId>

        </dependency>

        <!--密码加密解密依赖包-->

        <dependency>

            <groupId>org.jasypt</groupId>

            <artifactId>jasypt</artifactId>

            <version>1.9.2</version>

        </dependency>

    </dependencies>
2:关键配置
2.1:认证服务配置-WebAuthorizationConfig
@Configuration

@EnableAuthorizationServer

public class WebAuthorizationConfig extends AuthorizationServerConfigurerAdapter {

    private final AuthenticationManager authenticationManager;

    private final UserDetailsService userDetailsService;

    private final PasswordEncoder passwordEncoder;

    private final TokenStore tokenStore;

    private final AuthorizationCodeServices authorizationCodeServices;

    private final AuthTokenExceptionHandler authTokenExceptionHandler;

    public WebAuthorizationConfig(AuthenticationManager authenticationManager,

                                  UserDetailsService userDetailsService,

                                  PasswordEncoder passwordEncoder,

                                  TokenStore tokenStore,

                                  AuthorizationCodeServices authorizationCodeServices,

                                  AuthTokenExceptionHandler authTokenExceptionHandler) {

        this.authenticationManager = authenticationManager;

        this.userDetailsService = userDetailsService;

        this.passwordEncoder = passwordEncoder;

        this.tokenStore = tokenStore;

        this.authorizationCodeServices = authorizationCodeServices;

        this.authTokenExceptionHandler = authTokenExceptionHandler;

    }

    @Override

    public void configure(ClientDetailsServiceConfigurer clients) throws Exception {

        String secret = PasswordHelper.encryptPassword(Oauth2ClientUserEnums.ADMIN.getClientSecret());

        clients.inMemory()

                .withClient(Oauth2ClientUserEnums.ADMIN.getClientId())

                .secret(secret)

                .scopes("all", "test")

                .resourceIds("admin")

                // autoApprove 可跳过授权页直接返回code

                .autoApprove("all")

                .redirectUris("http://www.baidu.com")

                //客户端认证所支持的授权类型 1:客户端凭证 2:账号密码 3:授权码 4:token刷新 5:简易模式

                .authorizedGrantTypes(CLIENT_CREDENTIALS, PASSWORD, REFRESH_TOKEN, AUTHORIZATION_CODE, IMPLICIT)

                //用户角色

                .authorities("admin")

                //允许自动授权

                .autoApprove(false)

                //token 过期时间

                .accessTokenValiditySeconds((int) TimeUnit.HOURS.toSeconds(12))

                //refresh_token 过期时间

                .refreshTokenValiditySeconds((int) TimeUnit.DAYS.toSeconds(30))

        ;

    }

    @Override

    public void configure(AuthorizationServerSecurityConfigurer security) throws Exception {

        security

                .passwordEncoder(passwordEncoder)                //设置密码编辑器

                .allowFormAuthenticationForClients()

                .tokenKeyAccess("permitAll()")                   //开启 /oauth/token_key 的访问权限控制

                .checkTokenAccess("permitAll()")                 //开启 /oauth/check_token 验证端口认证权限访问

        ;

    }

    @Override

    public void configure(AuthorizationServerEndpointsConfigurer endpoints) throws Exception {

        // 配置授权服务器端点的属性

        endpoints.authenticationManager(authenticationManager)    //认证管理器

                .tokenStore(tokenStore)

                .authorizationCodeServices(authorizationCodeServices)

                .userDetailsService(userDetailsService)

                .exceptionTranslator(authTokenExceptionHandler);

    }

}
注解:@EnableAuthorizationServer表明当前服务是认证服务。
介绍一下几个基础组件
①:authenticationManager
认证管理器,对客户端凭证、用户进行认证的地方。
②:tokenStore
存放token的地方,默认是存放在Inmemory(内存)中的。
③:authorizationCodeServices
code生成服务,使用默认的即可。
④:userDetailsService
用户详情服务,可重写实现,用户信息从数据库中加载。
⑤:authTokenExceptionHandler
自定义的 token 鉴别失败异常处理器。
⑥:authClientExceptionHandler
自定义的 客户端凭证 鉴别失败异常处理器。
2.2:资源服务配置-WebResourceConfig
@Configuration

@EnableResourceServer

public class WebResourceConfig extends ResourceServerConfigurerAdapter {

    private final AuthClientExceptionHandler authClientExceptionHandler;

    public WebResourceConfig(AuthClientExceptionHandler authClientExceptionHandler) {

        this.authClientExceptionHandler = authClientExceptionHandler;

    }

    @Override

    public void configure(ResourceServerSecurityConfigurer resources) {

        resources.resourceId("admin").stateless(true).authenticationEntryPoint(authClientExceptionHandler);

    }

    @Override

    public void configure(HttpSecurity http) throws Exception {

        // 资源链路

        http

                .sessionManagement()

                .sessionCreationPolicy(SessionCreationPolicy.IF_REQUIRED)

                .and().formLogin().permitAll()

                // 登录放通

                .and()

                .authorizeRequests()

                .antMatchers("/oauth/**", "/favicon.ico")

                //.authenticated()

                .permitAll()

                // 其他请求都需认证

                .and()

                .authorizeRequests()

                .anyRequest()

                .authenticated()

                // 跨域

                .and()

                .cors()

                // 关闭跨站请求防护

                .and()

                .csrf()

                .disable();

    }

}
注解:@EnableResourceServer表明当前服务是认证服务。
笔记:
为什么要放开 /favicon.ico 的访问权限?因为在进行授权码模式的时候,一直无法跳转到我定义的redirect_uri 地址中去。
使用 logging.level.org.springframework.security=debug 发现会访问 /favicon.ico ,然后报错,再然后就是调到登录页去了。
因此 /favicon.ico 放开之后,认证正常,成功调到redirect_uri 地址并返回了code。(这是OAuth2的小坑吗?)
2.3:安全配置-WebSecurityConfig
@Configuration

@EnableWebSecurity

public class WebSecurityConfig extends WebSecurityConfigurerAdapter {

    private final PasswordEncoder passwordEncoder;

    public WebSecurityConfig(PasswordEncoder passwordEncoder) {

        this.passwordEncoder = passwordEncoder;

    }

    @Override

    protected void configure(AuthenticationManagerBuilder auth) throws Exception {

        auth

                .userDetailsService(userDetailsService())

                .passwordEncoder(passwordEncoder);                  //为认证管理器配置passwordEncoder,无论客户端凭证密码还是用户密码都通过passwordEncoder进行密码匹配

    }

    @Bean

    @Override

    protected UserDetailsService userDetailsService() {

        return new VipUserDetailService();

    }

    @Bean(name = BeanIds.AUTHENTICATION_MANAGER)

    @Override

    public AuthenticationManager authenticationManagerBean() throws Exception {

        return super.authenticationManagerBean();

    }

}
详细配置可以翻阅我的GitHub:GitHub地址
3:认证授权演示
3.1:授权码模式
注意!!!一定要配置redirect_uri,并且一定要允许表单登录!!!
以下是步骤:
①:浏览器输入以下链接地址,会重定向到登录页
http://localhost:8123/oauth/authorize?client_id=admin&client_secret=admin&response_type=code&redirect_uri=http://www.baidu.com&scope=test
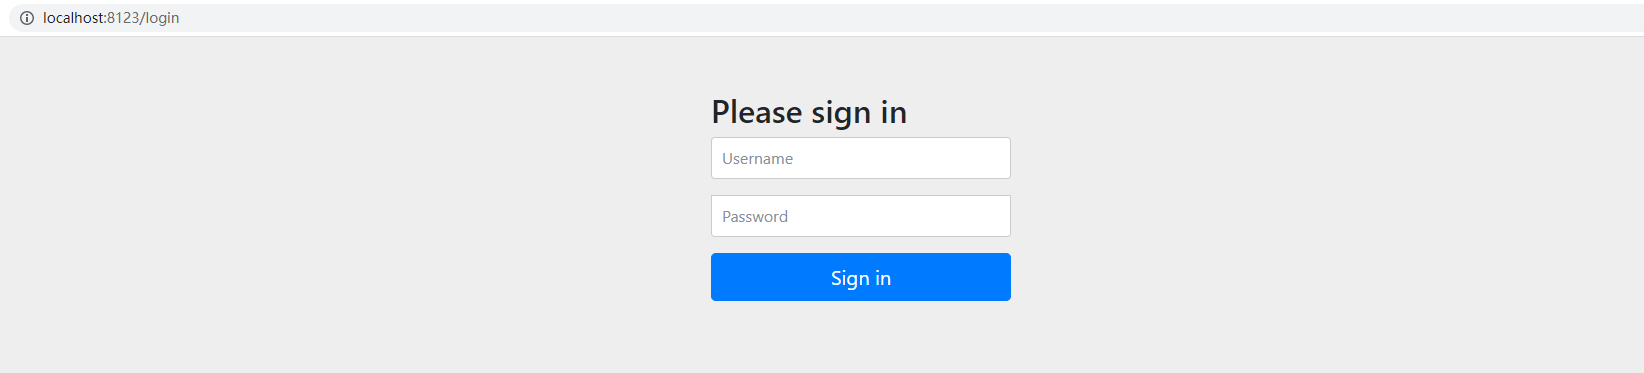
②:输入配置的用户名密码,回调到授权页

如果我们配置的scope是autoApprove的,即可跳过这步,直接到第③步,拿到code。
③:选择 Approve,点击Authorize 即可调到redirect_uri地址
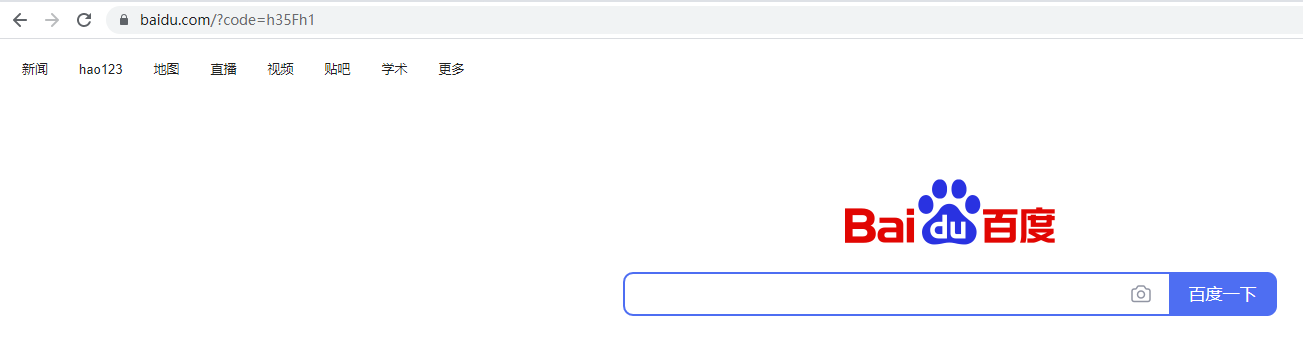
④:拿code 换 token
我的请求地址:127.0.0.1:8123/oauth/token?grant_type=authorization_code&code=h35Fh1&redirect_uri=http://www.baidu.com
需要配置Authorization,请求时会将客户端凭证以base64格式放在请求头中。

3.2:用户密码模式
我的请求地址:127.0.0.1:8123/oauth/token?grant_type=password&username=found&password=123456
需要配置Authorization,请求时会将客户端凭证以base64格式放在请求头中。

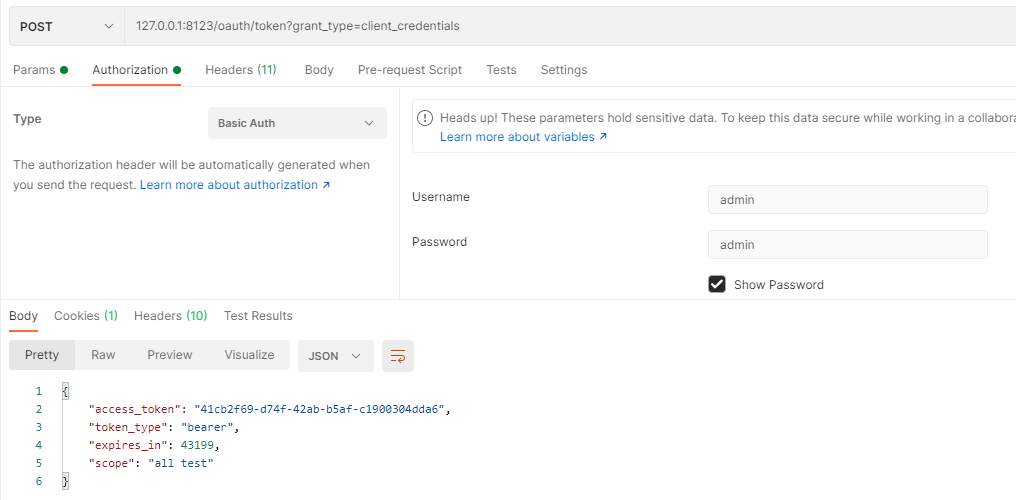
3.3:客户端凭证模式
我的请求地址:127.0.0.1:8123/oauth/token?grant_type=client_credentials
需要配置Authorization,请求时会将客户端凭证以base64格式放在请求头中。
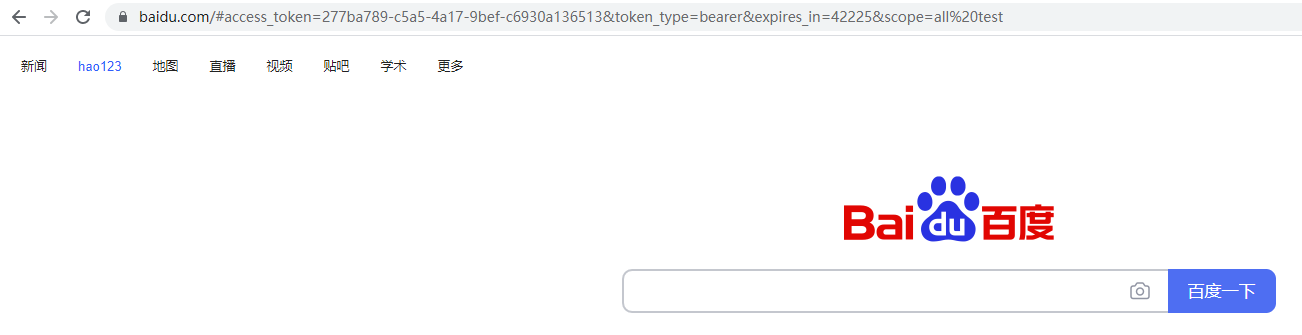
3.4:简易模式
浏览器输入以下地址即可拿到token:
http://localhost:8123/oauth/authorize?client_id=admin&client_secret=admin&response_type=token&redirect_uri=http://www.baidu.com
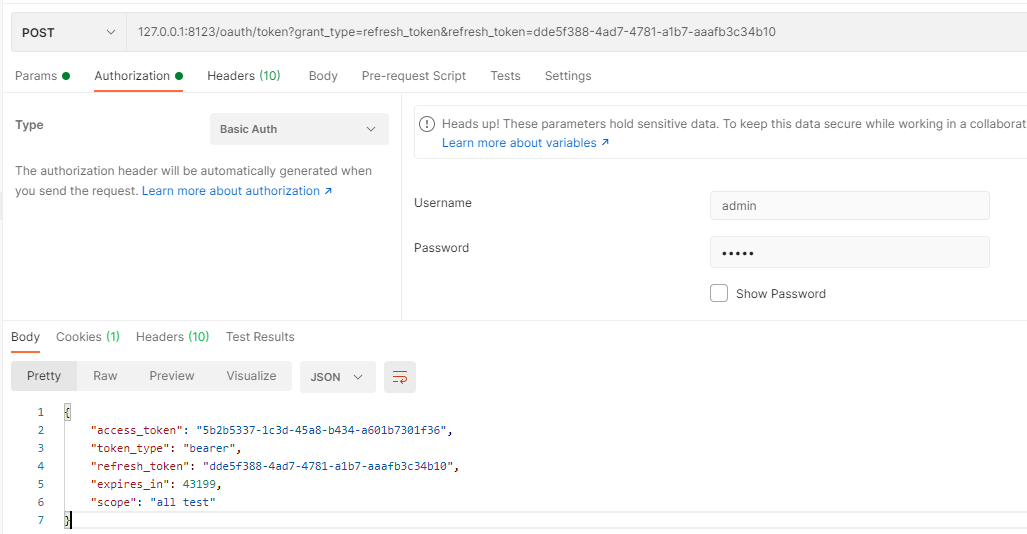
3.5:token 刷新
我的请求地址:127.0.0.1:8123/oauth/token?grant_type=refresh_token&refresh_token=dde5f388-4ad7-4781-a1b7-aaafb3c34b10
refresh_token是服务器颁发给客户端的,作用就是在一定时间内,让用户不用重新登录。
需要配置Authorization,请求时会将客户端凭证以base64格式放在请求头中。
4:从第三方登录让你理解什么是授权码模式
个人认为做第三方登录是当前比较流行的做法。
4.1:流程
①:比如我们现在登录processOn,就可以选择第三方登录。
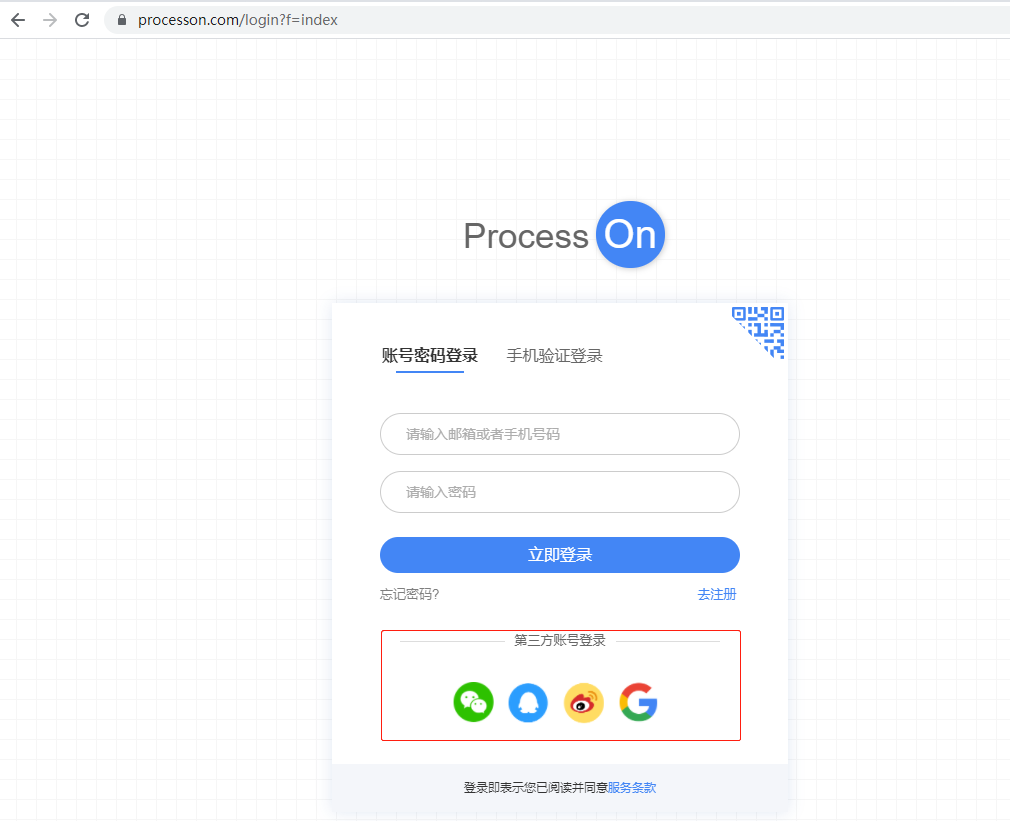
②:点击QQ登录后会调到这个页面↓↓↓↓↓↓↓↓↓↓↓↓
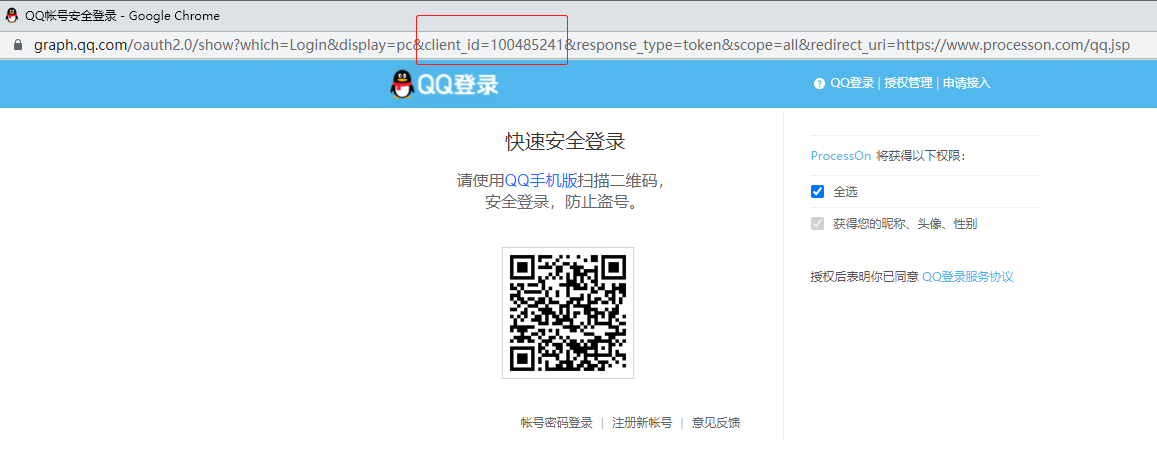
③:这个client_id 应该就是processOn 官方申请的第三方客户端凭证了。
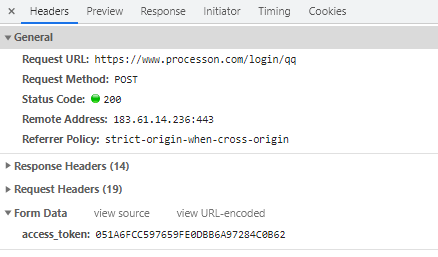
选择账号密码登录,输入账号密码之后就可以拿到token,(我手速快截了个图)

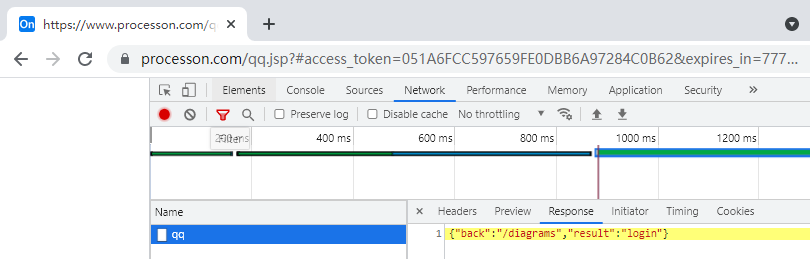
④:可以看到返回了access_token、过期时间。
随后processOn既发起请求进行登录操作,登录成功进入用户首页,失败则重定向到登录页。
4.2:uml图
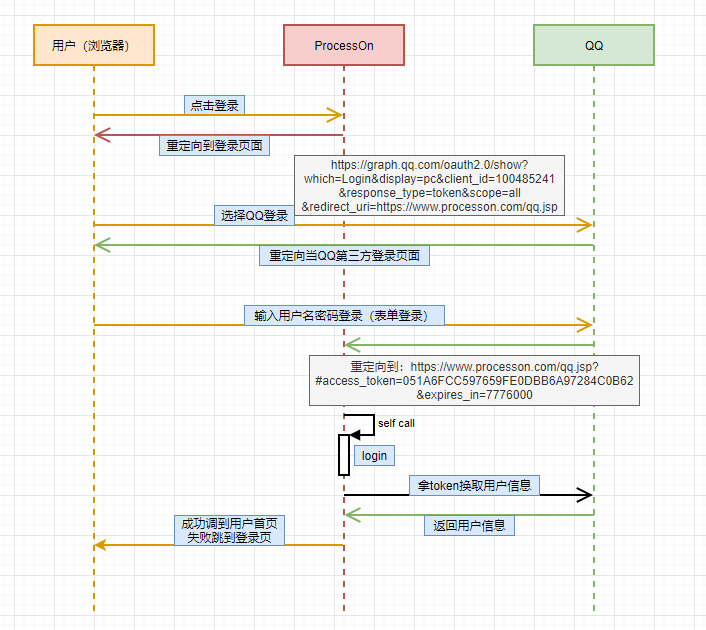
可以看到不需要用户进行Authorize操作即可拿到token了,说明QQ第三方认证中心设置的scope=all是autoApprove的。
总结 :
学习总要从身边找例子,这样才能更好的理解。
SpringCloud-OAuth2(二):实战篇的更多相关文章
- OAuth2简易实战(二)-模拟客户端调用
1. OAuth2简易实战(二) 1.1. 目标 模拟客户端获取第三方授权,并调用第三方接口 1.2. 代码 1.2.1. 核心流程 逻辑就是从数据库读取用户信息,封装成UserDetails对象,该 ...
- 二、Redis基本操作——String(实战篇)
小喵万万没想到,上一篇博客,居然已经被阅读600次了!!!让小喵感觉压力颇大.万一有写错的地方,岂不是会误导很多筒子们.所以,恳请大家,如果看到小喵的博客有什么不对的地方,请尽快指正!谢谢! 小喵的唠 ...
- 工作经常使用的SQL整理,实战篇(二)
原文:工作经常使用的SQL整理,实战篇(二) 工作经常使用的SQL整理,实战篇,地址一览: 工作经常使用的SQL整理,实战篇(一) 工作经常使用的SQL整理,实战篇(二) 工作经常使用的SQL整理,实 ...
- SpringCloud学习(二):微服务入门实战项目搭建
一.开始使用Spring Cloud实战微服务 1.SpringCloud是什么? 云计算的解决方案?不是 SpringCloud是一个在SpringBoot的基础上构建的一个快速构建分布式系统的工具 ...
- ActiveMQ实战篇之ActiveMQ实现request/reply模型(二)
ActiveMQ实战篇之ActiveMQ实现request/reply模型(二)
- 构建NetCore应用框架之实战篇(二):BitAdminCore框架定位及架构
本篇承接上篇内容,如果你不小心点击进来,建议重新从第一篇开始完整阅读. 构建NetCore应用框架之实战篇索引 一.BitAdminCore框架简介 从前篇论述我们知道,我们接下来将要去做一个管理系统 ...
- [SQL SERVER系列]工作经常使用的SQL整理,实战篇(二)[原创]
工作经常使用的SQL整理,实战篇,地址一览: 工作经常使用的SQL整理,实战篇(一) 工作经常使用的SQL整理,实战篇(二) 工作经常使用的SQL整理,实战篇(三) 接着上一篇“工作经常使用的SQL整 ...
- Ceres Solver: 高效的非线性优化库(二)实战篇
Ceres Solver: 高效的非线性优化库(二)实战篇 接上篇: Ceres Solver: 高效的非线性优化库(一) 如何求导 Ceres Solver提供了一种自动求导的方案,上一篇我们已经看 ...
- 如何在Visual Studio 2017中使用C# 7+语法 构建NetCore应用框架之实战篇(二):BitAdminCore框架定位及架构 构建NetCore应用框架之实战篇系列 构建NetCore应用框架之实战篇(一):什么是框架,如何设计一个框架 NetCore入门篇:(十二)在IIS中部署Net Core程序
如何在Visual Studio 2017中使用C# 7+语法 前言 之前不知看过哪位前辈的博文有点印象C# 7控制台开始支持执行异步方法,然后闲来无事,搞着,搞着没搞出来,然后就写了这篇博文,不 ...
随机推荐
- 关于Java处理串口二进制数据的问题 byte的范围 一个字节8bits
前置知识点 byte的范围[-128~127] 内存里表现为 0x00~0xFF 刚好是一个8bits的字节 问题 byte[] hexData = new byte[] {0x01, 0x03, 0 ...
- 判断标准I/O的缓冲区类型
#include <stdio.h> void pr_stdio(const char *, FILE *); int main() { FILE *fp; fputs("ent ...
- deep
deepinv20已经解决 sudo apt update && sudo apt upgrade
- mitogen附带文件到远程主机
#!/usr/bin/env python # import mitogen.master import mitogen.select import subprocess import logging ...
- Canal和Otter讨论二(原理与实践)
上次留下的问题 问题一: 跨公网部署Otter 参考架构图 解析 a. 数据涉及网络传输,S/E/T/L几个阶段会分散在2个或者更多Node节点上,多个Node之间通过zookeeper进行协同工 ...
- 强哥ThinkPHP学习笔记
TP框架:1.模板引擎2.MVC设计模式3.常用操作类 模板引擎和框架区别1.模板引擎只是框架中用来做php和html分离 MVC设计模式M model 数据模型V view 视图C control ...
- 如何对你的Linux系统进行基准测试: 3开源基准测试工具
如何对你的Linux系统进行基准测试: 3开源基准测试工具 0 赞0 评论 文章标签:SYS Source benchmark tool 开源 基准 系统 linux实用程序的 ...
- (转)Linux下用户组、文件权限详解
转自https://www.cnblogs.com/123-/p/4189072.html 用户组 在linux中的每个用户必须属于一个组,不能独立于组外.在linux中每个文件有所有者.所在组.其它 ...
- Day029 JDK8中新日期和时间API (二)
# JDK8中新日期和时间API (二) Instant介绍 Instant:时间线上的一个瞬时点. 这可能被用来记录应用程序中的事件时间 戳. 在处理时间和日期的时候,我们通常会想到年,月,日,时, ...
- 『言善信』Fiddler工具 — 1、Fiddler介绍与安装
目录 1.Fiddler简介 2.Fiddler功能 3.Fiddler工作原理 (1)先来了解一下B/S架构 (2)Fiddler工作原理 (3)Fiddler工作原理进阶说明 (4)以Google ...