
Android控件——7种形式的Android Dialog使用举例(转载)
在Android开发中,我们经常会需要在Android界面上弹出一些对话框,比如询问用户或者让用户选择。这些功能我们叫它Android Dialog对话框,在我们使用Android的过程中,我归纳了一下,Android Dialog的类型无非也就7种,下面我分别向大家介绍这7种Android Dialog对话框的使用方法,希望对大家能有所帮助。
1.该效果是当按返回按钮时弹出一个提示,来确保无误操作,采用常见的对话框样式。
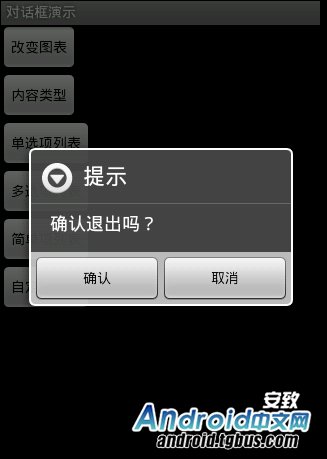
创建dialog对话框方法代码如下:
|
1
2
3
4
5
6
7
8
9
10
11
12
13
14
15
16
17
18
19
|
protected void dialog() { AlertDialog.Builder builder = new Builder(Main. this ); builder.setMessage( "确认退出吗?" ); builder.setTitle( "提示" ); builder.setPositiveButton( "确认" , new OnClickListener() { @Override public void onClick(DialogInterface dialog, int which) { dialog.dismiss(); Main. this .finish(); } }); builder.setNegativeButton( "取消" , new OnClickListener() { @Override public void onClick(DialogInterface dialog, int which) { dialog.dismiss(); } }); builder.create().show(); } |
在onKeyDown(int keyCode, KeyEvent event)方法中调用此方法
|
1
2
3
4
5
6
|
public boolean onKeyDown( int keyCode, KeyEvent event) { if (keyCode == KeyEvent.KEYCODE_BACK && event.getRepeatCount() == 0 ) { dialog(); } return false ; } |
2.改变了对话框的图表,添加了三个按钮

创建dialog的方法代码如下:
|
1
2
3
4
5
6
7
8
9
10
11
12
13
14
15
16
17
18
19
20
21
22
23
24
25
26
|
Dialog dialog = new AlertDialog.Builder( this ).setIcon( android.R.drawable.btn_star).setTitle( "喜好调查" ).setMessage( "你喜欢李连杰的电影吗?" ).setPositiveButton( "很喜欢" , new OnClickListener() { @Override public void onClick(DialogInterface dialog, int which) { // TODO Auto-generated method stub Toast.makeText(Main. this , "我很喜欢他的电影。" , Toast.LENGTH_LONG).show(); } }).setNegativeButton( "不喜欢" , new OnClickListener() { @Override public void onClick(DialogInterface dialog, int which) { // TODO Auto-generated method stub Toast.makeText(Main. this , "我不喜欢他的电影。" , Toast.LENGTH_LONG) .show(); } }).setNeutralButton( "一般" , new OnClickListener() { @Override public void onClick(DialogInterface dialog, int which) { // TODO Auto-generated method stub Toast.makeText(Main. this , "谈不上喜欢不喜欢。" , Toast.LENGTH_LONG) .show(); } }).create(); dialog.show(); |
3.信息内容是一个简单的View类型
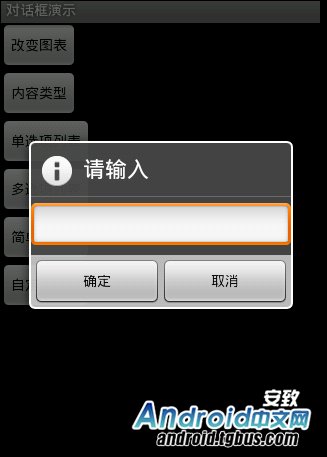
创建dialog方法的代码如下:
|
1
2
3
4
|
new AlertDialog.Builder( this ).setTitle( "请输入" ).setIcon( android.R.drawable.ic_dialog_info).setView( new EditText( this )).setPositiveButton( "确定" , null ) .setNegativeButton( "取消" , null ).show(); |
4.信息内容是一组单选框
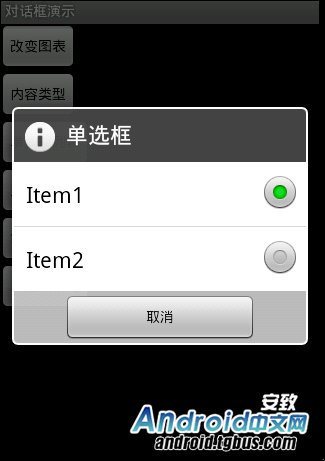
创建dialog方法的代码如下:
|
1
2
3
4
|
new AlertDialog.Builder( this ).setTitle( "复选框" ).setMultiChoiceItems( new String[] { "Item1" , "Item2" }, null , null ) .setPositiveButton( "确定" , null ) .setNegativeButton( "取消" , null ).show(); |
5.信息内容是一组多选框
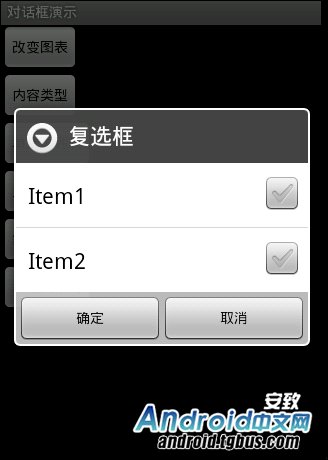
创建dialog方法的代码如下:
|
1
2
3
4
5
6
7
8
|
new AlertDialog.Builder( this ).setTitle( "单选框" ).setIcon( android.R.drawable.ic_dialog_info).setSingleChoiceItems( new String[] { "Item1" , "Item2" }, 0 , new DialogInterface.OnClickListener() { public void onClick(DialogInterface dialog, int which) { dialog.dismiss(); } }).setNegativeButton( "取消" , null ).show(); |
6.信息内容是一组简单列表项
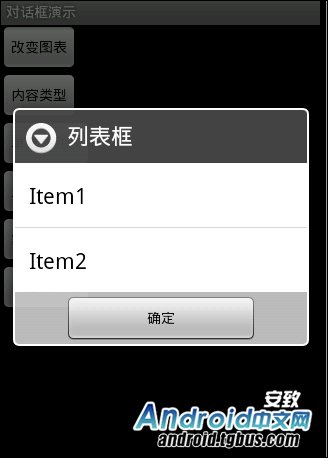
创建dialog的方法代码如下:
|
1
2
3
|
new AlertDialog.Builder( this ).setTitle( "列表框" ).setItems( new String[] { "Item1" , "Item2" }, null ).setNegativeButton( "确定" , null ).show(); |
7.信息内容是一个自定义的布局
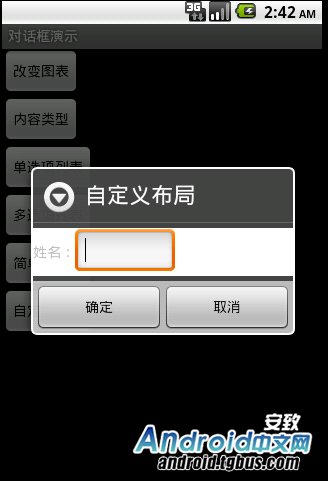
dialog布局文件代码如下:
|
1
2
3
4
5
6
7
8
9
10
11
12
|
<? xml version = "1.0" encoding = "utf-8" ?> android:layout_height = "wrap_content" android:layout_width = "wrap_content" android:background = "#ffffffff" android:orientation = "horizontal" android:id = "@+id/dialog" > < TextView android:layout_height = "wrap_content" android:layout_width = "wrap_content" android:id = "@+id/tvname" android:text = "姓名:" /> < EditText android:layout_height = "wrap_content" android:layout_width = "wrap_content" android:id = "@+id/etname" android:minWidth = "100dip" /> </ LinearLayout > |
创建dialog方法的代码如下:
|
1
2
3
4
5
6
|
LayoutInflater inflater = getLayoutInflater(); View layout = inflater.inflate(R.layout.dialog, (ViewGroup) findViewById(R.id.dialog)); new AlertDialog.Builder( this ).setTitle( "自定义布局" ).setView(layout) .setPositiveButton( "确定" , null ) .setNegativeButton( "取消" , null ).show(); |
Android控件——7种形式的Android Dialog使用举例(转载)的更多相关文章
- Android控件点击事件
1. 介绍 本文介绍了Android控件的点击事件 Android控件点击(onClick)事件可以用如下三种方式来实现 2. 实现onClick方法 在layout的xml中指定onClick方法, ...
- Android控件系列之RadioButton&RadioGroup(转)
学习目的: 1.掌握在Android中如何建立RadioGroup和RadioButton 2.掌握RadioGroup的常用属性 3.理解RadioButton和CheckBox的区别 4.掌握Ra ...
- Android初级教程_获取Android控件的宽和高
转载:http://blog.csdn.net/johnny901114/article/details/7839512 我们都知道在onCreate()里面获取控件的高度是0,这是为什么呢?我们来看 ...
- Android入门(六):Android控件布局属性全解
第一类:属性值为true或falseandroid:layout_centerHrizontal 水平居中 (Hrizontal表示水平)android:layout_centerVertical 垂 ...
- Android 控件架构及View、ViewGroup的测量
附录:示例代码地址 控件在Android开发的过程中是必不可少的,无论是我们在使用系统控件还是自定义的控件.下面我们将讲解一下Android的控件架构,以及如何实现自定义控件. 1.Android控件 ...
- Android控件属性大全(转)
http://blog.csdn.net/pku_android/article/details/7365685 LinearLayout 线性布局 子元素任意: Tab ...
- UIAutomator定位Android控件的方法
UIAutomator各种控件定位的方法. 1. 背景 使用SDK自带的NotePad应用,尝试去获得在NotesList那个Activity里的Menu Options上面的那个Add note菜单 ...
- Android控件系列之CheckBox
学习目的: 1.掌握在Android中如何建立CheckBox 2.掌握CheckBox的常用属性 3.掌握CheckBox选中状态变换的事件(监听器) CheckBox简介: CheckBox和Bu ...
- android控件的属性
android控件的属性 本节描述android空间的位置,内容等相关属性及属性的含义 第一类:属性值为true或false android:layout_centerHrizontal 水平居中 ( ...
随机推荐
- 【转】Go maps in action
原文: https://blog.golang.org/go-maps-in-action ------------------------------------------------------ ...
- python处理csv
python处理csv 学习了:https://blog.csdn.net/qq_33363973/article/details/78783481 竟然pip install csv 无果: 学习 ...
- 转:android studio 改编译区背景色
http://blog.csdn.net/zhuhai__yizhi/article/details/44017609 最近开始学习使用android studio想设置背景颜色,不过上网找的全都是复 ...
- 倍福TwinCAT(贝福Beckhoff)常见问题(FAQ)-为什么无法打开官方范例的项目,打开tszip文件时提示尝试越过结尾怎么办
打开新的解决方案,找到tszip文件 提示错误Advanced Setting时越过结尾 到这里一般VS会卡死 但是我们已经可以得到解压出来的文件夹,其中包含PLC的完整项目文件夹,可以新 ...
- has been modified since the precompiled header地图错误
添加高德地图的一个错误 has been modified since the precompiled header 解决方案: xcode---product----clean 清理重新编译一下就 ...
- webDriver API——第11部分Remote WebDriver
The WebDriver implementation. class selenium.webdriver.remote.webdriver.WebDriver(command_executor=' ...
- ant-design表单处理和常用方法及自定义验证
首先要说一下antdesign这个框架API和demo丰富,而且开发环境提供对应的warning来纠正用户的错误.是一个很好的组件库. 关于表单验证方面是依赖于 async-validator 库. ...
- Hadoop生态圈介绍及入门(转)
本帖最后由 howtodown 于 2015-4-2 23:15 编辑 问题导读 1.Hadoop生态圈介绍了哪些组件,分别都是什么? 2.大数据与Hadoop是什么关系? 本章主要内容: 理解大数据 ...
- windowsclient开发--怎样測量一个字符串显示的物理长度
首先须要说明的是,我所说的字符串的长度,不是string的length,也不是string的size.我指的是显示的长度.即物理长度. 缘由: 之所以要提到这个.是由于遇到了一些问题. 再使用duil ...
- shell脚本对多端口进程kill并重启进程
#!/bin/bash export LOG_FILE='/data/log/search' spider_search_pid=`ps aux|grep flask_web_search|grep ...