React Native常用组件之ListView
1. ListView常用属性
ScrollView 相关属性样式全部继承
dataSource ListViewDataSource 设置ListView的数据源
initialListSize number
设置ListView组件刚刚加载的时候渲染的列表行数,用这个属性确定首屏或者首页加载的数量,而不是花大量的时间渲染加载很多页面数据,提高性能。onChangeVisibleRows function (visibleRows,changedRows)=>void。
当可见的行发生变化的时候回调该方法。onEndReachedThreshold number
当偏移量达到设置的临界值调用onEndReachedonEndReached function
当所有的数据项行被渲染之后,并且列表往下进行滚动。一直滚动到距离底部onEndReachedThredshold设置的值进行回调该方法。原生的滚动事件进行传递(通过参数的形式)。
pageSize number 每一次事件的循环渲染的行数
removeClippedSubviews bool
该属性用于提供大数据列表的滚动性能。该使用的时候需要给每一行(row)的布局添加over:'hidden'样式。该属性默认是开启状态。
renderFooter function 方法 ()=>renderable
在每次渲染过程中头和尾总会重新进行渲染。如果发现该重新绘制的性能开销比较大的时候,可以使用StaticContainer容器或者其他合适的组件。
renderHeader function 方法
在每一次渲染过程中Footer(尾)该会一直在列表的底部,header(头)该会一直在列表的头部,用法同上。
renderRow function (rowData,sectionID,rowID,highlightRow)=>renderable
该方法有四个参数,其中分别为数据源中一条数据,分组的ID,行的ID,以及标记是否是高亮选中的状态信息。renderScrollComponent function
方法 (props)=>renderable 该方法可以返回一个可以滚动的组件。默认该会返回一个ScrollView
renderSectionHeader function (sectionData,sectionID)=>renderable
如果设置了该方法,这样会为每一个section渲染一个粘性的header视图。该视图粘性的效果是当刚刚被渲染开始的时候,该会处于对应的内容的顶部,然后开始滑动的时候,该会跑到屏幕的顶端。直到滑动到下一个section的header(头)视图,然后被替代为止。
renderSeparator function
(sectionID,rowID,adjacentRowHighlighted)=>renderable
如果设置该方法,会在被每一行的下面渲染一个组件作为分隔。除了每一个section分组的头部视图前面的最后一行。scrollRenderAheadDistance number
进行设置当该行进入屏幕多少像素以内之后就开始渲染该行
2. ListView的高阶特性
ListView同样支持一些高级特性,包括设置每一组的粘性的头部(类似于iPhone)、支持设置列表的header以及footer视图、当数据列表滑动到最底部的时候支持onEndReached方法回调、设备屏幕列表可见的视图数据发生变化的时候回调onChangeVisibleRows以及一些性能方面的优化特性。
ListView设计的时候,当需要动态加载非常大的数据的时候,下面有一些方法性能优化的方法可以让我们的ListView滚动的时候更加平滑:
- 只更新渲染数据变化的那一行 ,rowHasChanged方法会告诉ListView组件是否需要重新渲染当前那一行。
- 选择渲染的频率,默认情况下面每一个event-loop(事件循环)只会渲染一行(可以同pageSize自定义属性设置)。这样可以把大的工作量进行分隔,提供整体渲染的性能。
3. Demo1 - ListView的简单使用
3.1 代码
/**

 * Sample React Native App

 * https://github.com/facebook/react-native

 * @flow

 */

import React, {Component} from 'react';

import {

  AppRegistry,

  StyleSheet,

  Text,

  View,

  Image,

  ListView,

  TouchableOpacity,

  AlertIOS,

} from 'react-native';

var Dimensions = require('Dimensions');

var {width, height} = Dimensions.get('window');

// 引入数据文件

var models = require("./Wine.json");

var rn0910ListViewTest01 = React.createClass({

  /**

   * 生命周期,不可更改的属性在这里

   * @returns {{}}

   */

  getDefaultProps() {

    return {}

  },

  /**

   * 生命周期,状态机在这里

   * @returns {{}}

   */

  getInitialState() {

    // 创建数据源   rowHasChanged方法决定了ListView是否重新渲染当前这一行

    var ds = new ListView.DataSource({

      rowHasChanged: (r1, r2) => {

        r1 !== r2

      }

    });

    return {

      // 数据源中的数据

      dataSource: ds.cloneWithRows(models)

    }

  },

  /**

   * 生命周期,复杂的操作在这里

   */

  componentDidMount() {

  },

  /**

   * 生命周期,渲染

   * @returns {XML}

   */

  render() {

    return (

      <ListView

        dataSource={this.state.dataSource} // 指定数据源

        renderRow={this.renderRow} // 渲染每一行

      />

    );

  },

  /**

   * ListView根据数据源的数据进行渲染

   * @param rowData 每一项的数据

   * @param sectionID 组号

   * @param rowID 行号

   * @param highlightRow

   * @returns {XML}

   */

  renderRow(rowData, sectionID, rowID, highlightRow) {

    return (

      <TouchableOpacity

        activeOpacity={0.7}

        onPress={() => this.cellDidClick(rowID, rowData)}

      >

        <View style={styles.wineCell}>

          <Image style={styles.icon} source={{uri: rowData.image}}/>

          <View style={styles.titleContainer}>

            <Text style={styles.title}>{rowData.name}</Text>

            <Text style={styles.subTitle}>${rowData.money}</Text>

          </View>

        </View>

      </TouchableOpacity>

    );

  },

  cellDidClick(rowID, rowData) {

    alert("点击了" + rowID + rowData.name);

  }

});

const styles = StyleSheet.create({

  container: {

    flex: 1,

    justifyContent: 'center',

    alignItems: 'center',

    backgroundColor: '#F5FCFF',

    paddingTop: 20

  },

  wineCell: {

    flexDirection: "row",

    borderBottomWidth: 1,

    borderBottomColor: '#eee',

    paddingLeft: 10,

    paddingTop: 10,

    paddingBottom: 10,

    backgroundColor: 'white'

  },

  icon: {

    width: 60,

    height: 60,

  },

  titleContainer: {

    flexDirection: "column",

    justifyContent: 'space-between'

  },

  title: {

    fontSize: 15,

    fontWeight: 'bold',

    width: width - 60,

    paddingLeft: 10,

    paddingRight: 10

  },

  subTitle: {

    fontSize: 15,

    marginLeft: 10,

  }

});

AppRegistry.registerComponent('rn0910ListViewTest01', () => rn0910ListViewTest01);
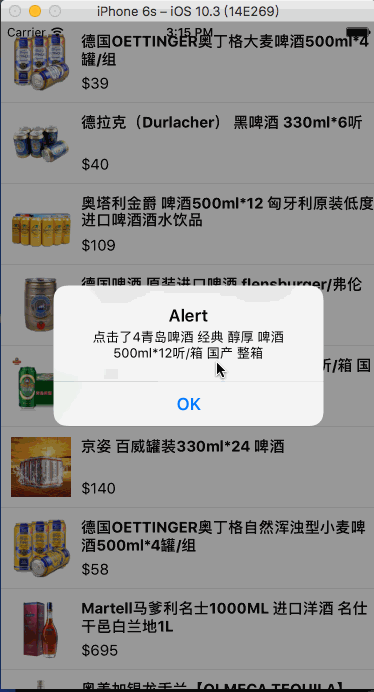
3.2 效果图
4. ListView之九宫格布局
  listViewContentStyle: {

    // ListView实现九宫格布局,主要是这俩属性

    flexDirection: 'row',

    flexWrap: 'wrap'

  },

  cellStyle: {

    alignItems: 'center',

    // 每一项设置宽高

    width: cellWH,

    height: cellWH,

    marginLeft: hMargin,

    marginTop: tMargin

  },
4.1 代码
/**

 * Sample React Native App

 * https://github.com/facebook/react-native

 * @flow

 */

import React, {Component} from 'react';

import {

  AppRegistry,

  StyleSheet,

  Text,

  View,

  ListView,

  Image,

  TouchableOpacity,

  AlertIOS

} from 'react-native';

// 引入json文件

var models = require("./shareData.json");

// 获取屏幕宽度

var Dimensions = require('Dimensions');

var screen_Width = Dimensions.get('window').width;

var col = 3; // 列数

var cellWH = 100; // 每项宽高

var tMargin = 25; // 行 顶间距

var hMargin = (screen_Width - cellWH * col) / (col + 1); // 每项之间的间距

var rn0912ListViewTest02 = React.createClass({

  /**

   * 不可修改的属性

   * @returns {{}}

   */

  getDefaultProps() {

    return {}

  },

  /**

   * 状态机

   */

  getInitialState() {

    var ds = new ListView.DataSource({rowHasChanged: (r1, r2) => r1 !== r2});

    return {

      dataSource: ds.cloneWithRows(models.data)

    }

  },

  /**

   * 渲染

   * @returns {{}}

   */

  render() {

    return (

      <ListView

        dataSource={this.state.dataSource}

        renderRow={this.renderRow}

        contentContainerStyle={styles.listViewContentStyle}

      />

    )

  },

  /**

   * 操作

   */

  componentDidMount() {

  },

  renderRow(rowData) {

    return (

      <TouchableOpacity

        activeOpacity={0.8}

        onPress={() => {

          alert("点击分享到" + rowData.title)

        }}

      >

        <View style={styles.cellStyle}>

          <Image style={styles.iconStyle} source={{uri: rowData.icon}}/>

          <Text style={styles.nameStyle}>{rowData.title}</Text>

        </View>

      </TouchableOpacity>

    );

  }

});

const styles = StyleSheet.create({

  container: {

    flex: 1,

    justifyContent: 'center',

    alignItems: 'center',

    backgroundColor: '#F5FCFF',

  },

  listViewContentStyle: {

    // ListView实现九宫格布局,主要是这俩属性

    flexDirection: 'row',

    flexWrap: 'wrap'

  },

  cellStyle: {

    alignItems: 'center',

    // 每一项设置宽高

    width: cellWH,

    height: cellWH,

    marginLeft: hMargin,

    marginTop: tMargin

  },

  iconStyle: {

    width: 80,

    height: 80,

  },

  nameStyle: {

    fontSize: 14

  }

});

AppRegistry.registerComponent('rn0912ListViewTest02', () => rn0912ListViewTest02);
4.2 效果图

5. ListView黏性sectionHeader
5.1 技术点分析
如何实现滚动时每个sectionHeader会吸顶?
在ListView中要实现sticky,需要使用cloneWithRowsAndSections方法,将dataBlob(object),sectionIDs(array),rowIDs(array)三个值传进去.
dataBlob
dataBlob包含ListView所需的所有的数据(sectionHeader 和 rows),在ListView渲染数据时,使用getSectionData 和 getRowData 来渲染每一行数据. dataBlob的 key 值包含sectionID + rowID

sectionIDs
sectionIDs 用语表示每组section

rowIDs 二维数组
rowIDs 用于描述每个section里的每行数据的位置及是否需要渲染. 在ListView渲染时,会先遍历 rowIDs 获取到对应的 dataBlob 数据

模拟对应的数据结构

在 DataSource 中, 设置ListView获取 row 和 section 的方法
  getInitialState() {

    var getSectionHeaderData = (dataBlob, sectionID) => {

      return dataBlob[sectionID];

    }

    var getRowData = (dataBlob, sectionID, rowID) => {

      return dataBlob[sectionID + ":" + rowID];

    }

    return {

      // 设置数据源,数据庞大,在

      dataSource: new ListView.DataSource({

        getSectionHeaderData: getSectionHeaderData, // 获取组数据

        getRowData: getRowData, // 获取行数据

        rowHasChanged: (r1, r2) => {

          r1 !== r2

        }, // 什么时候创建行

        sectionHeaderHasChanged: (s1, s2) => {

          s1 !== s2

        } // 什么时候创建组

      })

    };

  },
刷新状态机,将数据传入到ListView中
this.setState({

 dataSource: this.state.dataSource.cloneWithRowsAndSections(dataBlob, sectionIDs, rowIDs)

});
ListView中不仅要renderRow 还要 renderSectionHeader
   <ListView

     dataSource={this.state.dataSource}

     renderRow={this.renderRow}

     renderSectionHeader={this.renderSectionHeader}

   />
5.2 代码
/**

 * Sample React Native App

 * https://github.com/facebook/react-native

 * @flow

 */

import React, {Component} from 'react';

import {

  AppRegistry,

  StyleSheet,

  Text,

  View,

  ListView,

  Image,

  TouchableOpacity

} from 'react-native';

var carData = require("./Car.json");

var rn0913ListViewTest03 = React.createClass({

  /**

   * 不可更改的属性

   * @returns {{}}

   */

  getDefaultProps() {

    return {};

  },

  /**

   * 状态机

   * @returns {{}}

   */

  getInitialState() {

    var getSectionHeaderData = (dataBlob, sectionID) => {

      return dataBlob[sectionID];

    }

    var getRowData = (dataBlob, sectionID, rowID) => {

      return dataBlob[sectionID + ":" + rowID];

    }

    return {

      // 这里就没有指定数据源,由于需要处理数据,所以在componentDidMount()方法中进行数据处理

      dataSource: new ListView.DataSource({

        getSectionHeaderData: getSectionHeaderData, // 获取组数据

        getRowData: getRowData, // 获取行数据

        rowHasChanged: (r1, r2) => {

          r1 !== r2

        }, // 什么时候创建行

        sectionHeaderHasChanged: (s1, s2) => {

          s1 !== s2

        } // 什么时候创建组

      })

    };

  },

  /**

   * 渲染界面

   */

  render() {

    return (

      <View style={styles.container}>

        <View style={styles.nav}>

          <Text style={styles.navTitle}>Chaos车库</Text>

        </View>

        <ListView

          dataSource={this.state.dataSource}

          renderRow={this.renderRow}

          renderSectionHeader={this.renderSectionHeader}

        />

      </View>

    );

  },

  /**

   * 渲染每一项

   * @param rowData

   * @returns {XML}

   */

  renderRow(rowData) {

    return (

      <TouchableOpacity activeOpacity={0.8}>

        <View style={styles.cellStyle}>

          <Image style={styles.imgStyle} source={{uri: rowData.icon}}/>

          <Text style={styles.carTitleStyle}>{rowData.name}</Text>

        </View>

      </TouchableOpacity>

    );

  },

  /**

   * 渲染每一组

   * @param sectionData

   * @returns {XML}

   */

  renderSectionHeader(sectionData) {

    return (

      <TouchableOpacity activeOpacity={0.8}>

        <View style={styles.headerStyle}>

          <Text style={styles.headerTextStyle}>{sectionData}</Text>

        </View>

      </TouchableOpacity>

    );

  },

  /**

   * 复杂操作

   */

  componentDidMount() {

    this.loadDataFromJson();

  },

  /**

   * 加载数据,处理数据

   */

  loadDataFromJson() {

    var jsonData = carData.data;

    var dataBlob = {}, // 对象

      sectionIDs = [],

      rowIDs = [], // 这是个二维数组

      cars = [];

    for (var i = 0; i < jsonData.length; i++) {

      // 确定每组的id

      sectionIDs.push(i);

      // 确定每组的id对应的组数据

      dataBlob[i] = jsonData[i].title;

      // 获取行集合

      cars = jsonData[i].cars;

      rowIDs[i] = []; // 二维数组,每一项都是行id的数组

      for (var j = 0; j < cars.length; j++) {

        rowIDs[i].push(j);

        // 确定每一行的数据

        dataBlob[i + ":" + j] = cars[j];

      }

    }

    // 给ListView的数据源赋值

    this.setState({

      dataSource: this.state.dataSource.cloneWithRowsAndSections(dataBlob, sectionIDs, rowIDs)

    });

  }

});

const styles = StyleSheet.create({

  container: {},

  nav: {

    height: 64,

    backgroundColor: '#eee',

    alignItems: 'center',

    justifyContent: 'center'

  },

  navTitle: {

    fontSize:26

  },

  headerStyle: {

    backgroundColor: '#ccc',

    height:30,

  },

  headerTextStyle: {

    lineHeight:30,

    paddingLeft:10

  },

  cellStyle: {

    borderBottomColor:'#eee',

    borderBottomWidth:0.5,

    flexDirection:'row',

    alignItems:'center',

    padding:10

  },

  imgStyle: {

    width: 60,

    height: 60

  },

  carTitleStyle: {

    marginLeft:10

  }

});

AppRegistry.registerComponent('rn0913ListViewTest03', () => rn0913ListViewTest03);
5.3 效果图

React Native常用组件之ListView的更多相关文章
- React Native常用组件之ListView组件
学习iOS开发的同学应该都知道UITableView,几乎每个APP中都有它的存在,而且衍生出各种形态:那么同样,ListView就是在React Native中的tableView,而且更加简单和灵 ...
- React Native常用组件在Android和IOS上的不同
React Native常用组件在Android和IOS上的不同 一.Text组件在两个平台上的不同表现 1.1 height与fontSize 1.1.1只指定font,不指定height 在这种情 ...
- react native 常用组件汇总
react-native-uploader //文件上传https://github.com/aroth/react-native-uploader jpush-react-native //官方版本 ...
- React Native常用组件之ScrollView
1. 两个要点 1.1 ScrollView必须有一个确定的高度才能正常工作 它实际上所做的就是将一系列不确定高度的子组件装进一个确定高度的容器(通过滚动操作) 通常有两种做法: 第一种: 直接给该S ...
- React Native常用组件之ScrollView组件
一.前言 从iOS开发的经验来看,scrollView无疑是移动开发中很重要的一个组件,比如后面会学到的ListView就是继承自它.那么,在开发中比如:焦点图.引导页等地方都有其的影子,那接下来我们 ...
- React Native常用组件Image使用
前言 学习本系列内容需要具备一定 HTML 开发基础,没有基础的朋友可以先转至 HTML快速入门(一) 学习 本人接触 React Native 时间并不是特别长,所以对其中的内容和性质了解可能会有所 ...
- 一起来点React Native——常用组件之Touchable系列
在前面的登录界面中,我们发现所有的组件不会对用户的点击.触摸.拖拽做出合适的响应,这是十分不友好的.那么,在React Native中如何让视图对触发做出合适的响应呢? 一.高亮触摸 Touchab ...
- React Native常用组件之TabBarIOS、TabBarIOS.Item组件、Navigator组件、NavigatorIOS组件、React Navigation第三方
以下内容为老版本React Native,faceBook已经有了新的导航组件,请移步其他博客参考>>[我是传送门] 参考资料:React Navigation react-native ...
- 一起来点React Native——常用组件之Image
一.前言 在开发中还有一个非常重要的组件Image,通过这个组件可以展示各种各样的图片,而且在React Native中该组件可以通过多种方式加载图片资源. 二.Image组件的基本用法 2.1 从当 ...
随机推荐
- [ONTAK2015]Związek Harcerstwa Bajtockiego
[ONTAK2015]Związek Harcerstwa Bajtockiego 题目大意: 一棵\(n(n\le10^6)\)个点的树,从\(m\)出发,依次执行\(k(k\le10^6)\)条操 ...
- 老毛桃UEFI版u盘启动盘
使用老毛桃制作UEFI启动盘 下载UEFI版本启动盘制作工具,打开官方网站http://www.laomaotao.org,当前显示页面右下下载UEFI版本.文章写作时最新版本为9.3. 使用教程见: ...
- [NOIP2018]OI之旅的中转站
咳咳(清嗓子) 好了,现在NOIP2018结束了 作为初三的一名没考到一等的选手,非常抱歉,我不能继续参加了 那么……我接下来的目标就是中考了(虽然现实很残酷) 能不能继续自己的OI路,就要看自己了 ...
- 2017.08.15【NOIP提高组】模拟赛B组
Summary 今天比赛很差很差,掉到谷底.第一题快排打错了,漏了递归,变成一个while循环.最后一题k忘记减一,答案一直是无穷大,所以没交.第三题没时间调DP就打了个递归,第二题状态想歪了.四道题 ...
- c# 后台绑定treeview 单个tab
<wijmo:C1TreeView ID="C1TreeView1" runat="server" ShowCheckBoxes="true&q ...
- day7接口开发
一.数据库操作, 1.创建游标时指定游标类型为字典,返回值类型为字典,方便取值 cur = coon.cursor(cursor=pymysql.cursor.Dictursor) 2.获取执行查询S ...
- keras 的svm做分类
SVC继承了父类BaseSVC SVC类主要方法: ★__init__() 主要参数: C: float参数 默认值为1.0 错误项的惩罚系数.C越大,即对分错样本的惩罚程度越大,因此在训练样本中准确 ...
- Spring Boot @Autowired 没法自动注入的问题
Application 启动类: @SpringBootApplication @EnableConfigurationProperties @ComponentScan(basePackages = ...
- 具有相同名称 的类/接口已在使用。请使用类定制设置来解决此冲突。java调用第三方的webservice应用实例
WSDLToJava Error: http://10.96.84.124:81/BTRPWebServiceForSMB/OnSMBOrderService.svc?xsd=xsd0 [0,0]: ...
- C# SemaphoreSlim 实现
当多个任务或线程并行运行时,难以避免的对某些有限的资源进行并发的访问.可以考虑使用信号量来进行这方面的控制(System.Threading.Semaphore)是表示一个Windows内核的信号量对 ...