Docker技术入门与实战 第二版-学习笔记-9-Docker Compose 项目-3-Django项目实例
使用 Django
我们现在将使用 Compose 配置并运行一个 Django/PostgreSQL 应用。在此之前,先确保 Compose 已经安装。
1.通过编辑 Dockerfile文件来指定 Docker 容器要安装内容:
FROM python:2.7

ENV PYTHONUNBUFFERED

RUN mkdir /code

WORKDIR /code

ADD requirements.txt /code/

RUN pip install -r requirements.txt

ADD . /code/
以上内容指定应用将使用安装了 Python 以及必要依赖包的镜像
2.在 requirements.txt文件里面写明需要安装的具体依赖包名:
Django

psycopg2
3.构建docker-compose.yml文件将把所有的东西关联起来
它描述了应用的 构成(一个 web 服务和一个数据库)、使用的 Docker 镜像、镜像之间的连接、挂 \载到容器的卷,以及服务开放的端口:
db:

  image: postgres //db服务使用的镜像

web:

  build: . //即本地的Dockerfile文件

  command: python manage.py runserver 0.0.0.0: //容器启动时运行的命令

  volumes:

    - .:/code //挂载的数据卷

  ports:

    - "8000:8000" //映射的端口

  links: //连接的db容器

    - db
4.然后就可以使用 docker-compose run命令启动一个 Django 应用了
Compose 会先使用 Dockerfile为 web 服务创建一个镜像,接着使用这个镜像在容器里运行下面的指令
userdeMacBook-Pro:django user$ docker-compose run web django-admin.py startproject docker_composeexample .

Starting django_db_1 ... done
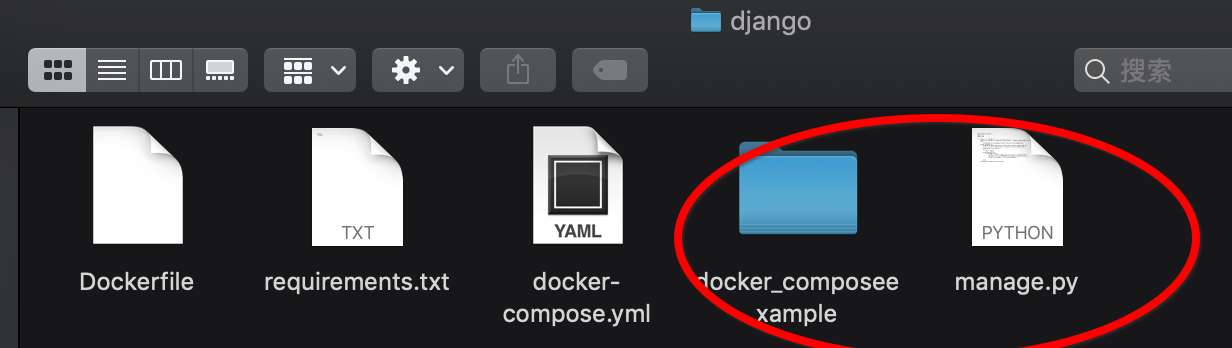
然后就会生成下面红圈圈起来的部分文件和文件夹:
5.开始使用该Django:
1)首先,我们要为应用设置好数据库的连接信息。用以下内容替换 docker_composeexample/settings.py文件中 DATABASES = ...定义的节点内容:
DATABASES = {

    'default': {

        'ENGINE': 'django.db.backends.postgresql_psycopg2',

        'NAME': 'postgres',

        'USER': 'postgres',

        'HOST': 'db',

        'PORT': ,

    }

}
这些信息是在 postgres Docker 镜像固定设置好的。 然后,运行 docker-compose up:
userdeMacBook-Pro:django user$ docker-compose up

django_db_1 is up-to-date

Starting django_web_1 ... done

Attaching to django_db_1, django_web_1

db_1   | The files belonging to this database system will be owned by user "postgres".

db_1   | This user must also own the server process.

db_1   |

db_1   | The database cluster will be initialized with locale "en_US.utf8".

db_1   | The default database encoding has accordingly been set to "UTF8".

db_1   | The default text search configuration will be set to "english".

db_1   |

db_1   | Data page checksums are disabled.

db_1   |

db_1   | fixing permissions on existing directory /var/lib/postgresql/data ... ok

db_1   | creating subdirectories ... ok

db_1   | selecting default max_connections ...

db_1   | selecting default shared_buffers ... 128MB

db_1   | selecting dynamic shared memory implementation ... posix

db_1   | creating configuration files ... ok

db_1   | running bootstrap script ... ok

db_1   | performing post-bootstrap initialization ... ok

db_1   |

db_1   | WARNING: enabling "trust" authentication for local connections

db_1   | You can change this by editing pg_hba.conf or using the option -A, or

db_1   | --auth-local and --auth-host, the next time you run initdb.

db_1   | syncing data to disk ... ok

db_1   |

db_1   | Success. You can now start the database server using:

db_1   |

db_1   |     pg_ctl -D /var/lib/postgresql/data -l logfile start

db_1   |

db_1   | ****************************************************

db_1   | WARNING: No password has been set for the database.

db_1   |          This will allow anyone with access to the

db_1   |          Postgres port to access your database. In

db_1   |          Docker's default configuration, this is

db_1   |          effectively any other container on the same

db_1   |          system.

db_1   |

db_1   |          Use "-e POSTGRES_PASSWORD=password" to set

db_1   |          it in "docker run".

db_1   | ****************************************************

db_1   | waiting for server to start....-- ::34.186 UTC [] LOG:  listening on Unix socket "/var/run/postgresql/.s.PGSQL.5432"

db_1   | -- ::34.202 UTC [] LOG:  database system was shut down at -- :: UTC

db_1   | -- ::34.207 UTC [] LOG:  database system is ready to accept connections

db_1   |  done

db_1   | server started

db_1   |

db_1   | /usr/local/bin/docker-entrypoint.sh: ignoring /docker-entrypoint-initdb.d/*

db_1   |

db_1   | waiting for server to shut down....2018-12-17 10:29:34.279 UTC [45] LOG:  received fast shutdown request

db_1   | 2018-12-17 10:29:34.282 UTC [45] LOG:  aborting any active transactions

db_1   | 2018-12-17 10:29:34.284 UTC [45] LOG:  background worker "logical replication launcher" (PID 52) exited with exit code 1

db_1   | 2018-12-17 10:29:34.285 UTC [47] LOG:  shutting down

db_1   | 2018-12-17 10:29:34.302 UTC [45] LOG:  database system is shut down

db_1   |  done

db_1   | server stopped

db_1   |

db_1   | PostgreSQL init process complete; ready for start up.

db_1   |

db_1   | 2018-12-17 10:29:34.392 UTC [1] LOG:  listening on IPv4 address "0.0.0.0", port 5432

db_1   | 2018-12-17 10:29:34.392 UTC [1] LOG:  listening on IPv6 address "::", port 5432

db_1   | 2018-12-17 10:29:34.395 UTC [1] LOG:  listening on Unix socket "/var/run/postgresql/.s.PGSQL.5432"

db_1   | 2018-12-17 10:29:34.407 UTC [54] LOG:  database system was shut down at 2018-12-17 10:29:34 UTC

db_1   | 2018-12-17 10:29:34.412 UTC [1] LOG:  database system is ready to accept connections

web_1  | /usr/local/lib/python2.7/site-packages/psycopg2/__init__.py:144: UserWarning: The psycopg2 wheel package will be renamed from release 2.8; in order to keep installing from binary please use "pip install psycopg2-binary" instead. For details see: <http://initd.org/psycopg/docs/install.html#binary-install-from-pypi>.

web_1  |   """)

web_1  | Performing system checks...

web_1  |

web_1  | System check identified no issues (0 silenced).

web_1  |

web_1  | You have 13 unapplied migration(s). Your project may not work properly until you apply the migrations for app(s): admin, auth, contenttypes, sessions.

web_1  | Run 'python manage.py migrate' to apply them.

web_1  | December 17, 2018 - 11:03:22

web_1  | Django version 1.11.17, using settings 'docker_composeexample.settings'

web_1  | Starting development server at http://0.0.0.0:8000/

web_1  | Quit the server with CONTROL-C.
这个 web 应用已经开始在你的 docker 守护进程里监听着 5000 端口了(如果你有使用 boot2docker ,执行 boot2docker ip,就会看到它的地址)。
你还可以在 Docker 上运行其它的管理命令,例如对于同步数据库结构这种事,在运行完 docker-compose up后,在另外一个终端运行以下命令即可:
userdeMacBook-Pro:django user$ docker-compose run web python manage.py syncdb

Starting django_db_1 ... done

/usr/local/lib/python2./site-packages/psycopg2/__init__.py:: UserWarning: The psycopg2 wheel package will be renamed from release 2.8; in order to keep installing from binary please use "pip install psycopg2-binary" instead. For details see: <http://initd.org/psycopg/docs/install.html#binary-install-from-pypi>.

  """)

Unknown command: 'syncdb'

Type 'manage.py help' for usage.
错误原因:在Django 1.9及未来的版本种使用migrate代替syscdb,所以将syscdb改为migrate即可:
userdeMacBook-Pro:django user$ docker-compose run web python manage.py migrate

Starting django_db_1 ... done

/usr/local/lib/python2./site-packages/psycopg2/__init__.py:: UserWarning: The psycopg2 wheel package will be renamed from release 2.8; in order to keep installing from binary please use "pip install psycopg2-binary" instead. For details see: <http://initd.org/psycopg/docs/install.html#binary-install-from-pypi>.

  """)

Operations to perform:

  Apply all migrations: admin, auth, contenttypes, sessions

Running migrations:

  Applying contenttypes.0001_initial... OK

  Applying auth.0001_initial... OK

  Applying admin.0001_initial... OK

  Applying admin.0002_logentry_remove_auto_add... OK

  Applying contenttypes.0002_remove_content_type_name... OK

  Applying auth.0002_alter_permission_name_max_length... OK

  Applying auth.0003_alter_user_email_max_length... OK

  Applying auth.0004_alter_user_username_opts... OK

  Applying auth.0005_alter_user_last_login_null... OK

  Applying auth.0006_require_contenttypes_0002... OK

  Applying auth.0007_alter_validators_add_error_messages... OK

  Applying auth.0008_alter_user_username_max_length... OK

  Applying sessions.0001_initial... OK
Docker技术入门与实战 第二版-学习笔记-9-Docker Compose 项目-3-Django项目实例的更多相关文章
- Docker技术入门与实战 第二版-学习笔记-10-Docker Machine 项目-2-driver
1>使用的driver 1〉generic 使用带有SSH的现有VM/主机创建机器. 如果你使用的是机器不直接支持的provider,或者希望导入现有主机以允许Docker Machine进行管 ...
- Docker技术入门与实战 第二版-学习笔记-8-网络功能network-3-容器访问控制和自定义网桥
1)容器访问控制 容器的访问控制,主要通过 Linux 上的 iptables防火墙来进行管理和实现. iptables是 Linux 上默认的防火墙软件,在大部分发行版中都自带. 容器访问外部网络 ...
- Docker技术入门与实战 第二版-学习笔记-10-Docker Machine 项目-1-cli
Docker Machine 是 Docker 官方编排(Orchestration)项目之一,负责在多种平台上快速安装 Docker 环境 Docker Machine是一种工具,它允许你在虚拟主机 ...
- Docker技术入门与实战 第二版-学习笔记-7-数据管理(volume)
Docker 数据管理 为什么要进行数据管理呢?因为当我们在使用container时,可能会在里面创建一些数据或文件,但是当我们停掉或删除这个容器时,这些数据或文件也会同样被删除,这是我们并不想看见的 ...
- Docker技术入门与实战 第二版-学习笔记-5-容器-命令及限制内存与cpu资源
1.启动容器 启动容器有两种方式: 基于镜像新建一个容器并启动 将在终止状态(stopped)的容器重新启动 1)新建并启动——docker run 比如在启动ubuntu:14.04容器,并输出“H ...
- Docker技术入门与实战 第二版-学习笔记-3-Dockerfile 指令详解
前面已经讲解了FROM.RUN指令,还提及了COPY.ADD,接下来学习其他的指令 5.Dockerfile 指令详解 1> COPY 复制文件 格式: COPY <源路径> .. ...
- Docker技术入门与实战 第二版-学习笔记-8-网络功能network-1-单个host上的容器网络
Docker 中的网络功能介绍 Docker 允许通过外部访问容器或容器互联的方式来提供网络服务 1) 外部访问容器 容器中可以运行一些网络应用,要让外部也可以访问这些应用,可以通过 -p或 -P参数 ...
- Docker技术入门与实战 第二版-学习笔记-6-仓库
仓库(Repository)是集中存放镜像的地方 一个容易混淆的概念是注册服务器(Registry). 实际上注册服务器是管理仓库的具体服务器,每个服务器上可以有多个仓库,而每个仓库下面有多个镜像. ...
- Docker技术入门与实战 第二版-学习笔记-2-镜像构建
3.利用 commit 理解镜像构成 在之前的例子中,我们所使用的都是来自于 Docker Hub 的镜像. 直接使用这些镜像是可以满足一定的需求,而当这些镜像无法直接满足需求时,我们就需要定制这些镜 ...
随机推荐
- Docker:集装箱式“运输”在软件上的实现
Docker是由PaaS提供商dotCloud在2013年年初创建的一款开源应用引擎,Docker可以自动将任何应用打包成轻量.可移植.自包涵的容器引擎.开发者构建的应用可以一次构建全平台运行,包括本 ...
- 【代码笔记】iOS-removeFromSuper
代码: RootViewController.m - (void)viewDidLoad { [super viewDidLoad]; // Do any additional setup after ...
- Js获取地址栏参数值
function getQueryString(name) { var reg = new RegExp("(^|&)" + name + "=([^&] ...
- amazeui+canvas绘制二维码
<link rel="stylesheet" type="text/css" href="css/amazeui.min.css"/& ...
- 关于在JSP页面用c标签写if语句
2017年5月28日,晴,心情还不错. 昨晚和同事撸串,回来后继续威士忌走起,喝到凌晨2点多,聊的甚欢.彼此分享了很多自己成长过程中的故事,相互之间有了进一步的了解,友情又进了一步.在以后的时光里,愿 ...
- 语义SLAM的数据关联和语义定位(二)Semantic Localization Via the Matrix Permanent
论文假设和单目标模型 这部分想讲一下Semantic Localization Via the Matrix Permanent这篇文章的一些假设. 待求解的问题可以描述为 假设从姿态\(x\)看到的 ...
- singleInstance和singleTask导致startActivityForResult回调失败
先来了解下这两种启动模式: 1.singleInstance,全局唯一,它的实例在全局(即在众多任务栈中)是唯一的,它单独地存在于属于自己的任务栈中,而且这个任务栈没有其他实例. 2.singleTa ...
- AndroidStudio 3.0升级之compile、implementation简要说明
1.现象 androidStudio 升级至3.0后 之前引用库所使用的complie默认变成implementation 如以下: 3.0之前 compile 'io.reactivex.rxjav ...
- webpack+sass+vue 入门教程(二)
六.新建webpack配置文件 webpack.config.js 文件整体框架内容如下,后续会详细说明每个配置项的配置 webpack.config.js直接放在项目demo目录下 module.e ...
- LeetCode题解之 Odd Even Linked List
1.题目描述 2.问题分析 将链表拆分成两个,奇数节点形成一个链表,偶数节点形成另外一个链表,最后将偶数节点链表加在奇数节点链表后面. 3.代码 ListNode* oddEvenList(ListN ...