SpringBoot自定义一个starter
@Configuration //指定这个类是一个配置类

@ConditionalOnXXX //在指定条件成立的情况下自动配置类生效

@AutoConfigureAfter //指定自动配置类的顺序

@Bean //给容器中添加组件

@ConfigurationPropertie结合相关xxxProperties类来绑定相关的配置

@EnableConfigurationProperties //让xxxProperties生效加入到容器中

自动配置类要能加载

将需要启动就加载的自动配置类,配置在META‐INF/spring.factories

org.springframework.boot.autoconfigure.EnableAutoConfiguration=\

org.springframework.boot.autoconfigure.admin.SpringApplicationAdminJmxAutoConfiguration,\

org.springframework.boot.autoconfigure.aop.AopAutoConfiguration,\
- 启动器只用来做依赖导入;
- 专门来写一个自动配置模块;
- 启动器依赖自动配置;别人只需要引入启动器(starter)
- mybatis-spring-boot-starter;自定义启动器名-spring-boot-starter
步骤:
启动器模块(就是一个Maven项目):
<?xml version="1.0" encoding="UTF-8"?>

<project xmlns="http://maven.apache.org/POM/4.0.0"

         xmlns:xsi="http://www.w3.org/2001/XMLSchema-instance"

         xsi:schemaLocation="http://maven.apache.org/POM/4.0.0 http://maven.apache.org/xsd/maven-4.0.0.xsd">

    <modelVersion>4.0.0</modelVersion>

    <groupId>ustc-anmin-starter</groupId>

    <artifactId>ustc-anmin-spring-boot-starter</artifactId>

    <version>1.0-SNAPSHOT</version>

    <properties>

        <project.build.sourceEncoding>UTF-8</project.build.sourceEncoding>

        <maven.compiler.source>10</maven.compiler.source>

        <maven.compiler.target>10</maven.compiler.target>

    </properties>

    <!--引入自动配置模块-->

    <dependencies>

        <dependency>

            <groupId>ustc.anmin.starter</groupId>

            <artifactId>anmin-spring-boot-starter-autoconfigure</artifactId>

            <version>0.0.1-SNAPSHOT</version>

        </dependency>

    </dependencies>

</project>
自动配置模块
<?xml version="1.0" encoding="UTF-8"?>

<project xmlns="http://maven.apache.org/POM/4.0.0" xmlns:xsi="http://www.w3.org/2001/XMLSchema-instance"

         xsi:schemaLocation="http://maven.apache.org/POM/4.0.0 http://maven.apache.org/xsd/maven-4.0.0.xsd">

    <modelVersion>4.0.0</modelVersion>

    <parent>

        <groupId>org.springframework.boot</groupId>

        <artifactId>spring-boot-starter-parent</artifactId>

        <version>2.1.6.RELEASE</version>

        <relativePath/> <!-- lookup parent from repository -->

    </parent>

    <groupId>ustc.anmin.starter</groupId>

    <artifactId>anmin-spring-boot-starter-autoconfigure</artifactId>

    <version>0.0.1-SNAPSHOT</version>

    <name>anmin-spring-boot-starter-autoconfigure</name>

    <description>Demo project for Spring Boot</description>

    <properties>

        <java.version>1.8</java.version>

    </properties>

    <dependencies>

        <dependency>

            <groupId>org.springframework.boot</groupId>

            <artifactId>spring-boot-starter</artifactId>

        </dependency>

    </dependencies>

</project>
package ustc.anmin.starter;

import org.springframework.boot.context.properties.ConfigurationProperties;

@ConfigurationProperties(prefix = "ustc.anmin")

public class HelloServiceProperty {

    private String prefix;

    private String suffix;

    public String getSuffix() {

        return suffix;

    }

    public void setSuffix(String suffix) {

        this.suffix = suffix;

    }

    public String getPrefix() {

        return prefix;

    }

    public void setPrefix(String prefix) {

        this.prefix = prefix;

    }

}
package ustc.anmin.starter;

public class HelloService {

    HelloServiceProperty helloServiceProperty;

    public String sayHelloAnmin(String name){

        return helloServiceProperty.getPrefix() + name + helloServiceProperty.getSuffix();

    }

    public HelloServiceProperty getHelloServiceProperty() {

        return helloServiceProperty;

    }

    public void setHelloServiceProperty(HelloServiceProperty helloServiceProperty) {

        this.helloServiceProperty = helloServiceProperty;

    }

}
package ustc.anmin.starter;

import org.springframework.beans.factory.annotation.Autowired;

import org.springframework.boot.autoconfigure.condition.ConditionalOnWebApplication;

import org.springframework.boot.context.properties.EnableConfigurationProperties;

import org.springframework.context.annotation.Bean;

import org.springframework.context.annotation.Configuration;

@Configuration

@ConditionalOnWebApplication

@EnableConfigurationProperties(HelloServiceProperty.class)  //将配置类加入容器

public class HelloServiceAutoConfiguration {

    @Autowired

    HelloServiceProperty helloServiceProperty;

    @Bean

    public HelloService helloService(){

        HelloService service = new HelloService();

        service.setHelloServiceProperty(helloServiceProperty);

        return new HelloService();

    }

}
spring.factories文件
org.springframework.boot.autoconfigure.EnableAutoConfiguration=\

  ustc.anmin.starter.HelloServiceAutoConfiguration
test controller
<?xml version="1.0" encoding="UTF-8"?>

<project xmlns="http://maven.apache.org/POM/4.0.0" xmlns:xsi="http://www.w3.org/2001/XMLSchema-instance"

         xsi:schemaLocation="http://maven.apache.org/POM/4.0.0 http://maven.apache.org/xsd/maven-4.0.0.xsd">

    <modelVersion>4.0.0</modelVersion>

    <parent>

        <groupId>org.springframework.boot</groupId>

        <artifactId>spring-boot-starter-parent</artifactId>

        <version>2.1.6.RELEASE</version>

        <relativePath/> <!-- lookup parent from repository -->

    </parent>

    <groupId>ustc.anmin</groupId>

    <artifactId>starter-test</artifactId>

    <version>0.0.1-SNAPSHOT</version>

    <name>starter-test</name>

    <description>Demo project for Spring Boot</description>

    <properties>

        <java.version>1.8</java.version>

    </properties>

    <dependencies>

        <dependency>

            <groupId>org.springframework.boot</groupId>

            <artifactId>spring-boot-starter-web</artifactId>

        </dependency>

        <dependency>

            <groupId>ustc.anmin.starter</groupId>

            <artifactId>ustc-anmin-spring-boot-starter</artifactId>

            <version>1.0-SNAPSHOT</version>

        </dependency>

        <dependency>

            <groupId>org.springframework.boot</groupId>

            <artifactId>spring-boot-starter-test</artifactId>

            <scope>test</scope>

        </dependency>

    </dependencies>

    <build>

        <plugins>

            <plugin>

                <groupId>org.springframework.boot</groupId>

                <artifactId>spring-boot-maven-plugin</artifactId>

            </plugin>

        </plugins>

    </build>

</project>
package ustc.anmin.starter.controller; import org.springframework.beans.factory.annotation.Autowired;
import org.springframework.web.bind.annotation.GetMapping;
import org.springframework.web.bind.annotation.RestController;
import ustc.anmin.starter.HelloService; @RestController
public class HelloController { @Autowired
HelloService service; @GetMapping("/hello")
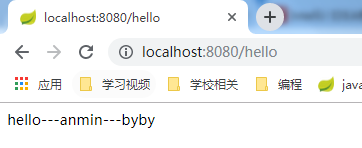
public String hello(){
return service.sayHelloAnmin("---anmin---");
} }

SpringBoot自定义一个starter的更多相关文章
- Spring boot 自定义一个starter pom
用过springboot的自动配置会觉得非常方便,我们完全可以自己写一个starter pom,这样不仅可以有自动配置功能,而且具有更通用的的耦合度低的配置, 新建一个starter的maven项目, ...
- SpringBoot编写自定义的starter 专题
What’s in a name All official starters follow a similar naming pattern; spring-boot-starter-*, where ...
- SpringBoot系列三:SpringBoot自定义Starter
在前面两章 SpringBoot入门 .SpringBoot自动配置原理 的学习后,我们对如何创建一个 SpringBoot 项目.SpringBoot 的运行原理以及自动配置等都有了一定的了解.如果 ...
- springboot系列十四、自定义实现starter
一.starter的作用 当我们实现了一个组建,希望尽可能降低它的介入成本,一般的组建写好了,只要添加spring扫描路径加载spring就能发挥作用.有个更简单的方式扫描路径都不用加,直接引入jar ...
- springboot 自定义starter之AutoConfiguration【原】
八.自定义starter AutoConfiguration: 1.这个场景需要使用到的依赖是什么? 没有特别依赖的配置 2.如何编写自动配置 @Configuration //指定这个类是一个配置类 ...
- SpringBoot --- 自定义 Starter
SpringBoot --- 自定义 Starter 创建 1.需要创建一个新的空工程 2.新的工程需要引入两个模块 一个Maven 模块 作为启动器 一个SpringBoot 模块 作为自动配置模块 ...
- springBoot 自动配置原理--自己新建一个 starter
上篇我们说到 springboot 和 SSM 框架的区别,今天我们就看看 springboot 到底为我们做了哪些事情,让我们开发变得如此简单. springboot 中起着重要作用的是 start ...
- 深入springboot原理——动手封装一个starter
从上一篇文章<深入springboot原理——一步步分析springboot启动机制(starter机制)> 我们已经知道springboot的起步依赖与自动配置的机制.spring-bo ...
- springboot2.x基础教程:动手制作一个starter包
上一篇博客介绍了springboot自动装配的原理.springboot本身有丰富的spring-boot-starter-xx集成组件,这一篇趁热打铁加深理解,我们利用springboot自动装配的 ...
随机推荐
- Bootstrap-CL:按钮下拉菜单
ylbtech-Bootstrap-CL:按钮下拉菜单 1.返回顶部 1. Bootstrap 按钮下拉菜单 本章将讲解如何使用 Bootstrap class 向按钮添加下拉菜单.如需向按钮添加下拉 ...
- 监听屏幕旋转事件window. onorientationchange
// 判断屏幕是否旋转 function orientationChange() { switch(window.orientation) { case 0: alert("肖像模式 0,s ...
- bzoj1996
区间dp 其实我们发现对于一段区间我们是这样构造的,每次我们会向两端放数,这样就有四种情况,且必须满足题意,初值是dp[i][i][0]=1,因为第一个人只有一种放法,不分左右.其实看见dp[i][i ...
- 【204】显示3D大球球
1. 光滑球 From Jan 28, 2016 2. 大球球 https://www.revolvermaps.com/?target=enlarge&i=0xoqkxnu52c&a ...
- E20180327-hm
renew vt. 补充; 重新开始; 使更新; 使恢复; vi. 重申,重复强调; 重新开始; renewal n. 重建,重生; 更新,革新; 重申; 合同的续订;
- HDU2438:Turn the corner(三分)
传送门 分析 根据这张图,我们只要使得h<=y即可,可以发现h是一个凸函数,故使用三分,具体见代码 代码 #include<cstdio> #include<cstring&g ...
- EOJ3263:丽娃河的狼人传说(贪心)
传送门 题意 分析 考虑将区间按右端点排序,再遍历区间,操作即可 建议以加方式写 trick 1.不需要判区间重合 代码 #include<cstdio> #include<cstr ...
- IT兄弟连 JavaWeb教程 Servlet表单数据
很多情况下,需要传递一些信息,从浏览器到Web服务器,最终到后台程序.浏览器使用两种方法可将这些信息传递到Web服务器,分别为GET方法和POST方法. 1.GET方法 GET 方法向页面请求发送已编 ...
- Java Web中实现设置多个域名跨域访问
添加以下设置可允许所有域名跨域访问: response.setHeader("Access-Control-Allow-Origin","*"); 但在实际应用 ...
- 同一台服务器上部署多个Tomcat的配置修改方法
同一服务器部署多个tomcat时,存在端口号冲突的问题,所以需要修改tomcat配置文件server.xml,以tomcat7为例. 首先了解下tomcat的几个主要端口: <Server po ...