保存深度值——小端序,位数,Android,Huawei AR engine
保存深度值——小端序,位数,Android
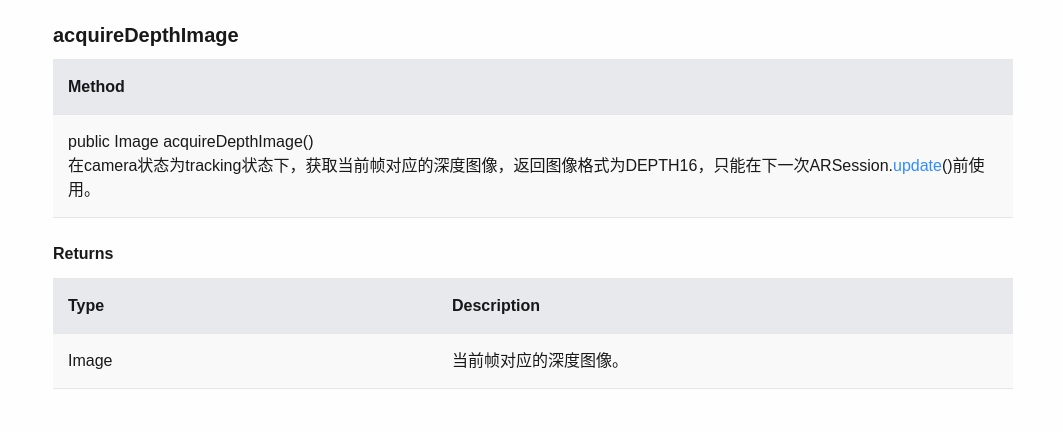
accuireDepthImage
华为Mate Pro系列基本上前置摄像头都是有TOF的,也就是能够得到场景的深度信息,在华为的AR engine里提供了一个方法可以读取场景的深度值。
不过其官方文档里对这个方法的介绍很少,寥寥数语,前期也在这里踩了一些坑。Google的AR core对这个深度值做了详细的介绍:
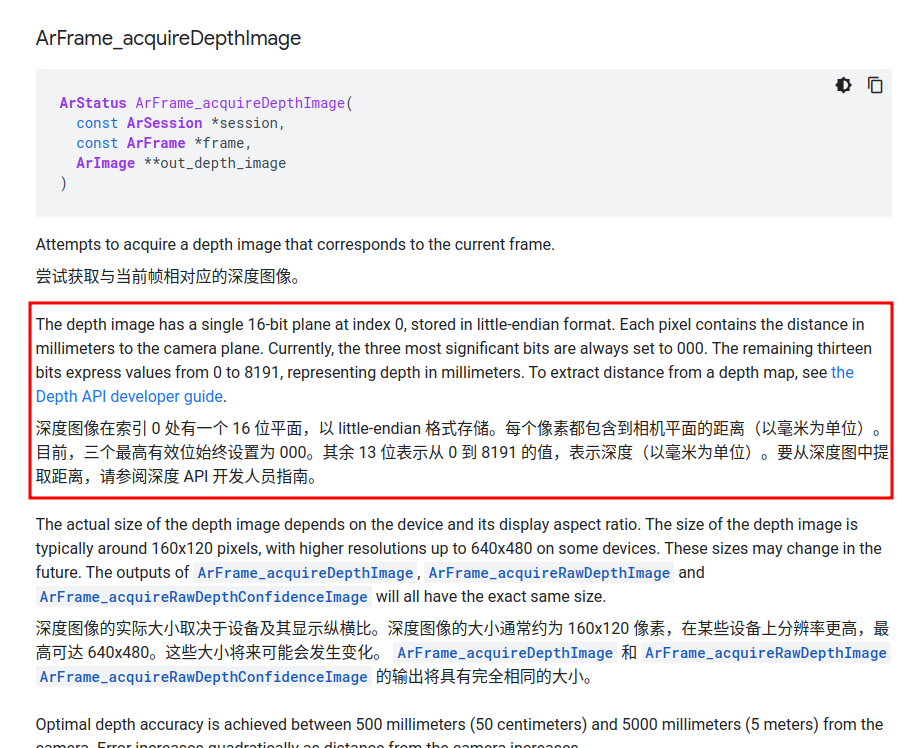
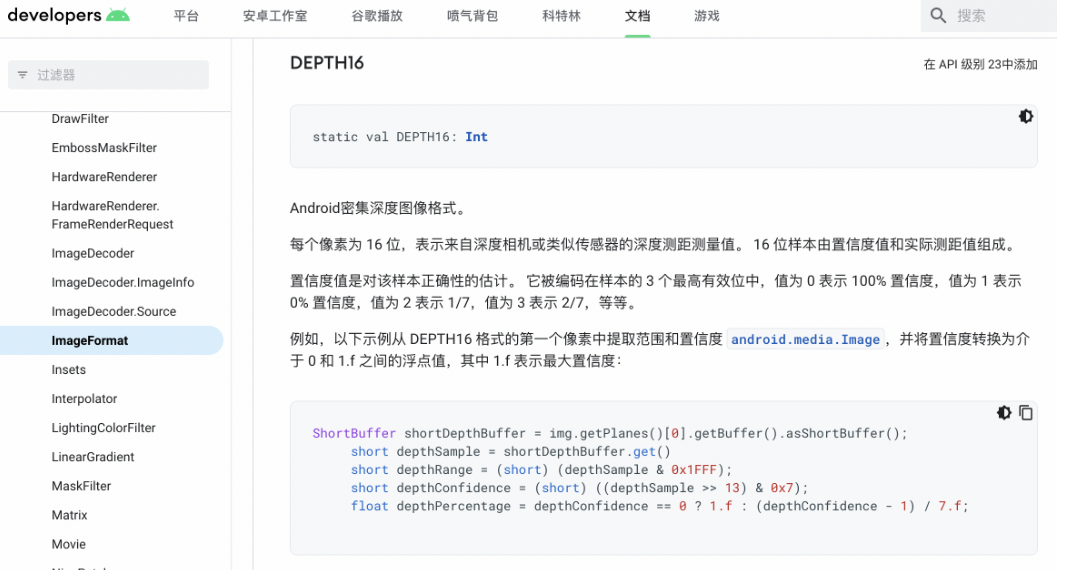
得到的深度图是16位的,其中高3位是置信度,低13位是采样得到的深度值,并且排列顺序是小端序。第一张图说设高3位为0,但是我看了一下,其实是第二种情况。
知道这个信息之后,我们便可以使用如下代码保存深度值(二进制文件):
Image depthImage = arFrame.acquireDepthImage();

File f = new File(dir, numFrameStr + "_depth16.bin");

if(depthImage.getFormat() != ImageFormat.DEPTH16)

    throw new RuntimeException("Expected image format is DEPTH16, but is:"+depthImage.getFormat());

ByteBuffer buffer = depthImage.getPlanes()[0].getBuffer();

try {

    FileChannel fc = new FileOutputStream(f).getChannel();

    fc.write(buffer);

    fc.close();

} catch (IOException e) {

    e.printStackTrace();

    Log.i(TAG, "Error writing image depth16: " +f.getPath());

}
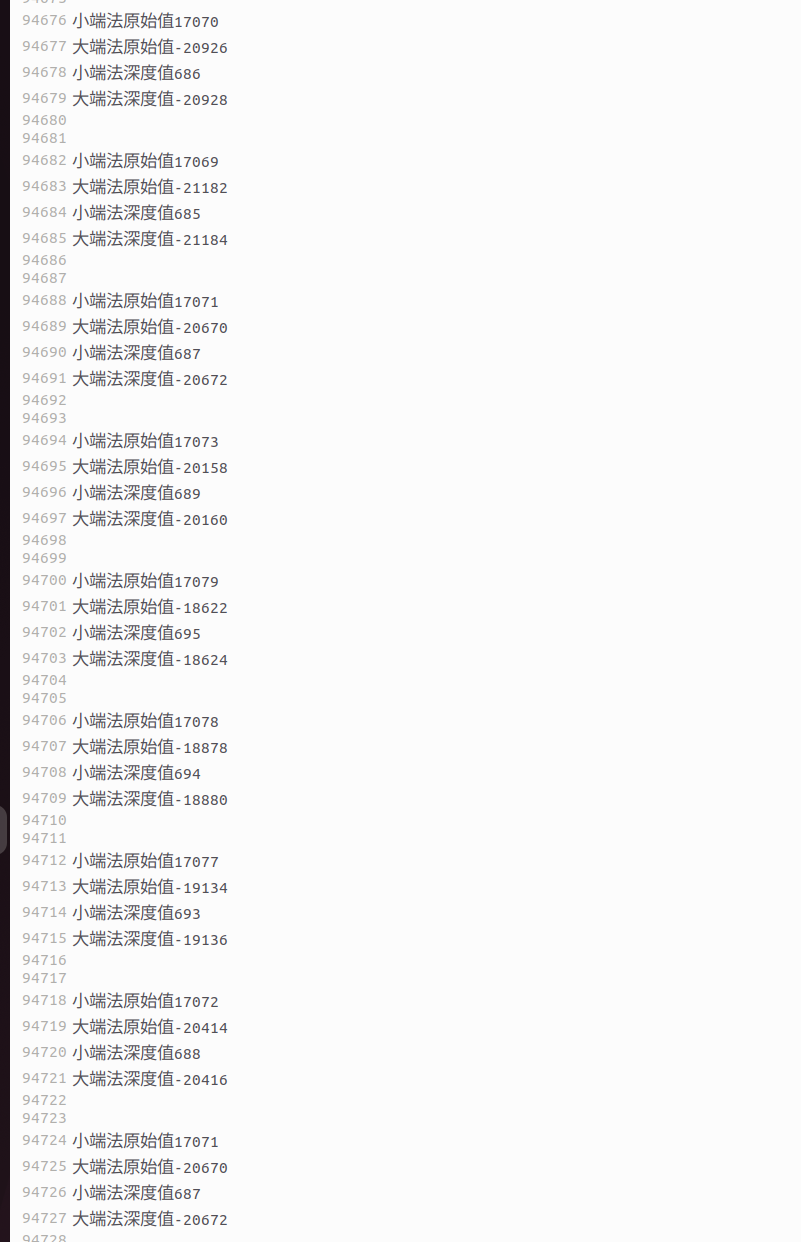
将二进制文件打开看一下:
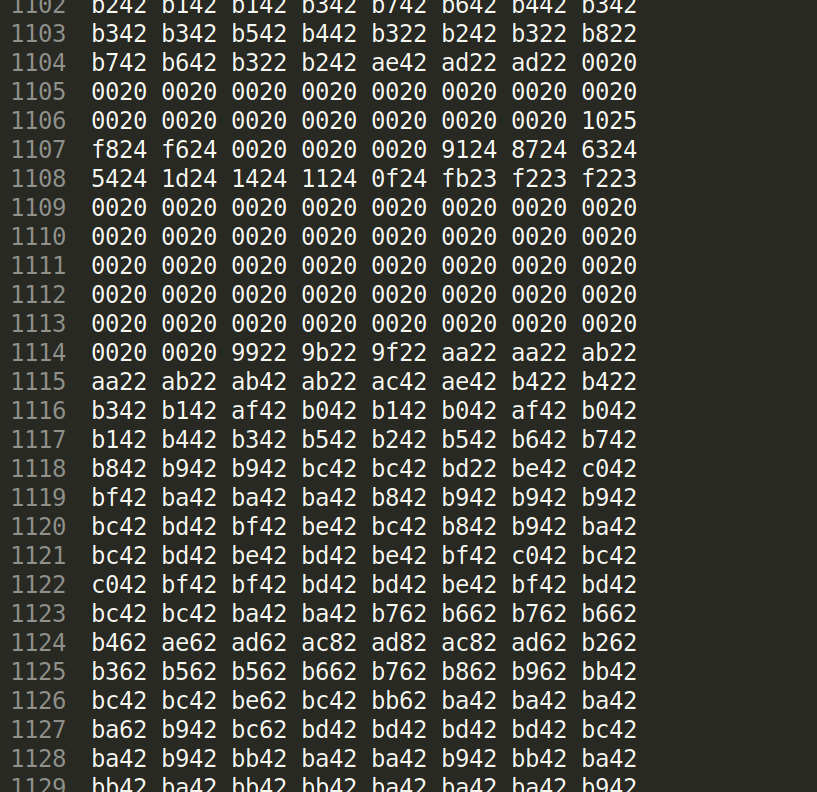
文件是以16进制保存的,所以每四个数字代表一个深度值。取0x0020,0x2242转化为十进制的深度值看一下。
| 16进制 | 0x0020 | 0x2242 | 0xba42 |
| 二进制 | 0000 0000 0010 0000 | 0010 0010 0100 0010 | 1011 1010 0100 0010 |
| 由于是小端序,将高位字节拿到前面 | 0010 0000 0000 0000 | 0100 0010 0010 0010 | 0100 0010 1011 1010 |
| 将高三位的置信度设为0 | 0000 0000 0000 0000 | 0000 0010 0010 0010 | 0000 0010 1011 1010 |
| 十进制 | 0mm | 546mm | 698mm |
最后我们将这个二进制文件转化为格式为CU_16的灰度图看一下:

效果还不错。
depthImag保存为图像
前面的保存的二进制文件是保存了置信度信息的,如果想要保存深度图就需要把高3位置信度信息设为0,才能保存。代码如下:
Image depthImg = arFrame.acquireDepthImage();

int width = depthImg.getWidth();

int height = depthImg.getHeight();

//ShortBuffer shortBuffer = depthImg.getPlanes()[0].getBuffer().asShortBuffer();

ShortBuffer shortBuffer = depthImg.getPlanes()[0].getBuffer().order(ByteOrder.LITTLE_ENDIAN).asShortBuffer();

Bitmap disBitmap = Bitmap.createBitmap(width, height, Bitmap.Config.ARGB_8888);

for (int i = 0; i < height; i++) {

    for (int j = 0; j < width; j++) {

        int index = (i * width + j);

        shortBuffer.position(index);

        short depthSample = shortBuffer.get();

        // 获取深度值后13位

        short depthRange = (short) (depthSample & 0x1FFF);

        // 拆分short数据成两个8位数据

        int highByte = (depthRange & 0xFF00) >> 8;  // 获取高8位

        int lowByte = depthRange & 0x00FF;  // 获取低8位

        disBitmap.setPixel(j, i, Color.argb(255 , highByte, lowByte, 0));

    }

}

try {

        FileOutputStream out = new FileOutputStream(file);

        disBitmap.compress(Bitmap.CompressFormat.PNG, 100, out);

        out.flush();

        out.close();

        //GLES20.glClear(GLES20.GL_DEPTH_BUFFER_BIT);

    } catch (Exception e) {

        e.printStackTrace();

    }
恢复深度值的时候就可以读出R通道的值,然后左移八位(乘256),再加上G通道的值。
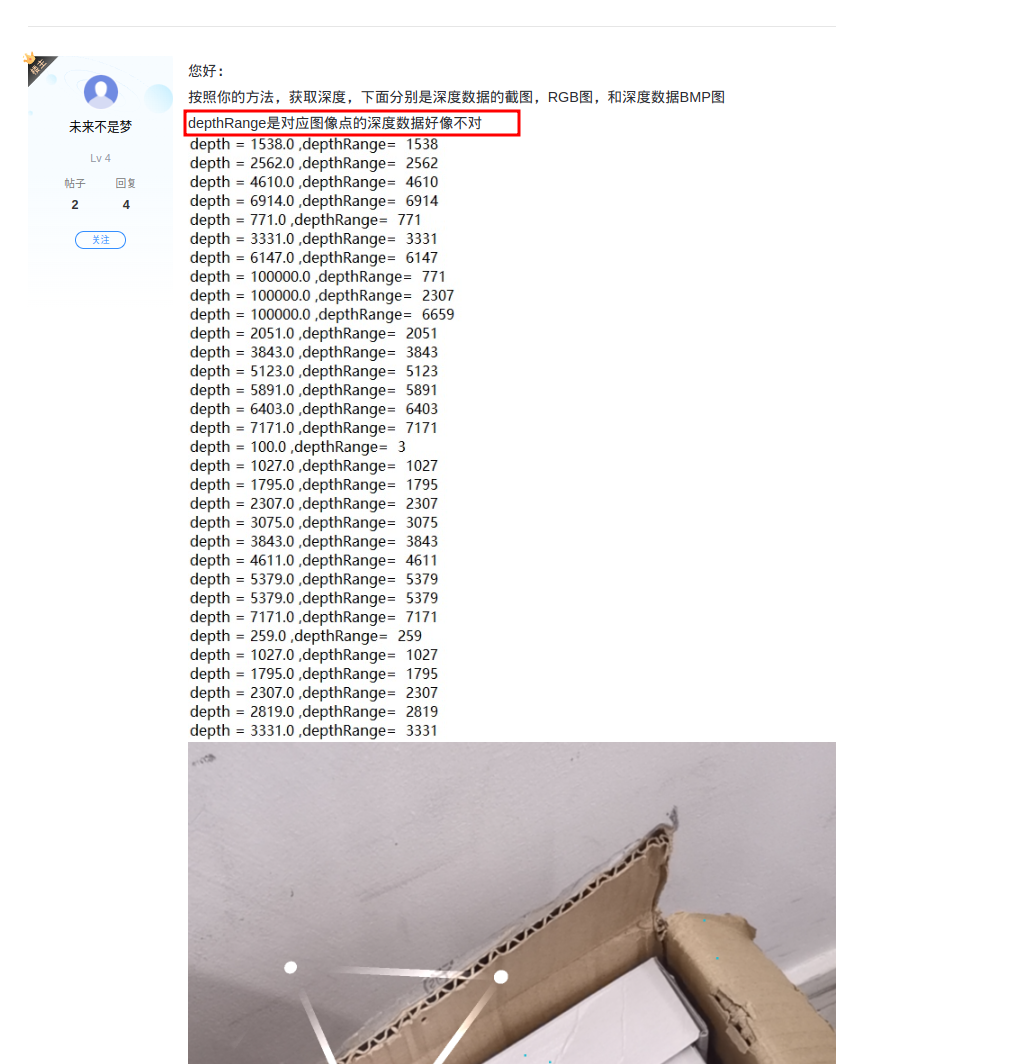
注意这里有一个非常隐晦的BUG,就是如果使用的是第5行被注释的代码保存ShortBuffer,得到的将是大端序的值,现在一般的机器都是小端序列,如果使用大端序这将会导致一些错误。
可以看到小端法使用的是
ShortBuffer shortBuffer = depthImg.getPlanes()[0].getBuffer().order(ByteOrder.LITTLE_ENDIAN).asShortBuffer();:其值是准确的,而使用
ShortBuffer shortBuffer = depthImg.getPlanes()[0].getBuffer().asShortBuffer();得到了错误的结果。
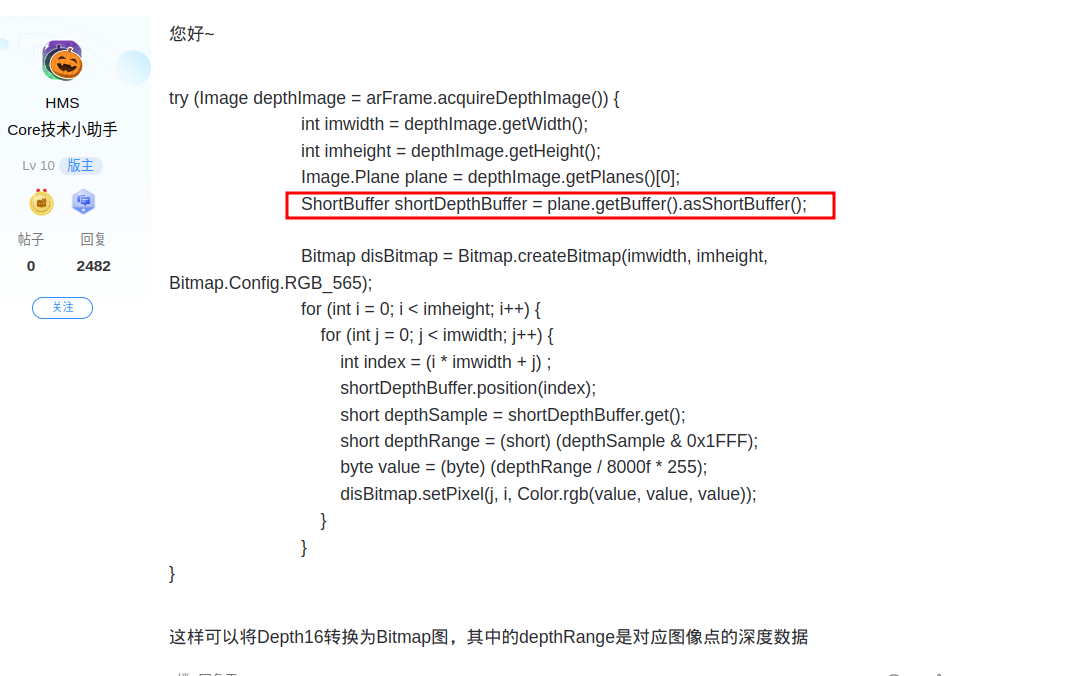
有些遗憾的是,我发现论坛里HMS 小助手提供的代码是有问题的:
这里应该使用
ShortBuffer shortDepthBuffer = plane.getBuffer().order(ByteOrder.LITTLE_ENDIAN).asShortBuffer();论坛里这个朋友也遇到了类似的问题:
最后建议在java中配置一下opencv直接保存为16位灰度图(推荐):
public static void writeDepth16binInPng16GrayscaleTum(String bin, int width, int height, String png) throws IOException {

    byte[] bytes = Files.readAllBytes(Paths.get(bin));

    ByteBuffer buffer = ByteBuffer.wrap(bytes);

    buffer = buffer.order(ByteOrder.LITTLE_ENDIAN);

    ShortBuffer sBuffer = buffer.asShortBuffer();

    short[] depthTum = new short[width*height];

    Mat mat = Mat.eye(height, width, CvType.CV_16UC1); //max is 65536 == 65meters / 16 bits = 2 bytes

    int i=0;

    for (int h = 0; h < height; h++) {

        for (int w = 0; w < width; w++) {

            short depthSample = sBuffer.get(); //depth16[y*width + x];

            short depthMm = (short) (depthSample & 0x1FFF);

//                short depthConfidence = (short) ((depthSample >> 13) & 0x7);

            depthTum[h*width+w] = (short)(depthMm * 5); //tum rgbd is 5==1mm / 5000==1m

        }

    }

    mat.put(0, 0, depthTum);

    Imgcodecs.imwrite(png, mat);

    //buffer.clear();

}
最后感谢remmel的精彩工作,提供了非常优秀的参考!
code
read_bin.cpp
//

// Created by xin on 23-11-15.

//

#include <iostream>

#include <opencv2/opencv.hpp>

#include <fstream>

#include <vector>

int main() {

    // 文件路径

    std::string file_path = "/home/xin/Code/CLionProjects/depth_image/img/another/0_depth16.bin";

    std::ifstream file(file_path, std::ios::binary);

    if (!file.is_open()) {

        std::cerr << "Failed to open the file." << std::endl;

        return 1;

    }

    // 读取文件内容到 vector

    std::vector<uint16_t> depth_values;

    uint16_t value;

    while (file.read(reinterpret_cast<char*>(&value), sizeof(value))) {

        value = value & uint16_t(0x1FFF); // 这个是真实的深度值

        value *= 5; // 为了更好的可视化,使得灰度图更亮一些

        depth_values.push_back(value);

    }

    file.close();

    cv::Mat depth_image(180, 240, CV_16UC1);

    // 将 depth_values 复制到 depth_image 中

    std::memcpy(depth_image.data, depth_values.data(), depth_values.size() * sizeof(uint16_t));

    cv::imwrite("DepthImage.png", depth_image);

    cv::waitKey(0);

    return 0;

}
保存深度值——小端序,位数,Android,Huawei AR engine的更多相关文章
- 《Intel汇编第5版》 Intel CPU小端序
一.MASM汇编器中的数据类型 二.Intel汇编中的立即数类型 三.定义有符号和无符号整数 四.小端序 内存中数据按照字节存储,一个4个字节无符号整数,其高位存储在低地址上,低位存储在高地址上. 比 ...
- java音视频编解码问题:16/24/32位位音频byte[]转换为小端序short[],int[],以byte[]转short[]为例
前言:Java默认采用大端序存储方式,实际编码的音频数据是小端序,如果处理单8bit的音频当然不需要做转换,但是如果是16bit或者以上的就需要处理成小端序字节顺序. 注:大.小端序指的是字节的存储顺 ...
- C# 中大端序与小端序
C# 中大端序与小端序 static void Main(string[] args) { uint value = 0x12345678; Console.WriteLine("原始字节序 ...
- c++——大端序,小端序的排列问题
#include<iostream> using namespace std; union TestModel { int i; char ch; }; int main() { unio ...
- C/C++字节序(大端/小端)判断
C/C++大端小端判断 说的是变量的高字节.低字节在内存地址中的排放顺序. 变量的高字节放到内存的低地址中(变量的低字节放到内存的高地址中)==>大端 变量的高字节放到内存的高地址中(变量的低字 ...
- 大端模式 VS 小端模式
简单点说,就是字节的存储顺序,如果数据都是单字节的,那怎么存储无所谓了,但是对于多字节数据,比如int,double等,就要考虑存储的顺序了.注意字节序是硬件层面的东西,对于软件来说通常是透明的.再说 ...
- 大端小端转换,le32_to_cpu 和cpu_to_le32
字节序 http://oss.org.cn/kernel-book/ldd3/ch11s04.html 小心不要假设字节序. PC 存储多字节值是低字节为先(小端为先, 因此是小端), 一些高级的平台 ...
- 【C#基础概念】字节顺序(大端、小端)
字节顺序,又称端序或尾序(英語:Endianness),在计算机科学领域中,指電腦記憶體中或在数字通信链路中,组成多字节的字的字节的排列顺序. 例如假设上述变量x类型为int,位于地址0x100处,它 ...
- Android为TV端助力 同时setTag两次,保存多种值
示例代码: view.setTag(R.string.action_settings,hodler.content); 接收两个值,一个是key值,必须是唯一值,而且要写在values/ids.xml ...
- 用C语言,如何判断主机是 大端还是小端(字节序)
所谓大端就是指高位值在内存中放低位地址,所谓小端是指低位值在内存中放低位地址.比如 0x12345678 在大端机上是 12345678,在小端机上是 78564312,而一个主机是大端还是小端要看C ...
随机推荐
- GIMP 开源、免费,功能强大的图像编辑软件
引言 万事开头难,打造个人网站,图片处理是必不可少的,老王的电脑还是 10 年前配置的,日常使用倒还流畅,但要是使用 Photoshop 就有些吃力,特别是越新的版本.然后,发现 GIMP 这个开源的 ...
- 互联网不景气了那就玩玩嵌入式吧,用纯.NET开发并制作一个智能桌面机器人(一):从.NET IoT入门开始
前言 为什么我会想着制作一个智能桌面机器人呢?自问自答一下,看过我之前文章的小伙伴应该都知道我之前有为稚晖君开源的ElectronBot桌面机器人开发过一个桌面上位机软件叫电子脑壳,由于Electro ...
- CAS实现原理
一.什么是CAS? 在计算机科学中,比较和交换(Conmpare And Swap)是用于实现多线程同步的原子指令. 它将内存位置的内容与给定值进行比较,只有在相同的情况下,将该内存位置的内容修改为新 ...
- w3cschool-Lua编程入门
https://www.w3cschool.cn/nhycto/ https://www.w3cschool.cn/cf_web/cf_web-dvxc32qu.html 1. Lua 基础知识 (1 ...
- 比特c语言-分支与循环
# 分支与循环 if语句 目录 if语句 if eg:输入一个整数,判断是否为奇数 else eg:输入一个整数,判断是否为奇数,如果是奇数打印是奇数,否则打印偶数 嵌套if eg:输入一个人 ...
- linux:搭建Drupal
了解 Drupal 是使用 PHP 语言编写的开源内容管理框架(CMF),由内容管理系统(CMS)及 PHP 开发框架(Framework)共同构成.Drupal 具备强大的定制化开发能力,您可使用 ...
- Windows 快速启动器
在日常工作和学习中,我们经常需要快速访问某些功能或资源,例如打开常用网站.启动应用程序或执行特定命令.Linux 用户可以通过 alias 快速实现这些操作,但在 Windows 上缺乏类似的原生支持 ...
- AI编程助手带来的洞察和启发——程序员职业的变革
前言 从chatgpt的横空出世到国内大模型的强势崛起, 从AI只会写诗作画到辅助编程, AI作为新质生产力的重要角色逐渐进入各行各业,为行业带来新的可能性. Cursor.通义灵码这类"A ...
- 安全可信|权威认证!天翼云边缘安全加速平台AccessOne护航企业行稳致远!
8月25日,由中国信息通信研究院(以下简称"中国信通院")和中国通信标准化协会联合主办的2023首届SecGo云和软件安全大会公布了可信安全最新评估结果,天翼云通过"首批 ...
- 利用Python开发Exporter,集成Prometheus和Grafana对进程监控
利用Python开发Exporter,集成Prometheus和Grafana对进程监控 在现代软件开发和运维中,监控是确保系统稳定运行和快速响应问题的重要手段.Prometheus和Grafana的 ...