源码编译安装lnmp环境(nginx-1.14.2 + mysql-5.6.43 + php-5.6.30 )------踩了无数坑,重装了十几次服务器才会的,不容易啊!
和LAMP不同的是,LNMP中的N指的是Nginx(类似于Apache的一种web服务软件),并且php是作为一个独立服务存在的,这个服务叫做php-fpm,Nginx直接处理静态请求,动态请求会转发给php-fpm。
目前LNMP环境的应用非常多。在静态页面的处理上,Nginx比Apache更强;但在动态页面的处理上,Nginx并不占优势。
安装顺序nginx -- php --- mysql
安装php-5.6.30:
1 环境准备
yum install gcc bison bison-devel zlib-devel libmcrypt-devel mcrypt mhash-devel openssl-devel libxml2-devel libcurl-devel bzip2-devel readline-devel libedit-devel sqlite-devel jemalloc jemalloc-devel
yum install libpng
yum install libpng-devel
yum -y install libjpeg-devel
yum install freetype-devel
cd /usr/local
mkdir php-fpm
cd /usr/local/src
wget http://cn2.php.net/distributions/php-5.6.30.tar.gz
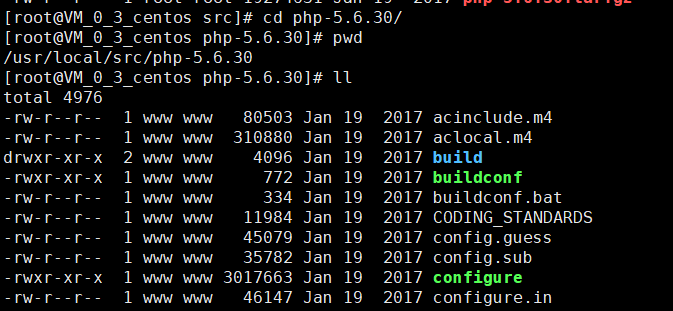
tar zvxf php-5.6.30.tar.gz
cd php-5.6.30
groupadd www
useradd -g www -s /sbin/nologin www
2 编译安装 (##编译参数)
./configure --prefix=/usr/local/php-fpm \
--with-config-file-path=/usr/local/php-fpm/etc \
--enable-inline-optimization --disable-debug \
--disable-rpath --enable-shared --enable-opcache \
--enable-fpm --with-fpm-user=www \
--with-png-dir \
--with-freetype-dir \
--with-jpeg-dir \
--with-gd \
--with-fpm-group=www \
--with-mysql=mysqlnd \
--with-mysqli=mysqlnd \
--with-pdo-mysql=mysqlnd \
--with-gettext \
--enable-mbstring \
--with-iconv \
--with-mcrypt \
--with-mhash \
--with-openssl \
--enable-bcmath \
--enable-soap \
--with-libxml-dir=/usr/ \
--enable-pcntl \
--enable-shmop \
--enable-sysvmsg \
--enable-sysvsem \
--enable-sysvshm \
--enable-sockets \
--with-curl --with-zlib \
--enable-zip \
--with-bz2 \
--with-readline
##参数解释
""" 安装路径 """--prefix=/usr/local/php56 \""" php.ini 配置文件路径 """--with-config-file-path=/usr/local/php56/etc \""" 优化选项 """--enable-inline-optimization \--disable-debug \--disable-rpath \--enable-shared \""" 启用 opcache,默认为 ZendOptimizer+(ZendOpcache) """--enable-opcache \""" FPM """--enable-fpm \--with-fpm-user=www \--with-fpm-group=www \""" MySQL """--with-mysql=mysqlnd \--with-mysqli=mysqlnd \--with-pdo-mysql=mysqlnd \""" 国际化与字符编码支持 """--with-gettext \--enable-mbstring \--with-iconv \""" 加密扩展 """--with-mcrypt \--with-mhash \--with-openssl \""" 数学扩展 """--enable-bcmath \""" Web 服务,soap 依赖 libxml """--enable-soap \--with-libxml-dir \""" 进程,信号及内存 """--enable-pcntl \--enable-shmop \--enable-sysvmsg \--enable-sysvsem \--enable-sysvshm \""" socket & curl """--enable-sockets \--with-curl \""" 压缩与归档 """--with-zlib \--enable-zip \--with-bz2 \""" GNU Readline 命令行快捷键绑定 """--with-readline3. 编译安装
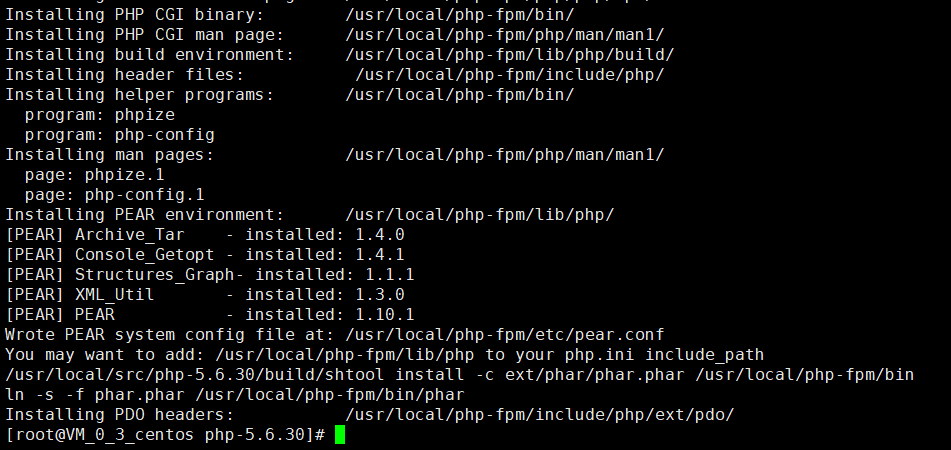
make && make install
如下图 ,不抱任何错误
4.配置服务
配置文件
cp php.ini-development /usr/local/php-fpm/etc/php.ini
cp /usr/local/php-fpm/etc/php-fpm.conf.default /usr/local/php-fpm/etc/php-fpm.conf
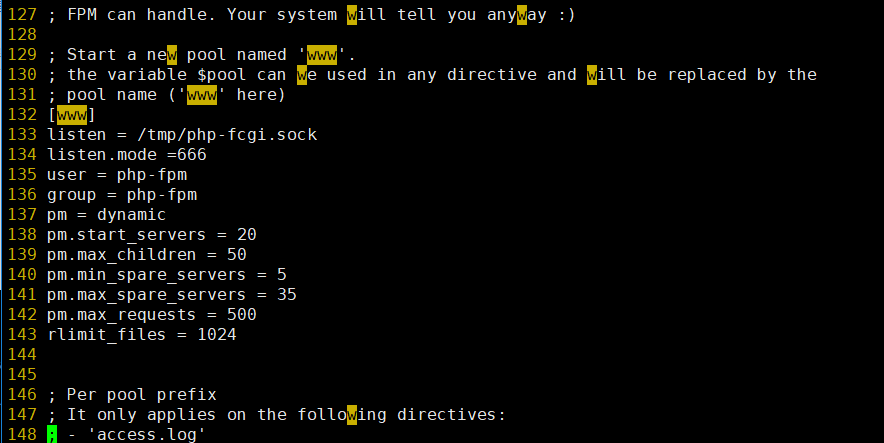
5 .修改配置
vim /usr/local/php-fpm/etc/php-fpm.conf
[global]
pid =/usr/local/php-fpm/var/run/php-fpm.pid
error_log = /usr/local/php-fpm/var/log/php-fpm.log
[www]

6. 保存配置文件后,检验配置是否正确的方法如下:
/usr/local/php-fpm/sbin/php-fpm -t
如果显示 "test is successful",说明配置没有问题,否则就要根据提示检查配置文件.

7.启动 php-fpm,命令如下:
cp /usr/local/src/php-5.6.30/sapi/fpm/init.d.php-fpm /etc/init.d/php-fpm
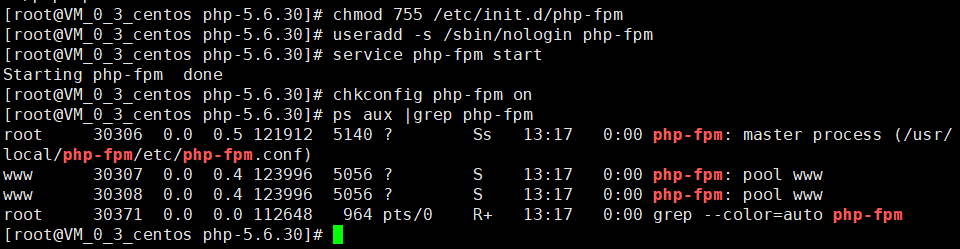
chmod 755 /etc/init.d/php-fpm
useradd -s /sbin/nologin php-fpm
service php-fpm start
设置php-fpm开启启动命令如下:
chkconfig php-fpm on
检测php-fpm是否启动的命令如下:
ps aux |grep php-fpm
执行这条命令,可以看见多个进程
安装nginx-1.14.2:
先不要急着安装,先确保它所依赖的库是否有,怎样查看软件是否安装(rpm -q xxx),如果没有安装依赖则进行安装(笔者一般安装依赖库直接使用yum 默认安装,这样在软件安装的时候就不需要知道依赖库的安装路径,省去不少麻烦)
需要安装的依赖包有 gcc expat-devel openssl-devel pcre pcre-devel

在src目录下 yum install gcc
yum install -y expat-devel
yum install openssl-devel
yum install -y pcre pcre-devel
yum install pcre-devel
1:在/usr/local下创建一个nginx目录
cd /usr/local
mkdir nginx
cd /usr/local/src
wget http://nginx.org/download/nginx-1.14.2.tar.gz
tar zxvf nginx-1.14.2.tar.gz
2.配置编译选项
cd nginx-1.14.2
./configure --prefix=/usr/local/nginx
3.编译和安装
make && make install
4.编写nginx启动脚本,并加入系统服务
vim /etc/init.d/nginx
#!/bin/bash

#chkconfig: - 30 21

#description: http service.

#Source Function Library

. /etc/init.d/functions

NGINX_SBIN="/usr/local/nginx/sbin/nginx"

NGINX_CONF="/usr/local/nginx/conf/nginx.conf"

NGINX_PID="/usr/local/nginx/logs/nginx.pid"

RETVAL=0

prog="Nginx"

start()

{

        echo -n $"Starting $prog: "

        mkdir -p /dev/shm/nginx_temp

        daemon $NGINX_SBIN -c $NGINX_CONF

        RETVAL = $?

        echo

        return $RETVAL

}

stop()

{

        echo -n $"Stopping $prog: "

        killproc -p $NGINX_PID $NGINX_SBIN -TERM

        rm -rf /dev/shm/nginx_temp

        RETVAL = $?

        echo

        return $RETVAL

}

reload()

{

        echo -n $"Reloading $prog: "

        killproc -p $NGINX_PID $NGINX_SBIN -HUP

        RETVAL = $?

        echo

        return $RETVAL

}

restart()

{

        stop

        start

}

configtest()

{

        $NGINX_SBIN -c $NGINX_CONF -t

        return 0

}

case "$1" in

        start)

                start

                ;;

        stop)

                stop

                ;;

        reload)

                reload

                ;;

        restart)

                restart

                ;;

        configtest)

                configtest

                ;;

        *)

                echo $"Usage: $0 {start|stop|reload|restart|configtest}"

                RETVAL=1

esac

exit $RETVAL
保存该脚本后更改权限,命令如下:
chmod 755 /etc/init.d/nginx
chkconfig --add nginx
如果想开启启动nginx,请执行命令如下:
chkconfig nginx on
5.更改nginx的配置文件:
> /usr/local/nginx/conf/nginx.conf
重定向符号>,单独使用时,可以吧一个文本文档快速清空
vim /usr/local/nginx/conf/nginx.conf //写入如下内容:
#vim  /usr/local/nginx/conf/nginx.conf

user nobody nobody;

worker_processes 2;

error_log /usr/local/nginx/logs/nginx_error.log crit;

pid /usr/local/nginx/logs/nginx.pid;

worker_rlimit_nofile 51200;

events

{

        use epoll;

        worker_connections 6000;

}

http

{

        include mime.types;

        default_type application/octet-stream;

        server_names_hash_bucket_size 3526;

        server_names_hash_max_size 4096;

        log_format combined_realip '$remote_addr $http_x_forwarded_for [$time_local]'

        ' $host "$request_uri" $status'

        ' "$http_referer" "$http_user_agent"';

        sendfile on;

        tcp_nopush on;

        keepalive_timeout 30;

        client_header_timeout 3m;

        client_body_timeout 3m;

        send_timeout 3m;

        connection_pool_size 256;

        client_header_buffer_size 1k;

        large_client_header_buffers 8 4k;

        output_buffers 4 32k;

        postpone_output 1460;

        client_max_body_size 10m;

        client_body_buffer_size 256k;

        client_body_temp_path /usr/local/nginx/client_body_temp;

        proxy_temp_path /usr/local/nginx/proxy_temp;

        fastcgi_temp_path /usr/local/nginx/fastcgi_temp;

        fastcgi_intercept_errors on;

        tcp_nodelay on;

        gzip on;

        gzip_min_length 1k;

        gzip_buffers 4 8k;

        gzip_comp_level 5;

        gzip_http_version 1.1;

        gzip_types text/plain application/x-javascript text/css text/htm

        application/xml;

        server

        {

                listen 80;

                server_name ax.xxx.xxb;

                index index.html index.htm index.php;

                root /usr/local/nginx/html;

                location ~ \.php$

                {

                        include fastcgi_params;

                        fastcgi_pass 127.0.0.1:9000;

                        fastcgi_index index.php;

                        fastcgi_param SCRIPT_FILENAME /usr/local/nginx/html$fastcgi_script_name;

                }

        }

}
6. 保存配置文件后,检验配置是否正确的方法如下:
/usr/local/nginx/sbin/nginx -t
如果显示 "test is successful",说明配置没有问题,否则就要根据提示检查配置文件.

7.启动nginx,命令如下:
service nginx start
重启 service nginx restart


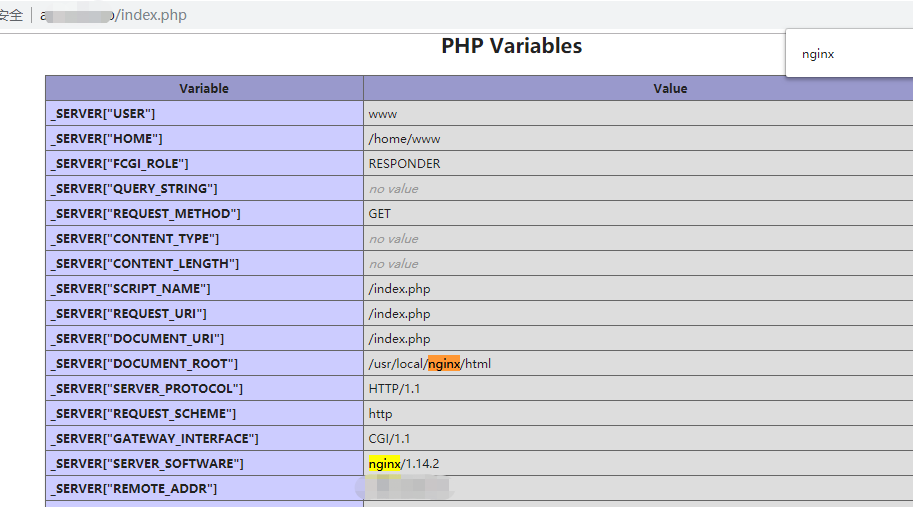
8.测试是否正确解析php
vim /usr/local/nginx/html/index.php
其内容如下
<?php
echo phpinfo();

安装mysql-5.6.43(与之前一模一样)
https://www.cnblogs.com/yehuisir/p/10061789.html
------------------------------------------------------------------------额外补充-----------------------------------------------------------------------------------
nginx.conf
#vim  /usr/local/nginx/conf/nginx.conf

user nobody nobody;

worker_processes 2;

error_log /usr/local/nginx/logs/nginx_error.log crit;

pid /usr/local/nginx/logs/nginx.pid;

worker_rlimit_nofile 51200;

events

{

    use epoll;

    worker_connections 6000;

}

http

{

    include mime.types;

    default_type application/octet-stream;

    server_names_hash_bucket_size 3526;

    server_names_hash_max_size 4096;

    log_format combined_realip '$remote_addr $http_x_forwarded_for [$time_local]'

    ' $host "$request_uri" $status'

    ' "$http_referer" "$http_user_agent"';

    sendfile on;

tcp_nopush on;

    keepalive_timeout 30;

    client_header_timeout 3m;

    client_body_timeout 3m;

    send_timeout 3m;

    connection_pool_size 256;

    client_header_buffer_size 1k;

    large_client_header_buffers 8 4k;

    output_buffers 4 32k;

    postpone_output 1460;

    client_max_body_size 10m;

    client_body_buffer_size 256k;

    client_body_temp_path /usr/local/nginx/client_body_temp;

    proxy_temp_path /usr/local/nginx/proxy_temp;

    fastcgi_temp_path /usr/local/nginx/fastcgi_temp;

    fastcgi_intercept_errors on;

    tcp_nodelay on;

    gzip on;

    gzip_min_length 1k;

    gzip_buffers 4 8k;

    gzip_comp_level 5;

    gzip_http_version 1.1;

    gzip_types text/plain application/x-javascript text/css text/htm

    application/xml;

    server

    {

        listen 80;

        server_name xxx.nxxx.cxx;

        index index.html index.htm index.php;

        root /usr/local/nginx/html;

        location ~ \.php$

        {

            include fastcgi_params;

            fastcgi_pass 127.0.0.1:9000;

            fastcgi_index index.php;

            fastcgi_param SCRIPT_FILENAME /usr/local/nginx/html$fastcgi_script_name;

        }

    }

    server

        {

                listen 80;

                server_name axxl.xxx.xxx;

                index index.html index.htm index.php;

                root /usr/local/nginx/html;

                location ~ \.php$

                {

                        include fastcgi_params;

                        fastcgi_pass 127.0.0.1:9000;

                        fastcgi_index index.php;

                        fastcgi_param SCRIPT_FILENAME /usr/local/nginx/html$fastcgi_script_name;

                }

        }

    server {

            listen       80;

            server_name  blxxx.xxx.xxx;

            root /usr/local/nginx/html/xxxg/public;

            index  index.html index.htm index.php;

            location / {

                if (!-e $request_filename) {

                    rewrite ^(.*)$ /index.php?s=$1 last;

                    break;

                }

            }

            error_page   500 502 503 504  /50x.html;

            location = /50x.html {

                root   html;

            }

            location ~ \.php$ {

               fastcgi_pass   127.0.0.1:9000;

               fastcgi_index index.php;

               include fastcgi_params;

               set $real_script_name $fastcgi_script_name;

               if ($fastcgi_script_name ~ "^(.+?\.php)(/.+)$") {

                   set $real_script_name $1;

                   set $path_info $2;

               }

               fastcgi_param SCRIPT_FILENAME $document_root$real_script_name;

               fastcgi_param SCRIPT_NAME $real_script_name;

               fastcgi_param PATH_INFO $path_info;

            }

            location ~ .*\.(gif|jpg|jpeg|png|bmp|swf|flv|ico)$ {

                expires 30d;

                access_log off;

            }

            location ~ .*\.(js|css)?$ {

                expires 7d;

                access_log off;

           }

    }

}
源码编译安装lnmp环境(nginx-1.14.2 + mysql-5.6.43 + php-5.6.30 )------踩了无数坑,重装了十几次服务器才会的,不容易啊!的更多相关文章
- 源码编译安装lnmp环境
一.源码编译安装步骤 首先说明源码安装的好处 速度快,可自定义路径 主要有三步:1.配置 进入源码安装包 ./configure --prefix=/uer/local/nginx 可指定参数 ...
- 源码编译安装LNMP环境及配置基于域名访问的多虚拟主机
实验环境及软件版本: CentOS版本: 6.6(2.6.32.-504.el6.x86_64) nginx版本: nginx-1.6.2 mysql版本: Mysql-5.6.23 php版本: ...
- centos6源码编译安装lnmp环境
操作系统 版本 64位 CentOS-6.6 10.0.0.20 安装环境所需依赖包 yum -y install gcc automake autoconf libtool make gcc- ...
- WordPress安装篇(5):源码编译安装LNMP并部署WordPress
与YUM方式安装相比,源码编译安装方式更灵活,安装过程中能自定义功能和参数,特别是在批量部署服务器又要求软件版本及配置一致时,源码编译安装的优势很明显.本文介绍如何通过源码编译方式安装Nginx1.1 ...
- 源码编译搭建LNMP环境
LNMP源码编译 1.LNMP介绍 LNMP=Linux Nginx Mysql PHP Nginx ("engine x") 是一个高性能的 HTTP 和 反向代理 服务器.Ng ...
- 源码编译安装LAMP环境及配置基于域名访问的多虚拟主机
实验环境及软件版本: CentOS版本: 6.6(2.6.32.-504.el6.x86_64) apache版本: apache2.2.27 mysql版本: Mysql-5.6.23 php版本 ...
- centos7源码编译安装LNMP+ZABBIX4.0LTS(1)——nginx
环境:192.168.117.132--zabbix server192.168.117.133--zabbix proxy 安装路径为/zabbix 安装nginx 1.安装包下载http://ng ...
- 年终福利,PHP7+Apache2.4+MySQL5.6 源码编译安装,环境配置,搭建你自己的LAMP环境
PHP7 都出来了,你还在玩PHP5吗? MySQL5.6 早都出来了,你还在玩MySql5.2吗? Apache2.4 早都出来了,你还在玩Apache2.2吗? 笔者不才,愿意亲自搭建环境,供搭建 ...
- 如何源码编译安装并控制nginx
安装nginx 注意 Linux操作系统需要2.6及其以上的内核(支持epoll) 使用nginx的必备软件 gcc编辑器 yum -y install gcc gcc-c++ pcre库(支持正则表 ...
随机推荐
- IIS文件名解析漏洞扼要分析
概括: 从技术角度分析IIS6文件名解析漏洞的原理与IIS7的相关情况. a.IIS6错误解析文件类型现象 1.当WEB目录下,文件名以 xxx.asp;xxx.xxx 来进行命名的时候,此文件将送交 ...
- Xcode.Subproject.And.Framework
1. Easy Xcode Static Library Subprojects and Submodules http://www.blog.montgomerie.net/easy-xcode-s ...
- 移动端web及app设计尺寸
转载 2017年07月27日 22:48:16 984 移动端高清.多屏适配方案 背景 开发移动端H5页面 面对不同分辨率的手机 面对不同屏幕尺寸的手机 视觉稿 在前端开发之前,视觉MM会给我们一个p ...
- 深入应用c++11 随书代码
代码并未在作者github上提供 将书中代码敲至vc 并调试运行 依赖BOOST库 编译环境vs2015 boost1.59 // Client.cpp : 定义控制台应用程序的入口点. // #in ...
- 【JS】判断浏览器类型
判断原理 JavaScript是前端开发的主要语言,我们可以通过 编写JavaScript程序来判断浏览器的类型及版本.JavaScript判断浏览器类型一般有两种办法,一种是根据各种浏览器独有的属性 ...
- 将IP地址转化为整数
$ip = 'IP地址';echo $intip = sprintf('%u',ip2long($ip)); //转换为无符号整型echo long2ip($intip);//将整型转换为ip
- 树莓派安装mono
http://www.mono-project.com/download/ sudo apt-key adv --keyserver hkp://keyserver.ubuntu.com:80 --r ...
- java,arduino,C#之间的一些编码转换
1.C#-> Encoding.UTF8.GetBytes( "abc中") ->[97,98,99,228,184,173] java->byte[] bs= ...
- 【Unity】2.4 层次视图(Hierarchy)
分类:Unity.C#.VS2015 创建日期:2016-03-29 一.简介 层级视图 (Hierarchy) 包含当前场景中的每个游戏对象 (GameObject).有些是三维模型等资源文件的直接 ...
- <%@ include file=""%>与<jsp:include page=""/>
https://www.cnblogs.com/sharpest/p/6117629.html