
解决跨域问题,前端 live-server --port=1802 后端启动 localhost:1801,以及解决 vue 的 axios 请求整合
- 测试的源码文件内容点击跳转
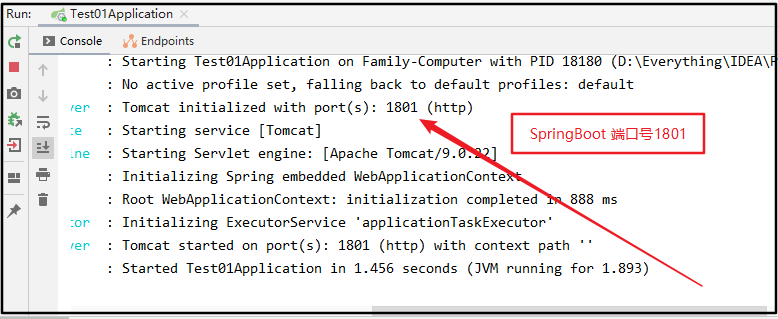
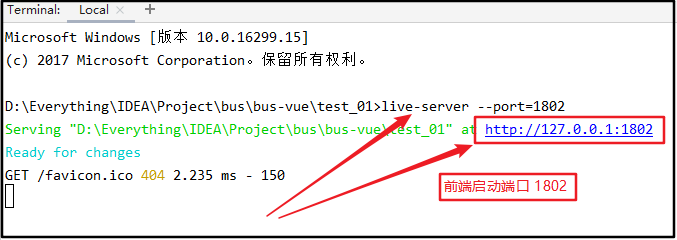
前端引入 vue.js 与 axios.min.js
<script src="https://cdn.bootcss.com/vue/2.6.10/vue.js"></script>

<script src="https://unpkg.com/axios/dist/axios.min.js"></script>
测试
前端请求 不带 http://

axios.get("localhost:1801/user/get");

后端不配置跨域
前端报错,后台进不去方法

前端请求 不带 http://
axios.get("localhost:1801/user/get");

后端配置跨域
前端报错,后台进不去方法
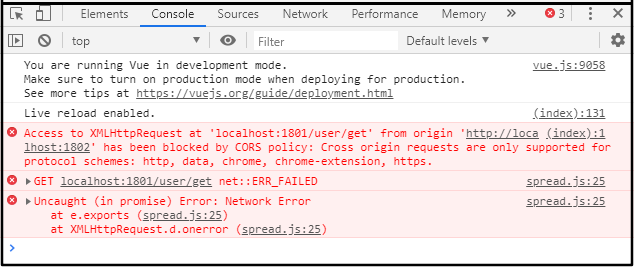
前端请求带 http://

axios.get("http://localhost:1801/user/get").then((res) =>

{

    alert("成功")

}).catch((res) =>

{

    alert("失败")

})

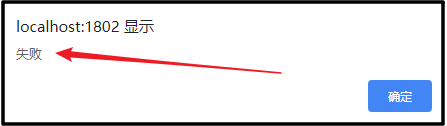
后端不配置跨域
前端报错,弹框"失败",也就是异常了
但是,后端方法正常跑完了
前端请求带 http://

axios.get("http://localhost:1801/user/get").then((res) =>

{

    alert("成功")

}).catch((res) =>

{

    alert("失败")

})

后端配置跨域
前端正常,弹框"成功",也就是正常访问,正常接收到返回数据了
后端方法自然也是正常跑完了

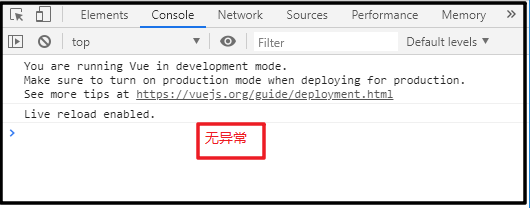
前端,测试在方法 get
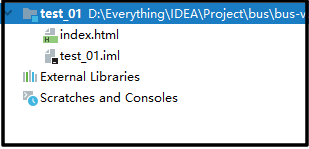
<!DOCTYPE html>

<html lang="en">

<head>

    <meta charset="UTF-8">

    <title>Title</title>

</head>

<body>

<div id="app">

    <input type="button" @click="get" value="get">

    <input type="button" @click="get1" value="get1">

    <input type="button" @click="get2" value="get2">

    <hr/>

    <input type="button" @click="post" value="post">

    <input type="button" @click="post1" value="post1">

    <input type="button" @click="post2" value="post2">

    <hr/>

    <input type="button" @click="del" value="delete">

    <input type="button" @click="del1" value="delete1">

    <input type="button" @click="del2" value="delete2">

    <hr/>

    <input type="button" @click="put" value="put">

    <input type="button" @click="put1" value="put1">

    <input type="button" @click="put2" value="put2">

</div>

<script src="https://cdn.bootcss.com/vue/2.6.10/vue.js"></script>

<script src="https://unpkg.com/axios/dist/axios.min.js"></script>

<script>

    new Vue({

        el: "#app",

        data: {

            request_get: {

                get1_id: "111",

                get2_id: "222"

            },

            request_post: {

                post: {

                    username: "我是用户名_post_data",

                    password: "我是密码_post_data",

                }

            },

            request_delete: {

                delete1_id: "111",

                delete2_id: "222"

            },

            request_put: {

                put: {

                    username: "我是用户名_put_data",

                    password: "我是密码_put_data",

                }

            },

        },

        methods: {

            get()

            {

                //axios.get("localhost:1801/user/get");

                //axios.get("http://localhost:1801/user/get");

                axios.get("http://localhost:1801/user/get").then((res) =>

                {

                    alert("成功")

                }).catch((res) =>

                {

                    alert("失败")

                })

            },

            get1()

            {

                axios.get("http://localhost:1801/user/get1?id=" + this.request_get.get1_id);

            },

            get2()

            {

                axios.get("http://localhost:1801/user/get2/" + this.request_get.get2_id);

            },

            post()

            {

                axios.post("http://localhost:1801/user/post");

            },

            post1()

            {

                /*方式1*/

                axios.post("http://localhost:1801/user/post1", {

                    "username": "我是用户名_post1_加引号",

                    "password": "我是密码_post1_加引号"

                });

                /*方式2*/

                axios.post("http://localhost:1801/user/post1", {

                    username: "我是用户名__post1_不引号",

                    password: "我是密码_post1_不引号"

                });

                /*方式3*/

                axios.post("http://localhost:1801/user/post1", this.request_post.post);

            },

            post2()

            {

                /*方式1*/

                axios.post("http://localhost:1801/user/post2?username=我是用户名_post2_1&password=我是密码_post2_1");

                /*方式2*/

                axios.post("http://localhost:1801/user/post2", "username=我是用户名_post2_2&password=我是密码_post2_2");

                /*方式3*/

                axios.post("http://localhost:1801/user/post2", "username="+this.request_post.post.username+"&password="+this.request_post.post.password);

            },

            del()

            {

                axios.delete("http://localhost:1801/user/delete");

            },

            del1()

            {

                axios.delete("http://localhost:1801/user/delete1?id=" + this.request_delete.delete1_id);

            },

            del2()

            {

                axios.delete("http://localhost:1801/user/delete2/" + this.request_delete.delete2_id);

            },

            put()

            {

                axios.put("http://localhost:1801/user/put");

            },

            put1()

            {

                /*方式1*/

                axios.put("http://localhost:1801/user/put1", {"username": "我是用户名_put1_加引号", "password": "我是密码_put1_加引号"});

                /*方式2*/

                axios.put("http://localhost:1801/user/put1", {username: "我是用户名__put1_不引号", password: "我是密码_put1_不引号"});

                /*方式3*/

                axios.put("http://localhost:1801/user/put1", this.request_put.put);

            }

        }

    })

</script>

</body>

</html>
index.html
后端

<?xml version="1.0" encoding="UTF-8"?>

<project xmlns="http://maven.apache.org/POM/4.0.0" xmlns:xsi="http://www.w3.org/2001/XMLSchema-instance"

         xsi:schemaLocation="http://maven.apache.org/POM/4.0.0 https://maven.apache.org/xsd/maven-4.0.0.xsd">

    <modelVersion>4.0.0</modelVersion>

    <parent>

        <groupId>org.springframework.boot</groupId>

        <artifactId>spring-boot-starter-parent</artifactId>

        <version>2.1.7.RELEASE</version>

        <relativePath/> <!-- lookup parent from repository -->

    </parent>

    <groupId>com.example</groupId>

    <artifactId>test_01</artifactId>

    <version>0.0.1-SNAPSHOT</version>

    <name>test_01</name>

    <description>Demo project for Spring Boot</description>

    <properties>

        <java.version>1.8</java.version>

    </properties>

    <dependencies>

        <dependency>

            <groupId>org.springframework.boot</groupId>

            <artifactId>spring-boot-starter-web</artifactId>

        </dependency>

        <dependency>

            <groupId>org.projectlombok</groupId>

            <artifactId>lombok</artifactId>

            <version>1.18.8</version>

        </dependency>

    </dependencies>

    <build>

        <plugins>

            <plugin>

                <groupId>org.springframework.boot</groupId>

                <artifactId>spring-boot-maven-plugin</artifactId>

            </plugin>

        </plugins>

    </build>

</project>
pom.xml
server.port=1801
application.properties
package panfeng;

import org.springframework.boot.SpringApplication;

import org.springframework.boot.autoconfigure.SpringBootApplication;

@SpringBootApplication

public class Test01Application

{

    public static void main(String[] args)

    {

        SpringApplication.run(Test01Application.class, args);

    }

}
Test01Application.java
package panfeng.config;

import org.springframework.context.annotation.Bean;

import org.springframework.context.annotation.Configuration;

import org.springframework.web.cors.CorsConfiguration;

import org.springframework.web.cors.UrlBasedCorsConfigurationSource;

import org.springframework.web.filter.CorsFilter;

/*

 * 描述:配置跨域

 * 【时间 2019-08-23 10:52 作者 陶 攀 峰】

 */

@Configuration

public class MyCors

{

    @Bean

    // import org.springframework.web.filter.CorsFilter;

    public CorsFilter corsFilter()

    {

        CorsConfiguration config = new CorsConfiguration();

        // 添加允许信任域名

        // 1) 允许跨域的域名,不要写*,否则cookie就无法使用了,*表示所有域名都可跨域访问

        // live-server --port=1802

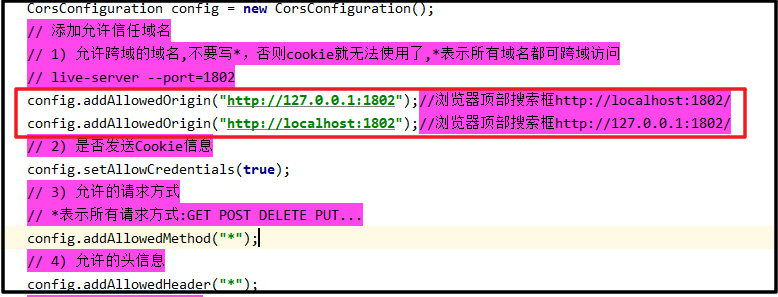
        config.addAllowedOrigin("http://127.0.0.1:1802");//浏览器顶部搜索框http://localhost:1802/

        config.addAllowedOrigin("http://localhost:1802");//浏览器顶部搜索框http://127.0.0.1:1802/

        // 2) 是否发送Cookie信息

        config.setAllowCredentials(true);

        // 3) 允许的请求方式

        // *表示所有请求方式:GET POST DELETE PUT...

        config.addAllowedMethod("*");

        // 4) 允许的头信息

        config.addAllowedHeader("*");

        // 初始化cors数据源对象

        // import org.springframework.web.cors.UrlBasedCorsConfigurationSource;

        UrlBasedCorsConfigurationSource configurationSource = new UrlBasedCorsConfigurationSource();

        configurationSource.registerCorsConfiguration("/**", config);

        // 返回CorsFilter实例,参数:cors配置源对象

        return new CorsFilter(configurationSource);

    }

}
MyCors.java
package panfeng.entity;

import lombok.AllArgsConstructor;

import lombok.Data;

import lombok.NoArgsConstructor;

import org.hibernate.validator.constraints.Length;

@Data

@NoArgsConstructor

@AllArgsConstructor

public class User

{

    private String username;

    private String password;

    private int age;

}
User.java
package panfeng.controller;

import org.springframework.http.ResponseEntity;

import org.springframework.stereotype.Controller;

import org.springframework.web.bind.annotation.*;

import panfeng.entity.User;

@Controller

@RequestMapping("user")

public class UserController

{

    @GetMapping("get")

    public ResponseEntity<String> get()

    {

        System.out.println("get...");

        return ResponseEntity.ok("w s return");

    }

    @GetMapping("get1")

    public void get1(@RequestParam("id") Integer id)

    {

        System.out.println("get1..." + id);

    }

    @GetMapping("get2/{id}")

    public void get2(@PathVariable("id") Integer id)

    {

        System.out.println("get2..." + id);

    }

    @PostMapping("post")

    public void post()

    {

        System.out.println("post...");

    }

    @PostMapping("post1")

    public void post1(@RequestBody(required = false) User user)

    {

        System.out.println("post1..." + user);

    }

    @PostMapping("post2")

    public void post2(@RequestParam("username") String username, @RequestParam("password") String password)

    {

        System.out.println("post2..." + username + "---" + password);

    }

    @DeleteMapping("delete")

    public void delete()

    {

        System.out.println("delete...");

    }

    @DeleteMapping("delete1")

    public void delete1(@RequestParam("id") Integer id)

    {

        System.out.println("delete1..." + id);

    }

    @DeleteMapping("delete2/{id}")

    public void delete2(@PathVariable("id") Integer id)

    {

        System.out.println("delete1..." + id);

    }

    @PutMapping("put")

    public void put()

    {

        System.out.println("put...");

    }

    @PutMapping("put1")

    public void put1(@RequestBody(required = false) User user)

    {

        System.out.println("put1..." + user);

    }

}
UserController.java
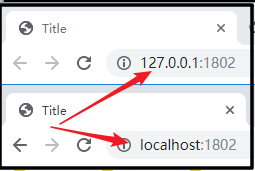
大坑
都要配置,如果只配置了localhost 顶部栏为127.0.0.1的时候就会报跨域的错误
解决跨域问题,前端 live-server --port=1802 后端启动 localhost:1801,以及解决 vue 的 axios 请求整合的更多相关文章
- Vue 本地代理 纯前端技术解决跨域
vue-axios获取数据很多小伙伴都会使用,但如果前后端分离且后台没设置跨域许可,那要怎样才能解决跨域问题? 常用方法有几种: 通过jsonp跨域 通过修改document.domain来跨子域 使 ...
- Nginx+Springboot+Vue 前后端分离 解决跨域问题
1:前端vue 写完 打包 npm run build prod 2: 后端api 写完打包 springboot mvn package -Dmaven.test.skip=true 3: ngin ...
- 如何用Nginx解决跨域问题
一. 产生跨域的原因 1.浏览器限制 2.跨域 3.XHR(XMLHttpRequest)请求 二. 解决思路 解决跨域有多重,在这里主要讲用nginx解决跨域 1.JSONP 2.nginx代理 3 ...
- 使用Access-Control-Allow-Origin解决跨域
什么是跨域 当两个域具有相同的协议(如http), 相同的端口(如80),相同的host(如www.google.com),那么我们就可以认为它们是相同的域(协议,域名,端口都必须相同). 跨域就指着 ...
- 一步一步学习SignalR进行实时通信_3_通过CORS解决跨域
原文:一步一步学习SignalR进行实时通信_3_通过CORS解决跨域 一步一步学习SignalR进行实时通信\_3_通过CORS解决跨域 SignalR 一步一步学习SignalR进行实时通信_3_ ...
- proxyTable 解决跨域问题
1.使用 proxyTable(地址映射表)解决跨域问题(即通过设置代理解决跨域问题): 可以通过设置将复杂的url简化,例如我们要请求的地址是api.xxxxxxxx.com/list/1,可以按照 ...
- 在django中解决跨域AJAX
由于浏览器存在同源策略机制,同源策略阻止从一个源加载的文档或脚本获取另一个源加载的文档的属性. 特别的:由于同源策略是浏览器的限制,所以请求的发送和响应是可以进行,只不过浏览器不接收罢了. 浏览器同源 ...
- 搞懂:前端跨域问题JS解决跨域问题VUE代理解决跨域问题原理
什么是跨域 跨域:一个域下的文档或脚本试图去请求另一个域下的资源 广义的跨域包含一下内容: 1.资源跳转(链接跳转,重定向跳转,表单提交) 2.资源请求(内部的引用,脚本script,图片img,fr ...
- 前端通过Nginx反向代理解决跨域问题
在前面写的一篇文章SpringMVC 跨域,我们探讨了什么是跨域问题以及SpringMVC怎么解决跨域问题,解决方式主要有如下三种方式: JSONP CORS WebSocket 可是这几种方式都是基 ...
随机推荐
- LC 894. All Possible Full Binary Trees
A full binary tree is a binary tree where each node has exactly 0 or 2 children. Return a list of al ...
- 综合开源框架之RxJava/RxAndroid
* 一种帮助做异步的框架. 类似于 AsyncTask. 但其灵活性和扩展性远远强于前者. * 主页: https://github.com/ReactiveX/RxJava * 中文资料: * ht ...
- Python排序搜索基本算法之归并排序实例分析
Python排序搜索基本算法之归并排序实例分析 本文实例讲述了Python排序搜索基本算法之归并排序.分享给大家供大家参考,具体如下: 归并排序最令人兴奋的特点是:不论输入是什么样的,它对N个元素的序 ...
- laravel多主多从配置示例
'mysql' => [ 'write' => [ [ 'host' => '192.168.1.180', 'username' => '', 'password' => ...
- Nmap扫描二级目录
nmap --script http-enum -p80 192.168.2.100 //namp扫描2级目录
- bash: ./vmware-install.pl: /user/bin/perl: 坏的解释器:没有那个文件或目录
----------------安装VMwere Tools------------------------bash: ./vmware-install.pl: /usr/bin/perl: bad ...
- 【VS开发】【Linux开发】【DSP开发】如何截获以太网帧并解析
1 2 3 4 5 6 7 8 9 10 11 12 13 14 15 16 17 18 19 20 21 22 23 24 25 26 27 28 29 30 31 32 33 34 35 36 3 ...
- Nginx的root和alias区别
1.root 下面举例说明: location /i/ { root /data/w3; } 请求 http://foofish.net/i/top.gif 这个地址时,那么在服务器里面对应的真正的资 ...
- SQL语句规范
SQLStructure Query Language,结构化查询语言 1.规范(1)mysql对于SQL语句不区分大小写,SQL语句关键字尽量大写 show databases;show DataB ...
- Elasticsearch-布尔类型
boolean类型用于存储文档中的true/false.例如:专辑类型中需要添加一个字段表示是否可以下载,如下 curl -XPUT 'localhost:9200/music/album/4' -d ...