从零搭建DotnetCore2.0
没时间介绍了,废话不说先上车

以下所有扯淡都是建立在.NETCore2.0环境已经搭建好
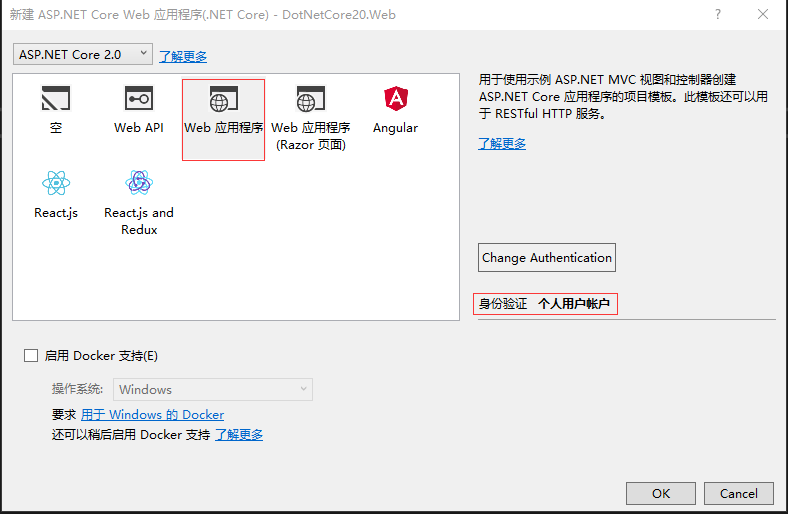
右键解决方案>新建项目>
选择Web>ASP.NETCoreWeb应用程序(.NET Core)

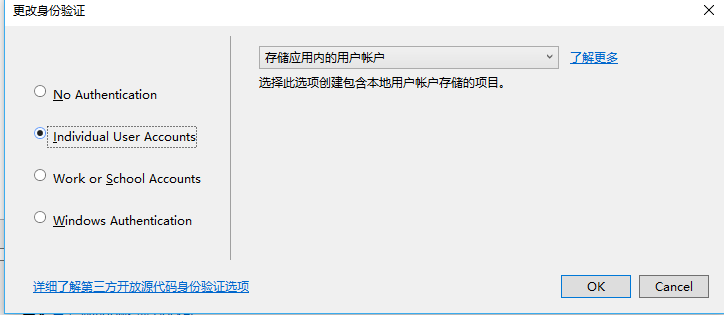
选择Web应用程序,暂时不选择启用Docker,身份验证选择个人用户账户(会自动生成一系列和用户认证的代码)
随后生代码层次目录如下:

其中会包含身份信息的相关实现,比如相关实体信息(user)之类的,如果想对扩展微软自动的生成的用户实体类,可在Models中的ApplicationUser下扩展,
在此ApplicationUser中添加属性即可:比如添加叫WeChatId属性,添加后如下:
using System;

using System.Collections.Generic;

using System.Linq;

using System.Threading.Tasks;

using Microsoft.AspNetCore.Identity;

namespace DotNetCore20.Web.Models

{

    // Add profile data for application users by adding properties to the ApplicationUser class

    public class ApplicationUser : IdentityUser

    {

        /// <summary>

        /// 微信Id

        /// </summary>

        public string WeChatId { get; set; }

    }

}
在之后生成运行并迁移,数据库的AspNetUsers中就会多出WeChatId 属性.
一:安装引用
nugnet恢复引用失效时,可在程序包管理控制台输入:
dotnet restore 即可

会发现在恢复指令后在NuGet中会有一个Microsoft.VisualStudio.Web.CodeGeneration.Design的报错,信息如下:
已使用“.NETPortable,Version=v0.0,Profile=Profile259, .NETFramework,Version=v4.6.1”而不是项目目标框架“.NETCoreApp,Version=v2.0”还原了包“Microsoft.Composition 1.0.27”。这可能会导致兼容性问题
这个库是ASP.NET Core的代码生成工具。包含用于生成控制器和视图的dotnet-aspnet-codegenerator命令,暂时可先卸载,不影响项目运行.
对项目类库的引用有以下几种方式
1.Nuget去安装(官网https://www.nuget.org/packages/)
2.右键依赖项点击菜单中的添加引用
3.可在程序包管理控制台输入:Install-Package 引用类库名称
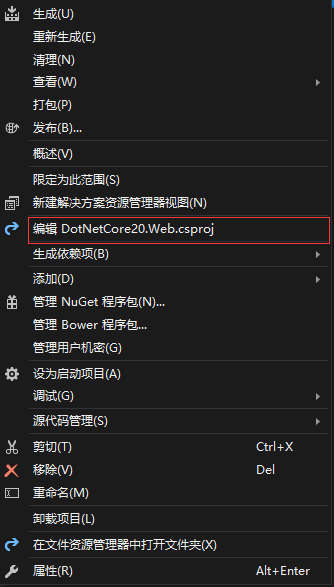
4.可右键编辑csproj工程文件进行添加,然后执行dotnet restore
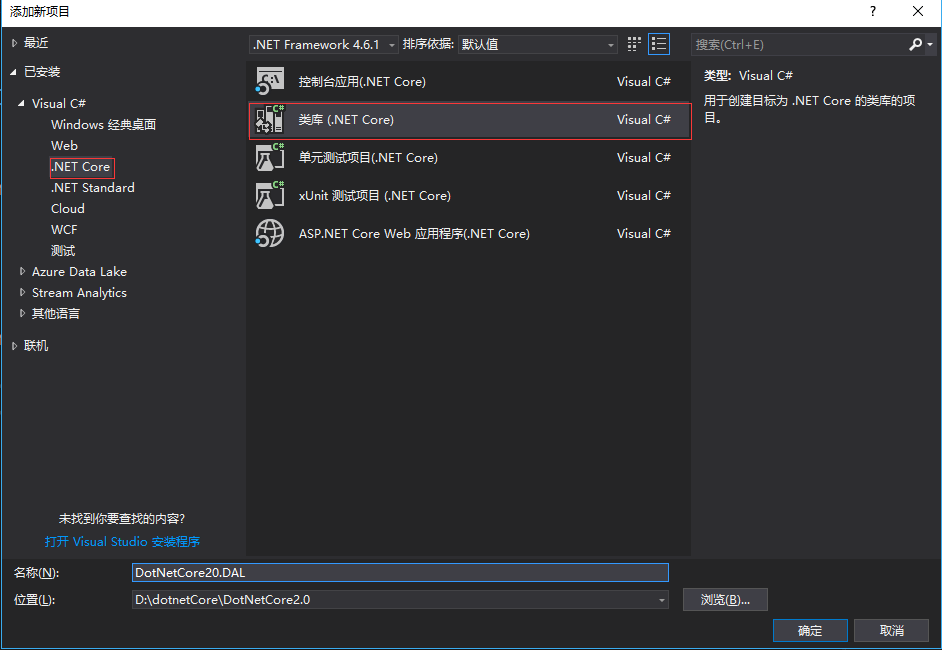
二.创建实体程序集
右键解决方案>添加项目>

首先创建抽象类,供Entity实体继承,主要为每个实体提供公用属性
using System;

using System.Collections.Generic;

using System.ComponentModel.DataAnnotations;

using System.Runtime.Serialization;

using System.Text;

namespace DotNetCore20.Entity.Core

{

    /// <summary>

    /// DB表基底

    /// </summary>

    [Serializable]

    public abstract partial class BaseEntity

    {

        /// <summary>

        /// Id

        /// </summary>

        [DataMember]

        public long Id { get; set; }

        /// <summary>

        /// DB 資料版號

        /// </summary>

        [Timestamp]

        public byte[] RowVersion { get; set; }

        /// <summary>

        /// 创建时间

        /// </summary>

        [DataMember]

        public DateTime CreateTime { get; set; }

        /// <summary>

        /// 更新时间

        /// </summary>

        [DataMember]

        public DateTime UpdateTime { get; set; }

        /// <summary>

        /// 状态

        /// </summary>

        [DataMember]

        public EnumState State { get; set; }

    }

    /// <summary>

    /// 状态

    /// </summary>

    public enum EnumState

    {

        /// <summary>

        /// 删除

        /// </summary>

        Delete = ,

        /// <summary>

        /// 正常

        /// </summary>

        Normal = ,

    }

}
添加一个UserExtend用户扩展类(Entity):
using DotNetCore20.Entity.Core;

using System;

using System.Runtime.Serialization;

namespace DotNetCore20.Entity

{

    [DataContract]

    public class UserExtend : BaseEntity

    {

        /// <summary>

        /// 用户Id

        /// </summary>

        [DataMember]

        public long UserId { get; set; }

        /// <summary>

        /// 昵称

        /// </summary>

        [DataMember]

        public long NickName { get; set; }

    }

}
三.创建数据层
添加引用
DAL层需要用到EF实体映射相关和我们自己前面定义的Entity中的UserExtend实体表,所以要添加相关引用,DotNetCore20.Entity和 Microsoft.EntityFrameworkCore.Tools
快捷键:Ctrl+Alt+o 打开程序包管理器输入以下:
install-package Microsoft.EntityFrameworkCore.Tools

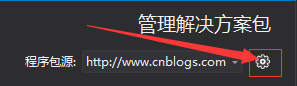
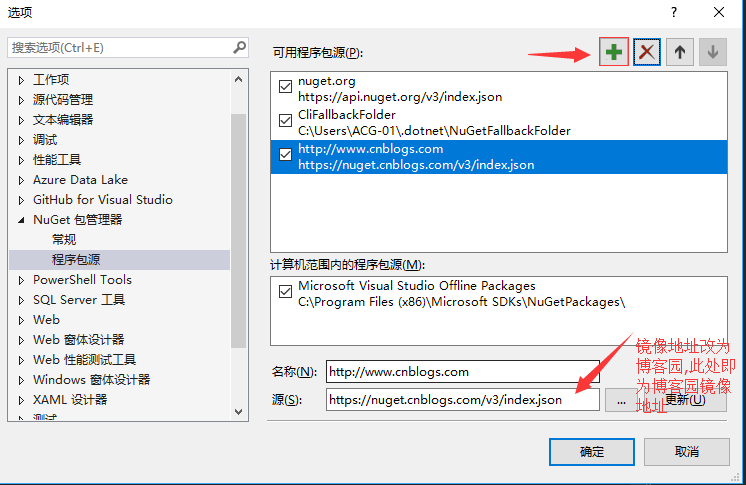
如果是网络限制下载失败,推荐把nuget镜像改为博客园资源,方法如下:
右键解决方案>管理解决方案的nuget程序包.显示如下:
新建一个数据上下文类,目录结构如下:
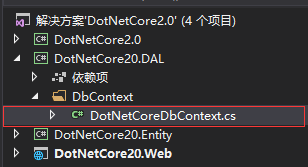
DotNetCoreDbContext内部代码改为以下:
using DotNetCore20.Entity;

using Microsoft.EntityFrameworkCore;

namespace DotNetCore20.DAL.DbContext

{

    public class DotNetCoreDbContext : Microsoft.EntityFrameworkCore.DbContext

    {

        public DotNetCoreDbContext(DbContextOptions<DotNetCoreDbContext> options) : base(options)

        {

        }

        public DbSet<UserExtend> UserExtend { get; set; }

    }

}
在此基本的实体映射相关的代码都完毕,现在还有一步,就是数据库连接字符串的配置
首先打开appsettings.json文件,在ConnectionStrings节点下增加以下
"DotNetCoreConnection": "Server=(localdb)\\mssqllocaldb;Database=DotNetCoreDb;Trusted_Connection=True;MultipleActiveResultSets=true"
增加后如下:
{

    "ConnectionStrings": {

        "DefaultConnection": "Server=(localdb)\\mssqllocaldb;Database=DotNetCoreDefaultDb;Trusted_Connection=True;MultipleActiveResultSets=true",

        "DotNetCoreConnection": "Server=(localdb)\\mssqllocaldb;Database=DotNetCoreDb;Trusted_Connection=True;MultipleActiveResultSets=true"

    },

  "Logging": {

    "IncludeScopes": false,

    "Debug": {

      "LogLevel": {

        "Default": "Warning"

      }

    },

    "Console": {

      "LogLevel": {

        "Default": "Warning"

      }

    }

  }

}
再打开web网站下的Startup文件,在ConfigureServices方法中添加一下行:
//自定义数据库连接字符串

            services.AddDbContext<DotNetCoreDbContext>(options =>

                options.UseSqlServer(Configuration.GetConnectionString("DotNetCoreConnection")));
增加后如下:
using System;

using System.Collections.Generic;

using System.Linq;

using System.Threading.Tasks;

using Microsoft.AspNetCore.Builder;

using Microsoft.AspNetCore.Diagnostics.EntityFrameworkCore;

using Microsoft.AspNetCore.Identity;

using Microsoft.AspNetCore.Http;

using Microsoft.EntityFrameworkCore;

using Microsoft.AspNetCore.Hosting;

using Microsoft.Extensions.Configuration;

using Microsoft.Extensions.DependencyInjection;

using Microsoft.Extensions.Options;

using DotNetCore20.Web.Data;

using DotNetCore20.Web.Models;

using DotNetCore20.Web.Services;

using DotNetCore20.DAL.DbContext;

namespace DotNetCore20.Web

{

    public class Startup

    {

        public Startup(IConfiguration configuration)

        {

            Configuration = configuration;

        }

        public IConfiguration Configuration { get; }

        // This method gets called by the runtime. Use this method to add services to the container.

        public void ConfigureServices(IServiceCollection services)

        {

            services.AddDbContext<ApplicationDbContext>(options =>

                options.UseSqlServer(Configuration.GetConnectionString("DefaultConnection")));

            //自定义数据库连接字符串

            services.AddDbContext<DotNetCoreDbContext>(options =>

                options.UseSqlServer(Configuration.GetConnectionString("DotNetCoreConnection")));

            services.AddIdentity<ApplicationUser, IdentityRole>()

                .AddEntityFrameworkStores<ApplicationDbContext>()

                .AddDefaultTokenProviders();

            // Add application services.

            services.AddTransient<IEmailSender, AuthMessageSender>();

            services.AddTransient<ISmsSender, AuthMessageSender>();

            services.AddMvc();

        }

        // This method gets called by the runtime. Use this method to configure the HTTP request pipeline.

        public void Configure(IApplicationBuilder app, IHostingEnvironment env)

        {

            if (env.IsDevelopment())

            {

                app.UseDeveloperExceptionPage();

                app.UseBrowserLink();

                app.UseDatabaseErrorPage();

            }

            else

            {

                app.UseExceptionHandler("/Home/Error");

            }

            app.UseStaticFiles();

            app.UseAuthentication();

            app.UseMvc(routes =>

            {

                routes.MapRoute(

                    name: "default",

                    template: "{controller=Home}/{action=Index}/{id?}");

            });

        }

    }

}
运行程序,点击登陆(只要访问数据库的操作都可),出现错误页面:
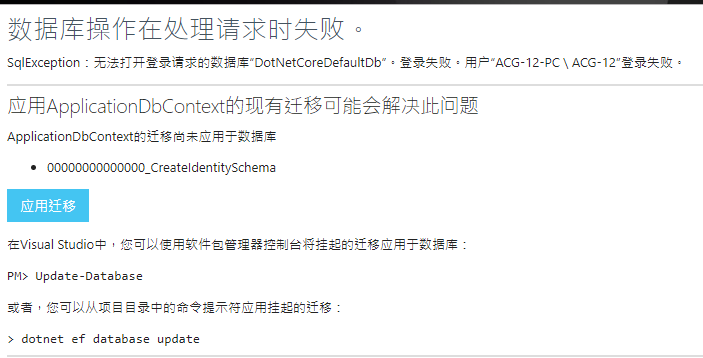
点击应用迁移 ,即自动迁移数据库.
由于两个数据库,只会自动迁移关于用户的表AspNetUsers,
所以还得VS中程序包管理器中下命令迁移.
Add-Migration firstMigration -Context DotNetCoreDbContext
以上命令执行后再执行以下命令:
Update-Database -Context DotNetCoreDbContext;
然后查看数据库会发现多出两个数据库,
以DotNetCoreDefaultDb生成的为例,会生成如下表:

其中AspNetUsers就中会有之前添加的WeChatId字段

然后再次运行程序:

这样一个完整的 Asp.NetCore2.0网站就初步运行起来了
下一篇将在DAL层增加Repository和UnitWorks,完成简单crud的统一管理
从零搭建DotnetCore2.0的更多相关文章
- 从零搭建vue3.0项目架构(附带代码、步骤详解)
前言: GitHub上我开源了vue-cli.vue-cli3两个库,文章末尾会附上GitHub仓库地址.这次把2.0的重新写了一遍,优化了一下.然后按照2.0的功能和代码,按照vue3.0的语法,完 ...
- 从零搭建基于golang的个人博客网站
原文链接 : http://www.bugclosed.com/post/14 从零搭建个人博客网站需要包括云服务器(虚拟主机),域名,程序环境,博客程序等方面.本博客 就是通过这几个环节建立起来的, ...
- SpringBoot整合Shiro实现基于角色的权限访问控制(RBAC)系统简单设计从零搭建
SpringBoot整合Shiro实现基于角色的权限访问控制(RBAC)系统简单设计从零搭建 技术栈 : SpringBoot + shiro + jpa + freemark ,因为篇幅原因,这里只 ...
- 从零搭建docker+jenkins 自动化部署环境
从零搭建docker+jenkins+node.js自动化部署环境 本次案例基于CentOS 7系统 适合有一定docker使用经验的人阅读 适合有一定linux命令使用经验的人阅读 1.docker ...
- 从零搭建Spring Boot脚手架(1):开篇以及技术选型
1. 前言 目前Spring Boot已经成为主流的Java Web开发框架,熟练掌握Spring Boot并能够根据业务来定制Spring Boot成为一个Java开发者的必备技巧,但是总是零零碎碎 ...
- 从零搭建一个IdentityServer——项目搭建
本篇文章是基于ASP.NET CORE 5.0以及IdentityServer4的IdentityServer搭建,为什么要从零搭建呢?IdentityServer4本身就有很多模板可以直接生成一个可 ...
- 从零搭建TypeScript与React开发环境
前言 平时进行开发大多数是基于vue-cli或者create-react-app等官方或者公司内部搭建的脚手架. 我们业务仔做的最多就是npm i和npm run dev或者npm start,然 ...
- 从零搭建一个IdentityServer——聊聊Asp.net core中的身份验证与授权
OpenIDConnect是一个身份验证服务,而Oauth2.0是一个授权框架,在前面几篇文章里通过IdentityServer4实现了基于Oauth2.0的客户端证书(Client_Credenti ...
- 以Aliyun体验机为例,从零搭建LNMPR环境(上)
使用云服务器搭建 Web 运行环境,尤其是搭建常见的 LNMPR(Linux+Nginx+MySQL+PHP+Redis) 环境,对于开发人员是必备的职场基本技能之一.在这里,借着搭建我的" ...
随机推荐
- Lua 设置table为只读属性
项目中部分只读表易被人误改写,故决定在非线上环境里对这些表附加只读属性,方便在出现误改写的时候抛出lua错误,最终版代码如下: --[[-------------------------------- ...
- An Introduction to Stock Market Data Analysis with R (Part 1)
Around September of 2016 I wrote two articles on using Python for accessing, visualizing, and evalua ...
- 初码-Azure系列-记一次MySQL数据库向Azure的迁移
初码Azure系列文章目录 还在继续给客户迁移不同的系统到Azure,这一次是一个系统的MySQL数据库要迁移,将迁移过程记录一下 原系统环境 数据库版本:MySQL Community Editio ...
- oracle创建用户四部曲
创建用户一般分四步: 第一步:创建临时表空间 第二步:创建数据表空间 第三步:创建用户并制定表空间 第四步:给用户授予权限 创建临时表空间 create temporary tablespace ho ...
- Ajax请求(二)--JQuery的Ajax请求方法
JQuery库的Ajax请求的几种方法: 1. load( url, [data], [callback] ) :载入远程 HTML 文件代码并插入至 DOM 中. 参数含义: url (String ...
- ViewModel从未如此清爽 - 轻量级WPF MVVM框架Stylet
Stylet是我最近发现的一个WPF MVVM框架, 在博客园上搜了一下, 相关的文章基本没有, 所以写了这个入门的文章推荐给大家. Stylet是受Caliburn Micro项目的启发, 所以借鉴 ...
- javaCV开发详解之技术杂烩:javaCV能帮我们做什么?能实现什么功能?ffmpeg和openCV能实现功能,javaCV如何做到更快、更简单的实现相应的功能?等等一堆实用话题
前言: 该篇文章旨在帮助刚接触javaCV的盆友系统的认识音视频.javaCV.图像处理相关的体系知识和一些实用的知识. 序: javaCV早期因为内置了openCV库,所以常用来做图像识别应用,现在 ...
- cocoapod升级
1.0 重新安装问题 cd /user/xx/.cocoapod/repos rm -rf master pod setup /user/xx/.cocoapod/repos 查看目录文件夹大小: d ...
- 记一次调试串口设备Bug的经历
最近花了差不多1天的时间在折腾一个Bug,该Bug的表象如下: 这个Bug还特别独特,在开发电脑中无提示,在终端用户那里每次使用软件的时候都报这个.仔细思考了一下最近在源码中新添加的功能,没发现有啥特 ...
- 关于前后端同构,我的一点思路和心得(vue、nodejs、react、模版、amd)
最近1年多,前后端同构慢慢变成一个流行词,也许很多人还停留在前后端分离的最佳实践道路上,但实际上又有一批人已经从简单的服务端渲染走向探索最佳前后端同构方案的路上了.不过,我只是膜拜后者的过客. 虽然大 ...