SSM框架之AOP、动态代理、事务处理相关随笔
AOP:
原理:底层利用动态代理(两种动态代理技术都使用了)
两种实现方案:
第一种:JDK动态代理技术
实现的InvocationHandler接口,要想实现某个类的动态代理对象,必须有接口有实现类。
第二种:cglib动态代理技术(需要导入spring包--4个核心包)
实现了MethodInterceptor接口,原理是继承要代理的类。
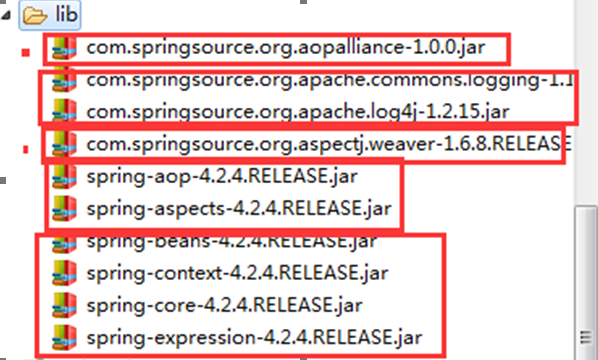
第一步:导入包 4+2+2+2
第二步:准备肉鸡
编写一个接口UserService 和 UserServiceImpl,具体详见代码
第三步:编写通知类
public class MyAdvice {
//Spring中的代码增强,方式非常多
// 前置通知
//--目标对象方法(切入点)执行之前调用
// 后置通知(如果出现异常不会执行)
//--目标对象方法(切入点)执行之后调用
// 环绕通知
//--目标对象方法(切入点)执行之前和之后调用
// 异常拦截通知
//--切入点执行异常才会调用
// 后置通知(不论是否出现异常都会执行)
//--目标对象方法(切入点)执行之后调用
// 前置通知
public void before(){
System.out.println("这是前置通知代码");
}
// 后置通知
public void after01(){
System.out.println("这是后置通知代码(出现异常不调用)");
}
// 后置通知
public void after02(){
System.out.println("这是后置通知代码(都调用)");
}
//异常通知
public void afterException(){
System.out.println("妈呀,出异常了,怎么办?");
}
//环绕通知
public Object around(ProceedingJoinPoint pip) throws Throwable{
System.out.println("这是环绕通知前");
Object obj=pip.proceed();
System.out.println("这是环绕通知后");
return obj;
}
}
第四步:书写配置文件
<?xml version="1.0" encoding="UTF-8"?>
<beans xmlns:xsi="http://www.w3.org/2001/XMLSchema-instance"
xmlns="http://www.springframework.org/schema/beans" xmlns:context="http://www.springframework.org/schema/context"
xmlns:aop="http://www.springframework.org/schema/aop"
xsi:schemaLocation="http://www.springframework.org/schema/beans http://www.springframework.org/schema/beans/spring-beans-4.2.xsd http://www.springframework.org/schema/context http://www.springframework.org/schema/context/spring-context-4.2.xsd http://www.springframework.org/schema/aop http://www.springframework.org/schema/aop/spring-aop-4.2.xsd ">
<bean name="userService" class="com.xcy.service.UserServiceImpl"></bean>
<bean name="myAdvice" class="com.xcy.advice.MyAdvice"></bean>
<!-- weaving -->
<aop:config>
<!--
public void com.xcy.service.UserServiceImpl.save()
void com.xcy.service.UserServiceImpl.save()
* com.xcy.service.UserServiceImpl.*()
* com.xcy.service.*ServiceImpl.*(..)
* com.xcy.service..*ServiceImpl.*(..)
-->
<!-- 切入點: 想要增強的方法 -->
<aop:pointcut expression="execution(* com.xcy.service..*ServiceImpl.*(..))" id="pc"/>
<!-- 切面:增強、通知 + 切入點 -->
<aop:aspect ref="myAdvice">
<!-- 前置增強 -->
<aop:before method="before" pointcut-ref="pc"/>
<aop:after-returning method="after01" pointcut-ref="pc"/>
<aop:after method="after02" pointcut-ref="pc"/>
<aop:after-throwing method="afterException" pointcut-ref="pc"/>
<aop:around method="around" pointcut-ref="pc"/>
</aop:aspect>
</aop:config>
</beans>
第五步:测试 如果使用junit和spring整合的方式测试,需要导入包(3个)
package com.xcy.test;
import org.junit.Test;
import org.junit.runner.RunWith;
import org.springframework.beans.factory.annotation.Autowired;
import org.springframework.test.context.ContextConfiguration;
import org.springframework.test.context.junit4.SpringJUnit4ClassRunner;
import com.xcy.service.UserService;
//帮我们创建容器
@RunWith(SpringJUnit4ClassRunner.class)
//创建容器时,需要指定配置文件
@ContextConfiguration("classpath:applicationContext02.xml")
public class SpringJUnit {
//代理對象
@Autowired
private UserService userService;
@Test
public void testAop(){
userService.save();
}
}
注解方式:以上是通过xml配置方式书写,以下是通过注解方法书写。
package com.xcy.advice;
。。。相关包
@Aspect//表示该类为通知类、增强类
publicclass MyAdvice02 {
//Spring中的代码增强,方式非常多
// 前置通知
//--目标对象方法(切入点)执行之前调用
// 后置通知(如果出现异常不会执行)
//--目标对象方法(切入点)执行之后调用
// 环绕通知
//--目标对象方法(切入点)执行之前和之后调用
// 异常拦截通知
//--切入点执行异常才会调用
// 后置通知(不论是否出现异常都会执行)
//--目标对象方法(切入点)执行之后调用
// 前置通知
@Before("execution(* com.xcy.service..*ServiceImpl.*(..))")
publicvoid before(){
System.out.println("这是前置通知代码");
}
// 后置通知
@AfterReturning("execution(* com.xcy.service..*ServiceImpl.*(..))")
publicvoid after01(){
System.out.println("这是后置通知代码(出现异常不调用)");
}
// 后置通知
@After("execution(* com.xcy.service..*ServiceImpl.*(..))")
publicvoid after02(){
System.out.println("这是后置通知代码(都调用)");
}
//异常通知
@AfterThrowing("execution(* com.xcy.service..*ServiceImpl.*(..))")
publicvoid afterException(){
System.out.println("妈呀,出异常了,怎么办?");
}
//环绕通知
@Around("execution(* com.xcy.service..*ServiceImpl.*(..))")
public Object around(ProceedingJoinPoint pip) throws Throwable{
System.out.println("这是环绕通知前");
Object obj=pip.proceed();
System.out.println("这是环绕通知后");
return obj;
}
}
配置文件:
<?xml version="1.0" encoding="UTF-8"?>
<beans xmlns:xsi="http://www.w3.org/2001/XMLSchema-instance"
xmlns="http://www.springframework.org/schema/beans" xmlns:context="http://www.springframework.org/schema/context"
xmlns:aop="http://www.springframework.org/schema/aop"
xsi:schemaLocation="http://www.springframework.org/schema/beans http://www.springframework.org/schema/beans/spring-beans-4.2.xsd http://www.springframework.org/schema/context http://www.springframework.org/schema/context/spring-context-4.2.xsd http://www.springframework.org/schema/aop http://www.springframework.org/schema/aop/spring-aop-4.2.xsd ">
<bean name="userService" class="com.xcy.service.UserServiceImpl"></bean>
<bean name="myAdvice" class="com.xcy.advice.MyAdvice02"></bean>
<!-- 开启使用注解织入 -->
<aop:aspectj-autoproxy></aop:aspectj-autoproxy>
</beans>
错误总结:
不要忘记写execution单词
|
package com.xcy.advice; import org.aspectj.lang.ProceedingJoinPoint; import org.aspectj.lang.annotation.After; import org.aspectj.lang.annotation.AfterReturning; import org.aspectj.lang.annotation.AfterThrowing; import org.aspectj.lang.annotation.Around; import org.aspectj.lang.annotation.Aspect; import org.aspectj.lang.annotation.Before; @Aspect//表示该类为通知类、增强类 publicclass MyAdvice02 { //Spring中的代码增强,方式非常多 // 前置通知 //--目标对象方法(切入点)执行之前调用 // 后置通知(如果出现异常不会执行) //--目标对象方法(切入点)执行之后调用 // 环绕通知 //--目标对象方法(切入点)执行之前和之后调用 // 异常拦截通知 //--切入点执行异常才会调用 // 后置通知(不论是否出现异常都会执行) //--目标对象方法(切入点)执行之后调用 // 前置通知 @Before("execution(* com.xcy.service..*ServiceImpl.*(..))") publicvoid before(){ System.out.println("这是前置通知代码"); } // 后置通知 @AfterReturning("execution(* com.xcy.service..*ServiceImpl.*(..))") publicvoid after01(){ System.out.println("这是后置通知代码(出现异常不调用)"); } // 后置通知 @After("execution(* com.xcy.service..*ServiceImpl.*(..))") publicvoid after02(){ System.out.println("这是后置通知代码(都调用)"); } //异常通知 @AfterThrowing("execution(* com.xcy.service..*ServiceImpl.*(..))") publicvoid afterException(){ System.out.println("妈呀,出异常了,怎么办?"); } //环绕通知 @Around("execution(* com.xcy.service..*ServiceImpl.*(..))") public Object around(ProceedingJoinPoint pip) throws Throwable{ System.out.println("这是环绕通知前"); Object obj=pip.proceed(); System.out.println("这是环绕通知后"); return obj; } } |
SSM框架之AOP、动态代理、事务处理相关随笔的更多相关文章
- .Net 框架实现AOP(动态代理实现AOP,本文为翻译)
在上一节,我们将静态实现AOP,但是对于一个大型项目,要想为每个类,每个方法都去实现AOP ,进行日志记录和权限验证似乎是不可能的. 即使可能对于成百上千个类维护,也是很难维护.所以今天的主题就是如标 ...
- 技术的正宗与野路子 c#, AOP动态代理实现动态权限控制(一) 探索基于.NET下实现一句话木马之asmx篇 asp.net core 系列 9 环境(Development、Staging 、Production)
黄衫女子的武功似乎与周芷若乃是一路,飘忽灵动,变幻无方,但举手抬足之间却是正而不邪,如说周芷若形似鬼魅,那黄衫女子便是态拟神仙. 这段描写出自<倚天屠龙记>第三十八回. “九阴神抓”本是& ...
- Spring学习笔记之aop动态代理(3)
Spring学习笔记之aop动态代理(3) 1.0 静态代理模式的缺点: 1.在该系统中有多少的dao就的写多少的proxy,麻烦 2.如果目标接口有方法的改动,则proxy也需要改动. Person ...
- spring的AOP动态代理--JDK代理和CGLIB代理区分以及注意事项
大家都知道AOP使用了代理模式,本文主要介绍两个代理模式怎么设置以及区别,对原文一些内容进行了引用后加入了自己的理解和更深入的阐述: 一.JDK代理和CGLIB代理的底层实现区别* JDK代理只能 ...
- AOP动态代理解析4-代理的创建
做完了增强器的获取后就可以进行代理的创建了 AnnotationAwareAspectJAutoProxyCreator->postProcessAfterInitialization-> ...
- spring aop 动态代理批量调用方法实例
今天项目经理发下任务,需要测试 20 个接口,看看推送和接收数据是否正常.因为对接传输的数据是 xml 格式的字符串,所以我拿现成的数据,先生成推送过去的数据并存储到文本,以便验证数据是否正确,这时候 ...
- ASM字节码框架学习之动态代理
ASM字节码操纵框架,可以直接以二进制的形式来来修改已经存在的类或者创建新的类.ASM封装了操作字节码的大部分细节,并提供了非常方便的接口来对字节码进行操作.ASM框架是全功能的,使用ASM字节码框架 ...
- spring AOP 动态代理和静态代理以及事务
AOP(Aspect Oriented Programming),即面向切面编程 AOP技术,它利用一种称为"横切"的技术,剖解开封装的对象内部,并将那些影响了多个类的公共行为封装 ...
- spring源码-aop动态代理-5.3
一.动态代理,这是一个很强大的东西哦.研发过程中我们会常用很多业务类,但是存在一个问题.如何在不修改源码逻辑的情况下,加入自己的相关逻辑.比如异常处理,日志记录等! 二.Java动态代理的两种方式JD ...
随机推荐
- GET和POST请求的区别和使用场景
本质上的区别: GET请求.处理.响应过程中只是产生一个TCP数据包,而POST请求会产生两个TCP数据包. 更具体地说,GET请求过程中头和请求正文数据一起到服务器端, 而POST请求过程中, ...
- Spring Boot 的各种start
新建一个springBoot项目时,你会选择很多依赖,在项目中的build.gradle中你会看见各种start,例如下边的代码: 今天就在这里列举一下各种start: 1.spring-boot-s ...
- Linux系统下lz4解压缩命令小结
lz4是一个让"人见人爱.花见花开"的压缩算法,能够在多核上很好的扩展.lz4在压缩率上略微逊色, 但是在解压速度上有着惊人的优势 (大概是gzip的3倍(多次测试对比)).因为压 ...
- 7.28Assignment
1.考试题(7.27) + 2.插头dp 4道题 0/4 before 18:00 3.cdq分治 2道题理解 0/2 before 21:00 4.点分治 2道题 0/2 before 7:00 ...
- TCP,UDP,HTTP
使用图表非常系统介绍了TCP和UDP的区别 https://blog.fundebug.com/2019/03/22/differences-of-tcp-and-udp/ 举了一个TCP/IP通讯的 ...
- PCL智能指针疑云 <二> 使用同一智能指针作为PCL预处理API的输入和输出
问题介绍: slam构建地图,先进行降采样,再进行可视化或存储.然而经过降采样后,代码没有报错的情况下,点云数据散成一团.将代码和点云数据展示如下, pcl::VoxelGrid<Lidar:: ...
- 【技术分享:python 应用之一】如何使用 Python 对 Excel 做一份数据透视表
客户这边,其中有一张如同上图所示的数据汇总表,然而需求是,需要将这张表数据做一个数据透视表,最后通过数据透视表中的数据,填写至系统数据库.拿到需求,首先就想到肯定不能直接用设计器去操作 Excel,通 ...
- AttributeError: module 'datetime' has no attribute 'now'
在用时间转化时,一直报AttributeError: module 'datetime' has no attribute 'now', 我用的 import datetime datetime ...
- mysql 安装教程(详细说明)
如果你装过,一定要先卸载干净,并且重启重新装.卸载教程(保证成功)https://www.cnblogs.com/qzhc/p/11354678.html 大家都知道MySQL是一款中.小型关系型数据 ...
- iOS11最新隐私信息访问列表
今天早上应用出现拍照上传闪退的紧急bug,才发现在iOS11中,隐私权限配置又发生了改变,将原来的相册访问权限分开了,现在有读写两种权限. iOS11访问权限列表 隐私数据 对应key值 提示语 相册 ...