
Gitlab Server
systemctl start postfix

systemctl enable postfix
yum install -y curl openssh-server openssh-clients postfix cronie policycoreutils-python

# gitlab-ce 10.x.x以后的版本需要依赖policycoreutils-python
#curl https://packages.gitlab.com/install/repositories/gitlab/gitlab-ee/script.rpm.sh | sudo bash

#curl https://packages.gitlab.com/install/repositories/gitlab/gitlab-ce/script.rpm.sh | sudo bash
3.安装 Gitlab
#yum 安装

#yum install -y gitlab-ce

#Gitlab包下载

#wget https://mirror.tuna.tsinghua.edu.cn/gitlab-ee/yum/el7/gitlab-ee-13.0.6-ee.0.el7.x86_64.rpm

wget https://mirror.tuna.tsinghua.edu.cn/gitlab-ce/yum/el7/gitlab-ce-13.0.6-ce.0.el7.x86_64.rpm

yum localinstall -y gitlab-ce-13.0.6-ce.0.el7.x86_64.rpm

vim /etc/gitlab/gitlab.rb

#配置域名

external_url 'http://gitlab.precious.com'

#配置邮箱

### Email Settings

gitlab_rails['gitlab_email_enabled'] = true

gitlab_rails['gitlab_email_from'] = '2370046629@qq.com'

gitlab_rails['gitlab_email_display_name'] = 'gitlab.precious.com'    #推送邮箱的时候发送域名链接

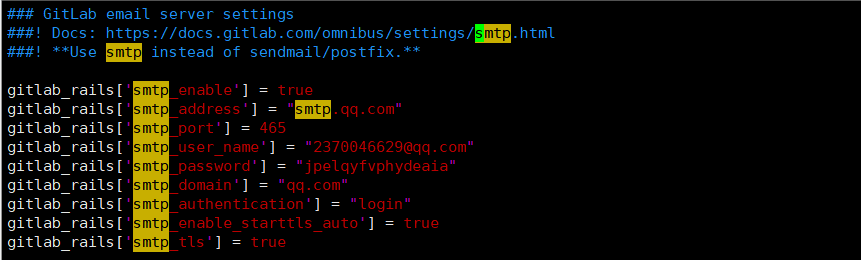
### GitLab email server settings

###! Docs: https://docs.gitlab.com/omnibus/settings/smtp.html

###! **Use smtp instead of sendmail/postfix.**

gitlab_rails['smtp_enable'] = true

gitlab_rails['smtp_address'] = "smtp.qq.com"

gitlab_rails['smtp_port'] = 465

gitlab_rails['smtp_user_name'] = "2370046629@qq.com"

gitlab_rails['smtp_password'] = "jpelqyfvphydeaia"  #这个是授权码,而不是QQ密码

gitlab_rails['smtp_domain'] = "qq.com"

gitlab_rails['smtp_authentication'] = "login"

gitlab_rails['smtp_enable_starttls_auto'] = true

gitlab_rails['smtp_tls'] = true

4.初始化Gitlab服务,启动Gitlab服务
#初始化

gitlab-ctl reconfigure

#启动 重启 停止

gitlab-ctl start | restart | stop | status

#PS: 每次修改/etc/gitlab/gitlab.rb文件 都需要重新初始化 gitlab-ctl reconfigure
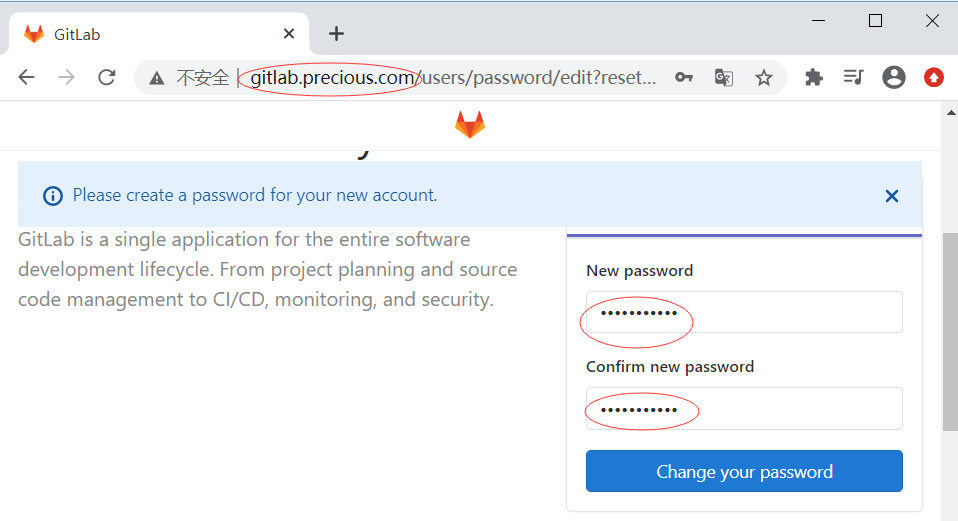
 5.访问Gitlab服务,浏览器访问域名gitlab.precious.com(外网需要做域名解析,内网需要增加hosts文件)用户名为root, 需要自己设置密码
#wget https://gitlab.com/xhang/gitlab/-/tree/12-3-stable-zh/gitlab-12-3-stable-zh.tar.gz

wget https://gitlab.com/xhang/gitlab/-/archive/12-3-stable-zh/gitlab-12-3-stable-zh.tar.gz

tar xf gitlab-12-3-stable-zh.tar.gz

[root@localhost ~]# cat gitlab-12-3-stable-zh/VERSION   #查看汉化版本

12.3.5

PS:汉化包最好好gitlab版本一致
[root@localhost ~]# gitlab-ctl stop

[root@localhost ~]# \cp -r gitlab-12-3-stable-zh/* /opt/gitlab/embedded/service/gitlab-rails/

[root@localhost ~]# gitlab-ctl start
- PM(项目主管/项目经理)在gitlab创建任务,分配给开发人员
- 开发人员领取任务后,在本地使用git clone 拉取代码库
- 开发人员创建开发分支(git checkout -b dev),并运行开发
- 开发人员完成之后,提交到本地仓库(git commit)
- 开发人员在gitlab界面上申请分支合并请求(Merge request)
- PM在gitlab上Mark done确认开发完成,并关闭ssue。这一步在提交合并请求可以通过描述中填写"clone #1"等字样,可以直接关闭issue
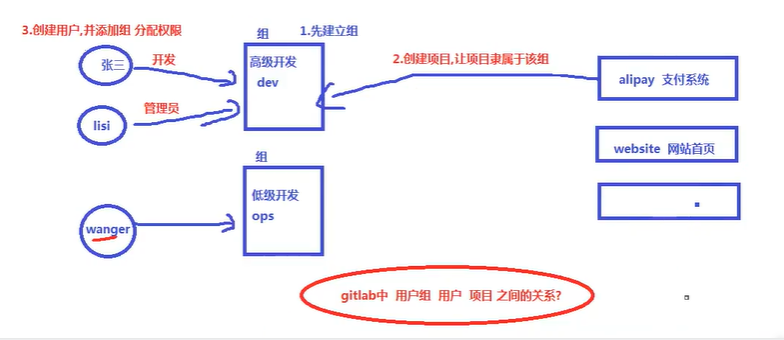
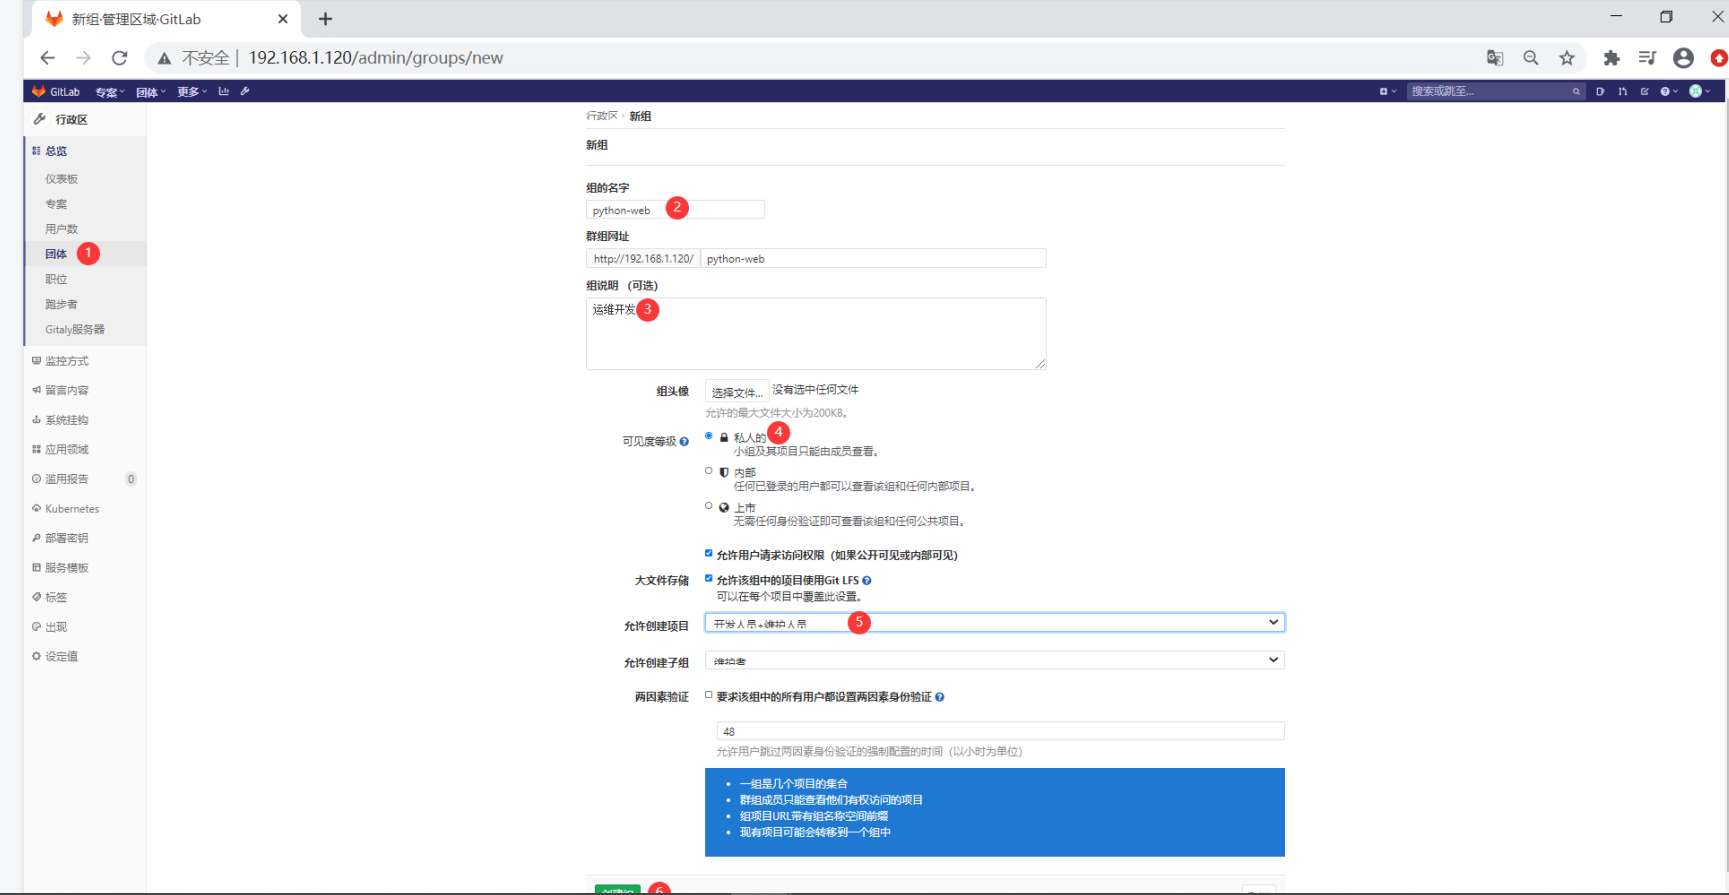
1.创建组
2.创建项目--->项目隶属于某个组
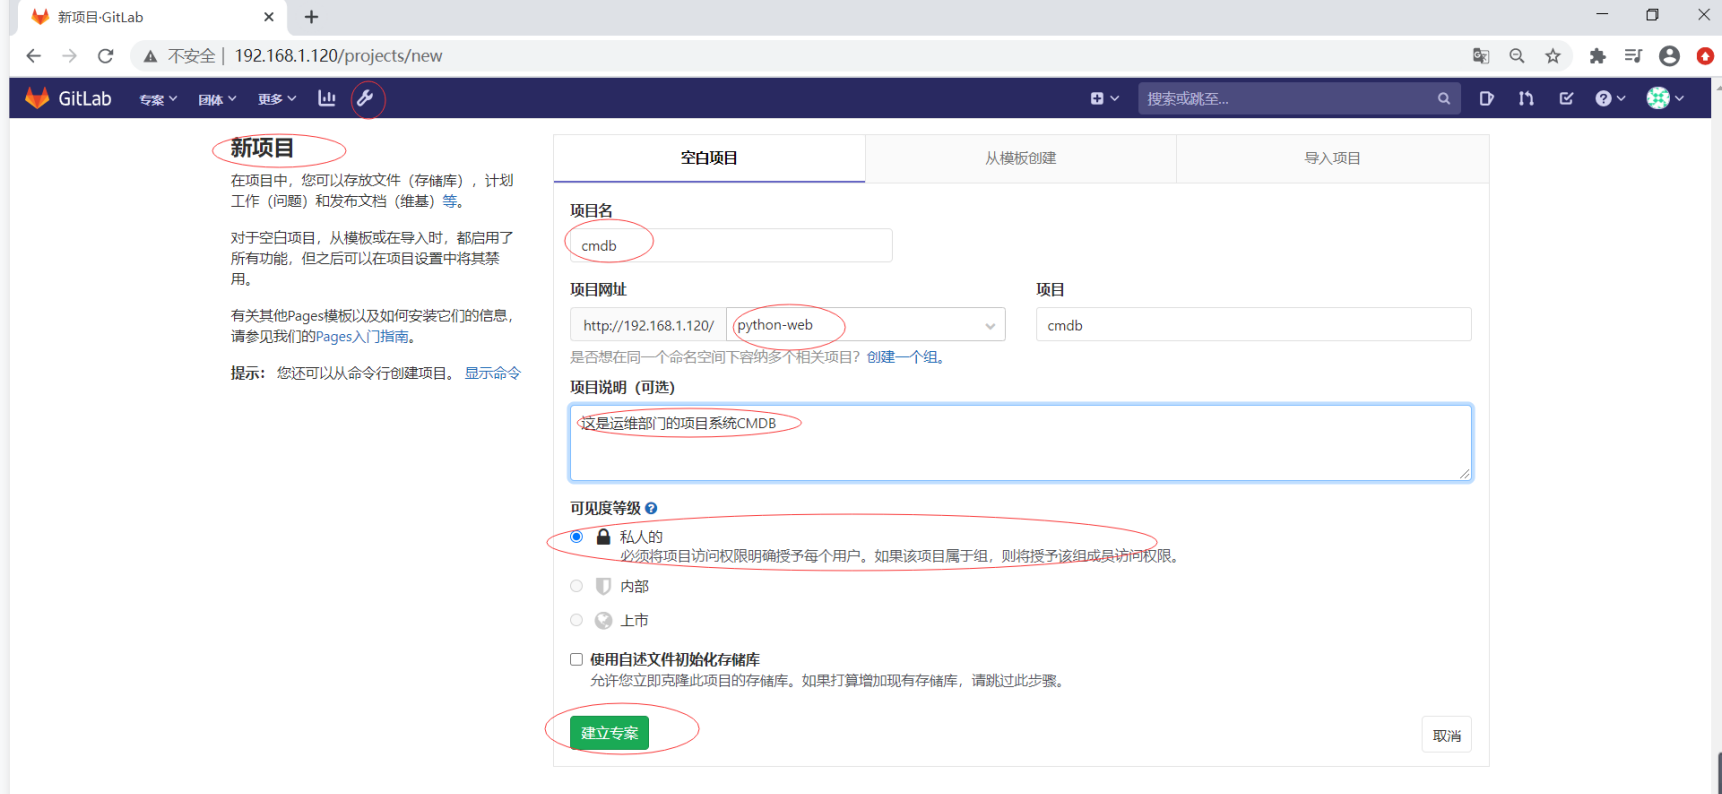
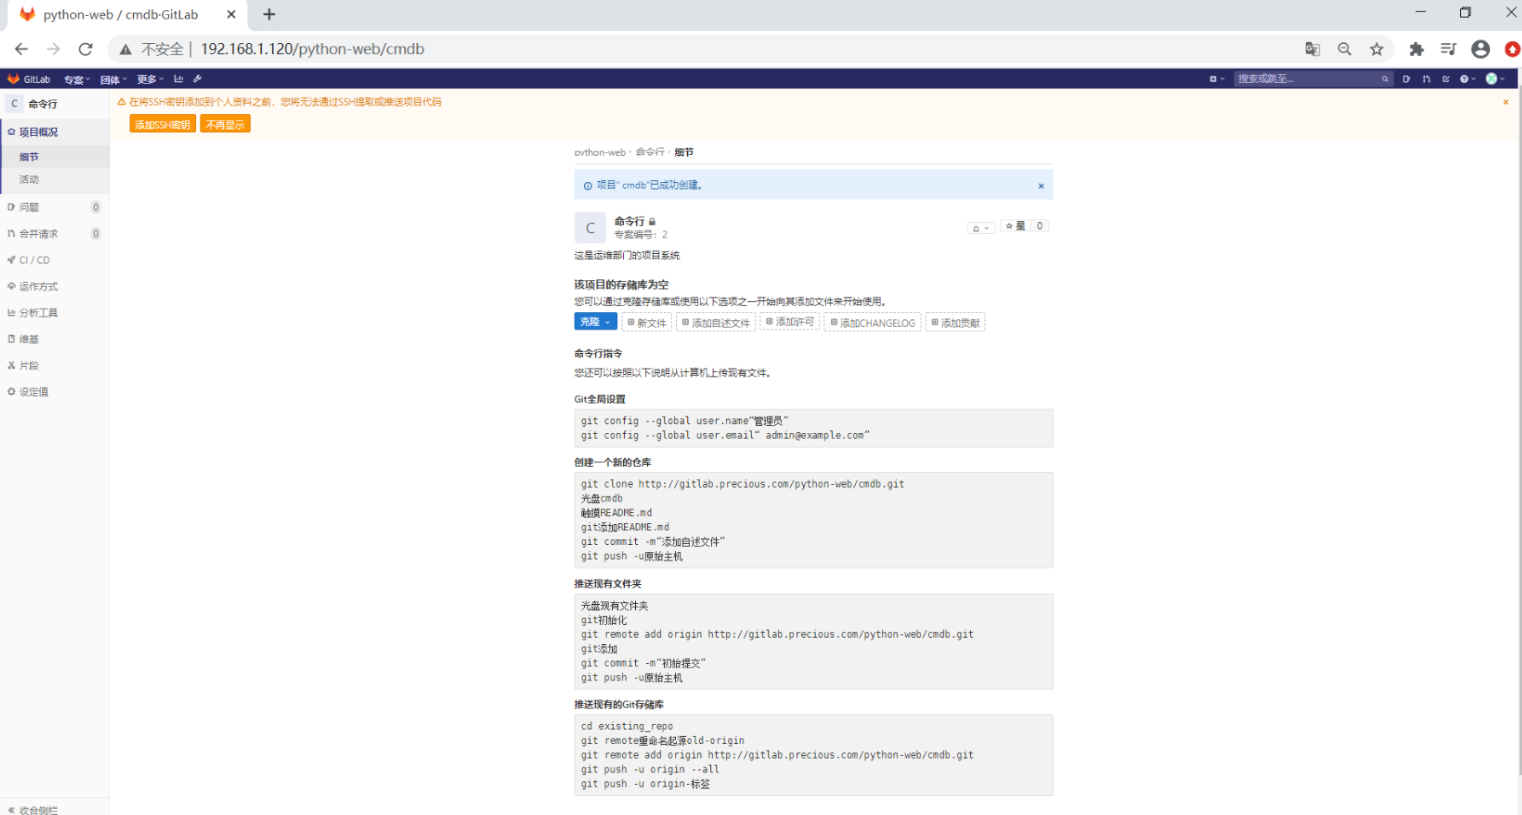
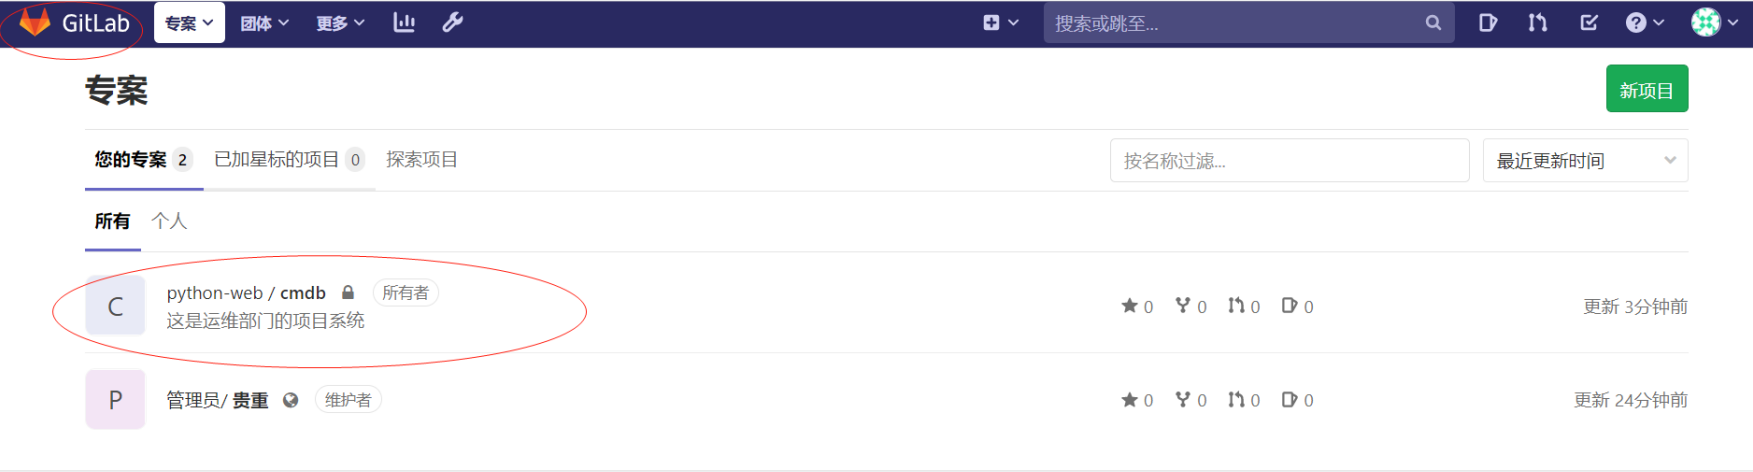
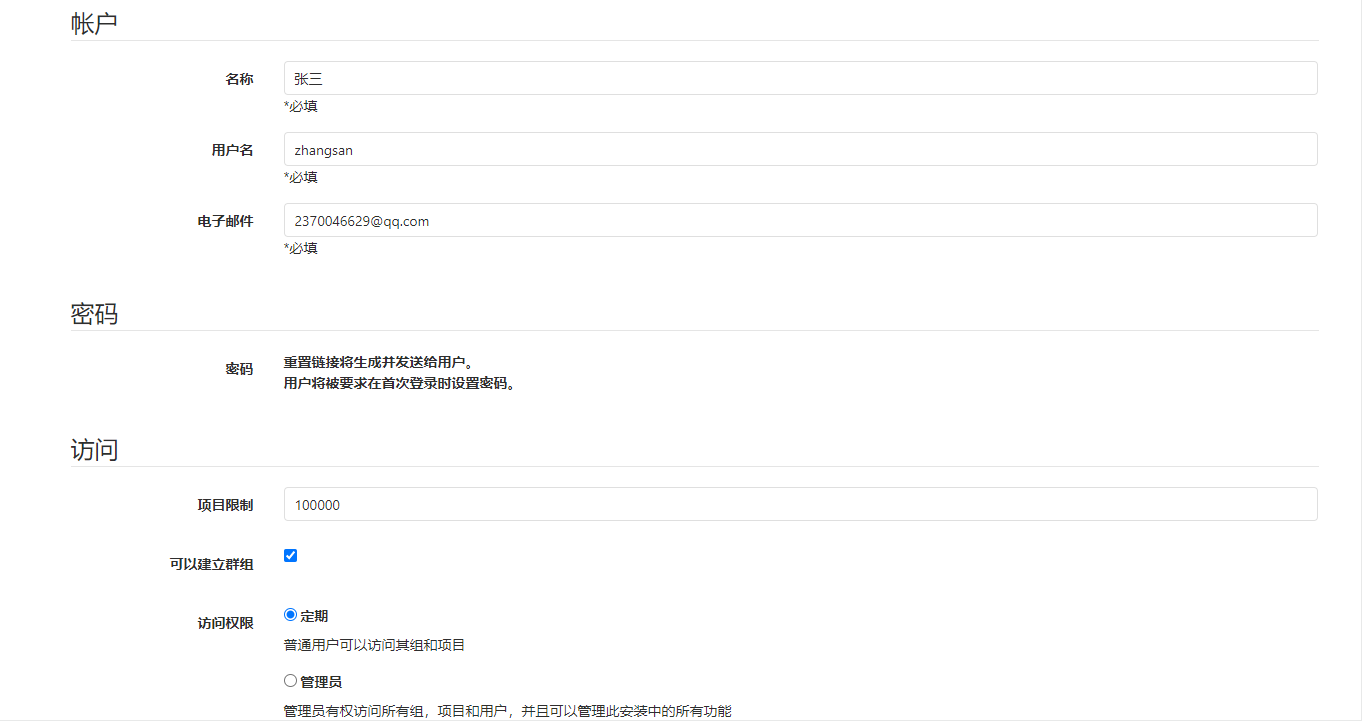
3.创建用户,设定密码,为用户分配权限
用户:zhansan 开发者
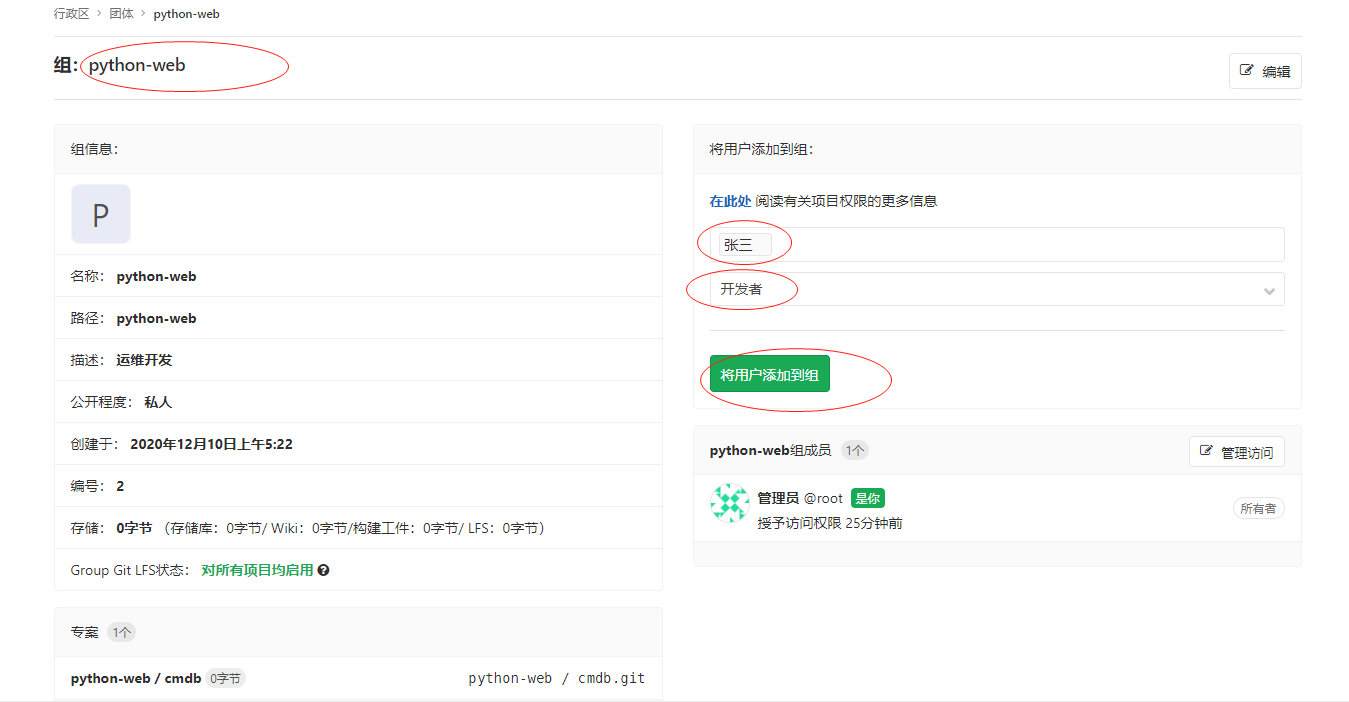
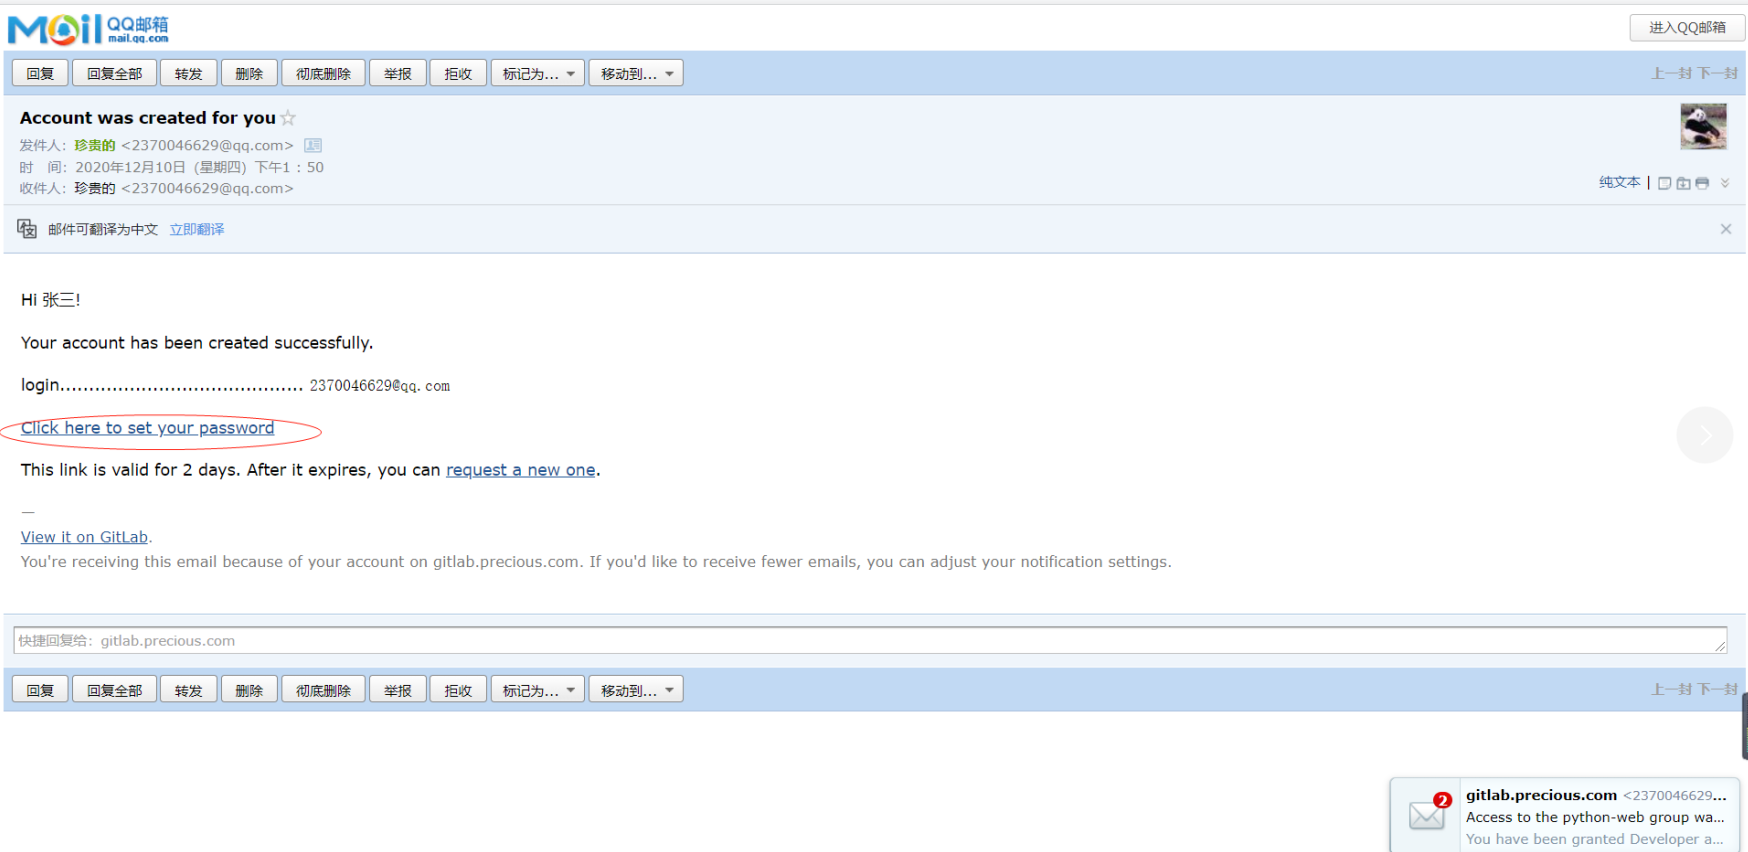
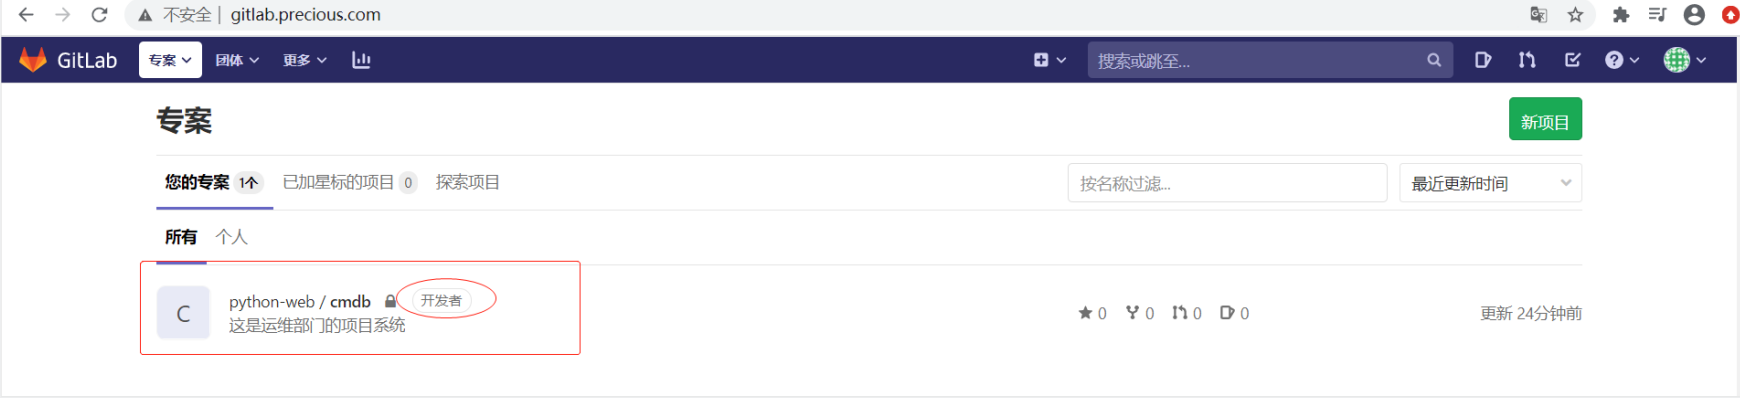
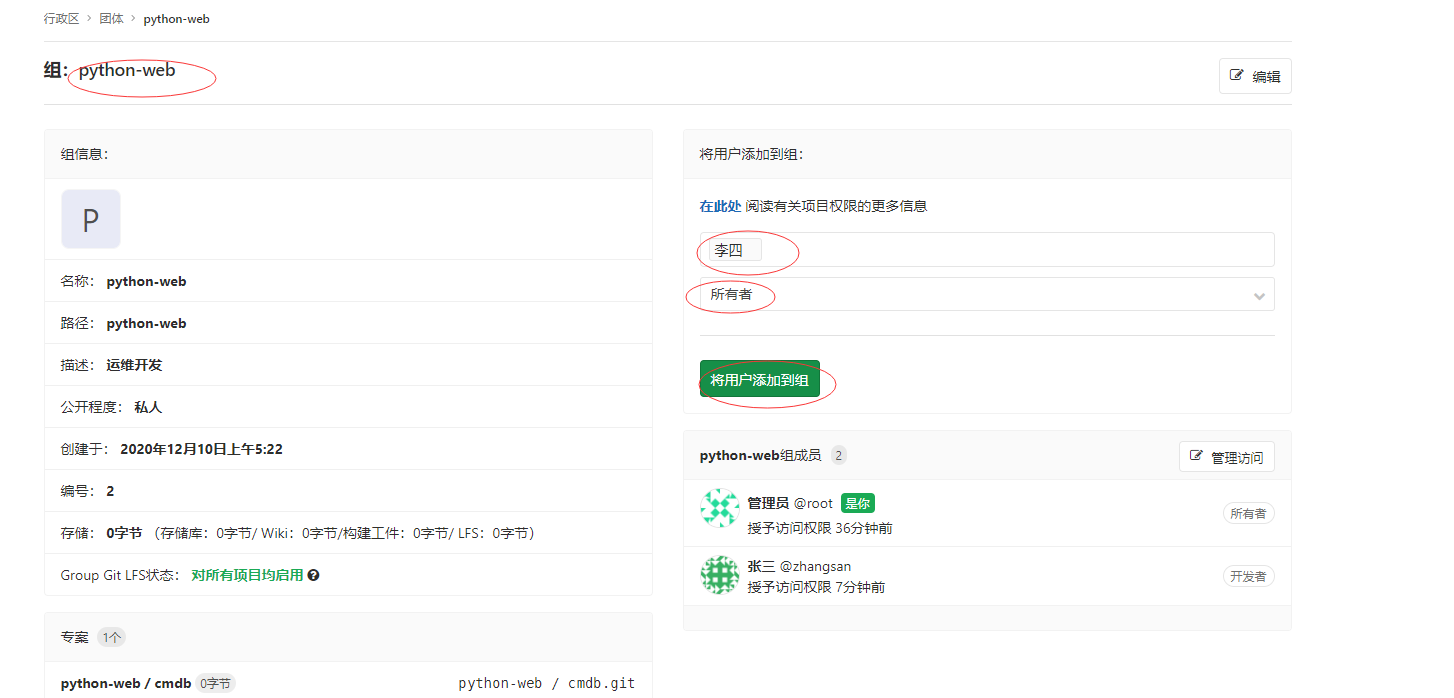
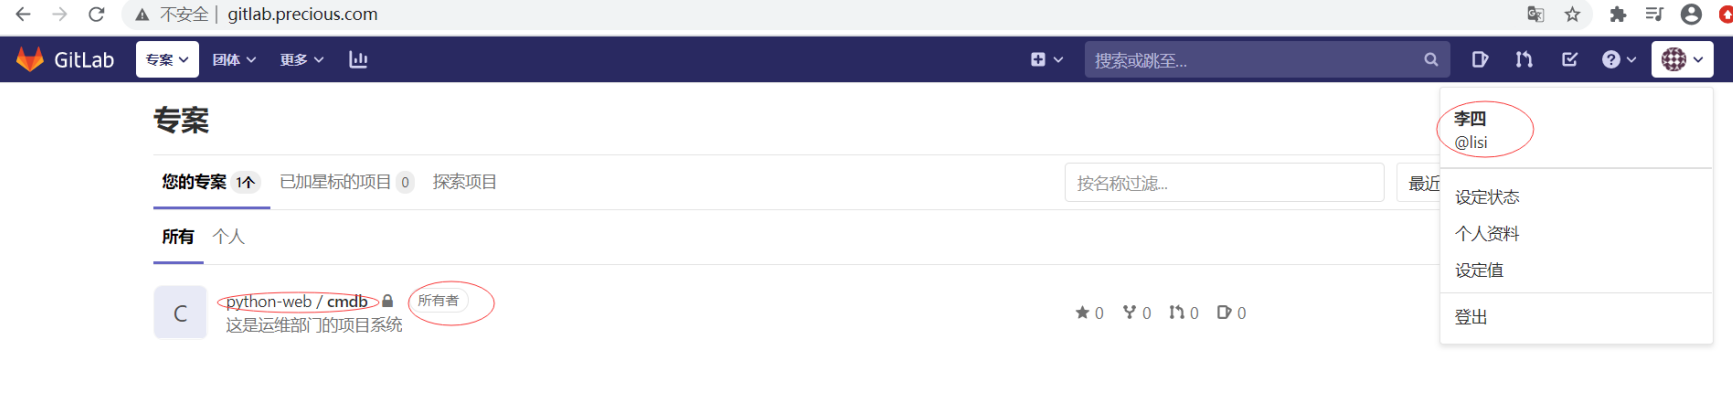
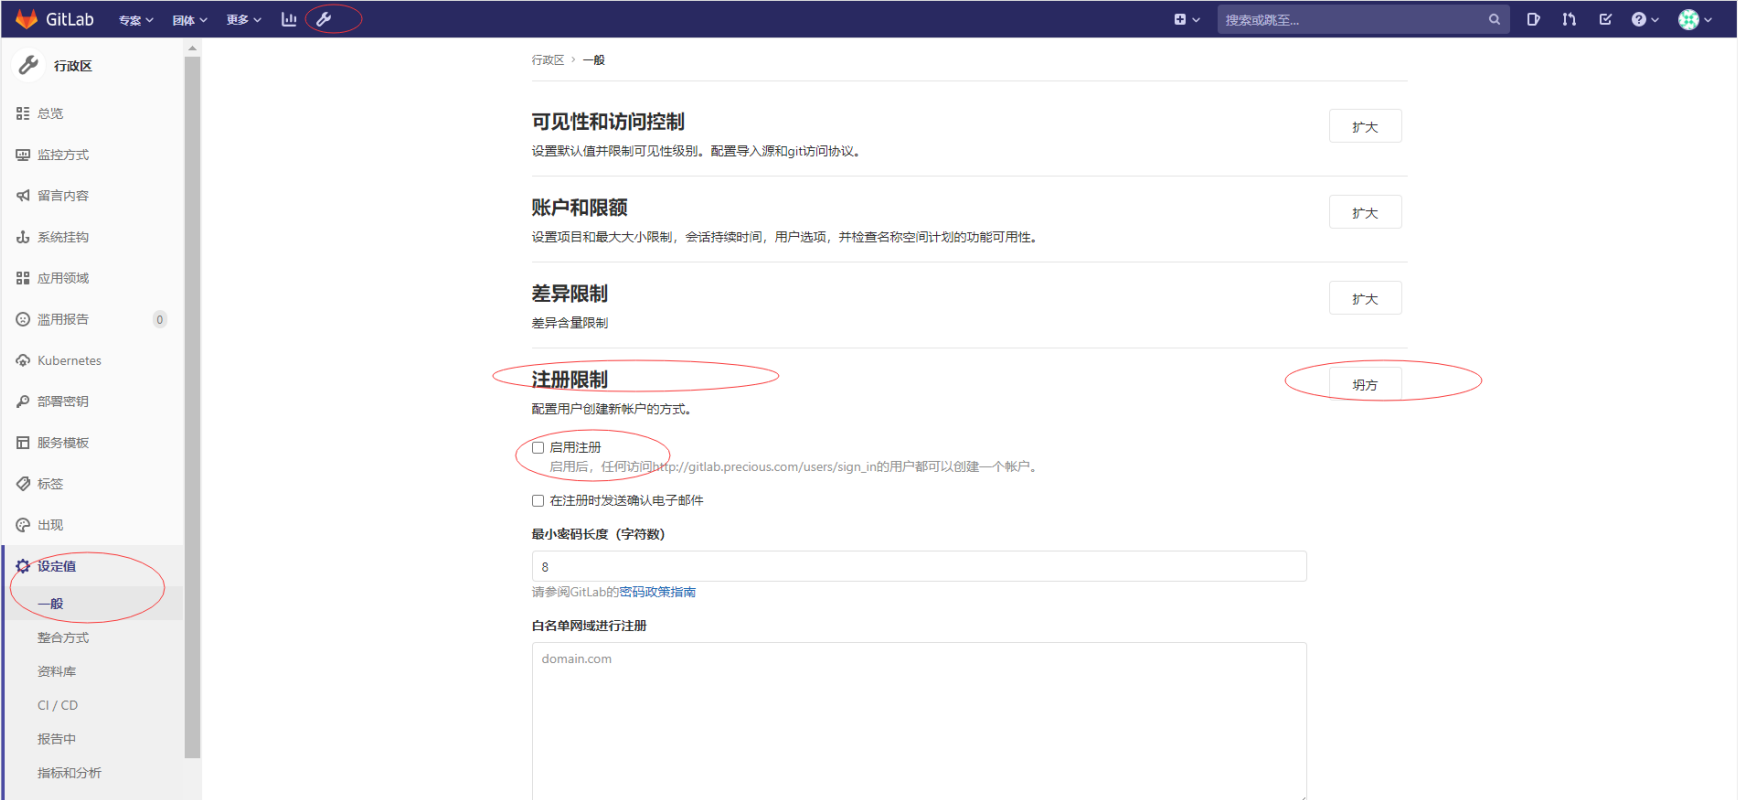
关闭gitlab 注册功能
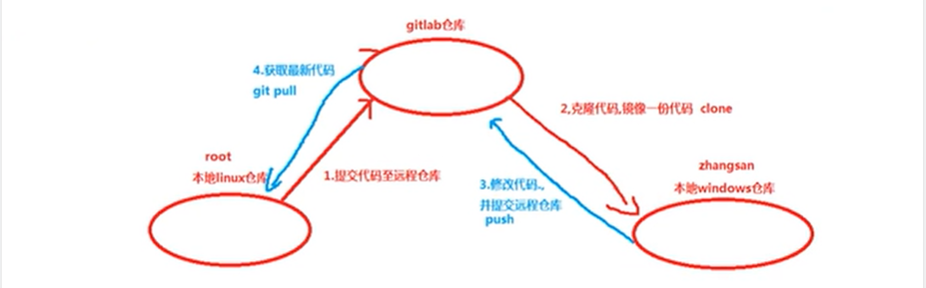
#Git全局设置(用户/邮箱 自定义)

git config --global user.name "Administrator"

git config --global user.email "admin@example.com"

#创建一个新的仓库

git clone http://gitlab.precious.com/python-web/cmdb.git

cd cmdb

touch README.md

git add README.md

git commit -m "add README"

git push -u origin master

#推送现有文件夹

cd existing_folder

git init                 #初始化

git remote add origin http://gitlab.precious.com/python-web/cmdb.git

git add .

git commit -m "Initial commit"

git push -u origin master

#推送现有的GIt存储库

cd existing_repo

git remote rename origin old-origin

git remote add origin http://gitlab.precious.com/python-web/cmdb.git

git push -u origin --all

git push -u origin --tags
git remote -v

git remote remove origin

git remote add git@gitlab.precious.com:python-web/cmdb.git

#设置SSH 密钥

[root@localhost cmdb]# ssh-keygen

[root@localhost cmdb ~]# cat ~/.ssh/id_rsa.pub

ssh-rsa AAAAB3NzaC1yc2EAAAADAQABAAABAQC+UUlpwZQclOr1kn7p0NpjppNJGTxJg1/EWfmcYOWyV0zhsWkP8AZjTnvxZJthOuRrtEQ5dRSoZ383uw/emRnP0xmClqYVhaHvAYm628hmbSmP0B3GjiUbNiE4jwddFSSTS1CLSdfmjt8aoaYUQXRb1IKGjoDNFq+4UGoE3lgL30z6J26DJ3hZG3ogyK6nmZ2vZcu/PnySYkAtd69xt/Md7Hl8RvwxF8DpCjw0qkM7C6mAWirfoeRQ6gQON/SiK87Hb1HPafgYprRKQBeXKZgT5Um/l83asrthxKTv0BFvQ/tTtTInYTAmUGB3WKOSZTyHtMyPi15tByKxPrJycAkX root@localhost.localdomain
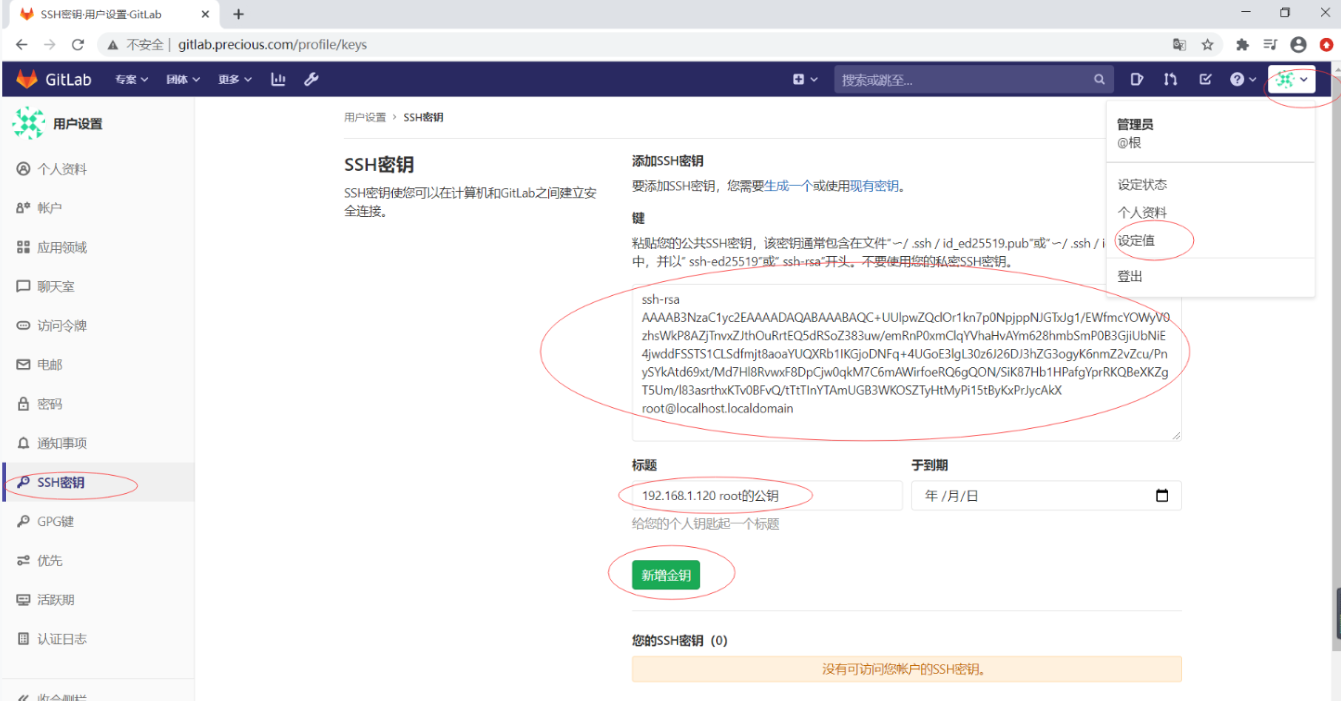
再次推送代码无需输入密码
git clone  git@gitlab.precious.com:python-web/cmdb.git

cd cmdb

touch README.md

git add README.md

git commit -m "add README"

git push -u origin master
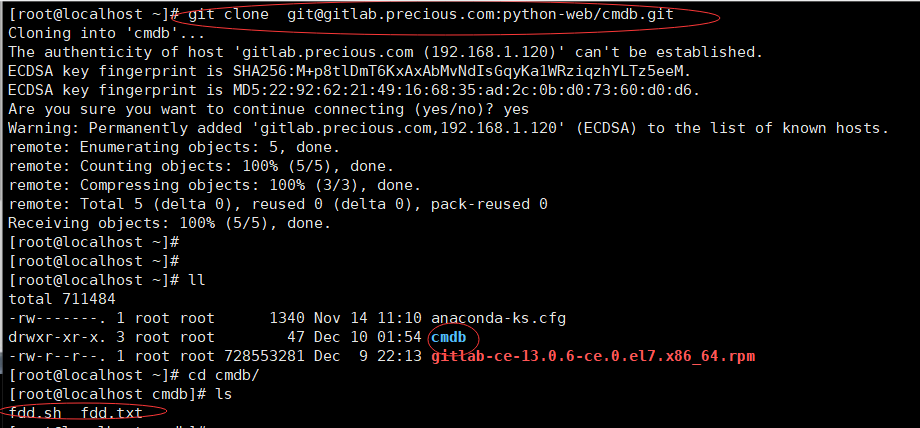
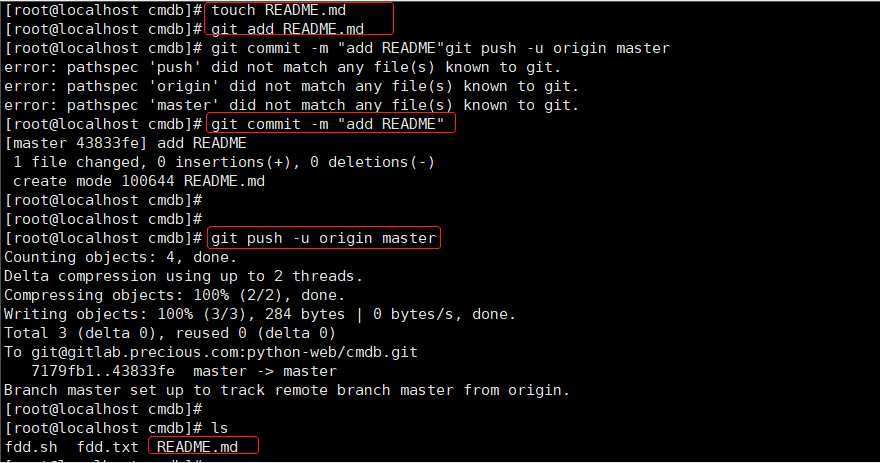
Gitlab 备份与恢复
[root@localhost ~]# gitlab-rake gitlab:backup:create

[root@localhost ~]# ls /data/gitlab/backup

1607585880_2020_12_10_13.0.6_gitlab_backup.tar
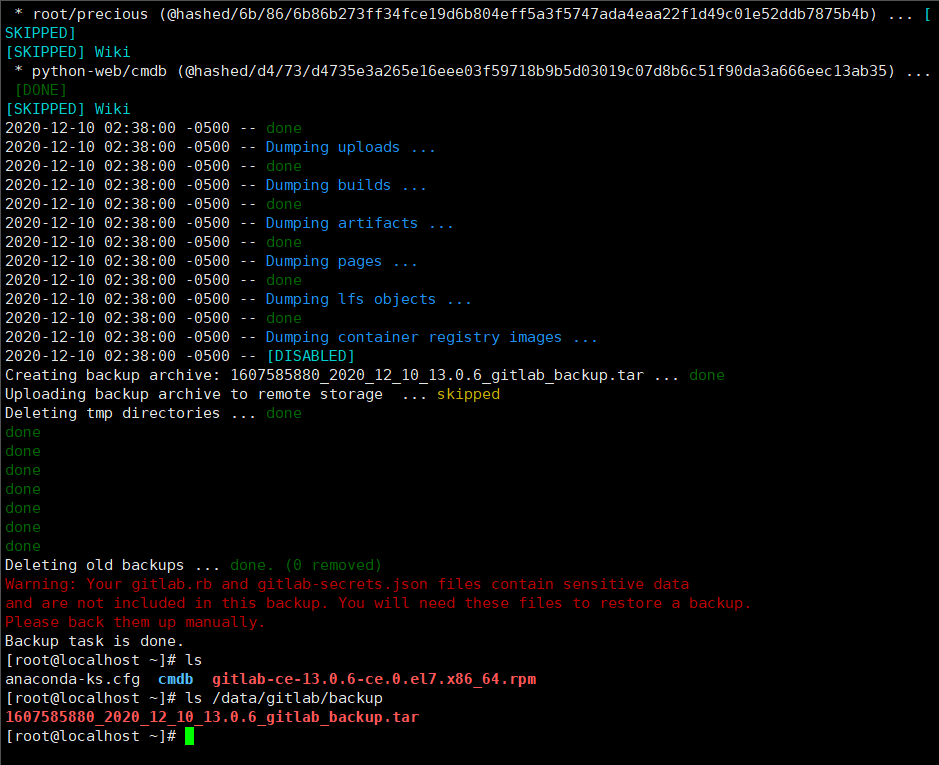
2.定时计划任务备份 crontal -e 每天凌晨2点进行备份
[root@localhost ~]# crontab -e

no crontab for root - using an empty one

crontab: installing new crontab

[root@localhost ~]#

[root@localhost ~]# crontab -l

00 02 * * *  gitlab-rake gitlab:backup:create &>/dev/null

3.删除GItlab项目,然后进行恢复
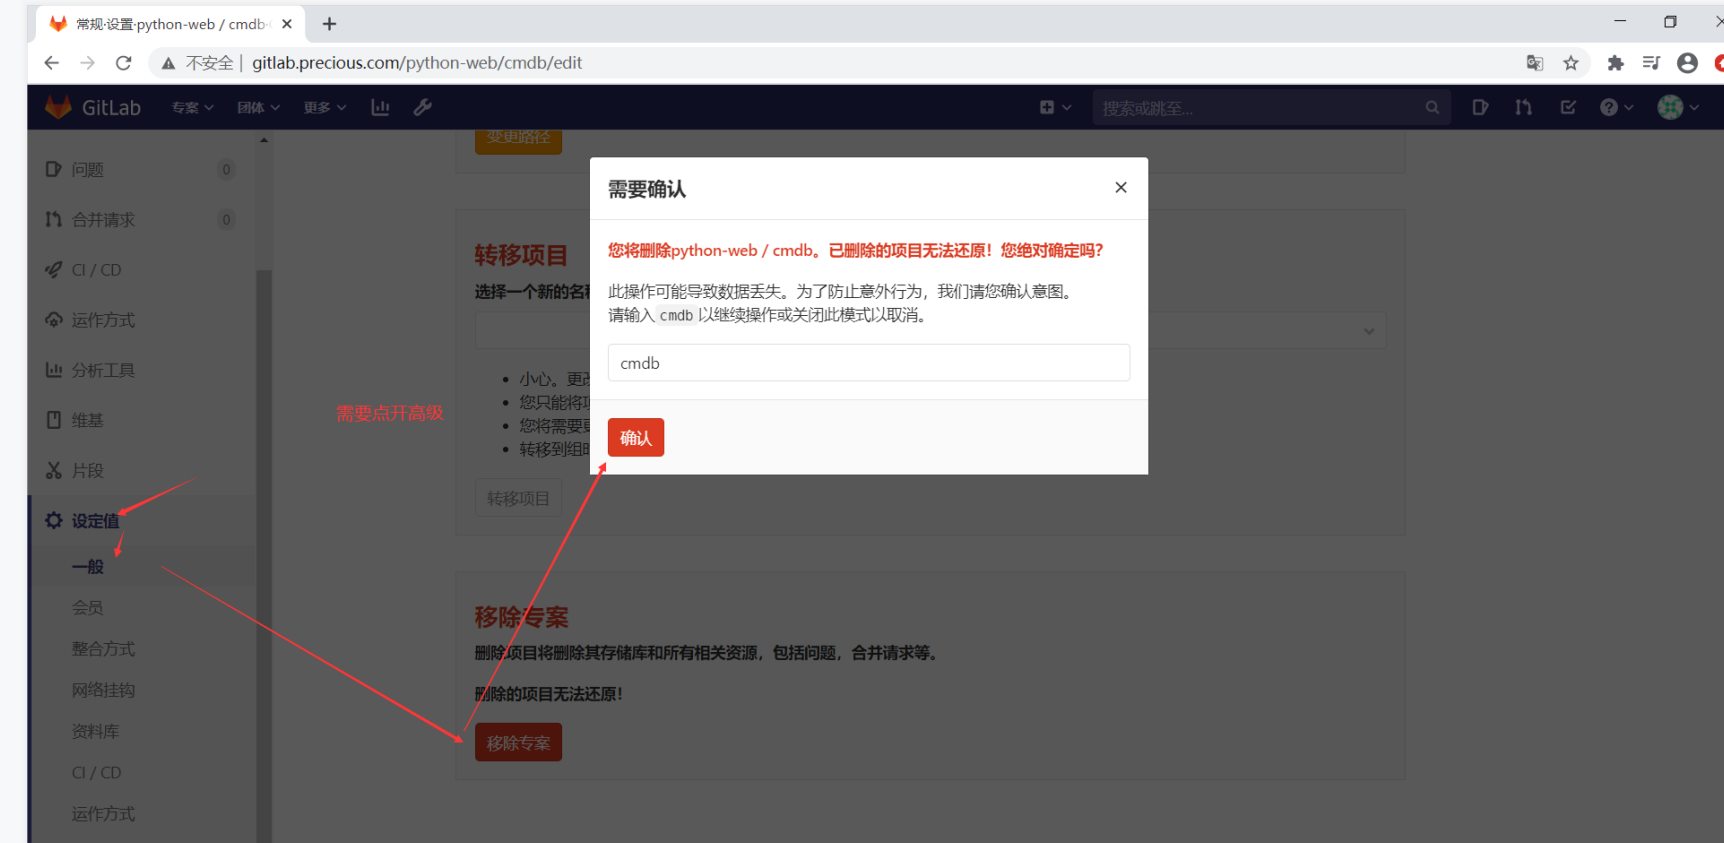
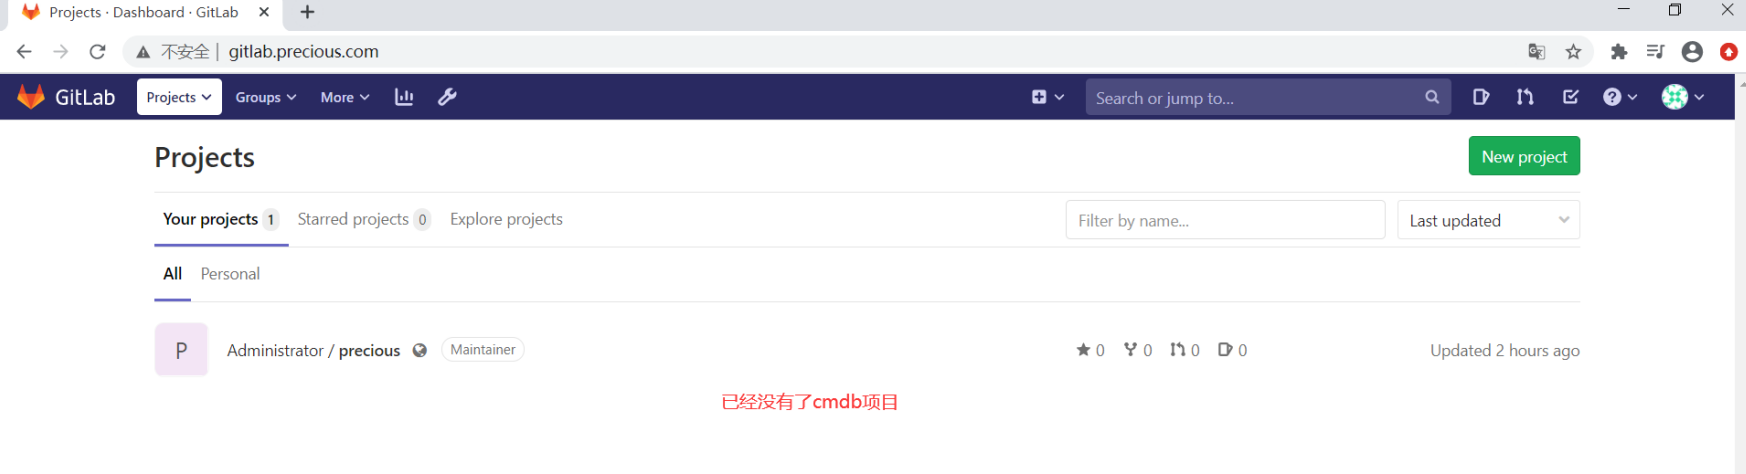
如何恢复?
1)停止数据写入服务

[root@localhost ~]# gitlab-ctl stop unicorn

[root@localhost ~]# gitlab-ctl stop sidekiq

ok: down: sidekiq: 0s, normally up

2)通过gitlab-reke 命令进行恢复,恢复时需要指定此前备份的名称。(但不需要写名称的.tar后缀)

[root@localhost ~]# ls /data/gitlab/backup

1607585880_2020_12_10_13.0.6_gitlab_backup.tar

[root@localhost ~]#

[root@localhost ~]# gitlab-rake gitlab:backup:restore BACKUP=1607585880_2020_12_10_13.0.6

需要输入yes

3)为了保险起见,重启gitlab,检测是恢复。

[root@localhost ~]# gitlab-ctl restart

4) 可以查看日志

[root@localhost ~]# gitlab-ctl tail

5)启动数据写入服务

[root@localhost ~]# gitlab-ctl start unicorn

[root@localhost ~]# gitlab-ctl start sidekiq

ok: run: sidekiq: (pid 44399) 304s


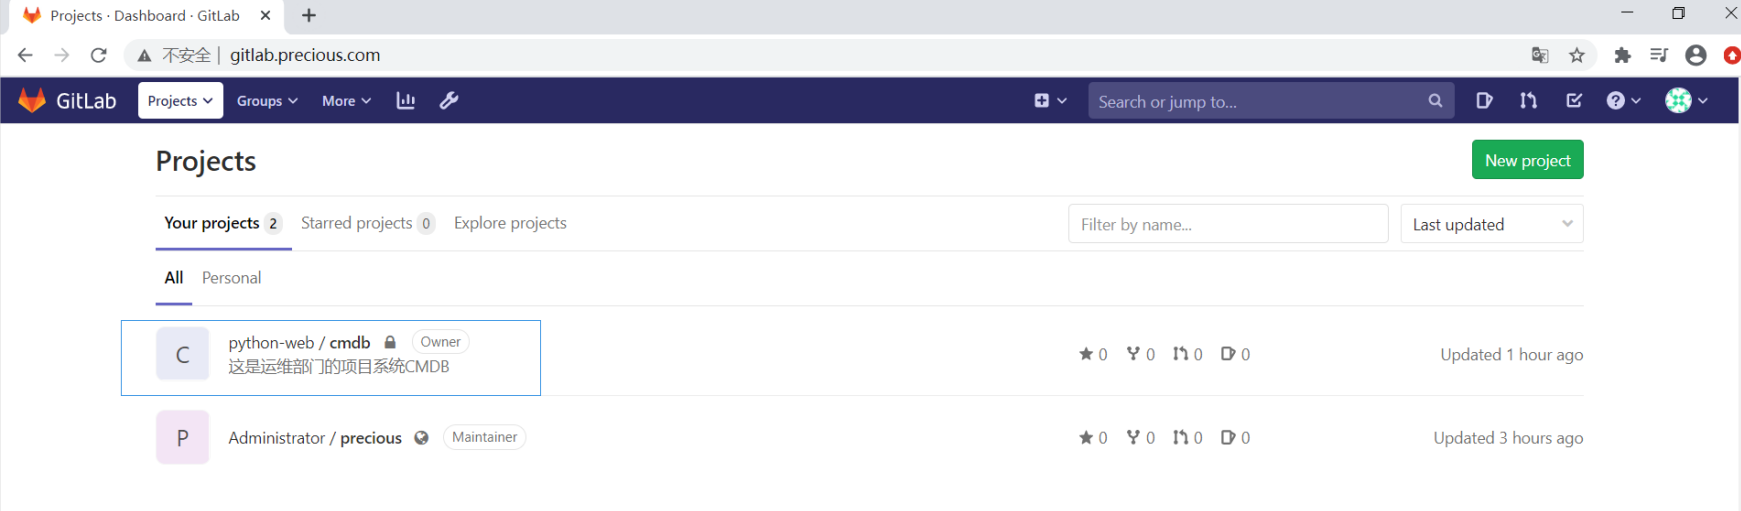
恢复后的效果
Gitlab Server的更多相关文章
- linux 搭建gitlab server
以root 身份进行登录linux 1.先安装相关依赖: sudo yum install -y curl policycoreutils-python openssh-server 2.开启SSH开 ...
- Gitlab完美安装【CentOS6.5安装gitlab-6.9.2】
摘要: 拆腾了几天,终于在今天找到了快速安装Gitlab的方法.CentOS6.5安装gitlab-6.9.2 参考网址:https://gitlab.com/gitlab-org/omnibus-g ...
- linux gitlab nginx 安装 配置
更新:bitnami-gitlab 7.8版本后界面发生变化 邮件问题: cd /data/server/gitlab/apps/gitlab/htdocs/config vim environmen ...
- Centos 6 搭建安装 Gitlab
官方安装教程 gitlab / gitlab-ce 官网下载:https://www.gitlab.cc/downloads 官网安装说明:https://doc.gitlab.cc/ce/insta ...
- 基于GitLab的Code Review教程
一.前言 1.本文主要内容 GitLab Code Review机制说明 Git Workflow 与 Git Code Review Workflow GitLab Code Review 配置说明 ...
- 手把手详解持续集成之GitLab CI/CD
一.环境准备 首先需要有一台 GitLab 服务器,然后需要有个项目:这里示例项目以 Spring Boot 项目为例,然后最好有一台专门用来 Build 的机器,实际生产中如果 Build 任务不频 ...
- Gitlab的安装
# GitLab Server 的搭建 参考 https://about.gitlab.com/installation ## 1. 准备工作 以Centos7为例,准备一台至少内存为4G的机器. # ...
- 五、compose 部署 GitLab 应用
1.我们部署的是sameersbn/docker-gitlab这个镜像. docker pull sameersbn/gitlab 2.配置文件,我们不需要去run它,只需要先下载一个compose的 ...
- Gitlab环境快速部署(RPM包方式安装)
之前梳理了一篇Gitlab的安装CI持续集成系统环境---部署Gitlab环境完整记录,但是这是bitnami一键安装的,版本比较老.下面介绍使用rpm包安装Gitlab,下载地址:https://m ...
- CentOS 7 安装配置 Gitlab
centos:http://www.centos.org/download/ download:https://about.gitlab.com/downloads/ update:https://g ...
随机推荐
- 使用GoEasy快速实现Android原生app中的websocket消息推送
摘要: GoEasy带来了一项令开发者振奋的消息:全面支持Android原生平台!现在,您可以在Android应用中使用最酷炫的实时通信功能,借助GoEasy轻松实现消息的发送和接收.本文将带您领略G ...
- SpringBoot定义优雅全局统一Restful API 响应框架完结撒花篇封装starter组件
之前我们已经,出了一些列文章. 讲解如何封统一全局响应Restful API. 感兴趣的可以看我前面几篇文章 (整个starter项目发展史) SpringBoot定义优雅全局统一Restful AP ...
- 2023年最具威胁的25种安全漏洞(CWE TOP 25)
摘要: CWE Top 25 是通过分析美国国家漏洞数据库(NVD)中的公共漏洞数据来计算的,以获取前两个日历年 CWE 弱点的根本原因映射. 本文分享自华为云社区<2023年最具威胁的25种安 ...
- Smali语言
什么是Smali smali语言是Davlik的寄存器语言,语法上和汇编语言相似,DalvikVM与JVM的最大的区别之一就是DalvikVM是基于寄存器的.基于寄存器的意思是,在smali里的所有操 ...
- 【MAUI Blazor踩坑日记】6.mac标题栏颜色修改
MAUI中mac的标题栏颜色默认是灰白色的,有一点丑 如果我们想要自定义颜色,并且在运行时也能更改颜色,该怎么办呢 万幸从一个GitHub库中借鉴到了办法 https://github.com/Ben ...
- 静态vlan的划分实验
静态vlan的划分 1,toupu图 2,配置id与子网掩码 2.1,pc,server的ip与子网配置 pc5 pc6 pc7 pc8 server1 server2 3,vlan的静态划分 1,v ...
- Cilium系列-14-Cilium NetworkPolicy 简介
系列文章 Cilium 系列文章 前言 今天我们进入 Cilium 安全相关主题, 介绍 Kubernetes 网络策略以及 CiliumNetworkPolicies 额外支持的内容. 网络策略(N ...
- 用React仿钉钉审批流
引言 这几天帮朋友忙,用了一周时间,高仿了一个钉钉审批流.这个东西会有不少朋友有类似需求,就分享出来,希望能有所帮助.为了方便朋友的使用,设计制作的时候,尽量做到节点配置可定制,减少集成成本.如果您的 ...
- msvc++工程之vs版本升级及工程目录规范
为什么要升级msvc++工程版本 对msvc++工程进行vs版本升级,一方面是可以使用较新的C++标准及对64位更好的支持. 首先你需要对msvc++ project文件有一定的了解,主要是vcxpr ...
- debian11安装mysql5.7
前言 mysql官网5.7版本的只找到debian10的,没有debian11的,试了下也能用. 系统版本:debian 11 mysql版本:5.7.35 步骤 下载bundle的tar包.官网地址 ...