[qemu] qemu旧的net参数已经不再可用了,新的这样用。
老的命令:
/root/BUILD_qemu/bin/qemu-system-x86_64 -enable-kvm \

    -m 2G \

    -cpu Nehalem -smp cores=,threads=,sockets= \

        -numa node,mem=1G,cpus=-,nodeid= \

        -numa node,mem=1G,cpus=-,nodeid= \

    -display vnc=0.0.0.0: \

    -net nic,vlan=1,model=virtio,macaddr='00:00:00:01:00:01' \

    -net tap,vlan=1,ifname=tap-int,script=no,downscript=no \

    -device virtio-net-pci,netdev=dev1,macaddr='00:00:00:01:00:02',vectors=,mq=on \

    -netdev tap,ifname=tap-,id=dev1,script=no,downscript=no,vhost=on,queues=16 \

    -drive file=disk.img,if=virtio \

    -cdrom /root/CentOS--x86_64-DVD-.iso \

    -boot order=c \
在qemu-2.11-0 会报错如下:
qemu-system-x86_64: -net nic,vlan=,model=virtio,macaddr=:::::: 'vlan' is deprecated. Please use 'netdev' instead.
详细用法:https://qemu.weilnetz.de/doc/qemu-doc.html#Network-options
摘要:
-nic [tap|bridge|user|l2tpv3|vde|netmap|vhost-user|socket][,...][,mac=macaddr][,model=mn]

This option is a shortcut for configuring both the on-board (default) guest NIC hardware and the host network backend in one go.
The host backend options are the same as with the corresponding -netdev options below. The guest NIC model can be set with model=modelname.
Use model=help to list the available device types. The hardware MAC address can be set with mac=macaddr.

The following two example do exactly the same, to show how -nic can be used to shorten the command line length (note that the e1000 is
the default on i386, so the model=e1000 parameter could even be omitted here, too):

qemu-system-i386 -netdev user,id=n1,ipv6=off -device e1000,netdev=n1,mac=:::::

qemu-system-i386 -nic user,ipv6=off,model=e1000,mac=:::::
简单解释:
两个方法:
A,用 -netdev和-device配合,-device需要志明model和mac,已经netdev的名字(这里是n1)是两个配置连接起来。
所有可选的参数见:
[root@D128 j]# /root/BUILD_qemu/bin/qemu-system-x86_64 -device help
不同的设备参数不同,需要查询详细的选项,如e1000e
[root@D128 j]# /root/BUILD_qemu/bin/qemu-system-x86_64 -device e1000e,help

e1000e.rombar=uint32

e1000e.disable_vnet_hdr=uint8 (Do not use virtio headers, perform SW offloads emulation instead)

e1000e.x-pcie-lnksta-dllla=bool (on/off)

e1000e.bootindex=int32

e1000e.multifunction=bool (on/off)

e1000e.romfile=str

e1000e.vlan=int32 (Integer VLAN id to connect to)

e1000e.command_serr_enable=bool (on/off)

e1000e.x-pcie-extcap-init=bool (on/off)

e1000e.addr=int32 (Slot and optional function number, example: 06.0 or )

e1000e.mac=str (Ethernet -byte MAC Address, example: :::::)

e1000e.netdev=str (ID of a netdev to use as a backend)

e1000e.subsys_ven=uint16 (PCI device Subsystem Vendor ID)

e1000e.subsys=uint16 (PCI device Subsystem ID)
B, 使用简化的命令,-nic,功能同A。同样需要指明model和mac。可选参数见:
[root@D128 j]# /root/BUILD_qemu/bin/qemu-system-x86_64 -nic model=help

qemu: Supported NIC models: e1000,e1000-82544gc,e1000-82545em,e1000e,i82550,i82551,i82557a,i82557b,i82557c,i82558a,i82558b,i82559a,i82559b,i82559c,
i82559er,i82562,i82801,ne2k_pci,pcnet,rocker,rtl8139,virtio-net-pci,vmxnet3

[root@D128 j]#
改过之后的启动脚本:
/root/BUILD_qemu/bin/qemu-system-x86_64 -enable-kvm \

    -m 2G \

    -cpu Nehalem -smp cores=,threads=,sockets= \

        -numa node,mem=1G,cpus=-,nodeid= \

        -numa node,mem=1G,cpus=-,nodeid= \

    -display vnc=0.0.0.0: \

    -device e1000e,netdev=dev0,mac='00:00:00:01:00:01' \

    -netdev tap,ifname=tap-int,id=dev0,script=no,downscript=no,vhost=on \

    -device virtio-net-pci,netdev=dev1,mac='00:00:00:01:00:02',vectors=,mq=on \

    -netdev tap,ifname=tap-,id=dev1,script=no,downscript=no,vhost=on,queues=16 \

    -drive file=disk.img,if=virtio \

    -cdrom /root/CentOS--x86_64-DVD-.iso \

    -boot order=c \

    &
-----------------------------------------------------------------------------------------------------------------------
依照如下步骤。虽然能编译,也能用,但是用起来还是有问题的,不清楚为什么。
比如: 1. kvm不好用,运行起来特别慢。2。 旧的image无法boot。
----------------- update ---------------
改了些编译参数,再编译:
[root@D128 qemu-2.12.0-rc3]# yum install ncurses-devel
[root@D128 qemu-2.12.0-rc3]# ./configure --enable-curses --enable-vhost-user --prefix=/root/BUILD_qemu/ --target-list=x86_64-softmmu --disable-gtk --enable-docs --enable-numa --enable-kvm --enable-modules --enable-system --enable-linux-user
支持了什么,configure的输出里都会打印出来。
可能会造成影响的参数包括
--enable-modules --enable-system --enable-linux-user
以上的参数,对效果影响没有区别。。。。
跟其他同事又找了一组设置:
./configure \

    --disable-bluez \

    --disable-brlapi \

    --disable-curses  \

    --disable-debug-tcg \

    --disable-fdt \

    --disable-guest-agent \

--disable-live-block-migration              --disable-qom-cast-debug            \

--disable-sdl              --disable-sparse              --disable-strip         \

--disable-vnc-jpeg              --disable-xen      --enable-docs \

--enable-kvm \

--enable-lzo               --enable-seccomp              --enable-snappy \

--enable-werror           \

--block-drv-ro-whitelist=vmdk,vhdx,vpc,https   \

--block-drv-rw-whitelist=qcow2,raw,file,host_device,nbd,gluster,blkdebug,luks      \

--disable-xen-pci-passthrough --disable-guest-agent-msi              --enable-attr       \

--enable-coroutine-pool              --enable-debug-info             \

--enable-gnutls \

--enable-numa       \

--enable-system \

--enable-tools         \

--enable-vhost-net \

--enable-vhost-vsock     \

--enable-vnc \

--enable-debug \

--tls-priority=NORMAL \

--with-coroutine=ucontext       \

--extra-cflags="-O2 -g -pipe -Wall  -fexceptions \

-fstack-protector-strong --param=ssp-buffer-size= -m64 -mtune=generic -fPIE -DPIE"        \

--extra-ldflags=" -pie -Wl,-z,relro -Wl,-z,now" \

--target-list=x86_64-softmmu
还是不行。。。
再试一次:卸载掉qemu-2.0.0的rpm,安装自编译的qemu到系统目录。
[root@D128 qemu-2.12.-rc3]# yum autoremove qemu qemu-kvm
[root@D128 qemu-2.12.-rc3]# ./configure --enable-curses --enable-vhost-user --target-list=x86_64-softmmu --disable-gtk --enable-docs --enable-numa --enable-kvm --enable-system --enable-modules
还是不行。。。 算了。。。
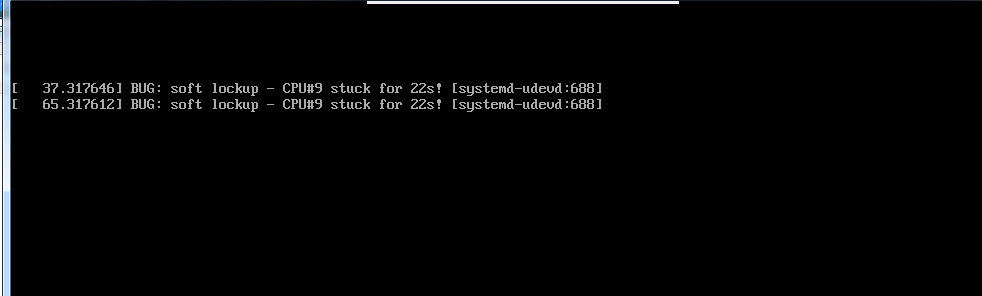
始终提示CPU STUCK
回退一个版本到2.10
[root@D128 qemu]# git branch

  master

* stable-2.10

[root@D128 qemu]# git submodule init

Submodule 'roms/QemuMacDrivers' (git://git.qemu.org/QemuMacDrivers.git) registered for path 'roms/QemuMacDrivers'

[root@D128 qemu]# git submodule update --recursive
再编译:
还是不行。。。。
错误类似:
[   28.050008] BUG: soft lockup - CPU# stuck for 23s! [systemd-udevd:]

[   56.050010] BUG: soft lockup - CPU# stuck for 23s! [systemd-udevd:]

[   84.050006] BUG: soft lockup - CPU# stuck for 23s! [systemd-udevd:]

[  112.050007] BUG: soft lockup - CPU# stuck for 22s! [systemd-udevd:]

[  140.050006] BUG: soft lockup - CPU# stuck for 22s! [systemd-udevd:]

[  168.050009] BUG: soft lockup - CPU# stuck for 22s! [systemd-udevd:]

[  196.050008] BUG: soft lockup - CPU# stuck for 22s! [systemd-udevd:]

[  224.050006] BUG: soft lockup - CPU# stuck for 22s! [systemd-udevd:]

[  252.050014] BUG: soft lockup - CPU# stuck for 22s! [systemd-udevd:]

[  280.050006] BUG: soft lockup - CPU# stuck for 22s! [systemd-udevd:]
退到2.9版本:
2.9也是这样。好的,放弃了。。。。
========================== 我又回来了,@ 2018-04-20 =====================
一直耿耿于怀这个问题。
那么,首先,soft lookup到底是什么问题? 见:
https://www.cnblogs.com/lyhabc/p/6640012.html
简单的说,就是内核出了问题。然后我用的是标准CentOS7的发行版,所以基本上就是驱动的问题。
那么对于一个qemu的虚拟机来说,唯一能做的就是改变硬件,如下:
我去掉了所有的网卡,并且去掉disk的virtio驱动。
果然正常运行了!
/root/BUILD_qemu/bin/qemu-system-x86_64 -enable-kvm \

    -m 2G \

    -cpu Nehalem -smp cores=,threads=,sockets= \

    -numa node,mem=1G,cpus=-,nodeid= \

    -numa node,mem=1G,cpus=-,nodeid= \

    -display vnc=0.0.0.0: \

    -drive file=disk.img \
查看文档,改变一下参数,重新把virtio用起来。
在那之前,再编一个qemu-2.12
[root@D128 qemu-2.12.-rc3]# ./configure --prefix=/root/BUILD_qemu/ --target-list=x86_64-softmmu --disable-gtk --enable-virtfs
不认识virtio,换了参数也不行:
#    -device virtio-blk-pci,scsi=off,bus=pci.,addr=0x7,drive=disk0,bootindex= \

#    -drive file=disk.img,if=none,id=disk0 \
kvm+virtio 就会有问题。很可能是VMware的原因。
--------------------------
差一个题外内容:
What is the difference and relationship between “xx-softmmu” and “xx-linux-user”?

To put it simply, xxx-softmmu will compile qemu-system-xxx, which is an emulated machine for xxx architecture (System Emulation).
When it resets, the starting point will be the reset vector of that architecture. While xxx-linux-user, compiles qemu-xxx,
which allows you to run user application in xxx architecture (User-mode Emulation). Which will seek the user applications'
main function, and start execution from there.

See https://en.wikipedia.org/wiki/QEMU#Operating_modes
https://stackoverflow.com/questions/32435138/what-is-the-difference-and-relationship-between-xx-softmmu-and-xx-linux-user?utm_medium=organic&utm_source=google_rich_qa&utm_campaign=google_rich_qa
[qemu] qemu旧的net参数已经不再可用了,新的这样用。的更多相关文章
- Apache服务停止:信号灯超时时间已到,指定的网络名不再可用
环境说明:Apache2.4.10,Windows Server 2008 R2 问题说明: apache服务用于下载文件,但是在运行一段时间后,突然挂了. 其错误提示如下所示: [error] (7 ...
- apache 指定的网络名不再可用 原因及解决方法
1.出现问题状况: 出现问题网站:http://www.ayyzz.cn/ 前段时间作文大全网出现有时候比较慢,有时候“找不到网页”404错误:另外在error.log里也报错: [Mon May 0 ...
- \\ip 映射 指定的网络名不再可用
问题:\\ip 映射 指定的网络名不再可用 解决方法:服务器端打开服务列表 services.msc 启动两个进程 1.Computer Browser 2. Workstation 就正常了~~ ...
- nginx gunicorn 部署flask,带参数链接不可用的现象(笔记)
微信小程序后台,开启 gunicorn之后屏幕会输出打印结果,一旦关闭shell 带参数链接不可用,只有开启shell才能使用, 一针见血 : 注释掉所有print语句,关闭shell 带参数的链接 ...
- AIO 开始不定时的抛异常: java.io.IOException: 指定的网络名不再可用
一天里会抛出几个这样的错误,但发现服务还在正常的运行. java.io.IOException: 指定的网络名不再可用. at sun.nio.ch.Iocp.translateErrorToIOEx ...
- ubuntu14.04 Samba服务无法访问 可能没有权限 指定的网络名不再可用的问题
按常规配置后,在windows资源管理器中登陆samba服务器,看得到分享目录却无法打开,弹出"无法访问.您可能没有权限使用网络资源,请与这台服务器的管理员联系以查明您是否有访问权限.指定的 ...
- Java1.0的AWT(旧AWT)和Java1.1以后的AWT(新AWT)有着很大的区别
Java1.0的AWT(旧AWT)和Java1.1以后的AWT(新AWT)有着很大的区别,新的AWT克服了旧AWT的很多缺点,在设计上有较大改进,使用也更方便,这里主要介绍新的AWT, 但在Java1 ...
- 关于“在从服务器接收结果时发生传输级错误。 (provider: TCP Provider, error: 0 - 指定的网络名不再可用。)”的解决方法之一
最近几天发现连sql数据库服务器的时候,总是提示“在从服务器接收结果时发生传输级错误. (provider: TCP Provider, error: 0 - 指定的网络名不再可用.)”的错误. 网上 ...
- [qemu] qemu从源码编译安装
环境:CentOS7-1804 下载最新的源码: ┬─[tong@T7:~/Src/thirdparty/PACKAGES]─[:: AM] ╰─>$ axel https://download ...
随机推荐
- [svc]gns3模拟器及探讨几个bgp问题
模拟器 链接:https://pan.baidu.com/s/1geMcmND 密码:7iir gns0.8.6的版本好用 思科的这个iso好用: c3660-js2-mz.124-21a.bin C ...
- LeetCode: Next Permutation 解题报告
Next Permutation Implement next permutation, which rearranges numbers into the lexicographically nex ...
- 【emWin】例程十五:触摸校准实例——五点校准法
介绍: 该例程介绍如何校准4.3寸.7寸液晶显示屏.校准方法如下: 1.进入以下界面,用户可选择是否进入校准界面进行液晶校准 *点击屏幕任何地方可进入校准界面 *不采取任何操作,几秒钟后会进入触摸测试 ...
- Java知多少(11)数据类型转换
数据类型的转换,分为自动转换和强制转换.自动转换是程序在执行过程中“悄然”进行的转换,不需要用户提前声明,一般是从位数低的类型向位数高的类型转换:强制类型转换则必须在代码中声明,转换顺序不受限制. 自 ...
- centos7 修改root密码方式
1 - 在启动grub菜单,选择编辑选项启动 2 - 按键盘e键,来进入编辑界面 3 - 找到Linux 16的那一行,将ro改为rw init=/sysroot/bin/sh 4 - 现在按下 Co ...
- 浏览器和服务器 对http请求(post get) url长度限制
1. GET URL长度限制 在Http1.1协议中并没有提出针对URL的长度进行限制,RFC协议里面是这样描述的,HTTP协议并不对URI的长度做任何的限制,服务器端 必须能够处理任何它们所提供服 ...
- MATLAB plot()、scatter()的RGB颜色设置以及生成渐变色
1.转载:https://blog.csdn.net/wh1312142954/article/details/80796764 plot(x,y,'Color',[R G B]);%只要设置颜色中R ...
- expect脚本同步文件 expect脚本指定host和要同步的文件 构建文件分发系统 批量远程执行命令
自动同步文件 #!/usr/bin/expect set " spawn rsync -av root@.txt /tmp/ expect { "yes/no" { se ...
- [Laravel] 08 - Auth & Data Migration
登录注册框架 一.加载Auth模块 Step 1, 安装Auth模块 生成相关 laravel 框架内部的代码模块: $ php artisan make:auth 自动添加了路由代码 在larave ...
- javascript +new Date()
最近学习JavaScript时,看到Date的一个有意思的用法就是+new Date(),结果跟Date对象的getTime(),valueOf()是一样的,他们返回的都是1970年1月1日午夜以来的 ...